Coding
To code (enter) an invoice, you will need to click the “Edit” button first. The fields that you will see are dependent on various settings in your environment. Your screen may look different from the screenshots below.
When you first edit an invoice, data may be filled that comes from:
OCR results
Processing by the BOT user
Received XML data via InvoiceSharing
Possibly in combination with transaction defaults.
General rules apply to the screen:

The entry can be saved when there are no errors/messages that prevent this
If a field has an invalid value, a message in a red may be displayed. This is also shown in the top right of the coding screen with a red exclamation mark. If you hover the mouse over it, you can see which fields generated an error:
When all the fields in a screen segment have been entered, the segment will collapse. Only selected fields will then be displayed on the folded line.
How search screens work:
When entering data in a field, the application will automatically try to retrieve the correct value based on the entered data:

Specifically for the supplier field a “/” can be used to search based on supplier number. When no “/” is used the search will start in the name and bank account number. In other entry fields (like ledger, VAT code, payment term) we will search in the code and description for the text you entered.
In the dropdown list, always a maximum of 20 items are displayed. If the value you are looking for is not visible, you need to narrow your search, if applicable it will be displayed at the bottom:
Shortcuts for lookup- and date fields:

Opening of popup to select value:

Closing that same popup:

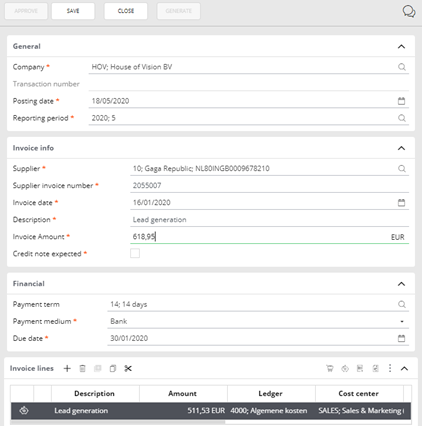
The entry screen will look like this:

Required fields can be recognized by the red asterisk that is shown next to the name of the field.
In the last segment of the screen you can add lines to the transaction or link it to another process.

The buttons that are shown above the transaction columns have the following function:

Add new line

Delete selected line

Retrieve transaction defaults (see the information about the organizations)

Copy selected line

Split in periods
Notice that:
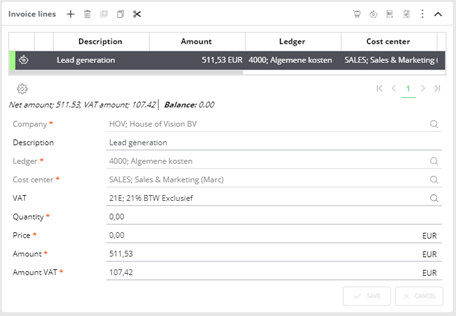
Before sending, the balance at the bottom of the lines eventually needs to be 0.00:

The VAT amount when using VAT-codes with the setting “exclusive” only functions properly if a standard VAT code is linked to the supplier.
A period division is possible, which can be used if your financial system and the interface support this option. First the full coding line needs to be created and saved. Then you can click the “scissors” icon to split the selected line.
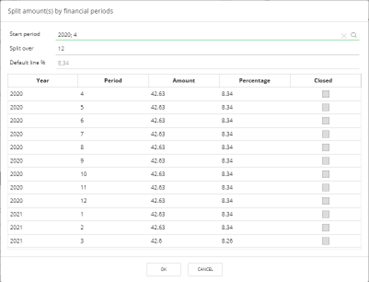
When splitting, you need to select the starting period and the number of periods to split in:

Dividing an amount over periods will now also consider the reporting periods that have been entered in the environment. If these are not sufficient to continue booking in the future, the remaining amount will be added as a new line after the last period. By the use of a setting it can be (un)blocked to book lines in closed periods. Whenever this is allowed and you are booking lines in a closed period the table will show this information. If it is not allowed the amounts for the closed periods will be summed up and booked in the first open period in the selection. If insufficient periods are available the last line will contain the remaining amount that could not be split properly.
VAT-amounts will always be booked on the first line of the spread transaction.
