
Email import
After reading this document, you are able to connect Onventis Invoice Processing to your Office365, Gmail mailbox or add a connection with another mail server using IMAP.
Office 365: Provide a one time consent:
If your Active Directory setup does not permit individual users or accounts to give consent to read mailboxes, a one-time consent is necessary. If consent is allowed, you can skip this step and proceed with creating new mailbox configurations.
To support this authentication method, the following actions must be completed once:
The Azure Active Directory administrator logs into Onventis and assigns themselves the role of 'Azure Active Directory Manager'.
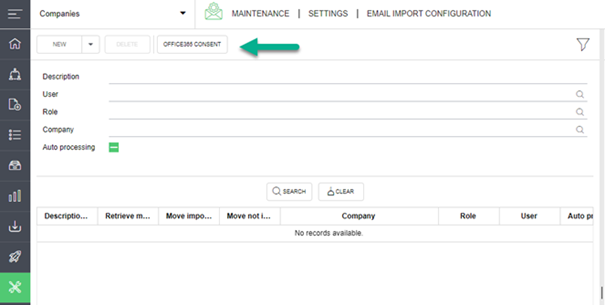
Navigate to Maintenance → Settings → Email import configuration
Click on the “Office365 Consent” button to open the Microsoft Login screen and log in with the Microsoft Administrator account.
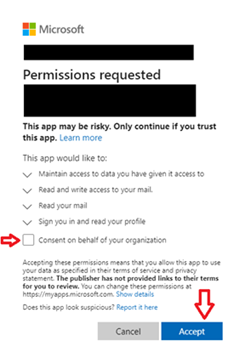
On the next screen, grant directory access to our application to enable email import.
Check 'Consent on behalf of your organization' and click 'Accept'.
If you forget to check this box, you will need to fully remove the Onventis application's access within your Active Directory, clear your browser cache, and repeat all steps.
New office365 / Gmail
To setup a connection with an office356 or Gmail email address:
Navigate to Maintenance → Settings → Email import configuration
Click on the arrow next to “New” and click on the desired new e-mail connection

A new Office365/Google window will be shown. Login on this window with the e-mail address you want to integrate with.
Once completed, a new row will be shown in the overview and the details are already filled in.
Fill in the fields;
Description: Enter the description (this is displayed in the ‘import via email’). It is prefilled with the email address and can be changed.
Company: Enter a company to which this configuration is linked
Enter an user or role. (Only this person or user linked to this role can use this configuration during import). It is prefilled with the user who started the mailbox configuration and can be changed.
Auto processing: check this box if you want to start automatic import
IMAP server: This is prefilled and cannot be changed.
IMAP port: This is prefilled and cannot be changed.
Secure Connection: This is prefilled and cannot be changed.
User name: This is prefilled and cannot be changed.
Use shared mailbox: check if you want to use a ‘shared mailbox’.
Shared Mailbox: Only available when the ‘use shared mailbox’ is checked. The formatting of the shared mailbox will look as follows: SharedBox@Domain.xx.
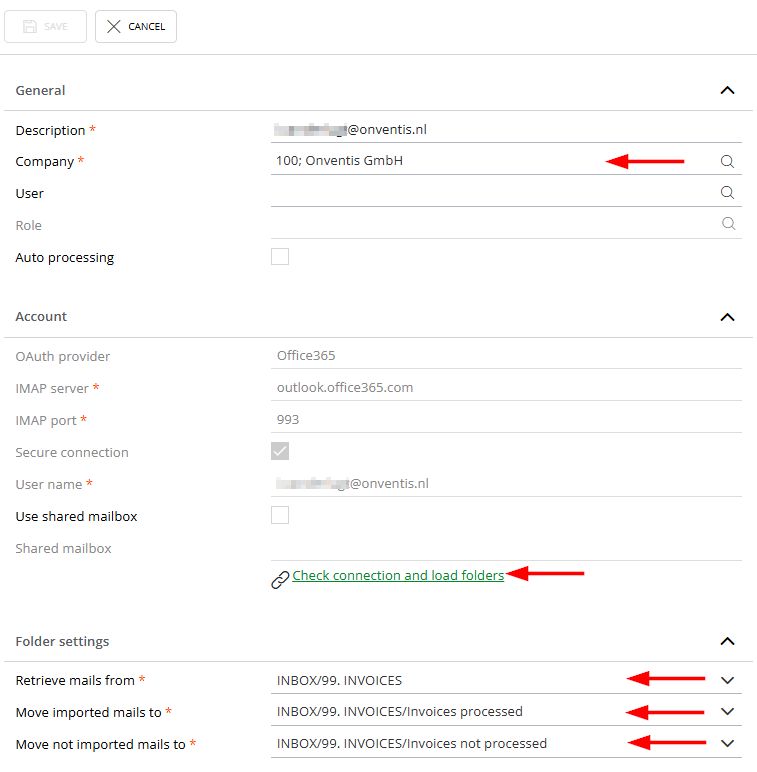
Besides, it is important to configure the correct Folder settings. Click on “Check connection and load folders” to retrieve the right folders.
Now configure the folders in the Folder settings. An example is given below.
Retrieve mails from – the default folder from the mailbox to be read out
Move imported mails to – the folder to which successfully imported emails are moved
Move not imported mails to – the folder to which not successfully imported emails are moved
By activating “Auto processing”, the mailbox will be scanned for new e-mails based on a schedule. This is recommended to automate the processes.
New IMAP connection
When you don’t use a Office365 or Google account, you can manually add an e-mail address.
Navigate to Maintenance → Settings → Email import configuration
Click on the “New” button
Enter the fields:
Description: Enter the description (this is displayed in the ‘import via email’).
Company: Enter a company to which this configuration is linked
User: Enter an user or role. (Only this person or user linked to this role can use this configuration during import).
Auto processing: check this box if you want to start automatic import
IMAP server: Enter IMAP Server (possibly prefilled with a default).
IMAP port: Enter IMAP port (possibly prefilled with a default)
Secure connection: Enter if the connection is secure (possibly prefilled with a default).
User name: Enter user name of the mailbox which is used for import. If you want to use a shared mailbox for a normal IMAP connection, you can change the login name to “user@domain.com\sharedbox” where user@domain.com is your own user name/mail and sharedbox is the name of the shared mailbox that you have access to.
Password: Enter the password to get access to the mailbox.
Use shared mailbox: Only available when this is an Office365 mail configuration.
Shared Mailbox: Only available when this is an Office365 mail configuration.
Application settings – defaults
In the application settings, 3 settings are mentioned where defaults can be entered for the fields ‘IMAP server, ‘ IMAP port’ and ‘Secure Connection’.
These are the settings:
Imap.DefaultPort
Imap.DefaultServer
Imap.DefaultUseSsl (value True = checkbox checked, False = checkbox is not checked)
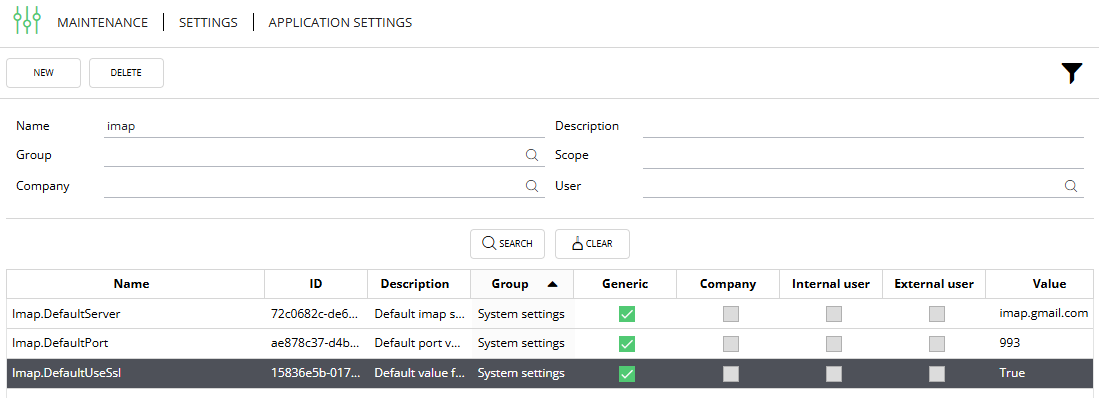
When something is prefilled here, it will be used as default when creating a new email import configuration.
Auto processing
If field auto processing is set to ‘True’, it will display additional fields. Section ‘import settings’
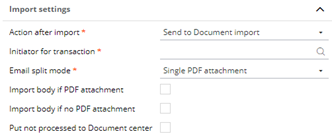
Action after import:
Document center -> all emails are send to the document center so the user can determine what to do after. (“Processing imported invoices”)
Initiate transaction -> All emails which are imported successfully via auto-import are automatically processed and send to the worklist of the first activity.
Initiator for transaction: This is the user which is mentioned as initiator of the process what is started after import of the document. Always check if this user has rights to start the mentioned process type. If the user cannot do this manually, it will also not be possible this way.
Email split mode:
Single PDF attachment: Only picks an email when only 1 pdf is linked to the email.
Per PDF attachment: Creates a separate transaction per PDF file found in the email.
Per email: Creates a transaction for all documents found in the email.
Import body if PDF attachment set to ‘true’
e-mail with one PDF attachment;
PDF attachment will be the main document
E-mail body PDF will be an attachment
E-mail with multiple attachments;
First PDF attachment will be the main document
E-mail body PDF + other attachments will be the attachment
If there is no PDF attachment, then the e-mail body PDF is the main document
E-mail with no attachments;
E-mail body PDF will be main document
Import body if no PDF attachment: If set to ‘True’, the body of the email is imported as PDF and the transaction will have the body document as main document.
Put not processed to Document center: If an email for whatever reason cannot be processed as a transaction, this setting will put the PDF as task in the Document Import Center for further revision.
Section ‘start process settings’

Select the process type to be used to send the document to, for example purchase invoices.
Section ‘Schedule’
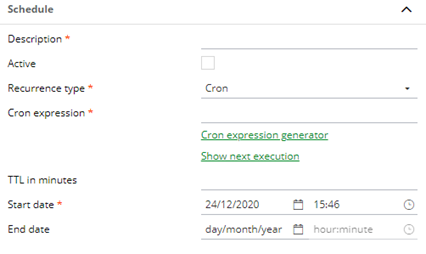
Here the frequency of importing email from the mailbox can be determined. See “Job Management” for more information.