
Edit and approve user requests
Under Master Data Management → User Management → User Applications you can edit all current user applications as well as send user applications to new users.
Send user registration link
Using the Action drop-down menu and selecting the Registration link buttons you can send a registration link to users.
To send the registration link, you must first fill out the e-mail form:
- Registration link: this field contains the link for user registration. To send the link to the user, you need to copy and paste it into the text box.
- Recipient e-mail: the address of the user who is to register in Onventis is entered here.
- Subject: here you can enter the subject of the e-mail message.
- Text: here you can enter your text for user applications. Please copy the registration link into this field.
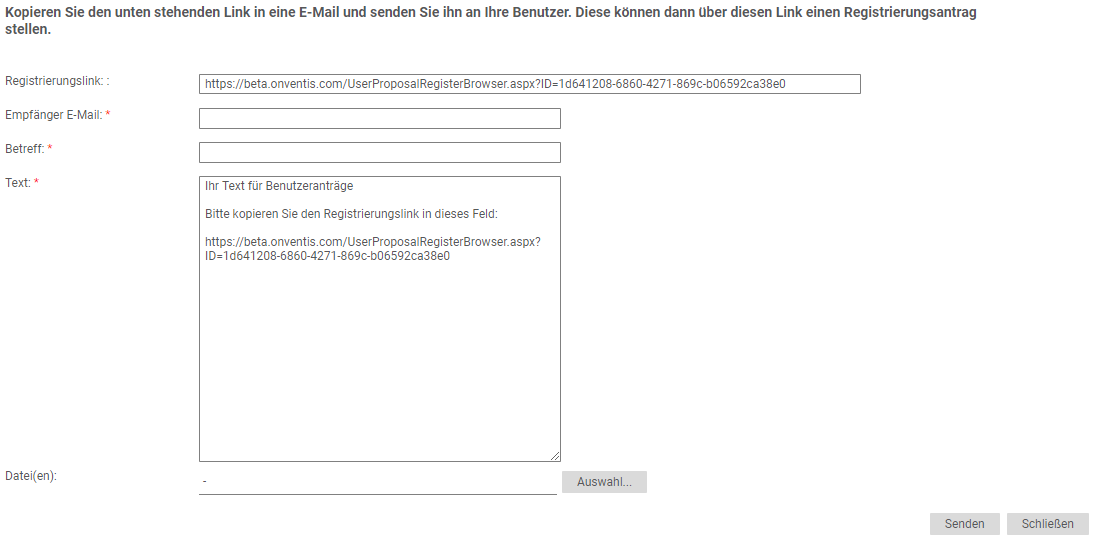
- File: here you can attach attachments to the e-mail via the selection button.
The Send button sends the email to the user.
The Close button closes the e-mail form and takes you back to the overview of all user applications.
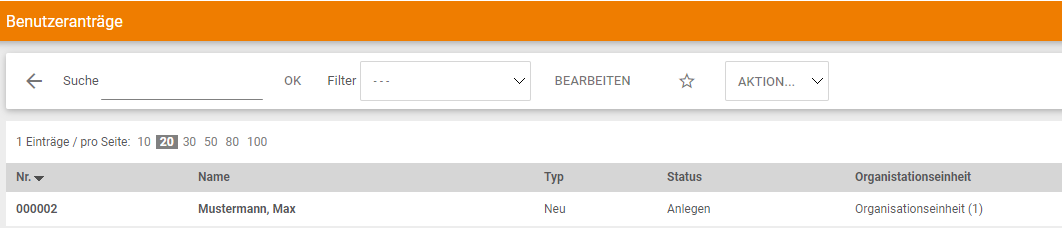
Approve and create users
To approve a user request, select the desired user under Master Data Management → User Management → User Requests .
The Create User button is used to create the user in the user administration.
In the user administration, you can adjust the user data if necessary.
You can send the access data via the Send access data button.
Application settings for user applications
Within organizations, users can independently register in Onventis via a user registration link, be approved via a user request approval workflow, and be created in Onventis.
In addition to automated user imports or manual creation, user registration offers an intuitive wizard that allows users to register independently in Onventis.
You can create a user registration request form under Master Data Management → User Management → Request Settings. You can define default values that are automatically assigned to a user after registration. You can then refine and, if necessary, adjust the settings in the user master.
Home page tab
- Input language: the drop-down menu allows you to select the input language for user registration.
- Text / Home page area: In this text field you can enter a welcome text. The user sees this when calling up the registration link.
Using the preview button, you can see how the text will be displayed during user registration.
Basic data tab
- Input language: the drop-down menu allows you to select the input language for user registration.
- Text / Basic data area: In the tab Basic Data User Registration the user has to enter his personal data. In this text field you can enter an information text for the data to be entered.
- Input of SAP user number required: if you activate this checkbox, the user must enter his user number for your SAP. This field is, after activation, a mandatory field and must be entered during user registration.
Use the preview button to see how the text will be displayed during user registration.
Assignments tab
- Input language: the drop-down menu allows you to select the input language for user registration.
- Text / Assignments area: In the Assignments tab in the user registration, the user can select the assignment to the organizational units. In this text field you can enter an information text for the data to be entered.
- Show ‘Assignments’ tab: if you check this box, the Assignments tab will be displayed during user registration. For user registration, these fields are optional. If you uncheck this box, the Assignments tab will be hidden.
Use the preview button to see how the text will be displayed during user registration.
Material group tab
- Input language: the drop-down menu allows you to select the input language for user registration.
- Text / Material group area: In the Material group tab in the user registration, the user can select the assignment to the material groups. In this text field you can enter an information text for the data to be entered.
- Settings area
In the Settings area, you can configure the selection of the material group(s) during user registration. Optionally, you can hide the tab for selecting material groups.
You can select the following defaults for the Material Groups tab from the drop-down menu:
- none
- Hide Material Groups tab
- User must select at least one material group
- User can select a maximum of one material group
- User can only select material groups individually
Use the preview button to see how the text will be displayed during user registration.
Summary tab
- Input language: the drop-down menu allows you to select the input language for user registration.
- Text / Summary area: In this text field you can enter a concluding information text. The user sees this text as well as the summary of his entered data. He can then send his user application.
Use the preview button to see how the text will be displayed during user registration.
Confirmation tab
- Input language: the drop-down menu allows you to select the input language for user registration.
- Text / Summary area: In this text field you can enter a concluding information text. The user sees this text after sending his user request.
Use the preview button to see how the text will be displayed during user registration.
User Request Release Workflow
Depending on the criteria organizational unit, plant and/or material groups, you can define a release workflow for the user requests. Within the workflow, you can select individual approvers or groups of approvers who release the user requests or receive them for information.
The approval workflow takes effect for users who have submitted a request to use Onventis via the user registration.
As soon as an approver receives user requests for approval, he or she is notified via Onventis and/or e-mail that corresponding requests are available for processing. The user requests are listed under Master Data Management → User Management → User Requests. By selecting the user and clicking the Create User button, the user is released and created in Onventis.
You can create a new release workflow for user requests by clicking the New button.
Basic data tab in the user application release workflow
In the Basic Data tab, you can enter the general data for the user request release workflow.
- No.: Entry of the workflow number. If you do not enter a number, Onventis automatically generates the next highest workflown number.
- Title: Enter the workflow title. This field is mandatory and must be entered.
- Description: Enter a detailed description for the workflow.
- Organizational unit: use the drop-down menu to select the organizational unit to which the user request release workflow should apply.
Step tab in the user request release workflow
You can define a multi-level approval procedure by defining several approval steps that are checked one after the other.
In the Step tab, you can see all approval steps of an approval workflow, if available.
You can create a new approval step using the New approval step button.
You can make configuration changes to an approval step that has already been created by selecting the approval step.
| Hinweis
For profound changes, especially deleting or adding steps, in workflows we recommend to create a copy of the existing workflow first. The Copy.svg icon allows you to create a backup copy of the existing workflow, after which the workflow can be safely modified. |
Configure release steps for user requests
Area Approval step
- Step: you can use the drop-down menu to define the order in which the approval steps are checked. The approval steps should be set up in the order in which a user release passes through the approval logic.
Example:
Step 1: Work of the user
Step 2: Material group electronics
etc. - Type: two types of approval steps are available via the drop-down menu:
- Release: if you define the approval step as type Release, the user request must be approved.
- Information: if you define the approval step as type Information, the approver is informed by e-mail about the newly created user.
- Approver (User): the radio button allows you to select the user who will approve the user request.
- Approver (user group): by activating the radio button and selecting the user group, you can set a user group as approver. With this option, all users in the user group are informed by e-mail. As soon as one of the users from the user group edits the user share, the remaining users can no longer edit it.
- Substitute (user) – after X minutes / hours / days: here you have the possibility to select a user from the dropdown menu, who will get the user request forwarded for approval after the selected time period (in minutes/hours/days). Forwarding is automatic if the first user does not process the user request. The selection of days takes into account the workday configuration of your organization.
- Substitute (user group): – after X minutes / hours / days: here you have the possibility to select a user group from the dropdown menu, which gets the user request after the selected period (in minutes / hours / days), forwarded for approval. Forwarding is automatic if the first user does not process the user request. The selection of days takes into account the workday configuration of your organization.
- Substitute from the user administration: – after X minutes / hours / days: here, the substitute of the user who is stored in the user administration with the approver is always determined automatically. After the selected period (in minutes/hours/days), the approval is forwarded to the representative for approval.
| Hinweis
If a release request is forwarded to another approver and the new approver has a permanent substitute who is valid for approvals, the substitute automatically receives a release request by e-mail after the time defined in the workflow step. |
- Example 1:
For the material group “Office supplies”, the approver is a user from the user group “Purchasing”, for example, Max Mustermann.
Max Mustermann has entered Heike Mustermann as a substitute for his vacation period.
The user release must be carried out by Heike Mustermann in the selected period. - Example 2:
For the material group “Tool”, the approver is a user from the user group “Purchasing”, for example, Peter Mustermann.
Peter Mustermann has entered Katja Mustermann as a substitute for his holiday period.
The user release must be carried out by Katja Mustermann in the selected period.
| It is advisable to always set up a substitute, since an approver can be absent due to vacation or illness and the user release is waiting for approval in his or her release list and is not processed. |
- Criteria: you can use the criteria to specify whether ALL criteria (criterion = AND) or at least ONE criterion (criterion = OR) must be fulfilled for the approval workflow to take effect during user approval.
Example 1:
You want all users of the plant “Esslingen” AND the material group “Tool” to go to a specific approver for approval.
To do this, you must make the following settings in the user release workflow:
Selection of criteria: AND
Selection plant: Esslingen
Selection of the material group: Tool
Results:
The approval step is activated if a user is to be created in the plant “Esslingen” AND the material group “Tool”.
For the approval step to apply, both criteria must be met.
Example 2:
You want all users of the plant “Esslingen” OR of the material group “Tool” to go to a specific approver for approval.
To do this, you must make the following settings in the user release workflow:
Selection of criteria: OR
Selection plant: Esslingen
Selection of the material group: Tool
Results:
The approval step is activated when a user is created in the plant “Esslingen” OR with the material group “Tool”.
For the approval step to take effect, only one of the two criteria must be met.
Range Criteria
- Plant: You can use the Select button to select the plant(s) for which the approval workflow is to take effect. For the release step to take effect, one of the plants must be assigned to the user when the new plant is created.
- Material group: You can select the material group(s) for which the approval workflow is to take effect via the selection button. For the release step to take effect, one of the material groups must be assigned to the user when the new material is created.
- Organizational unit: You can select the organizational unit(s) for which the approval workflow should take effect by clicking the Select button. For the release step to take effect, one of the organizational units must be assigned to the user when the user is created.