
Actions Required By You
Create an SSH key and send to support@spendency.com. More info below on how to create your key.
Getting Started
1. Create a data schema by uploading a SAMPLE file
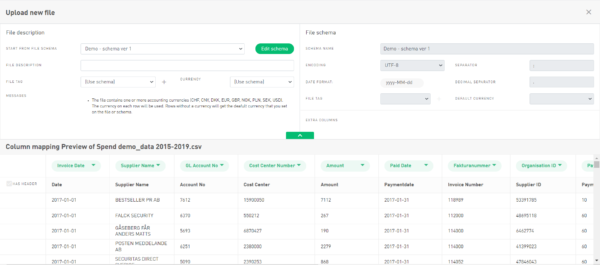
For each schema you would like to upload, get a sample file (300 rows or so) and upload that using the Onventis Spend Analytics website. This will allow you to model your file and assign the columns using the Spendency web tool.
Please note, that if you want to use a default currency for the whole file (and don’t have a data column in the file for currency), you should upload one sample per currency. In the below example, we have even made the default currency part of the Schema name. Also note the encoding, as it is vital that you chose the right encoding that you will use when uploading files over SFTP.
2. Find upload folder for the schema
Each schema will get an internal UUID. Names are tricky, they have spaces and other strange characters that may confuse the SFTP, so we’ve chosen to go with folders on SFTP that have the same UUID as the schema.
Suppose you want to upload a new file into the schema we just created (“SFTP upload SEK”). First find the schema, by viewing a list of your schemas:
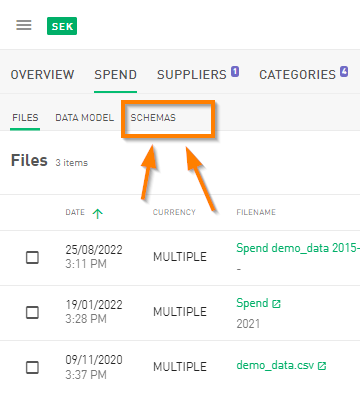
Press the button ” Schema” and the list all the schemas will appeared:

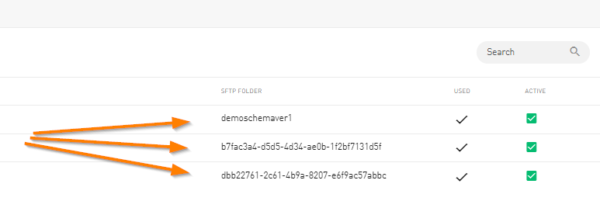
Click the little cloud icon, to reveal the SFTP upload folder.
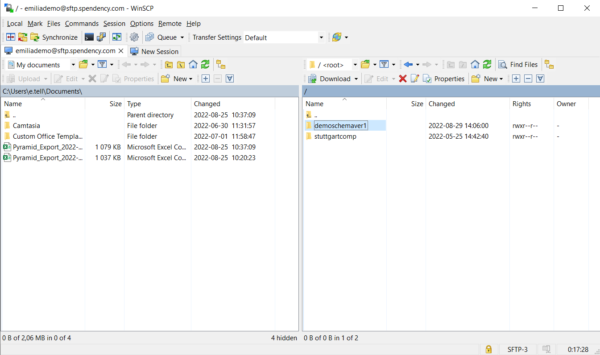
3. Log in to SFTP and upload a file
HOST: sftp.spendency.com
USER: <your Spendency account name>
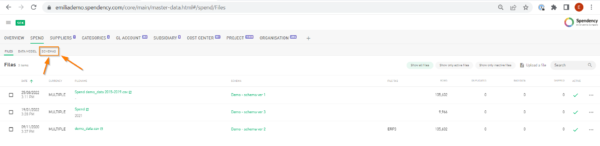
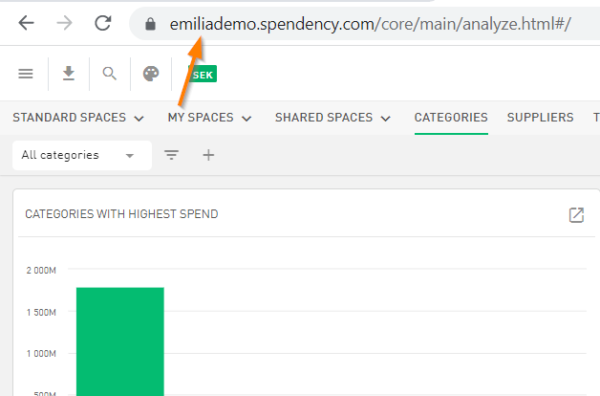
Your account name is easily found in the URL when you visit the Spendency website. It is the part that is in front of “.spendency.com”, in the example below the account name is “emiliademo”:
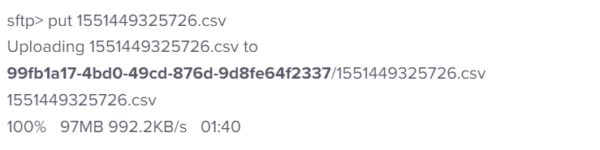
Now, upload a real file that follows the same schema (has the same columns).
4. Choose Your Own SFTP Folder Names
When setting up an integration directly into Onventis Spend Analytics from your ERP system(s), we have made it easier to organize your import files better on the SFTP server.
A schema is a mapping from the columns in a data file to the database attributes in the system. Every schema automatically gets a folder on the SFTP server, so that by uploading to the folder, you automatically read the file into Onventis Spend Analytics with the schema that the folder belongs to.

In Onventis Spend Analytics you can name the folder something that makes it easier to remember what data goes into that folder. We recommend using folder names that include the source system (for example “SAP Nordics” for your ERP for your Nordic subsidiary) and the version of the exported report (such as 1.2). If you change the export, the file will most likely not be compatible with the existing schemas, so use a new folder name.

Sometimes you want to go back and change the way a report is imported, for instance to add more columns being read, or fixing a mistake. In Onventis Spend Analytics you create a new schema. We recommend that schema names have the source system, the version of the report and a version of the schema itself. In the example above, we have created a new schema and moved the folder name to the new schema. This way, any new files sent to the system will sent to the new version of the schema.
5. Look at the file in the Spendency website
Once the upload is completed, the file is visible almost immediately. You do have to reload the web page if you were already in the file section.


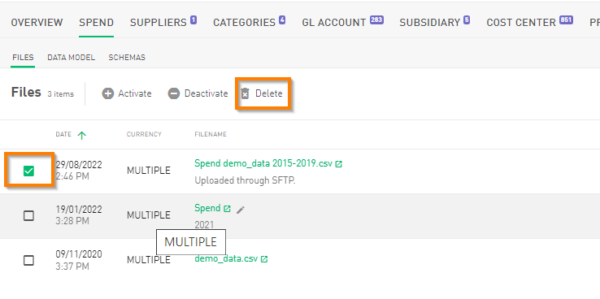
6. Disable the example file
You probably don’t want the example data, so just disable the file (using the “active” checkbox in the rightmost column).
That’s really all there is to it!
Troubleshooting
Uploading again
If the upload fails, and you want to upload the same file again, you have to delete it in the website first.
Then delete it on SFTP too, and upload again. If you upload a file again with the same name as an existing file, nothing will happen.
Generating Your SSH Key
-
Linux
-
Use ssh-keygen.
For Amazons instructions, see: https://docs.aws.amazon.com/transfer/latest/userguide/sshkeygen.html
-
-
Windows
-
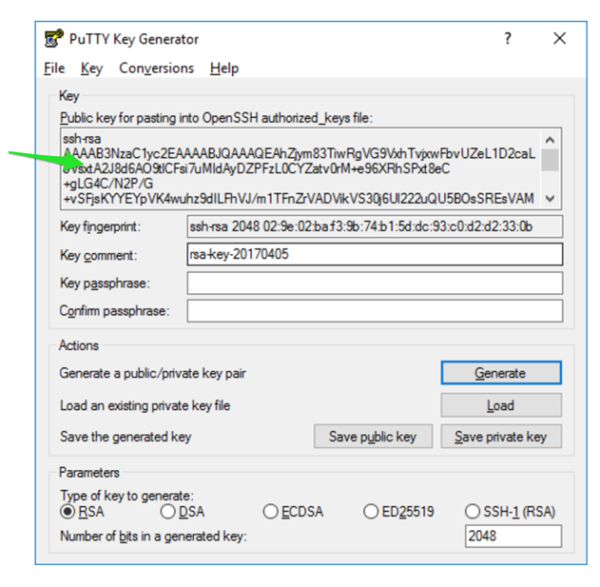
If you are using Windows and PuTTY, please see this instruction from ssh.com: https://www.ssh.com/ssh/putty/windows/puttygen
-
Copy the “open ssh” public key.
Server certificate fingerprint
ssh-rsa 2048 TeLYAF9aHGEI3HrGLdcvvW5/54LFi0xnyaqO4PYt+8g
ssh-rsa 2048 ed:95:86:ec:b7:7a:e8:e3:32:4b:ed:6c:63:4a:dc:e7