
A purchase requisition is a request from the user department to the purchasing department to procure a material or service in a certain quantity on a certain date.
Requirement items can only be created from the shopping cart and with the help of an Excel import. Requirement items can be transferred to purchase orders, RFQs, auctions, or purchasing projects.
Requirements items can be used to bundle the requirements of several users.
Under Operative Purchasing → Purchase Order Processing → Requirement Items, you can see an overview of the purchase requisitions.
General settings for demand items can be found under Configuration → Settings → Organizational Settings → Organizational Settings – Demand Items tab.
| Hinweis
With SAP integration, requirement items can be imported into Onventis via an import interface. These items can be automatically compared with the catalog data for supplier and price determination. Further processing of these items can be continued in Onventis. |
Toolbar and functions in the requirements item list

You can use the search field to search for specific records. You can enter numbers or text to search for specific records.
![]()
Predefined filters are already available in Onventis. You can use these to refine your search for specific records.
If you do not select a filter, Onventis searches for the selected record in all available fields. If, for example, you want to search for all purchase orders of a certain organizational unit, select Organizational unit in the filter and enter the organizational unit you are looking for in the search field described above.
Using the filter functions will make your search faster and more precise.
Edit
You can create new, individual filters using the Edit button next to the filter. The following fields are available for creating filters:
- Input language: here you select the language in which the filter is entered.
- Title: in the Title field, enter a title for the filter. This field is mandatory and must be maintained.
- Description: in the Description field you can describe the filter in more detail.
- Criteria:
- If you choose AND, all of the following criteria must be met.
- If you choose OR, at least one of the following criteria must be met.
- Explanation of the individual operators:
- =: Only data with exactly this value in the field will be displayed.
- >=: Only data with this and larger values in the field will be displayed.
- <=: Only data with this and smaller values in the field will be displayed.
- <>Only data that does not have this value in the field will be displayed.
- contains: Only data that contains this value in the field will be displayed.
- does not contain: Only data that does not contain this value in the field will be displayed.
- begins with: Only data starting with this value in the field will be displayed.
- does not start with: Only data that does not start with this value in the field will be displayed.
- Visibility: if you activate this option, this filter is public, i.e. all users within your organization can access this filter.
Switch off filter
With the filter off symbol you can switch off a set filter. The entire list is displayed again.
Favorites
With the favorites icon you can add the currently opened page to your favorites.
Use…
With the Use button you can bundle previously selected items and transfer them to other documents.
![]()
In the selection menu Bundling proposals you can bundle requirements specifically. The following bundling proposals are available:
Per supplier & delivery date
Per vendor & material group
![]()
In the Action drop-down menu, you can import and export demand items to Onventis. The following options are available to you:
You can import requirement items from your ERP system using the Retrieve requirement items from ERP button.
Via the Export… button you can export the demand items to an Excel file.
Via the Import… button you can import demand items using an Excel file.
Requirements items Overview
Under Operative Purchasing → Purchase Order Processing → Requirement Items, you can see an overview of all requirement items.
Requirement items of other users are only displayed if you have corresponding access to the external documents of other users. If you are responsible for a particular material group via a user group, you automatically have read and write access to the requirements items of this material group.
You can select or deselect the following columns in the requirements items overview:
- Selection: Selection column with the option to select one, several or all requirement items for further processing.
- Requirementno.: Requirement number, is assigned atuomatically by Onventis. When importing from SAP, this number corresponds to the SAP BANF number.
- Item no.: Number of the requirement item
- Requirementitem: in the column Requirement item you see the requirement description, the requester and the information whether it is a free text item.
- Supplier: if specified, you can see the supplier from whom the requirement is requested.
- Internal article number: the internal article number of the requirement item.
- Material group: the material group of the requirements item.
- Purchasing group: the purchasing group responsible for the requirements item.
- Requester: the requester who has reported the requirement.
- Cost center: the cost center for which the requirement item is requested.
- WBS element: the WBS element for which the requirements item is requested.
- Quantity: the requested quantity for the requirement.
- Unit price: the unit price for the requirement item.
- Delivery date: the desired delivery date by which the requirement is to be delivered.
- Currency: the currency for the requirement item.
- Status: Status of the requirement item. The following statuses are possible:
- New:
newly created requirements item - On order:
the requirement item has been transferred to a purchase order → see tab Follow-on documents - Quantities open:
part of the requirements item quantity is still open. Example: the user has requested 100 pieces but only 50 have been ordered. The open quantity = 50 pieces. - Inquiry:
the requirement item has been transferred to an inquiry → see tab Follow-on documents - In Procurement Project:
The requirements item has been transferred to a procurement project → see tab Follow-on documents - in Auction:
the requirement item has been transferred to an auction → see the follow-on documents tab page - Overruled:
the requirements item was rejected - Active requirement items:
displays only the requirement items that were not completed, cancelled or rejected. - Completed:
the requirements item has been marked as complete - By permission:
the requirements item is in the process of being approved. - Approved:
the requirements item has been approved and can be processed further. - Reopened:
the requirements item was rejected and then reopened for further processing.
- New:
Settings for activating requirement items
Under Configuration → Organization settings → Order tab → Shopping cart area , you can set which shopping cart items are to be transferred to the requirements list.
The following items can be transferred directly from the shopping cart to the requirements list, multiple selection is possible:
- Free text items
- Catalogue items
- Articles from certain suppliers
- Articles of certain material groups
In order for users to be able to edit the requirement items, you must ensure that the user has access to the requirement items of other users.
| Hinweis
If a user is responsible for a particular material group via a user group, this user is automatically given read and write access to the requirements items of this material group. |
Users who have created the requirements items can see their own requirements items in the requirements list.
Create requirement items
Create requirement items via free text items
In the shopping cart – overview you can create a new free text item by clicking the… button to create a new free text item.
Free text items are generally transferred to the requirements list. Regardless of whether you specify the vendor or select the option Vendor unknown in the shopping cart item.
By clicking on the submit shopping cart button, the free text item is transferred to the requirements list and can be further processed.
Create requirement items via catalog items
Depending on the settings in the organizational settings, catalog items can generally be transferred to the requirements list.
To transfer catalog items to the requirements list, you must activate the option Generally transfer catalog items to the requirements list in the organization settings.
If you select the option Vendor unknown in the shopping cart item, the shopping cart item is generally transferred to the requirements list.
By clicking on the Submit Shopping Cart button, the catalog item is transferred to the requirements list and can be further processed.
Import of demand items with Excel
You can import demand items into Onventis using Excel. To import the demand items into Onventis, follow these steps:
- Save the Onventis template for importing demand items on your computer. Here you can download the template:
Import_DemandPosition_Template.xlsx.
- Fill in the columns according to the specifications.
- Go to Onventis under Operational Purchasing → Purchase Order Processing → Requirement Items.
- Select the Import function in the Action drop-down menu in the toolbar using the Import… button. button.
- Via the Selection… button and then via the ... you can select the file.
- Attach the file using the Attach button and close the current window using the Close button.
- The Import button imports the requirements list into Onventis.
- Once you have started the import, you will see the title, status and creation date in the table. The following statuses are possible:
- Saved:
the file is being imported into Onventis. - OK:
the file was imported into Onventis without errors. The requirements items are available in the requirements item list. - Error:
the file is corrupted and could not be imported. Fix the errors in the Excel template and re-import the file. Click on the title to display the log file.
The error and the corresponding error message are displayed in the Log area.
- Saved:

| Hinweis
Since the import runs in the background, it may take a few minutes to complete. You can use the Refresh button to query the current import status. |
Edit requirement items
As soon as a user who has been assigned to your user group creates a requirement item, you as the purchaser are notified by e-mail.
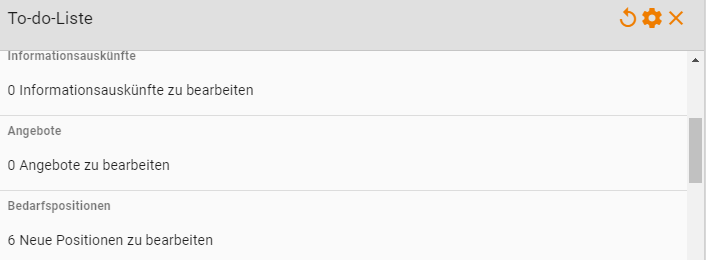
Demand items can be accessed from either the“New items to edit” link in the to-do list from your dashboard,
or via the selection in the menu under Operative Purchasing → Purchase Order Processing → Requirement Items.
After the call you see in the overview all positions to which you have an access.
Requirement items of other users are only displayed if you have corresponding access to the external documents of other users.
If you are responsible for a particular material group via a user group, you automatically have read and write access to the requirements items of this material group.
You can edit individual items by clicking on the desired item description.
You can use the grouping proposals to group the requirements items according to the following criteria:
- Per supplier and delivery date
- Per vendor and material group
Onventis filters and summarizes the demand items according to the selected criteria. You can then select the requirement items by activating the CheckedBox.svg checkbox and transfer them to a purchase order, request for quotation, auction or purchasing project by clicking the Use button.
Export of demand items to Excel
You can export the demand item list to an Excel file using the Action drop-down menu and the Export button.
Requirement items – Basic data tab
On the Requirements Items tab, you can view and, if necessary, change all relevant data.
Toolbar in the requirements items
Save and close
With the Save and Close button you leave the requirement position and return to the overview.
Delete
The delete record icon deletes the requirement item. This operation cannot be undone, the record is permanently deleted.
Notes
With the notes icon you can create notes for this record or, if available, call up the notes.
Track status
The Track Status button allows you to see the current processing status for this requirement item. Via the change history button you can see the changes made, if any. The changes are always displayed in the form of a table with two columns: Old value and New value = change.
Navigation
With the help of the navigation icons you can quickly navigate between the requirement items without having to switch to the overview list.
With the To first record icon you can call up the first requirement item from the requirement item list.
With the Previous record icon you can call up the previous requirement item, if available. Example: Requirement item no. 11 → Call previous requirement item no. 10.
With the Next record icon you can call up the next requirement item, if available. Example: Requirement item no. 11 → Call up next requirement item no. 12.
With the To last record icon you can call up the last requirement item from the requirement item list.
Use
With the Use button you can transfer the requirement item to other documents.
Cancel requisition
You can use the Cancel requisition button to cancel the requisition.
Convert to free text item
The Convert to free text item button can be used to convert a catalog requirement item into a free text item.
Close demand
The Close Demand button closes the demand item and it can no longer be edited.
Resume
The Resume button can be used to resume a previously canceled or rejected demand item for processing.
Inherit
With the Inherit button you can inherit the supplier entered in the requirement item to other requirement items.
Send
The Send button allows you to resend a resumed demand item for approval.
Budget
With the Budget button you can view the given budget targets which have been violated.
Comment on approval/rejection: in this field you have to enter the reason for the cancellation/rejection of this position in case of a cancellation or rejection.
Area of need reference
- Requirement no.: the requirement number for the requirement requirement.
- Requirement item no.: the requirement item number within a requirement request.
- Requester: the user who reported the need. Via the Info… button you can call up the full user name and e-mail address of the requester. Click the Close button to return to the requirements item.
SAP Assignment Area
The SAP Assignment area is only visible for an SAP connection.
- Plant: the SAP plant for which the purchase requisition was created. You can change the plant via the selection menu. This field is mandatory and must be filled in.
- Storage location: the SAP storage location for which the requisition was created. You can change the storage location via the selection menu. This field is mandatory and must be filled in.
- Purchasing group: the purchasing group responsible for processing the requisition. You can change the purchasing group via the selection menu.this field is mandatory and must be filled in.
- Requirement number: the SAP requirement number. When the requirements items are imported from SAP, this number is automatically included.
Article area
- Service item: if this option is activated, the requirement item is a service item.
- Test tool: if this checkbox is activated, the article is marked as a test tool.
- Quantity/MU: the requirements quantity reported for the article in the unit of measure. Under unit of measure is defined a unit that can be ordered, example: 1 bag with 10 screws, only at least 1 bag with 10 screws can be ordered.
- Articleno.: the article number.
- Manufacturer No.: the article number of the manufacturer.
- Manufacturer: the name of the manufacturer for the item.
- EAN/GTIN: the global article number, this is usually printed on the goods packaging as a machine-readable barcode and can be decoded by barcode scanners.
- Article: Name of the article.
- Article description: further article information can be maintained in the article description.
Conditions area
- Vendor: the vendor from whom the requirement can be procured.
- Unit price: the price at which the article can be ordered.
- Budget/Comparison Price: the budget or comparison price for this requirement item. This information can be used when creating a requisition to help his buyer: 1. the own budget level or 2. to communicate a comparative price of an alternative article. When a request is made, this information can be used to make a decision.
- Price unit: the price unit indicates the quantity to which the prices refer.
- Order interval: the quantity by which the total quantity of an order for this item must be divisible. Example: the order interval is 20 pieces, then the orderer can only order an order quantity divisible by 20, e.g. 20, 40, 60, etc.
- Minimum order quantity: the minimum order quantity is the smallest purchase quantity for this item.
- VAT: this field displays the value added tax. The value added tax, if deposited, is taken from the catalogue article. If no VAT is stored in the article, the settings of your organization apply.
- Delivery: for delivery you can choose between complete delivery and delivery division.
- Complete delivery: in the case of a complete delivery, the entire quantity ordered is to be delivered on one delivery date.
- Delivery allocation: via the New allocation button you can split the delivery of the total ordered quantity to several delivery dates, e.g. total quantity = 50 pieces and you want 25 pieces to be delivered on 31.11.2016 and the remaining 25 pieces on 10.11.2016.
- Delivery date: in this field you can enter the desired delivery date for this article in case of a complete delivery.
- Material group: the material group to which the requirements item is assigned. You can use the selection field to adjust a material group.
- Delivery address: the delivery address to which the requirement item is to be delivered. You can select the delivery address via the selection field. Via the Info… button you can view the address details. Via the Search… button you can search for another address and add it to the shopping cart item via the Transfer.svg icon. Via the New... button you can create a new address. The newly created address is saved under Master Data Management → Addresses.
- Settings:
- Declarable: if you have activated the option Declarable, the item will be marked as declarable. It is then mandatory to include a customs tariff number and the country of origin in the item with this article in the order.
- Inventory-managed: if you activate the option Inventory-managed in Settings, an increase in stock is posted in your ERP system when an order is sent. For an article to be activated as an inventory-managed article, a material number must be maintained.
Account assignment area
- Account assignment category: you can select an account assignment category via the selection field. This field is mandatory and must be filled in.
- Account assignment type: you can select the account assignment type via the selection field. The following account assignment types are available:
- Single account assignment: with a single account assignment, the entire quantity is posted to an account assignment object, for example, 100 pieces to cost center 4711.
- Quantity-based account assignment: with quantity-based account assignment, the total quantity can be distributed to different account assignment objects, for example, 50 pieces to cost center A, 50 pieces to cost center B.
- Percentage account assignment: with a percentage account assignment, the entire quantity can be distributed to different account assignment objects on a percentage basis, e.g. 70% to cost center A, 30% to cost center B. The quantity distribution is determined automatically by Onventis.
You can make the account assignment distribution using the New Assignment button.
- Recipient of delivery/service: in this field you can enter a recipient for the delivery or service, e.g. Mr. Mustermann.
- Unloading point: in this field you can enter an unloading point for the delivery or service, e.g. 2nd floor room 4711 or gate 1 Musterstrasse 47.
- Cost center: you can select a cost center via the selection field.
- Costtype/general ledger account: you can select a cost type or a general ledger account via the selection field.
- Business area: you can select a business area via the selection field.
- Job (chargeable): you can select a chargeable job via the selection field.
- Job (non-chargeable): you can select a non-chargeable job via the selection field.
- Task: you can select a task via the selection field.
- Order: in this field you can enter an order number.
- WBS element: in this field you can enter a WBS element.
- Attachment: in this field you can enter an attachment.
- Sales order: in this field you can enter a sales order.
- Customer: if you select No via the radio button, you cannot select anything. If you select Yes via the radio button, you can select a customer.
Other area
- External remark: in this field you can enter a text. The text is visible to the supplier.
- Internal remark: in this field you can enter a text. The text is only visible within your organization, the internal remarks are not visible for the supplier.
- External files: via the Select… button you can select a file and attach it to the requirement item. These files are visible to the supplier.
Multiple account assignment for account assignment distribution
In the case of multiple account assignment, you can distribute the account assignment to several account assignment objects on a quantity or percentage basis, depending on the account assignment type selected.
Cost allocation area
In the Cost Assignment area, you specify the distribution of the quantity. You can distribute the account assignment on a percentage or quantity basis.
Account assignment area
- Account assignment category: the account assignment category is selected in the requirements item and can no longer be changed during account assignment distribution.
The following entries can be maintained individually for each account assignment object in the case of multiple account assignment, for example, for each account assignment object.
- Recipient of delivery/service: in this field you can enter a recipient for the delivery or service, e.g. Mr. Mustermann.
- Unloading point: in this field you can enter an unloading point for the delivery or service, e.g. 2nd floor room 4711 or gate 1 Musterstrasse 47.
- Cost center: you can select a cost center via the selection field.
- Costtype/general ledger account: you can select a cost type or a general ledger account via the selection field.
- Business area: you can select a business area via the selection field.
- Job (chargeable): you can select a chargeable job via the selection field.
- Job (non-chargeable): you can select a non-chargeable job via the selection field.
- Task: you can select a task via the selection field.
- Order: in this field you can enter an order number.
- WBS element: in this field you can enter a WBS element.
- Attachment: in this field you can enter an attachment.
- Sales order: in this field you can enter a sales order.
- Customer: if you select No via the radio button, you cannot select anything. If you select Yes via the radio button, you can select a customer.
Requirement items – Follow-on documents tab page
On the Follow-on documents tab of a requirements item, you can see all the documents to which the requirements item has been transferred.
You can see the following columns in the overview:
- Object: Article description
- Document no.: Number of the document into which the requirement item was transferred.
- Document title: Title of the document into which the requirement item was transferred.
- Item no.: the item number within the document into which the requirement item was transferred.
- Quantity: the quantity transferred from the requirements item.
- Document status: the status in which the document to which the requirement item was transferred is currently located.
To call up the document, you can either click on the article description or on the document title.
Transfer requirements items to other documents
The requirement items can be transferred to other documents. You have the option of transferring individual or several requirements items to other documents at the same time.
Requirement items that have been bundled by vendor, for example, are combined into one document.
To transfer the requirement item(s) to another object, you must first select the object to which the items are to be transferred.
You can select the object via the selection menu. You can transfer the requirements items to the following objects:
- New orders
- New and existing inquiries, which are in the status “In capture”.
- New and existing auctions, which are in the status “In capture”.
- New and existing purchasing projects, which are in the status “Open” or “In process”.
Selection of individual requirement items
To transfer a requirements item to other documents, open the required requirements item. To do this, click on the item name in the Requirement Item column.
Via the Use… button the demand item can be transferred to other documents.
Selection of several requirement items
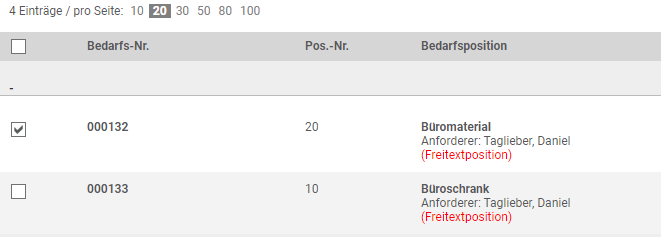
To transfer several requirement items to other documents, you must select the required items. To do this, activate the CheckedBox.svg check box to the left of the requirement item(s).
If you want to select all items from the requirements item list, activate the selection field in the top column line, see diagram:
Afterwards you can transfer the requirement items to other documents via the Use… button to transfer them to other documents.
The button ![]() is used to check whether the requirements would be split into several purchase orders. By clicking on
is used to check whether the requirements would be split into several purchase orders. By clicking on ![]() this division would be taken over. To avoid splitting into several orders, the displayed fields must be adjusted.
this division would be taken over. To avoid splitting into several orders, the displayed fields must be adjusted.
item transfer to purchase order
To transfer a requirements item to a purchase order, choose Transfer Items to….. the New Order(s) promotion.
Confirm your entries with the OK button.
You can cancel the process by clicking the Cancel button.
In the Transfer Details area, the requirement items can be bundled. To do this, activate the Bundle requirements option.
| Hinweis
Using the Bundle requirements option, items are grouped together into new purchase orders according to vendor, regardless of the requester. In this case, they are stored as orderers, while the requisitioners continue to be assigned at item level. |

After you have transferred the requirement item(s), the system displays a list of the purchase order(s).
If you click on the order number in the No. column, you switch directly to the order to which the requirement item was transferred.
You can go directly to the order overview via the To order list button.
You can send the order(s) directly to the supplier by clicking the Send order(s) button. The prerequisite for this is that all mandatory entries for purchase orders have already been maintained in the requirement item(s).
Item transfer to an auction, request for quotation or purchasing project
To transfer a requirement item to an inquiry, choose Transfer items to….. the action requests.
To transfer a requirement item to an auction, choose Transfer Items to….. the action auction.
To transfer a requirements item to a purchasing project, choose Transfer items to….. the purchasing project.
In the Search field you can enter the number or the title of the document and thus limit the results in the selection menu.
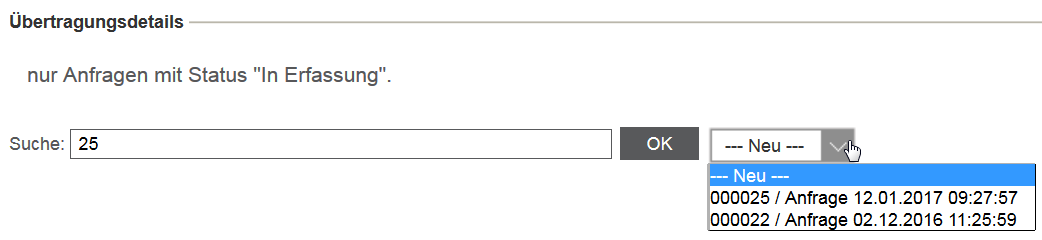
If you want to transfer the requirement item to a new inquiry or auction or a new purchasing project, select the action —New— in the selection box and confirm your entry with the OK button.
If you want to transfer the requirement item to an existing inquiry or auction or an existing purchasing project, select the desired document in the selection box and confirm your entries with the OK button.
| Hinweis
When transferring items to existing inquiries or auctions, only those documents can be selected which have the status “In capture”. When transferring items to existing purchasing projects, only those documents can be selected which have the status “Open” or “To be entered”. |
As soon as you have transferred the position to an inquiry, auction or purchasing project, TradeCore automatically switches to the corresponding document.
Approve or reject requirement items
To approve the requirements before they are sent to another object, you can use a requirements approval workflow.
You have the following options for calling up the requirements items that you must approve:
- in the release list:
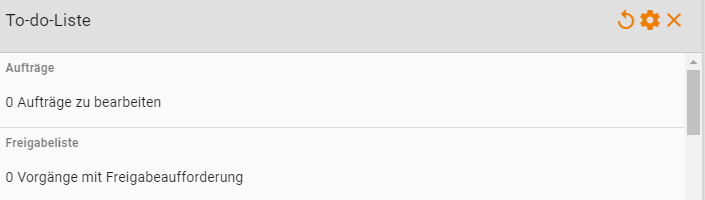
in the menu under Operative Purchasing → Release List. - in the Dashboard:
in the to-do list on your dashboard via the “X tasks with release requests” link.
- in the requirements item list:
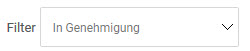
under Operative Purchasing → Purchase Order Processing → Requirement Items. About the selection of the filter in Approval.
- in the e-mail.
Requirements approval in Onventis
In the requirements item list, you can use the filter and the selection of the status In approval to filter the display accordingly.
In addition, you can see the user name of the current approver for the requirement item in the Status column.
To approve or reject a requirements item in the requirements list, open the requirements item. To do this, click on the requirements item title.
In the toolbar, you can approve the requirement item by clicking the Approve button. You can also enter a comment in the Comment on approval / rejection field.
If you want to reject a requirements item, you must first enter a reason for rejection in the Comment on approval/rejection field. You can then reject the requirement item using the Reject button.
The requirements items can only be transferred to other documents after they have been fully approved.
You can add a rejected requirements item back to the requirements list using the Resume button. You can then send the requirement item to the approval process again using the Send button.
E-mail for requirement approval
If you are entered as an approver in the requirement approval workflow, you will be notified by e-mail of the pending approval as soon as a requirement item is created.
If you edit the requirement items without the direct link in the approval email, you will receive the following email:

You can use the “Go to requirements items” link to edit the requirements approval in Onventis after logging into Onventis.
If you edit the requirement items with a direct link in the approval email, you will receive the following email:
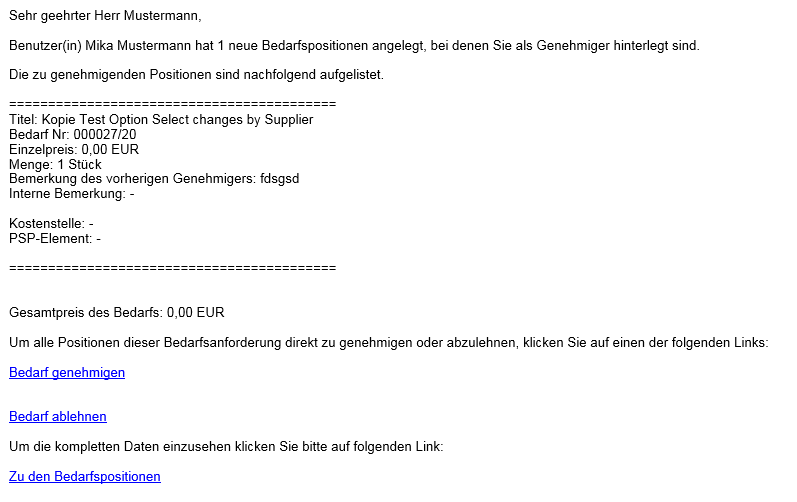
You can use the “Approve Demand” link to approve the demand directly, without logging into Onventis. Your entries are then confirmed with the following message:
You can reject the demand directly via the “Reject demand “ link, without logging into Onventis. Your entries are then confirmed with the following message:
You can use the “Go to requirements items” link to edit the requirements approval in Onventis after logging into Onventis.
In order for you as the approver to be able to process the requirement items via direct link, the following settings must be activated in Onventis:
Enable release via direct link
Enable approvals via direct link without entering login data