
If a customer has sent you an order, you can view and edit it at any time. The order has several statuses during processing.
The status of the order depends on the order processing workflow set up by the customer.
Basic data tab
In the header data you see the contact data of the customer, as well as your contact data stored by the customer. You can change this data and the conditions before you confirm the order.
If the customer has entered a comment, it will be displayed in green under the customer’s contact details.
Positions tab
Here you can see the ordered items of the customer, as well as the delivery date entered by him, the delivery address, and the current status of the item.
Before sending an order confirmation, you have the possibility to change the delivery date, the quantity, the shipping method and the price of the items, as well as to specify additional costs. The values ordered by the customer are then displayed in red.
The customer must then apply these changes to continue the order.
If the customer has assigned the items to item groups, you can see an overview of the item groups here.
Follow-on documents tab
All documents created for this order are saved here. Depending on the customer’s order processing workflow, this contains the delivery notes and invoices created by you, as well as the goods receipts and credit memos created by the customer.
Orders
An order includes information on the customer, order date, conditions and the items to be ordered. An order can go through several process steps from creation to payment processing. The process steps are dependent on the purchase order processing workflow (POC) assigned to the vendor.
Under Order Processing → Orders you can see an overview of all orders of the respective customer.
Toolbar and functions in the order list
![]()
You can use the search field to search for specific records. You can enter numbers or text to search for specific records.

Predefined filters are already available in Onventis. You can use these to refine your search for specific records.
If you do not select a filter, Onventis searches for the selected record in all available fields. For example, if you want to search for a specific order number, select Order no. in the filter and enter the order number you are looking for in the search field.
Using the filter functions will make your search faster and more precise.
Edit
You can create new, individual filters using the Edit button next to the filter. The following fields are available for creating filters:
- Input language: here you select the language in which the filter is entered.
- Title: in the Title field, enter a title for the filter. This field is mandatory and must be maintained.
- Description: in the Description field you can describe the filter in more detail.
- Criteria:
- If you choose AND, all of the following criteria must be met.
- If you choose OR, at least one of the following criteria must be met.
- Explanation of the individual operators:
- =: Only data with exactly this value in the field will be displayed.
- >=: Only data with this and larger values in the field will be displayed.
- <=: Only data with this and smaller values in the field will be displayed.
- <>Only data that does not have this value in the field will be displayed.
- contains: Only data that contains this value in the field will be displayed.
- does not contain: Only data that does not contain this value in the field will be displayed.
- begins with: Only data starting with this value in the field will be displayed.
- does not start with: Only data that does not start with this value in the field will be displayed.
- Visibility: if you activate this option, this filter is public, i.e. all users with access to the customer account can access this filter.
Switch off filter
With the filter off symbol you can switch off a set filter. The entire list is displayed again.
Favorites
With the favorites icon you can add the currently opened page to your favorites and manage.
Export…
With the Export button you can export the entire order list to an Excel file.
Order list overview
Under Sales → Order Processing → Orders you can see an overview of all orders of a customer.
- No.: the order number is displayed in the No. column.
- Title: the Title column displays the order title and the number of items within the order.
- Order number: the order number of the customer is displayed in the column Order number.
- Customer: the Customer column displays the customer who sent the order and the corresponding organizational unit.
- Order date: in the column Order date the date on which the order was sent by the customer is displayed.
- Total: in the column Total the net – total value of the order is displayed.
- Status: the current status of the order is displayed in the Status column.
- Action: the Action column displays an overview of the next possible process steps for the order. The process steps depend on the order processing workflow. By clicking on the link, you can generate the next document directly from the order overview list.
Optimize order search
A search field is available in the header area of the order list. If you are looking for a specific order, you can search for specific orders in the Search field by entering a purchase order or order number, for example.
Onventis searches the list for the string you entered. The filter is switched off and the entire job list is displayed again by clicking the Switch off filter icon.
The order number is always set in the standard system.
Example 1:
For example, if you are looking for order number 550430, you can enter 550430 or 430 in the search field.
Results:
The system displays the order with the number 550430.
Configuration of own filters
You can create your own individual filters in the header area of the order list.

The configured filters can be selected by your Onventis administrator as default filters for each user. You can make the settings under Administration → User Management → Users .
The Edit button opens a new window in which you can configure your own filters.
Click on the back symbol to return to the order overview. Please note that your entries will not be saved.
Use the Save and Close button to save your filter.
You can configure a new filter via the New icon.
Via the Copy icon you can copy the filter and adjust the configuration.
You can delete the filter by clicking the delete icon.
The notes icon allows you to add a note to a filter.
Via the track status icon you can see when and by which user the filter was created and last changed.
Filter area
- Language: you can select the language via the selection box.
- Title: in column Title you have to enter a title for the filter. This field is mandatory and must be filled in.
- Description: in the Description column you can enter a filter description.
Area Conditions
In the Conditions area, you can define the filter criteria.
If you want to filter by two or more criteria at the same time, select the AND link in the selection box. For the AND link, both criteria must be met.
Example 1:
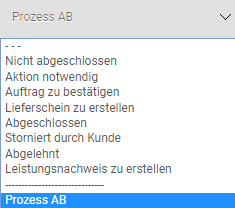
You want to filter for orders that do not contain services.

Procedure:
- select the AND link.
- in the two selection boxes, select process step AB = Completed.
- select Process step LN = Not available from the selection boxes for the second criterion.
- The Save and Close button saves the filter and the entered title and takes you back to the order list.
Results:
The system displays all orders that do not contain service items.
If you want to filter by one of several criteria, select the OR link in the selection box. For the OR operation, only one of the criteria must be met.
Example 2:
You want to filter for orders for which a delivery note or a performance record is to be created.

Procedure:
- select the OR link.
- in the two selection boxes, select process step LN = Active for vendor.
- For the second criterion, select Process step LLI = Active for vendor from the selection boxes.
- The Save and Close button saves the filter and the entered title and takes you back to the order list.
Results:
All orders for which a performance record or a delivery note is to be created are displayed.
Settings area
Visibility: if you activate this option, other users can also access your filters. Additionally, your Onventis administrator can set this filter as the default filter for you.
Preview area
Preview area, the selected conditions are displayed again.
You can use the Refresh button to update the filter again, e.g. after a correction.
Select filter
If you have created and saved a filter, you can then find and select it from the selection box, under the title you entered.
You can deactivate the filter via the Deactivate filter icon. The entire order list is displayed again.
Process steps of an order
An order has multiple statuses throughout the process, from entry to delivery.
| Hinweis
The process steps depend on the order processing workflow that has been assigned to you by the customer. |
By means of the colored representation you can understand whether the customer or you as a supplier must carry out an action and which process steps are still open. In addition, you can see all process steps that have to be executed until the order is completed. It can happen that several statuses have the same color at the same time.
Meaning of the color representation:
![]()
Dark blue: if a process step is displayed in dark blue, this step has already been completed. The purchase order was sent in the process step shown.
![]()
Light blue: if a process step is displayed in light blue, this step is still open and must be processed. In the process step shown, the purchase order waits for the customer to post a goods receipt.
![]()
Yellow: if a process step is displayed in yellow, this step is still open and must be processed.In the displayed process step, you as the supplier must create an order confirmation.
![]()
Grey: if a process step is displayed in grey, this step is still open. In order for this step to be processed, all previous steps, on the customer and supplier side, must first be completed.
order status
![]() Sent to supplier
Sent to supplier
The order receives this status when it has been sent to the vendor, possibly after approval. As a supplier, you will receive an e-mail notification of an incoming order.
![]() confirm order
confirm order
In this status, you as the vendor must confirm or reject the order. After the order confirmation or rejection, the customer receives an e-mail notification.
![]() Create delivery note
Create delivery note
In this status, you as the vendor must create one or more delivery note(s) for the order items. When the delivery note is sent, the customer will be notified by e-mail that the delivery note has been received. The delivery note is located in the order in the tab Follow-on documents.
![]() Post goods receipt
Post goods receipt
In this status, the customer must post a goods receipt. This status is completed when the goods receipt has been posted for all items. As a supplier, you will be informed of the posted goods receipt by e-mail. The goods receipt documents can be called up in the follow-on documents tab of the order.
![]() Billing info
Billing info
If Invoice Info has been selected in the purchase order processing workflow, you must generate an invoice info as the vendor. As soon as you send the invoice, it must be confirmed by the customer. The invoice documents can be called up in the follow-on documents tab of the order.
![]() Credit advice
Credit advice
In this status, the customer must generate a credit memo for the vendor. A credit note includes all items of the order, incl. of all shipping costs. After the customer has sent the credit note, you as the supplier receive an e-mail and must confirm the credit note.
![]() Archived
Archived
The order was archived by the customer. The order can no longer be processed.
![]() Filed under
Filed under
The order is completed and can no longer be processed.
![]() Canceled
Canceled
The order has been cancelled and can no longer be processed.
process orders
As soon as a customer has sent an order to you, you as the vendor receive a new order. You will be informed about the receipt of an order by e-mail. You have the following options for calling up orders:
- From the email via direct link
- From the to-do list on your dashboard, if configured
- Via the call under Order Processing → Orders
To edit a specific order, click on the order number or the order title.
| Hinweis
The functions described below depend on the settings in the order processing workflow of the customer account. If you want changes in the process flow, please contact your customer. |
Creation of an order confirmation
For new orders, open the desired order. The following note is displayed in the header area of the order:
To send the order confirmation to the customer, click on action > Confirm order.
Open the action menu and click on the Confirm Order button.
In the dialog box you will be asked if you want to send an order confirmation to the customer. You can confirm the process by clicking the OK button. You can cancel the process by clicking the Cancel button.

Once you have confirmed the order, you will receive the following notification:
| – The order confirmation <order no.> was sent to the customer by e-mail. |
The customer will be notified of the receipt of the order confirmation by e-mail.
Decline an order
Open the desired job. The following note is displayed in the header area of the order:
To send the order confirmation to the customer, click on action > Confirm order.
To reject an order, you must first enter a reason for rejection in the Miscellaneous area / External comment field.

Open the action menu and click on the reject order button.
If you do not enter a rejection reason, the following error message is displayed:
| – Please enter a reason for the order rejection! |
When you have entered the reason for rejection, you will be asked in the dialog box whether you want to reject the order.
You can confirm the process by clicking the OK button. You can cancel the process by clicking the Cancel button.

As soon as you have rejected the order, the following message is displayed:
| – The order rejection was sent to the customer by e-mail |
The customer will be notified of the order rejection by e-mail.
Confirm or reject individual order items
You can confirm or reject individual order items. To call up individual positions, first switch to the Positions tab. Then click on the desired article.
You can confirm the position by clicking the Confirm button. The order receives the status “Confirmed”.
You can reject the item by choosing Reject. The order receives the status “Rejected by supplier”.
You can then confirm the entire order by clicking the Confirm order button. The customer will be informed by e-mail.
| Hinweis
You can only change the data/fields that have been released by the customer. |
Confirm an incoming order
If it takes a long time to create an order confirmation, you can first confirm the receipt of the order. Via the Confirm receipt button, you can confirm the receipt of the order. The customer will be notified of the order confirmation by e-mail.
Change of order before sending an order confirmation
Before sending an order confirmation, you can change the order data.
Basic data tab contains the header data of a purchase order. In the supplier data area you can adjust your address and contact data. In the conditions section, you can change the payment and delivery conditions, as well as adjust the packaging instructions. In the Miscellaneous area, you can enter an external or internal comment. An external remark is visible for the customer, an internal remark is not visible for the customer.
In the tab Positions you can see a list of the individual order positions. In the item overview, you can adjust the quantity, price or delivery date.
You can then confirm the order by clicking the Confirm order button. The customer will be informed by e-mail.
| Hinweis
You can only change the data/fields that have been released by the customer. |
Change of order after sending an order confirmation
You can create an order change after the order confirmation has been sent. To do this, open the desired order and then create an order change using the New order change button. Depending on the customer settings, you can change the header and/or item data. After the change, the modified order must be sent to the customer via the Confirm order button. The customer can confirm or reject your order change.
The Show changes button gives you an overview of all changes made to the order.
| Hinweis
You can only change the data/fields that have been released by the customer. |
Order as attachment in the e-mail
Depending on the customer’s settings, the order is sent as an attachment. The following formats are possible:
- PDF file
- XML file
- Excel file
To receive the attachment in one of the listed formats, please contact your customer.
Save job as OpenTrans file
You can download the order as an XML file using the Export button. The file is available in OpenTrans 1.0 format and can be imported into your own ERP system if required.
Print order
To print a job, proceed as follows:
- open the desired order
- click on the print icon. Onventis creates a PDF document
- save or print the document on your computer
Create delivery note
After sending an order confirmation, you can send a delivery note, depending on the order processing procedure.
To send a delivery note click on the number or the title of the desired order.
You can create a delivery note via the New delivery note button.
In the header data, you can define the delivery terms and a delivery date. If you enter a delivery date, it will automatically be transferred to all items within this delivery note.
You can enter the position details in the Positions tab.
- Quantity: the quantity from the order is taken over. You can adjust the quantity to the actual delivery quantity per item.
- Final delivery: of the Final delivery indicator. If this indicator is set, no further delivery is planned for this item.
- Action: Via the delete symbol you can remove single positions from the delivery note.
You can send the delivery note via the Send button.
Delivery note – replacement delivery
You can use the substitute delivery indicator on a delivery note to indicate that it is a substitute delivery. The article in the delivery note will be marked as a replacement delivery in the PDF document and the e-mail accordingly.
Delivery note incl. Print barcode
Open the desired delivery note. You can print the delivery note using the print icon.
Depending on the customer’s settings, Onventis creates a PDF document incl. barcode, which you can continue to use.
Printing labels for individual articles
In the delivery note you can use the label print button to create labels for individual articles.
The Open button creates a PDF file and then opens it.
You can download the file via the download button. During the loading process, this window remains white for a short time.
In the field “Print from position no.” you can enter for which position(s) the label printing is to take place.
| If it is not possible to open the file, first save the file using the download button and then open it. |
Shipment tracking via Track&Trace interface
If the step LI = delivery note is activated in the order processing workflow, you as the supplier must create a delivery note for the order in Onventis.
You can see if you have to create a delivery note by an orange LI ![]() .
.
You can create a new delivery note via the New delivery note button. In the Tracking section, you can enter the package number and select the shipping company from the drop-down menu. You can choose between DHL-/ DPD-/, GLS-/ and TNT.
Via the + symbol the package number is taken over.
You can add further package numbers via the +.
You can delete the package number using the delete icon.
By clicking on the package no. the shipment tracking is called up in a separate browser window, via which the current status of the package can be queried.
Create performance records
In the case of service purchase orders, you must, depending on the purchase order processing workflow of your customer, create a service record as proof of the service performed.
Under Order Processing → Orders you can see an overview of all your customer’s orders. Orders for which a performance record is to be created can be recognized by the orange step LN ![]() in the status column.
in the status column.
You can set the filter in the drop-down menu to Create service record. After you have set the filter, only those orders are displayed which have already been confirmed, but the proof of service has not yet been created.
In the order overview, you can create a service record in the Action column by clicking the New service record button.
Alternatively, you can open the desired order and create a service record via the New service record button.
In the performance confirmation, you can report the total quantity, a partial quantity, or if allowed by the customer, an overfulfillment.
If the customer allows this and has activated the option “Add further services possible” in the order processing workflow, you can add further services via the Further service… button or a catalog item via the Catalog… button. button or add a catalog item via the Catalog… button. Prerequisite:
- Catalog article: it is an article with a condition released for the customer.
- Additional service: Normal item, which is marked as a service.
You can send the proof of service to the customer using the Send button.