When you go to the menu Document import – Purchase invoice, you will be in the screen where new supplier invoices can be imported.

Two options are possible from here: Import from drive or import from email. After this the invoices needs to be processed, so they will appear in the worklist.
Import from disk/network
When you click the button “Import from drive” you will see the following screen:
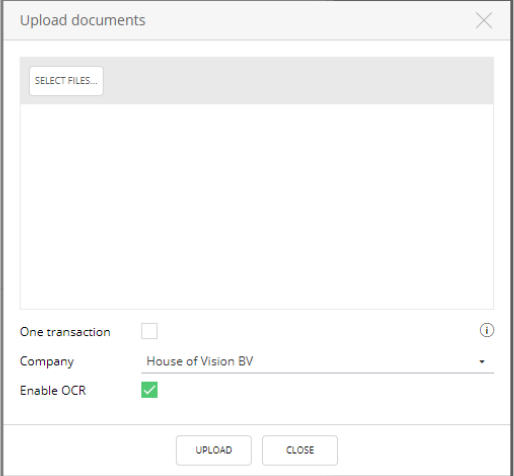
The following actions can be performed here:
- Button “Select files”: a window will be shown where you can select the files to be imported. Multiple files can be imported at once.
- Checkbox “One transaction”: this will allow you to combine all selected files into one transaction. Later you can select the main document. If every selected file is a separate invoice, do not tick this field.
- Company: The company for which you are importing invoices.
- Checkbox “Enable OCR”: when ticked, the invoices will be sent to the OCR service. By default it is ticked.
Once you click the button “Upload”, the files will be processed. This can take a few seconds.
Import from e-mail
When set up in your environment (see Basic implementation import e-mail ), you can make a direct connection to a mailbox. When you click the button “Import from email” the following screen is shown:
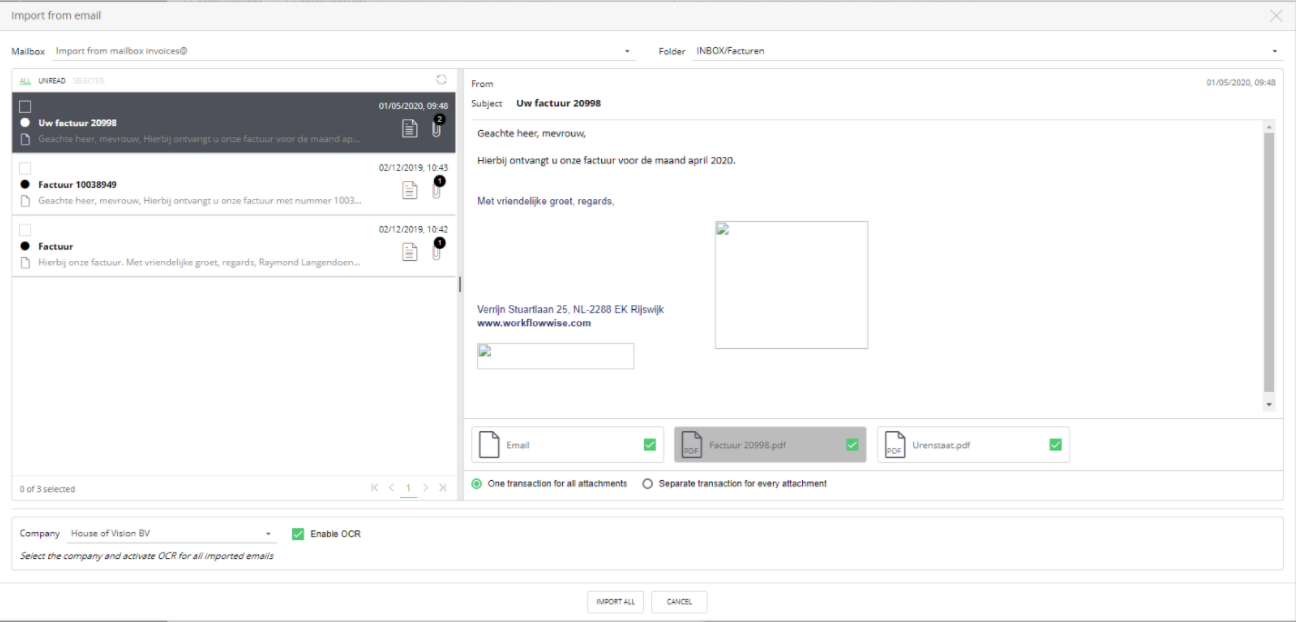
On the left, you will see all e-mails in the selected folder. On the right we will show the contents of the selected mail. Also you can see which attachments are linked to the mail. The following actions can be performed:
- You can determine whether the text of the mail itself should be imported. Sometimes the body of the mail contains important information that you want to add to the invoice. The system will then make a “print” of the mail and add it.
- You can select the attachments to be imported. By default all attachments are selected, but in case for example T&C were sent along with the mail and you don’t need them, you can deselect that attachment.
- You can decide whether the attachments of a mail belong together (“One transaction for all attachments”) or that they are separate invoices (“Separate transaction for every attachment”). In the latter case, the supplier sent you one mail with multiple invoices. This does not happen very often, that’s why the default setting here is “one transaction”.
After changing something in the right side of the screen, you will see that on the left this email is selected automatically. You can then proceed with the rest of the mails. Please note that only 10 mails are shown per page, so there can be more pages.
In the bottom left you can select the company that the invoices should be linked to. Also you can select whether they should be sent to the OCR service or not.
Finally you can click the “Import” button. The system will import the e-mails in the background and move the mail to the archive folder that is set up. That way you know that only mails are shown in this screen that still have to be processed.
It’s also possible to import all mails in the same way. In that case, after the above screen is shown you can click “Import all”. Now you can set up how the mails will be processed:
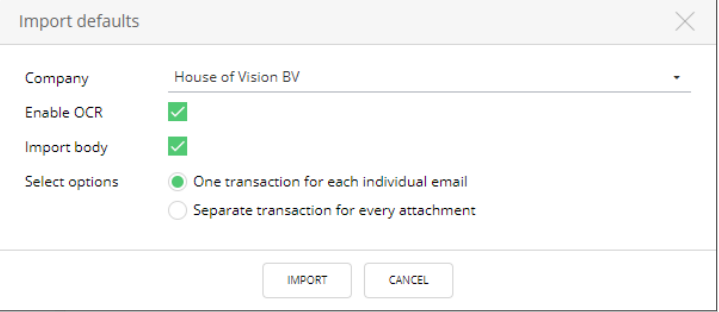
The settings here are the same as in the main screen. When you are ready, click “Import” to process all e-mails.
Importing the e-mail will always be done in the background. You will see a message in the lower right part of the screen as soon as it is started and when it’s ready:

and then:

The screen can now be refreshed:

Click the refresh button and the imported mails are shown. Now you can continue processing them.
Processing imported invoices
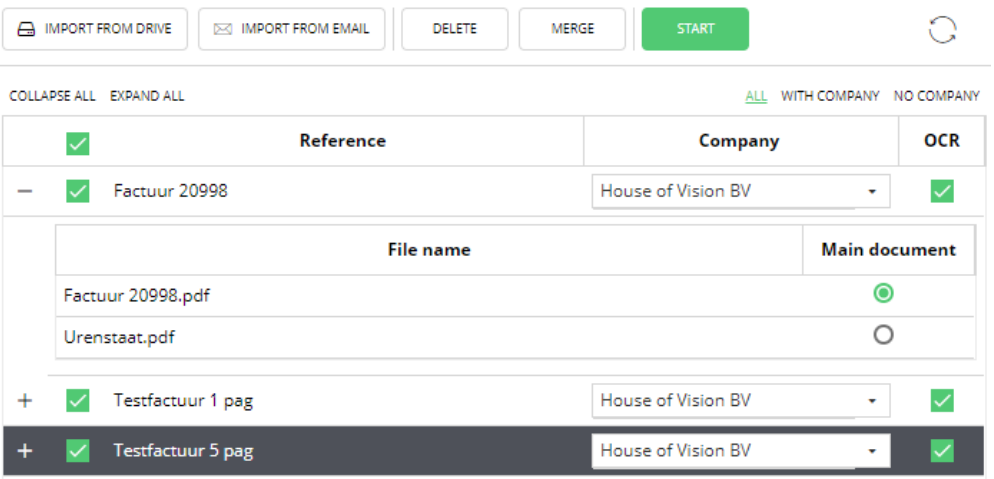
Once the imported invoices are shown, it’s possible to change what will be done with them. Think of merging documents, rotating pages and setting which document is the main document.
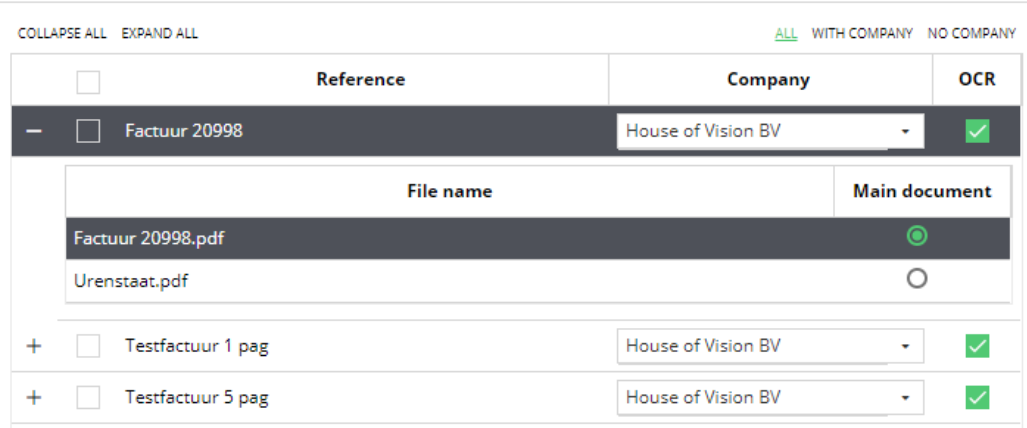
A few things can be seen here:
- The last two invoices consist of just one document. The first invoice has two documents.
- For this first invoice you can select which document is the “main document”. This document will be shown first, once the invoice is in the worklist or the archive. The other document will become the attachment.
- For each of the three lines you can still change the company and if it should be sent to the OCR service.
Some corrections can be done there. To delete an attachment that you accidentally imported, right click it:
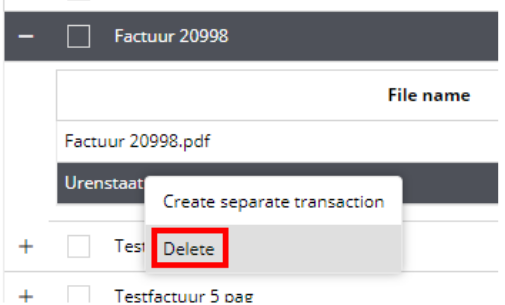
In case a document is not an attachment but a separate invoice, please choose “Create separate transaction”.
Merging to separate invoices to one can be done by selecting them both (with the checkbox in front) and then clicking the ‘Merge” button. Now they are merged to one invoice and you can select which document is the main document.
On the right side of the screen you will see the invoice image. Some things can be done here as well.
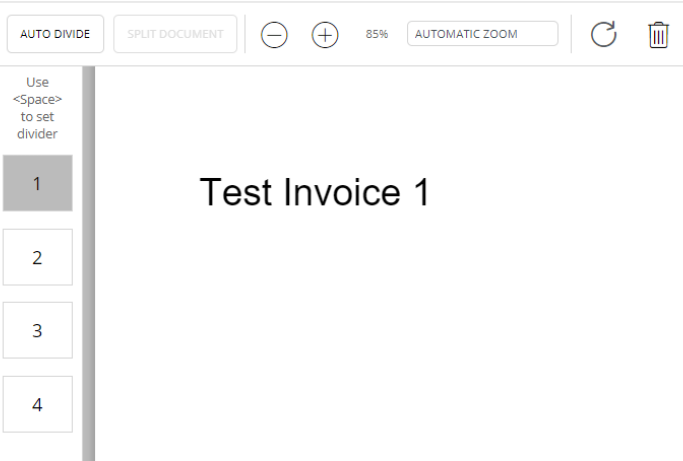
In case this document contains multiple invoices, for example because it is a scan of many paper invoices, you can split them.
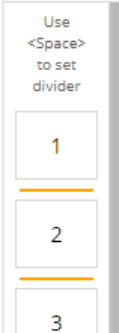
You can do this using the space bar. The yellow lines are the places where the document will be split.
Once you have done this for all pages of the document, click the button “Split document”. Now this one invoice will be split into multiple.
In case your file consists of multiple invoices of the same number of pages, you can use the “Auto divide” button.
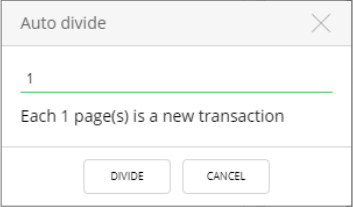
This will place a yellow divider after every X pages of the document. Then use the “Split document” button.
By using the buttons you can zoom out or zoom in.

The default zoom level will be ‘page wight’. When an user changes this, it will be remember and used when opening the document viewer again.
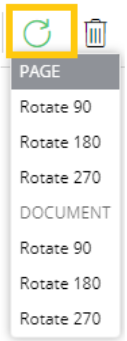
![]() By using this button above the invoice image, you can rotate pages or the whole document.
By using this button above the invoice image, you can rotate pages or the whole document.
By using this![]() button above the invoice image, you can delete the page.
button above the invoice image, you can delete the page.
Once you are done processing the invoices, they will have to be started. This can be done by selecting the invoices in the list. You will see the “Start” button changing to green.
Once you click “Start”, the invoices will be processed in the background. The envelope button in the top right of the screen will show the progress:

If you are importing a lot of invoices, it may take a while before you see them all in your coding worklist. In case anything went wrong during processing (for example a corrupt PDF file was encountered) it will be shown in the above message.
If you have multiple companies in your environment, please note that you can only start invoices for one company at a time. When invoices were selected for multiple companies, the “Start” button will not be available.