
The Onventis Mobile app is a multifunctional all-rounder that lets you implement rapid and decentralized procurement processes, even when you’re not in the workplace. From creating the shopping cart and performing approvals to tracking orders, the Onventis Mobile app takes care of the entire procurement process, even while you are on the go.
ORDERING PROCESSES WHILE ON THE GO
Initiating time-critical or time-consuming order processes and multi-stage approval workflows while you’re on the go is easy with Onventis Mobile Ordering. You can order products, product ranges or services ad-hoc at any time of day, wherever they are needed. What is more, you can do this with item selection using the integrated QR and barcode scanner solution.
APPROVAL WORKFLOWS IN RECORD TIME
With Onventis Mobile Approval, it’s easy to speed up the approval process for purchase requisitions, orders, order changes or sales order changes, service notes and invoices. Push notifications automatically inform you about any new supporting documents and the number of outstanding authorization requests in the authorization list, even if you don’t have the app open.
CURRENT DATA FOR MORE TRANSPARENCY
Of course, all of the actions carried out with the Onventis Mobile are continuously synchronized with the Onventis Cloud platform and are therefore transparent and easy-to-understand at all times.
YOUR BENEFITS & FEATURES WITH ONVENTIS MOBILE ORDERING
• Scan QR codes and barcodes to select items quickly
• Browse all online catalogs
• Download public and private favorite item lists from the Onventis Cloud platform
• Create and submit shopping carts
• View the current status of orders and purchase requisitions incl. the full history
• Post incoming goods receipts and service notes
• Retrieve data from subsidiary organizations and subsidiaries as part of the group structure with a single login
YOUR BENEFITS & FEATURES WITH ONVENTIS MOBILE APPROVAL
• Share documents in seconds
• Always up-to-date: Push notifications about new supporting documents and authorization requests
• Comment function for transparent communication and decisions
• Simple approval and acceptance of internal and external services
• Process acceleration and a unique user experience with all relevant information shown clearly incl. file attachments
• View amendment documents: detailed overview of order changes or sales order changes
• Confirm completion of service note line items and approve for automatic goods receipt
• Flexible use of Onventis workflow options, such as forwarding or returning
• Approve supporting documents from subsidiary organizations and subsidiaries as part of the group structure without the need to log in again
Note: The availability of some features and languages depends on the settings of your organization and the Onventis license.
Setup
The following administrative steps must be completed in order to be able to use Onventis Mobile:
1 Licensing of Onventis Mobile
Separate licenses are required for Onventis Mobile.
Onventis Mobile Approval for mobile approvals and Onventis Mobile Ordering for mobile ordering can be licensed separately.
2 Setting up user roles for Onventis Mobile
Like other Onventis functions, Onventis Mobile is approved for users on the basis of user roles.
The user role that allows users access to the app must include the following three user rights:
- Access to Onventis Mobile
This user right controls whether a user can log in to Onventis Mobile at all. - Onventis Mobile Ordering
This user right grants a user access to the ordering functions in Onventis Mobile.
These include catalog search, favorite items, shopping cart, order list and requirements list. As a basic principle, however, users of the app are limited to the functions that are also approved for them in the Onventis web application.
For example, a user will not be able to access the order list if he cannot do so in the web application.
The user right is only available if this function is licensed. - Onventis Mobile Approval
This user right grants a user access to the approval list in Onventis Mobile so that he can carry out approvals using a smartphone.
The user right is only available if this function is licensed.
The user role must then be assigned to users who need access to the relevant Onventis Mobile functions.
If access to Mobile Ordering and Mobile Approval is to be approved for different groups of users, two separate user roles can also be created. In such cases it is important to ensure that each of the user roles includes the user right for general access to Onventis Mobile.
3 Assigning of global user names for Onventis Mobile users
A global user name in the form of an email address is required to log in to the Onventis Mobile app.
This user name identifies the user unambiguously within the Onventis Cloud Procurement Network.
To create a global user name, navigate to Master data management → User management → User and select the user for which a global user name is to be set up.
Enter the global user name in the User name (email address) field in the Login data area.
The user name must be in the form of an email address. No information will be sent to this address, however.
If the user name that is entered has already been assigned within the Cloud Onventis Procurement Network, it will not be possible to save the entries.
If multiple users are to be updated at the same time, the import template for users (see Templates for master data imports) can also be used. The “GlobalLogin” column must be filled out in such cases.
4 Defining the corporate design settings for Onventis Mobile
Settings within Onventis Mobile can be configured independently of Onventis, so that the app can feature your company’s corporate design.
To define the settings, navigate to Configuration → Settings → Layout and texts and switch to the Layout tab.
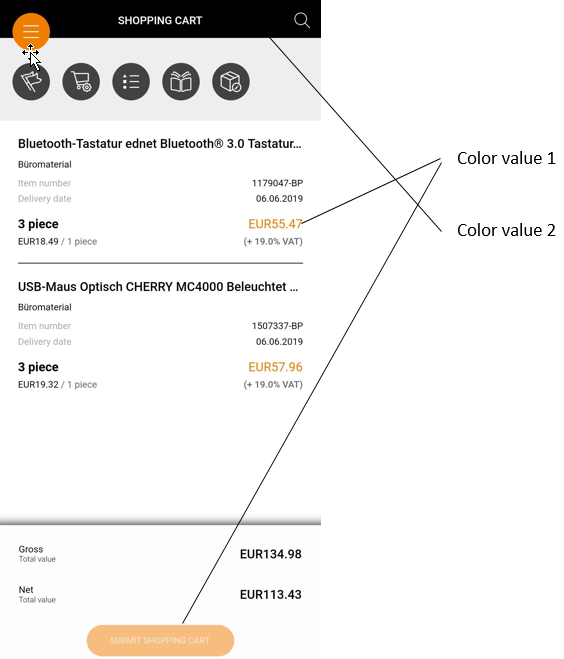
A company logo and two color values can be defined in the Onventis Mobile design settings area.
Please observe the following requirements and recommendations:
- Company logo
Dimensions (HxW): max. 320 x 560 px
Resolution: min. 72 dpi (a higher resolution is recommended for display on Retina or HiDPI displays)
File format: PNG including alpha channel
Background: transparent, suitable for display on a light background - Color value 1
The color value must be entered as a hexadecimal code in the form #FFFFFF.
A high-contrast color is recommended since white text is displayed on these sections.
The color is also used to highlight text. - Color value 2
The color value must be entered as a hexadecimal code in the form #FFFFFF.
A high-contrast color is recommended since white text is displayed on these sections.
The following illustration shows an example of the use of color values:
Installation and Availability
System requirements
Onventis Mobile supports the most popular mobile operating systems iOS and Android in the following versions:
| Platform | Version | Devices |
| Apple iOS |
|
All iOS devices with the corresponding iOS version. Smartphones and tablets. |
| Google Android |
|
Onventis Mobile supports a variety of Android smartphones and tablets. Please check the Google Play Store to see if your device is supported by Onventis Mobile. |
Download and installation
Users can download the app free of charge from the Apple App Store or the Google Play Store.
Use the following links or search the App Stores for “Onventis“:


* Registration in the app is only possible after appropriate licensing and activation in Onventis. See Setup
Distribution via MDM
Onventis does not provide .ipa or .apk files for the distribution of the app within companies. When using Mobile Device Management (MDM) systems and limited access to the app stores of the respective platforms, it is recommended that users be granted permissions to download the Onventis Mobile app.
Mobile function overview & operation
Take care of your Procure-to-Pay process on the move
An experience for all buyers & approvers
The design of the Onventis mobile app has been fundamentally revised and offers the user an even clearer and more modern user interface. Carefully thought-out control elements in an innovative design enable the user to operate the app intuitively and easily. With the black & white mode in harmony with your CI colours, you can design your mobile procurement solution completely individually.
The following PDF gives you a brief overview of the most important functions and range of Onventis mobile
Central control gestures: “Wiping and typing”
- You always wipe to the left to call up further actions.
- You always wipe down to refresh the current page
- You always wipe to the right to take another step back.
- Click to go one step further or perform actions.
Functions, fields, data not displayed in the app
Offline mode
The new mobile 5 app requires permanent Internet access. An offline mode is not planned.
Edit orders with status “in entry”
Currently, the new Onventis mobile 5 app cannot process orders with the status “in process”. Recommendation: Activate the organization setting “Mandatory field checking in shopping cart”. This means that the user cannot generate purchase orders in entry that he or she must subsequently change (and then cannot change via the app). The possibility of processing orders with the status in Entry is expected to come with version 5.1 / 5.2 of the mobile app.
New order modification
Currently, users of the Onventis mobile 5 app cannot make any order modifications. Order modifications may have to be made in Onventis Buyer. Releasing or displaying order modifications, on the other hand, is also possible in the mobile 5 App.
Multiple account assignment
Quantitative or percentage-based multiple account assignment is not available in the new Onventis mobile 5 app. Only the single account assignment can be processed in the shopping basket position. The multiple account assignment probably comes with version 5.1 / 5.2 of the mobile app.
Dynamic account assignment
Dynamic account assignment is currently not supported in the mobile application. This adjustment concerns only the API interface and is part of a general adjustment of the dynamic account assignment in Onventis Buyer.
Delivery compliance
In Onventis Buyer, users can use the Shopcart item-level delivery schedule function if the corresponding setting (“Allow Delivery Schedule” in the organizational settings) is enabled. This will most likely not be available in the Onventis mobile 5 app. The user can currently only send complete deliveries. If necessary, the adaptation will be done with version 5.1 / 5.2.
Approval workflow step 1 – Selection of approver
When setting up an approval workflow, the approval can be set so that the ordering user can directly select the approver from a user group when sending the purchase order. This case cannot currently be displayed in the Onventis mobile app. All other approval steps with the selection of the approver are possible if the selection is only part of the 2nd approval step.
Hide prices in ordering process
When setting up an approval workflow, the approval can be set so that the ordering user can directly select the approver from a user group when sending the purchase order. This case cannot currently be displayed in the Onventis mobile app. All other approval steps with the selection of the approver are possible if the selection is only part of the 2nd approval step.
Data-upload
Files such as photos of incoming goods etc. cannot currently be uploaded to the app. This adjustment will probably be done with version 5.1. / 5.2.
SAML
Login via SingleSignOn (SAML) will probably no longer be part of the first Onventis mobile 5 app. SAML is expected to be released in version 5.1. (if it can no longer be implemented within 5.0)
Shopping cart direct entry
Direct entry in the shopping cart is not possible in the current Onventis mobile 5 app. This adjustment is planned for version 5.1/5.2.
Edit or display surcharges and discounts / rebates in the shopping basket item
Surcharges, discounts and rebates in the shopping basket item cannot yet be edited / displayed.
Inheritance function
The inheritance function is generally not yet a implemented feature. But will probably play a role in one of the upcoming updates.
Activity record – Add position
Currently, benefit statements can be sent and processed, but no benefits (from catalogs or user-defined text) can be added to a benefit statement.
Select packing instructions in the shopping basket position
The various packaging regulations cannot be processed in the shopping basket position.
Structure of Onventis mobile
This chapter gives an overview of the structure of the Onventis mobile app compared to Onventis Buyer. This is illustrated using the example of the document category “Purchase order”, but the structure is generally the same for each document category.
Order list
![]()
| Order list
The list structure of Onventis Buyer is also reflected in the list view of the mobile app. You can use the icon |
Base data of the order
![]()
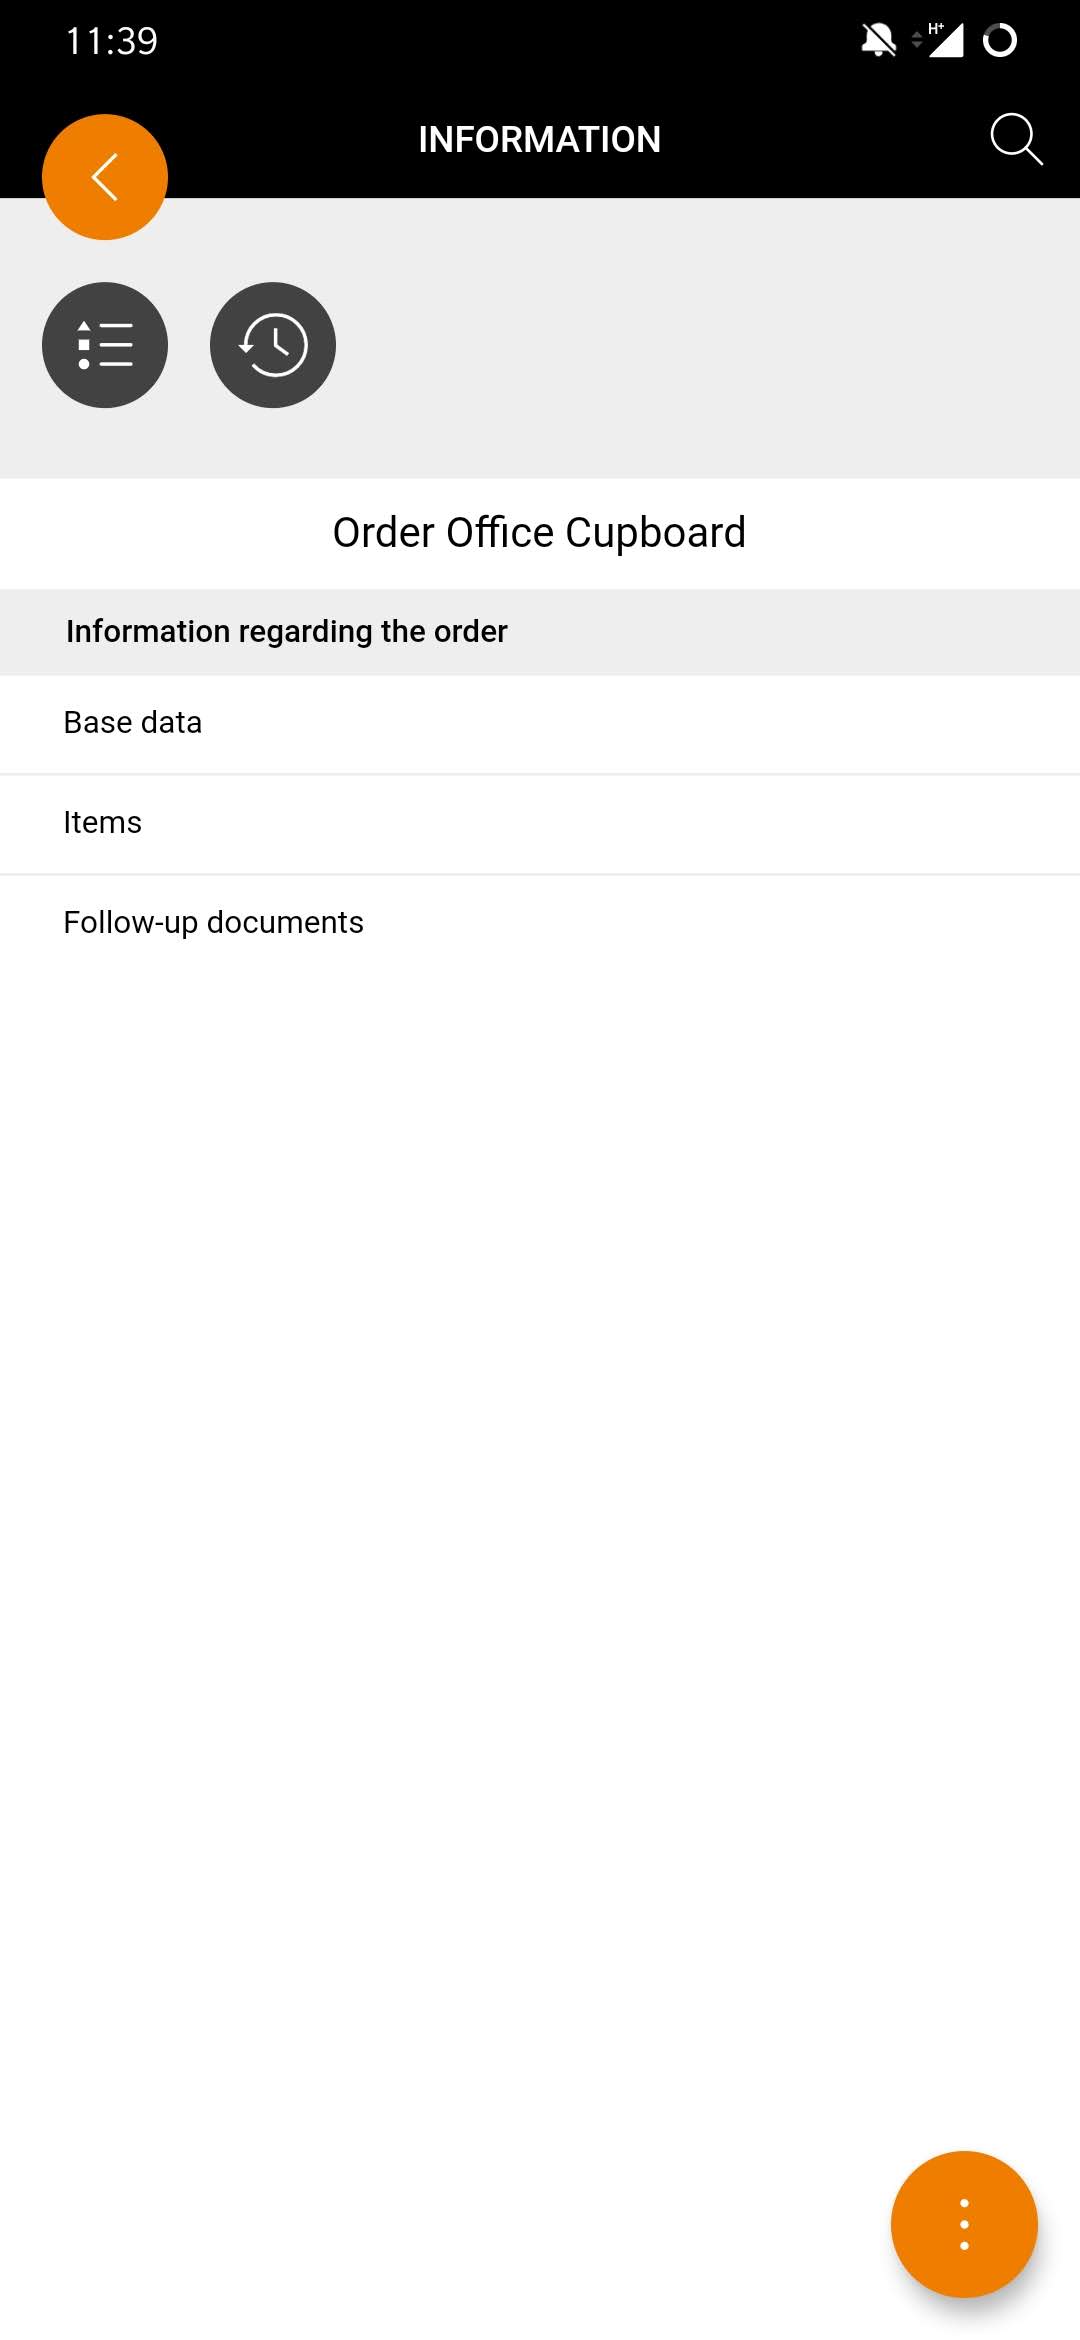
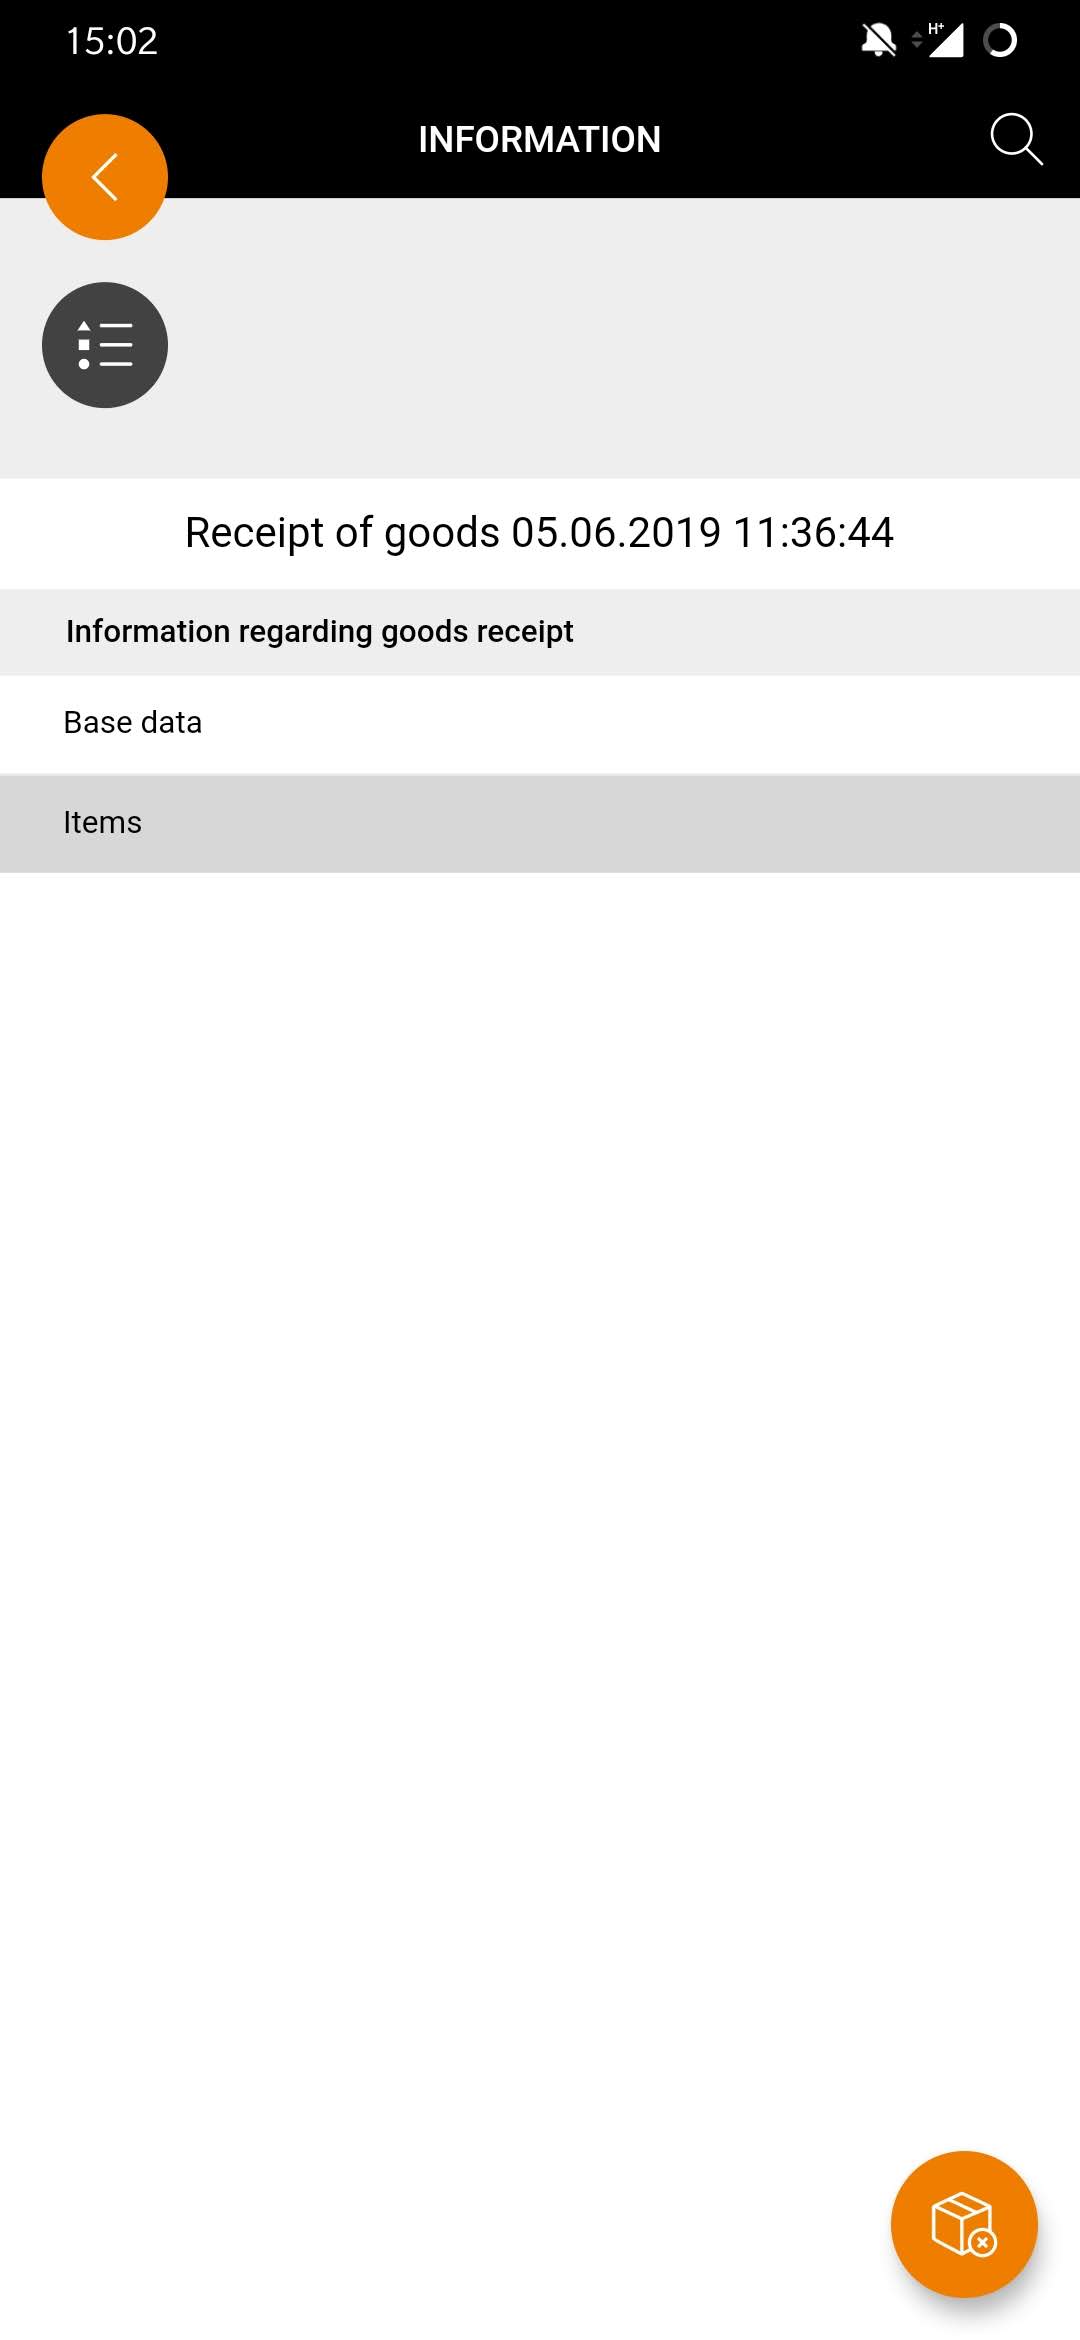
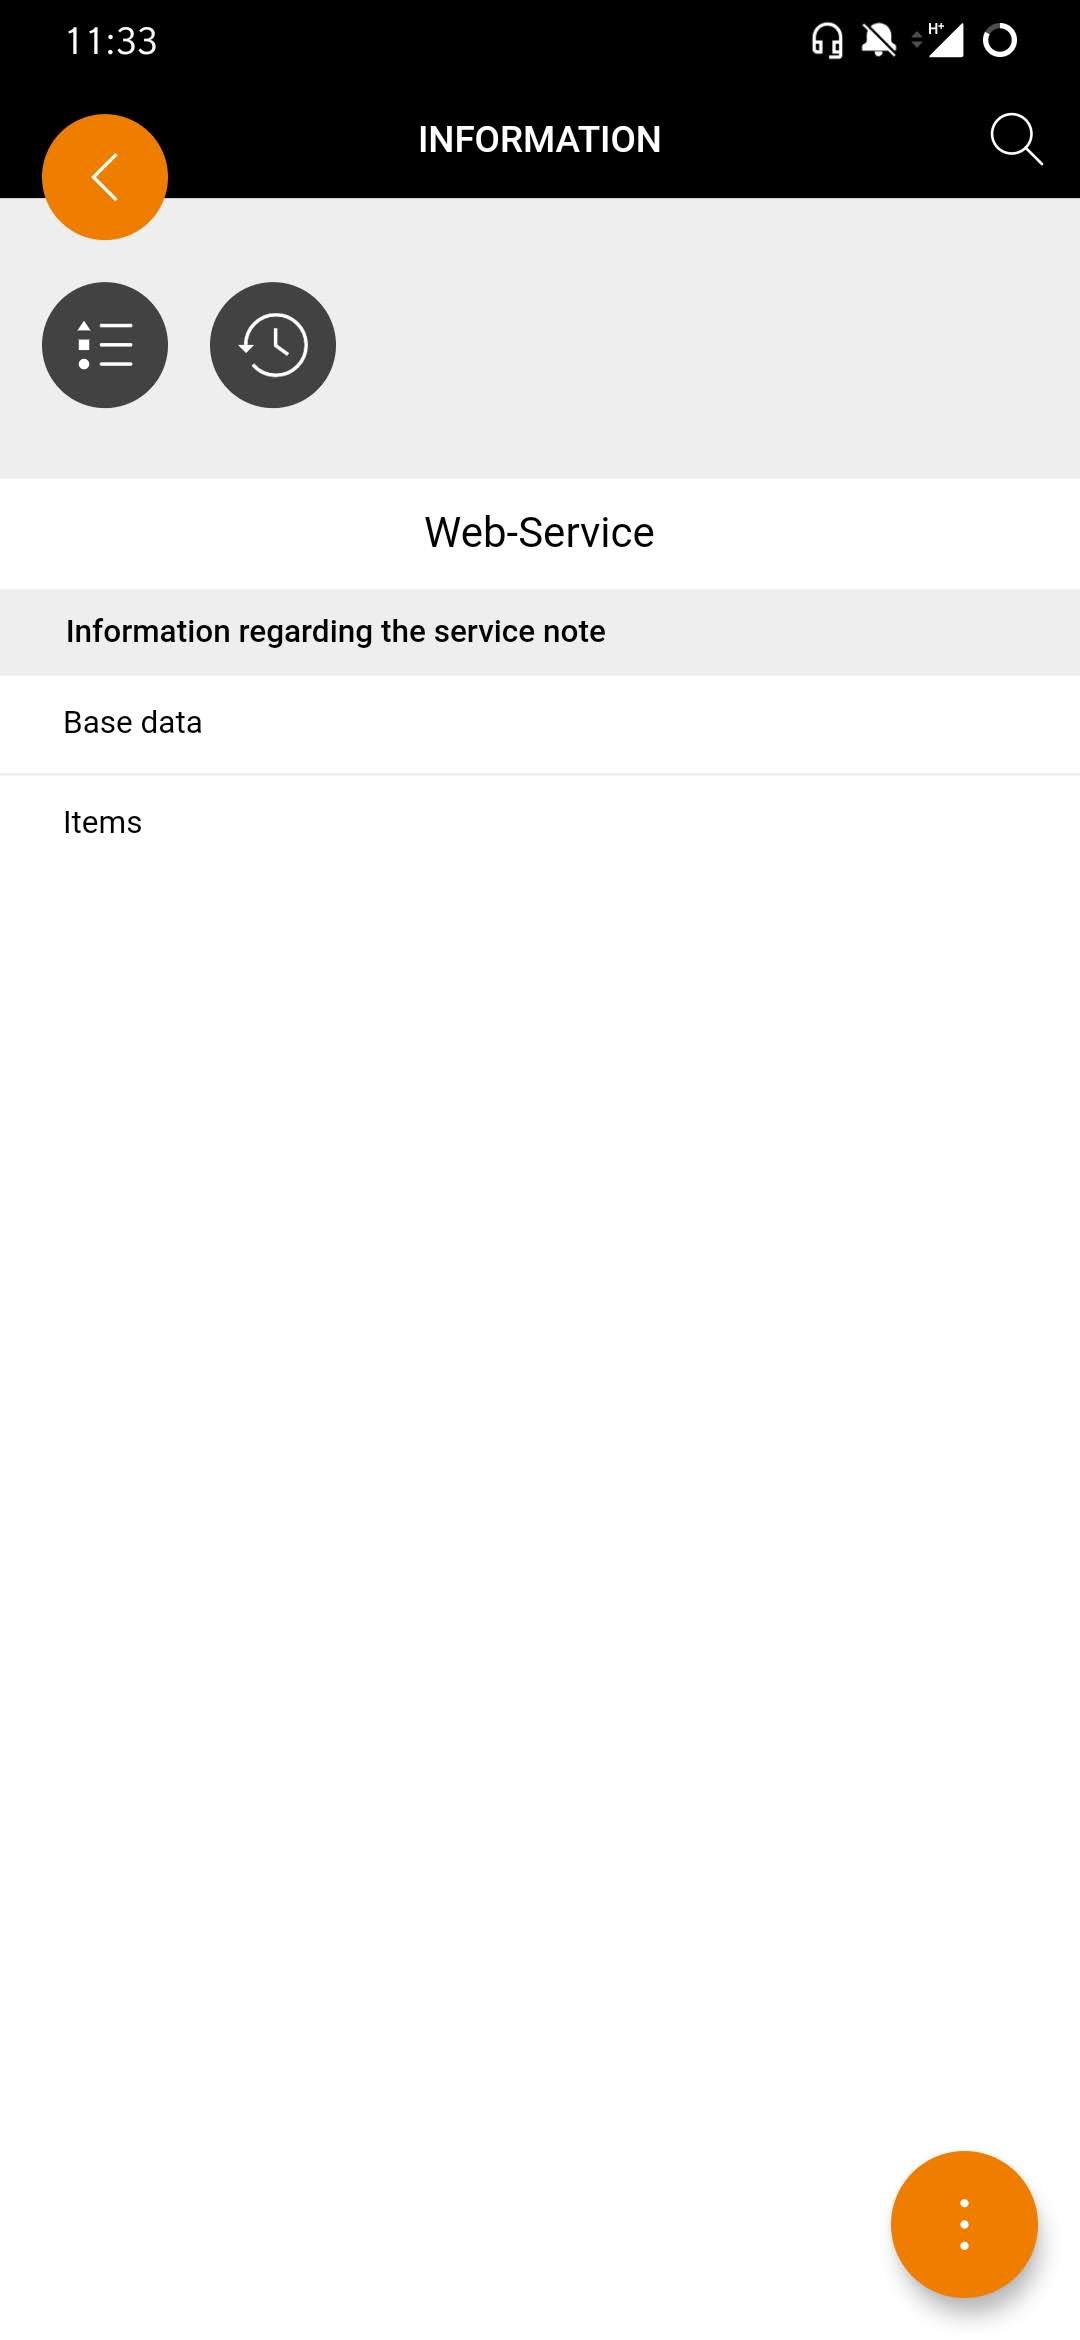
| Order information
If you have decided for a document, you can click on it and select the document. In the first step you can then decide which information you want to view. Compared to Onventis Buyer, the information overview in the first smartphone screen displays the tab selection |
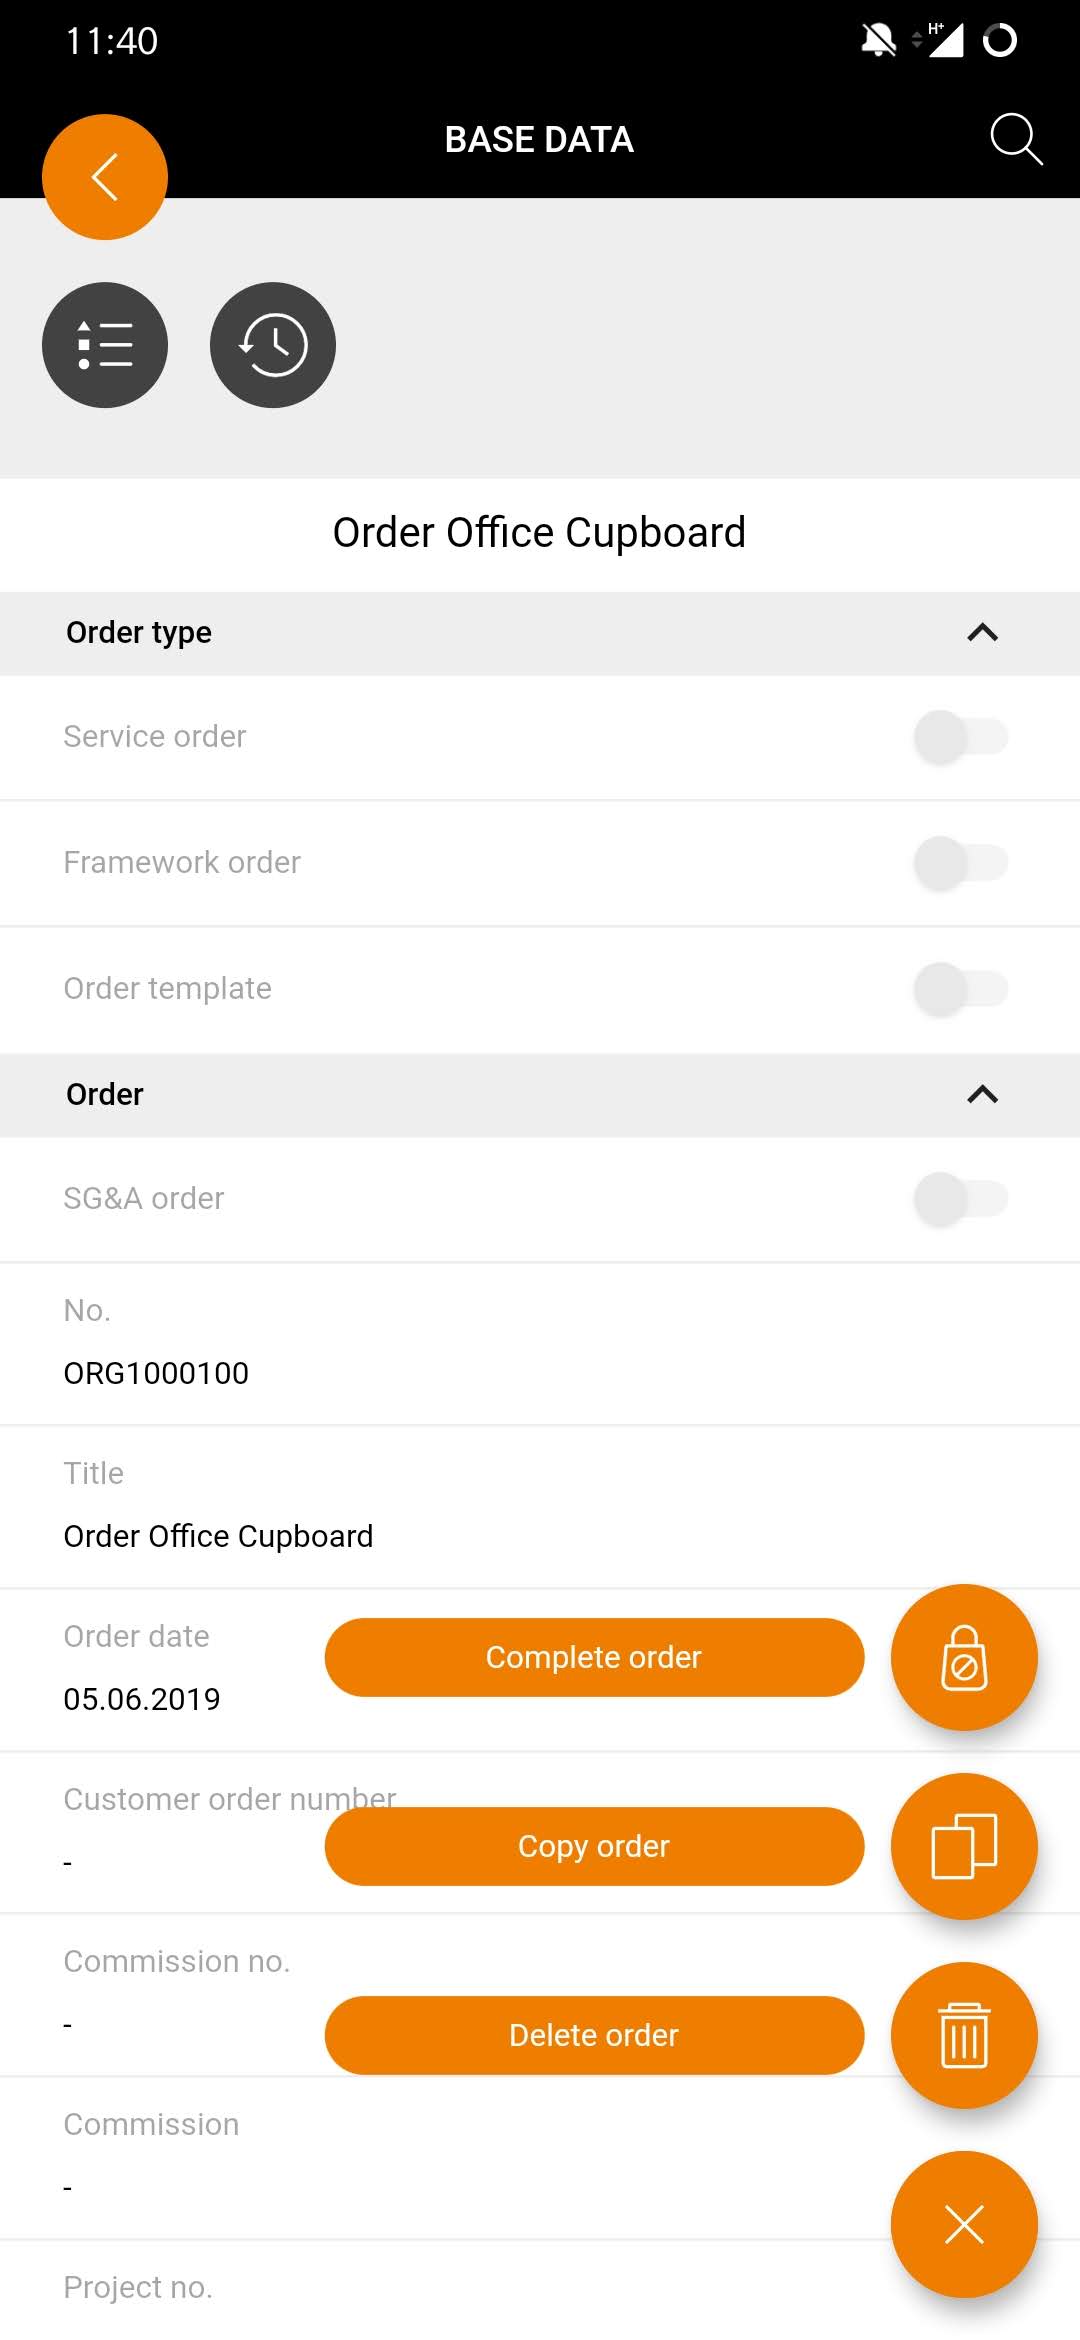
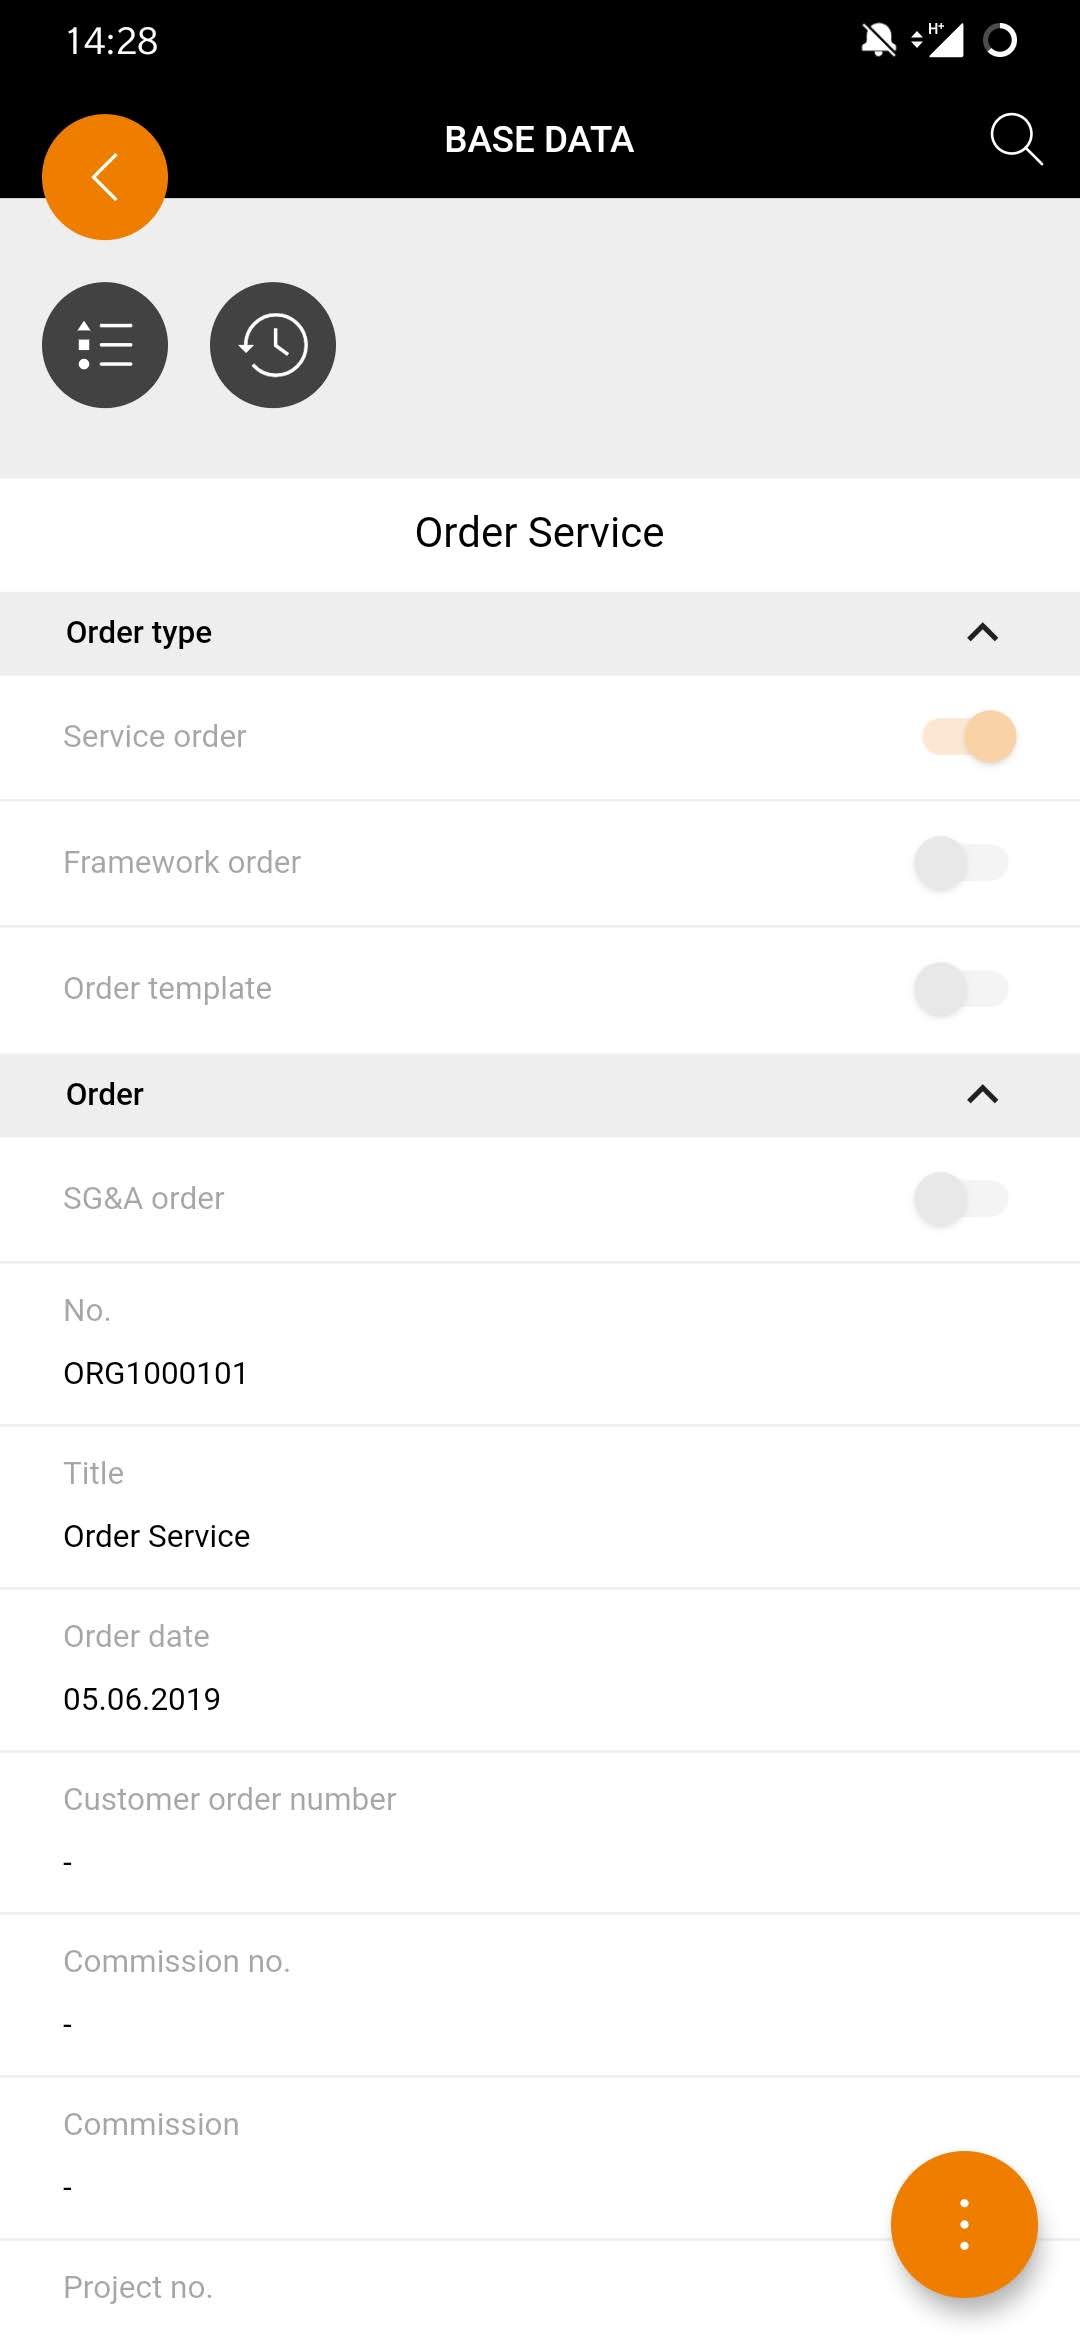
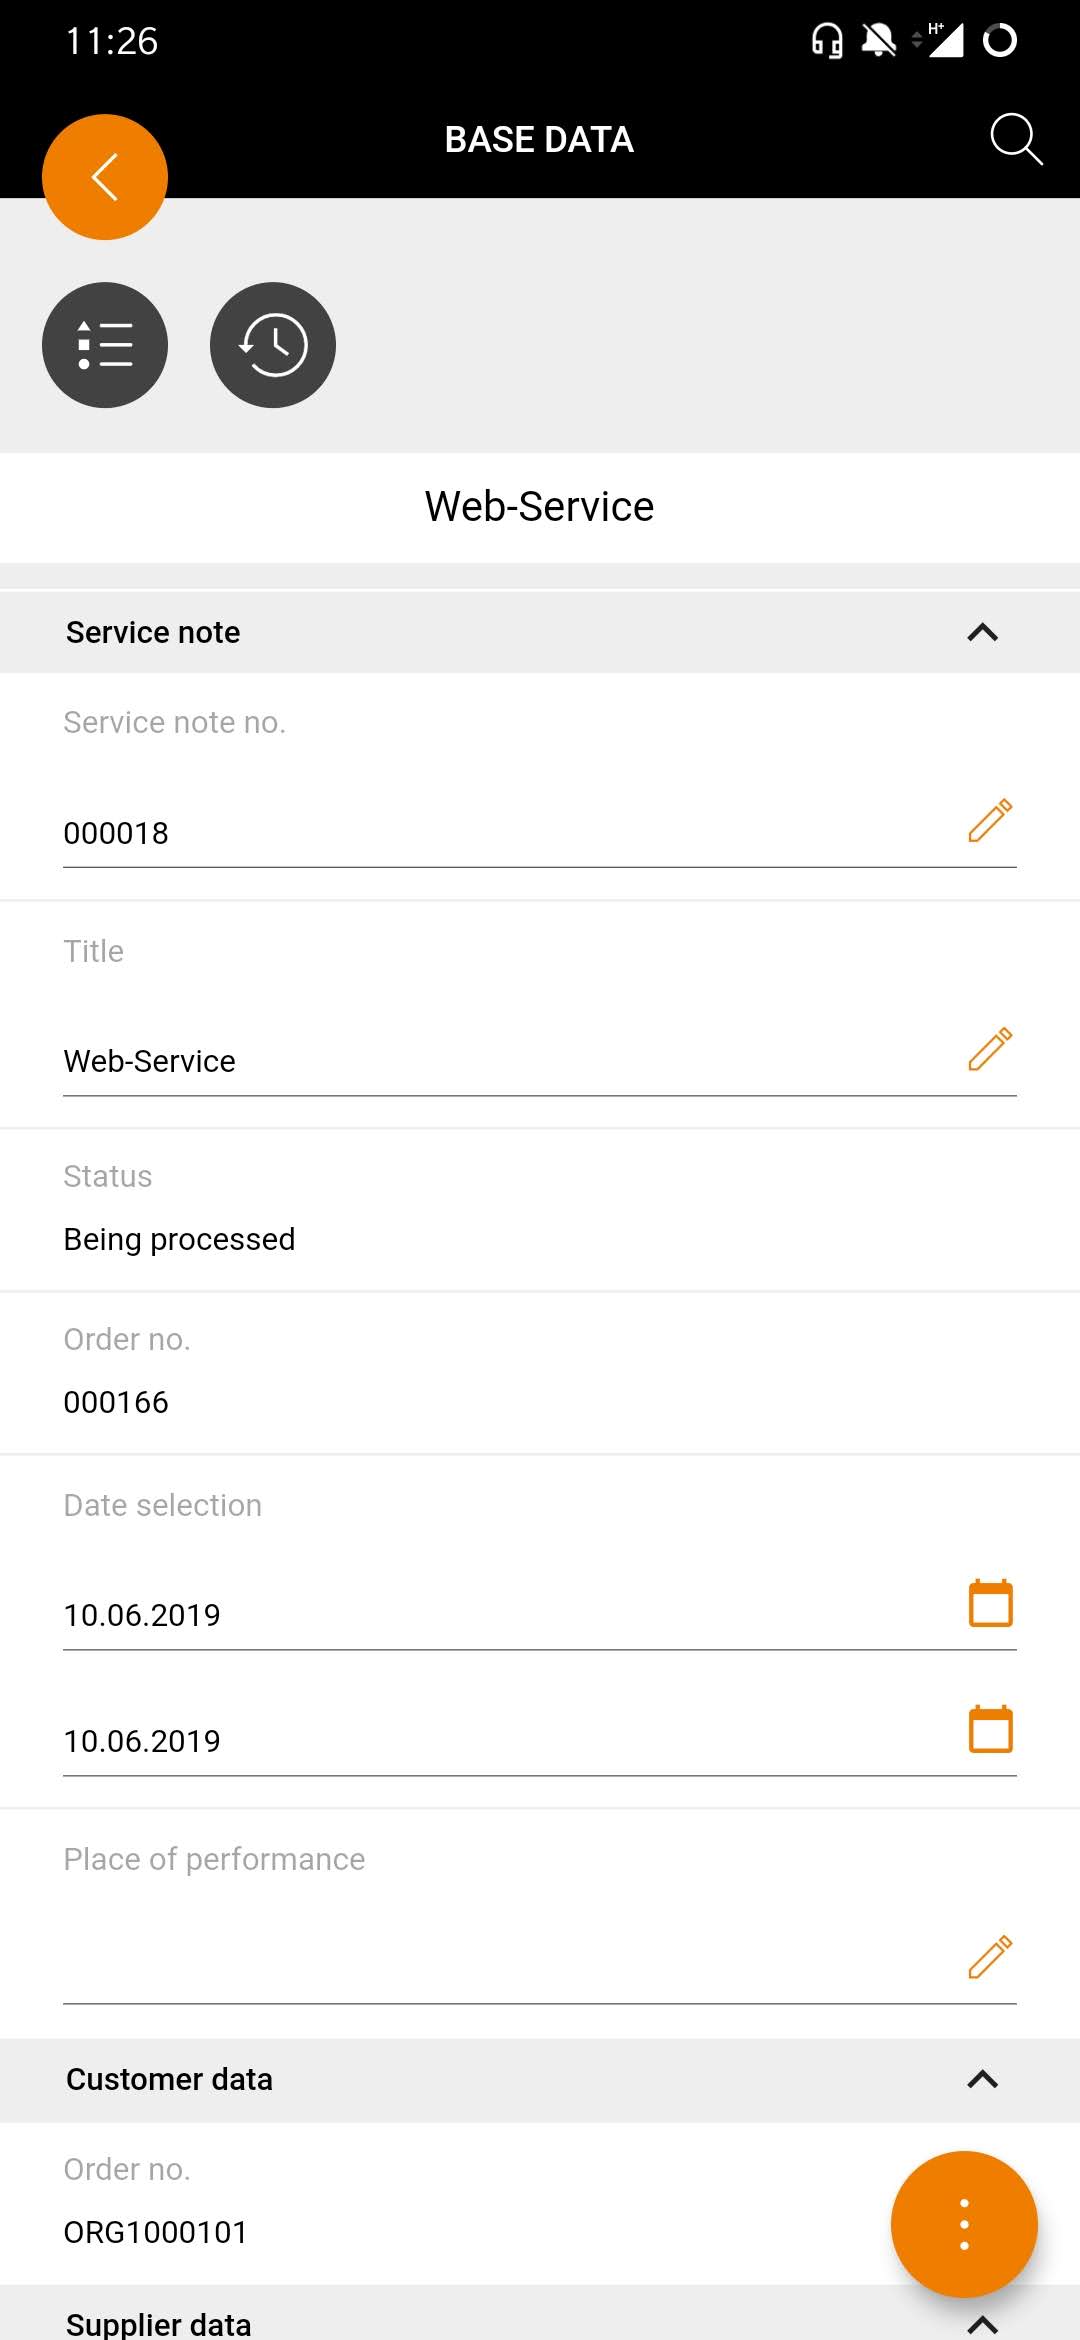
| Base order data
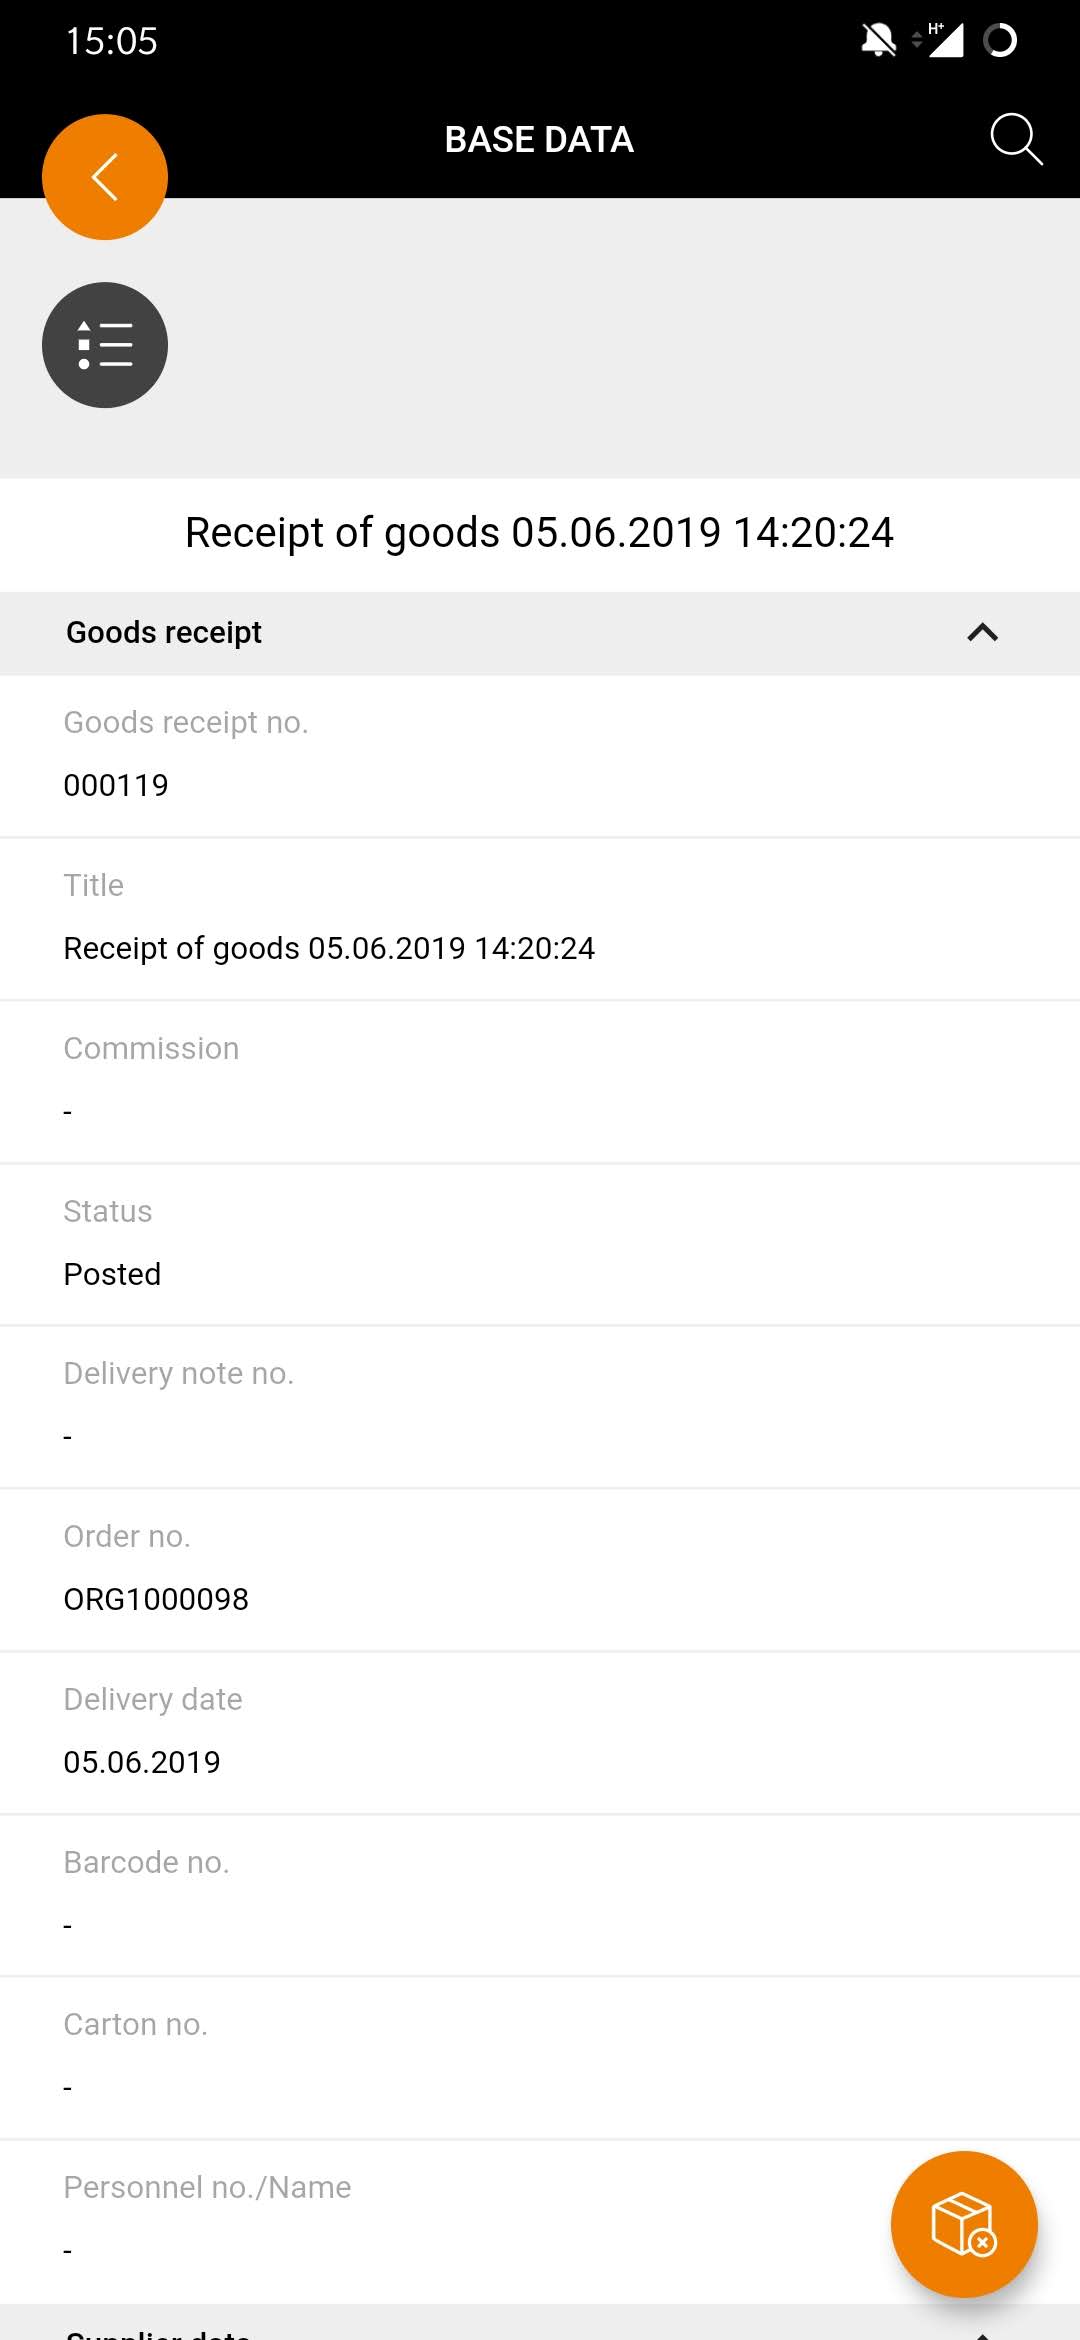
If you want to view the base data of the order, select the base data now. The Onventis mobile app also provides you with more detailed information on the base order data. The data here is divided into the same categories as in Onventis Buyer. In the base data itself, you can expand or collapse the individual areas by clicking At the same time, you have access to the context-related document actions via the multi-action button at the bottom right of the screen.
|
|
Order items
![]()
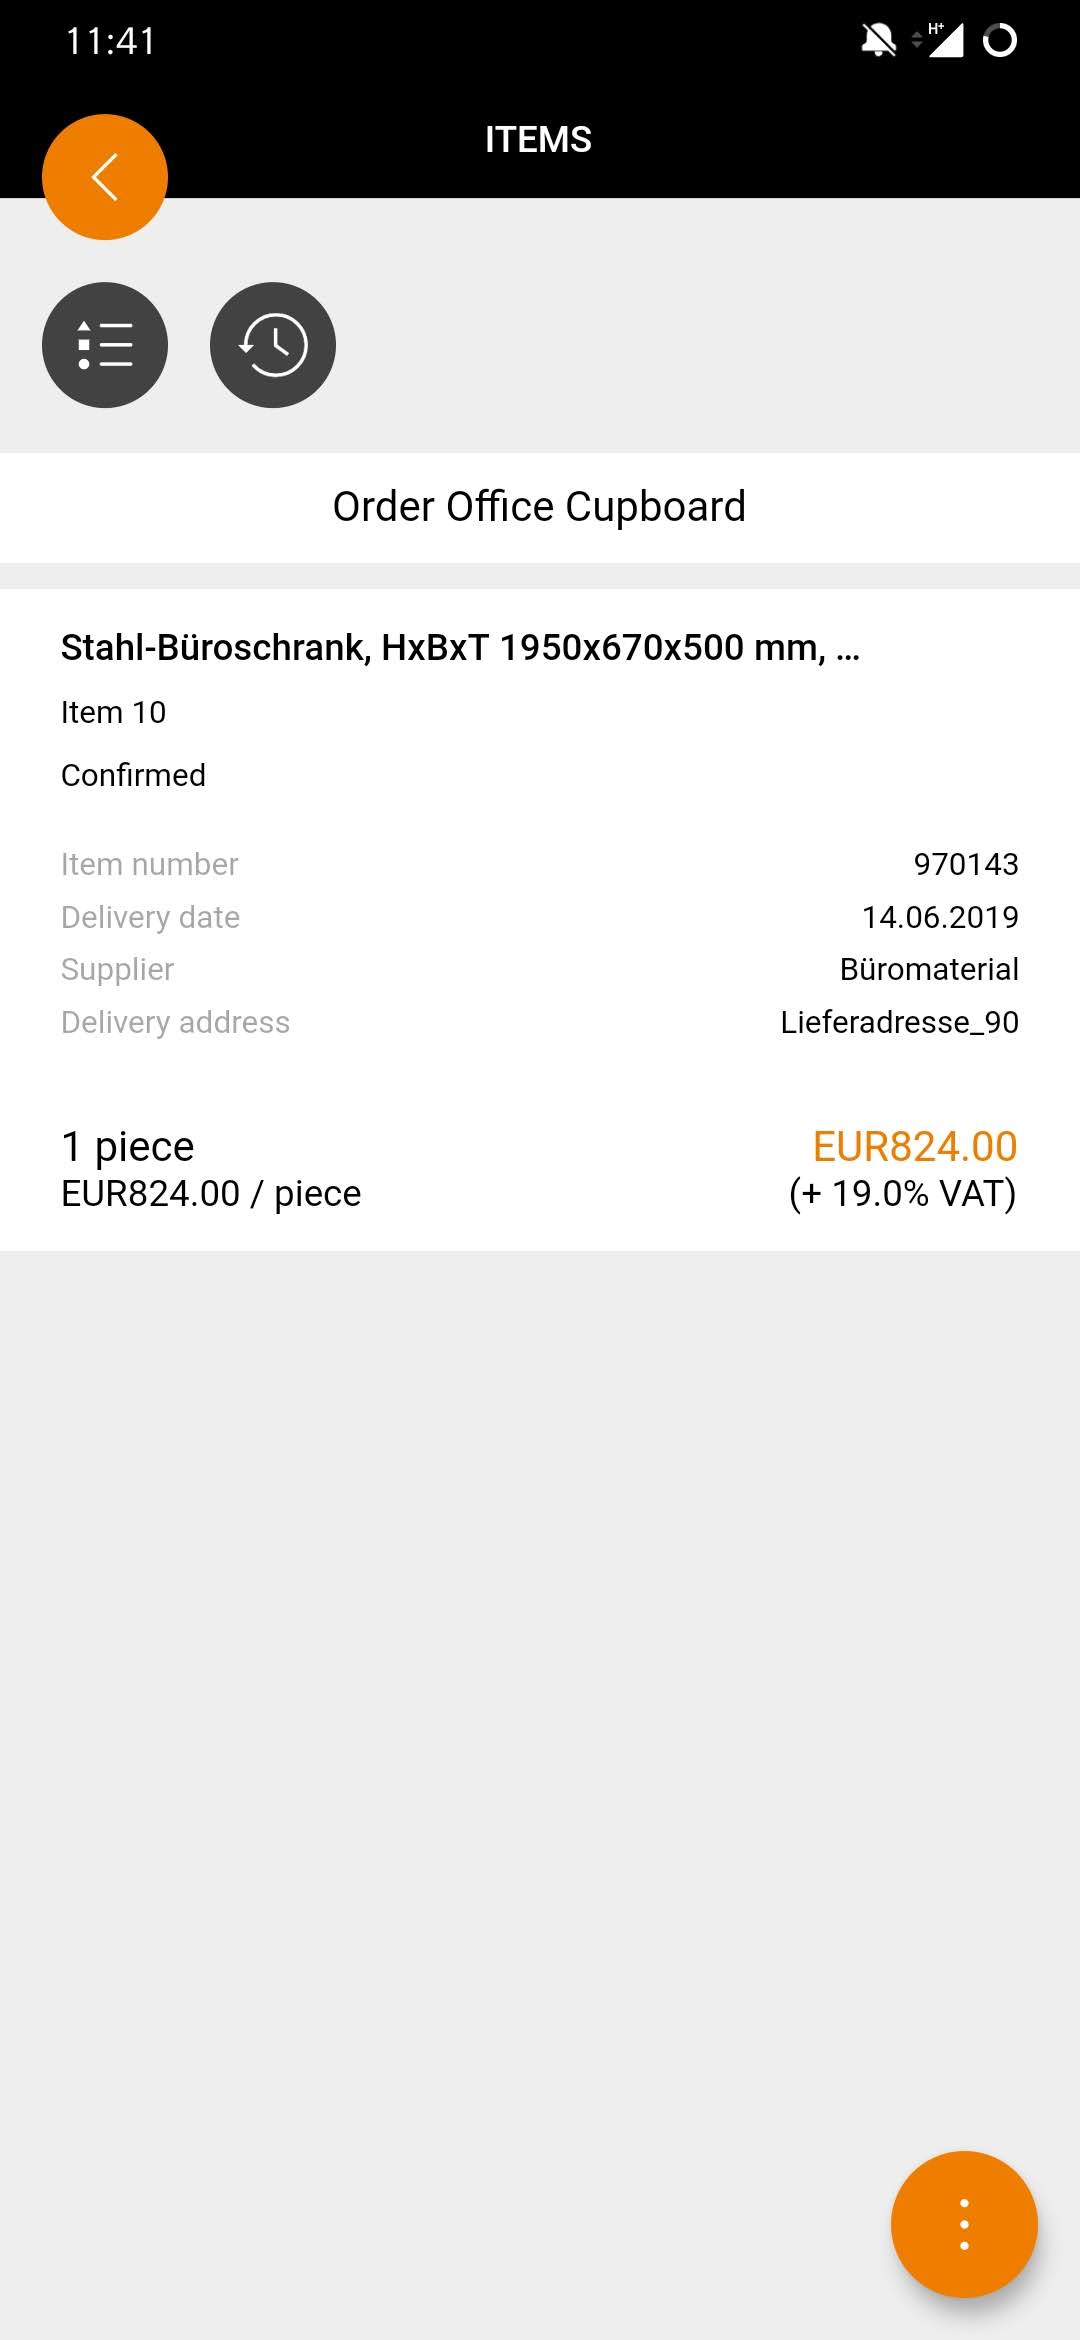
| Order item list
If you choose Items in the information overview of the purchase order, the next step displays the item list of the purchase order. The item list displays all relevant information of the items in a list. At the same time, you have access to the context-related document actions via the multi-action button at the bottom right of the screen. |
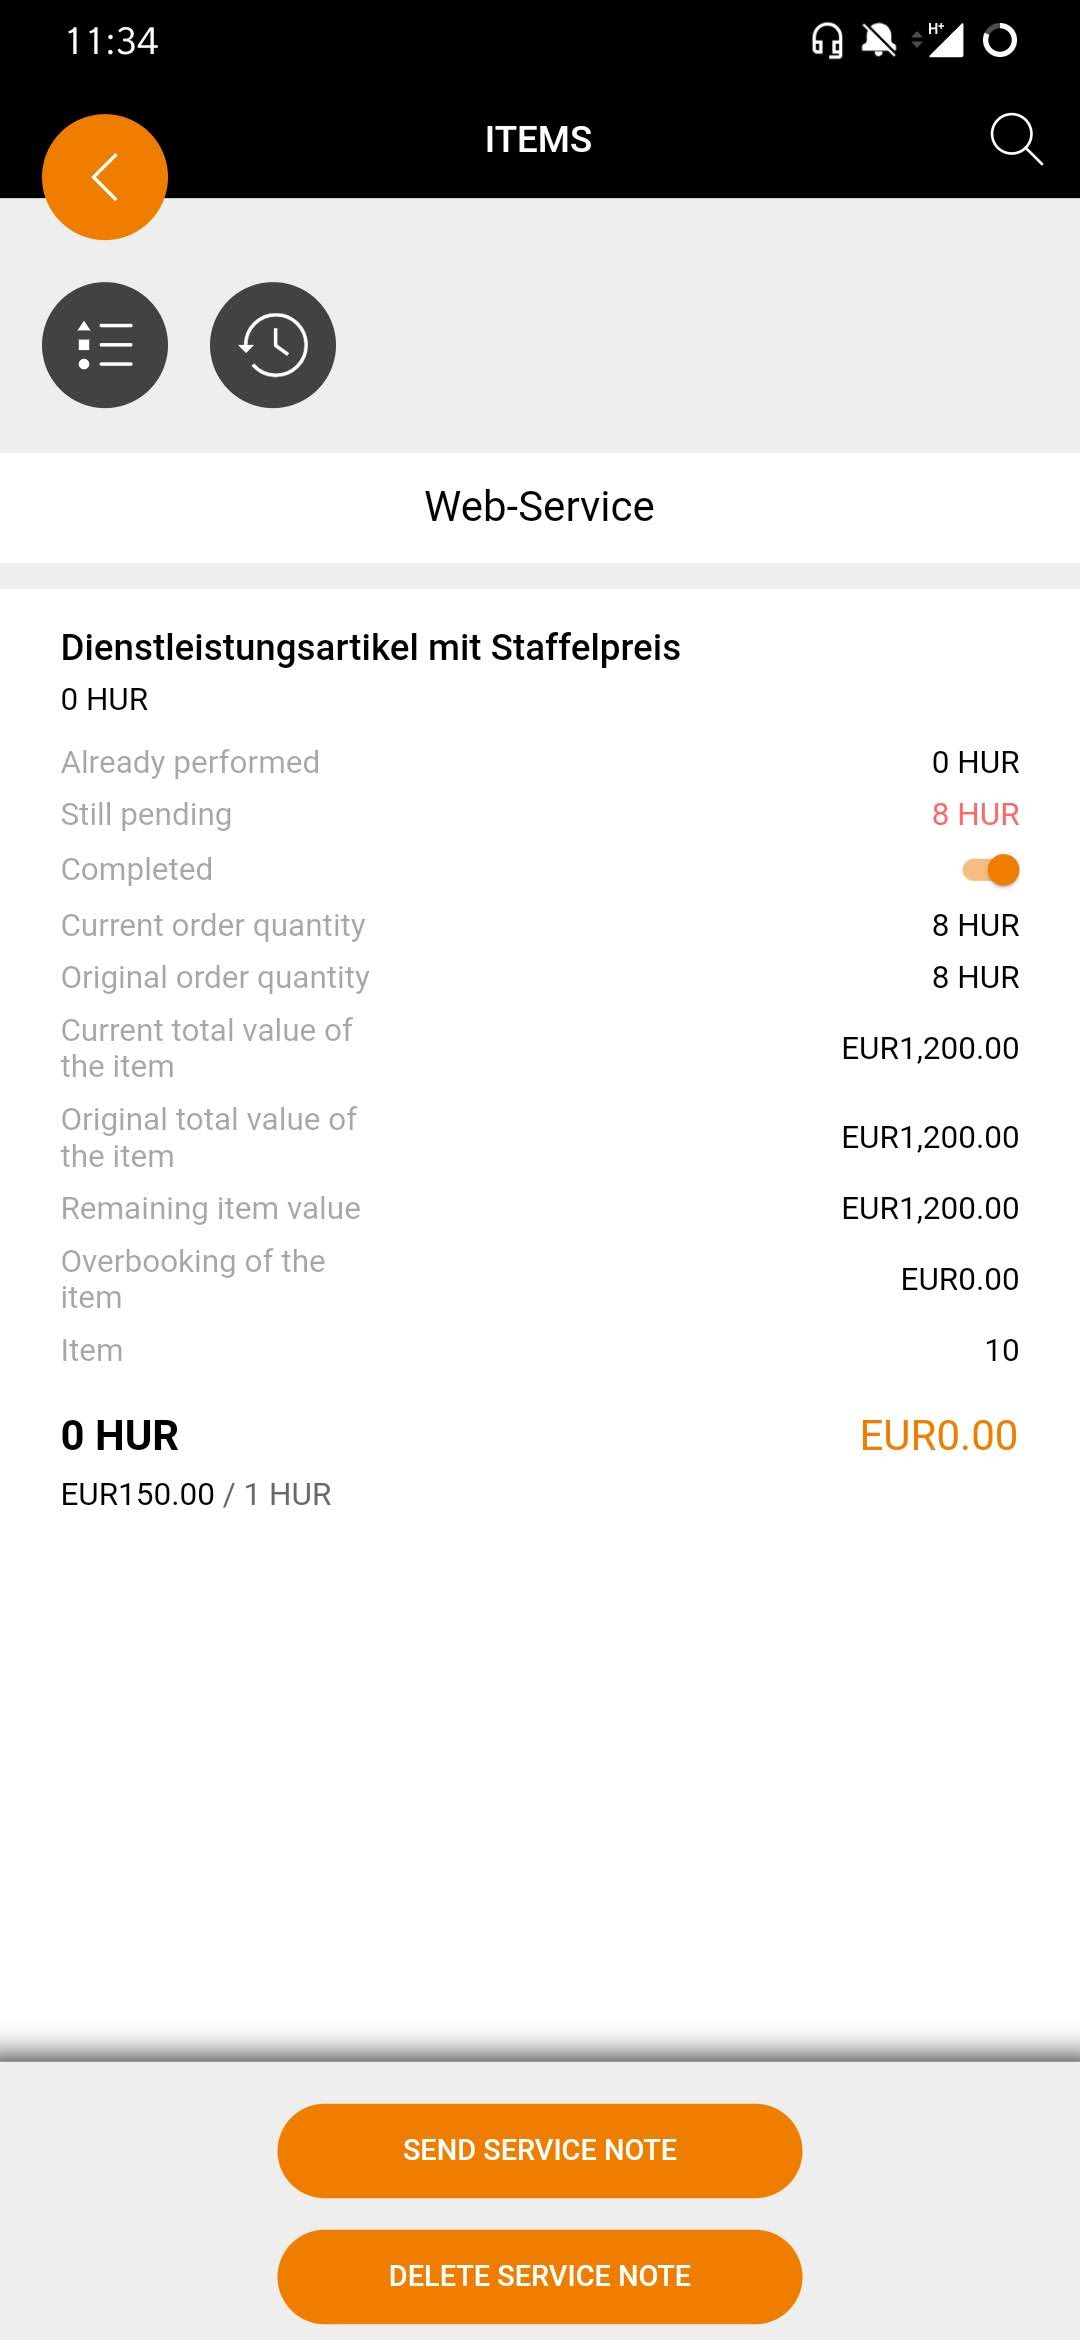
Item details of the order
![]()
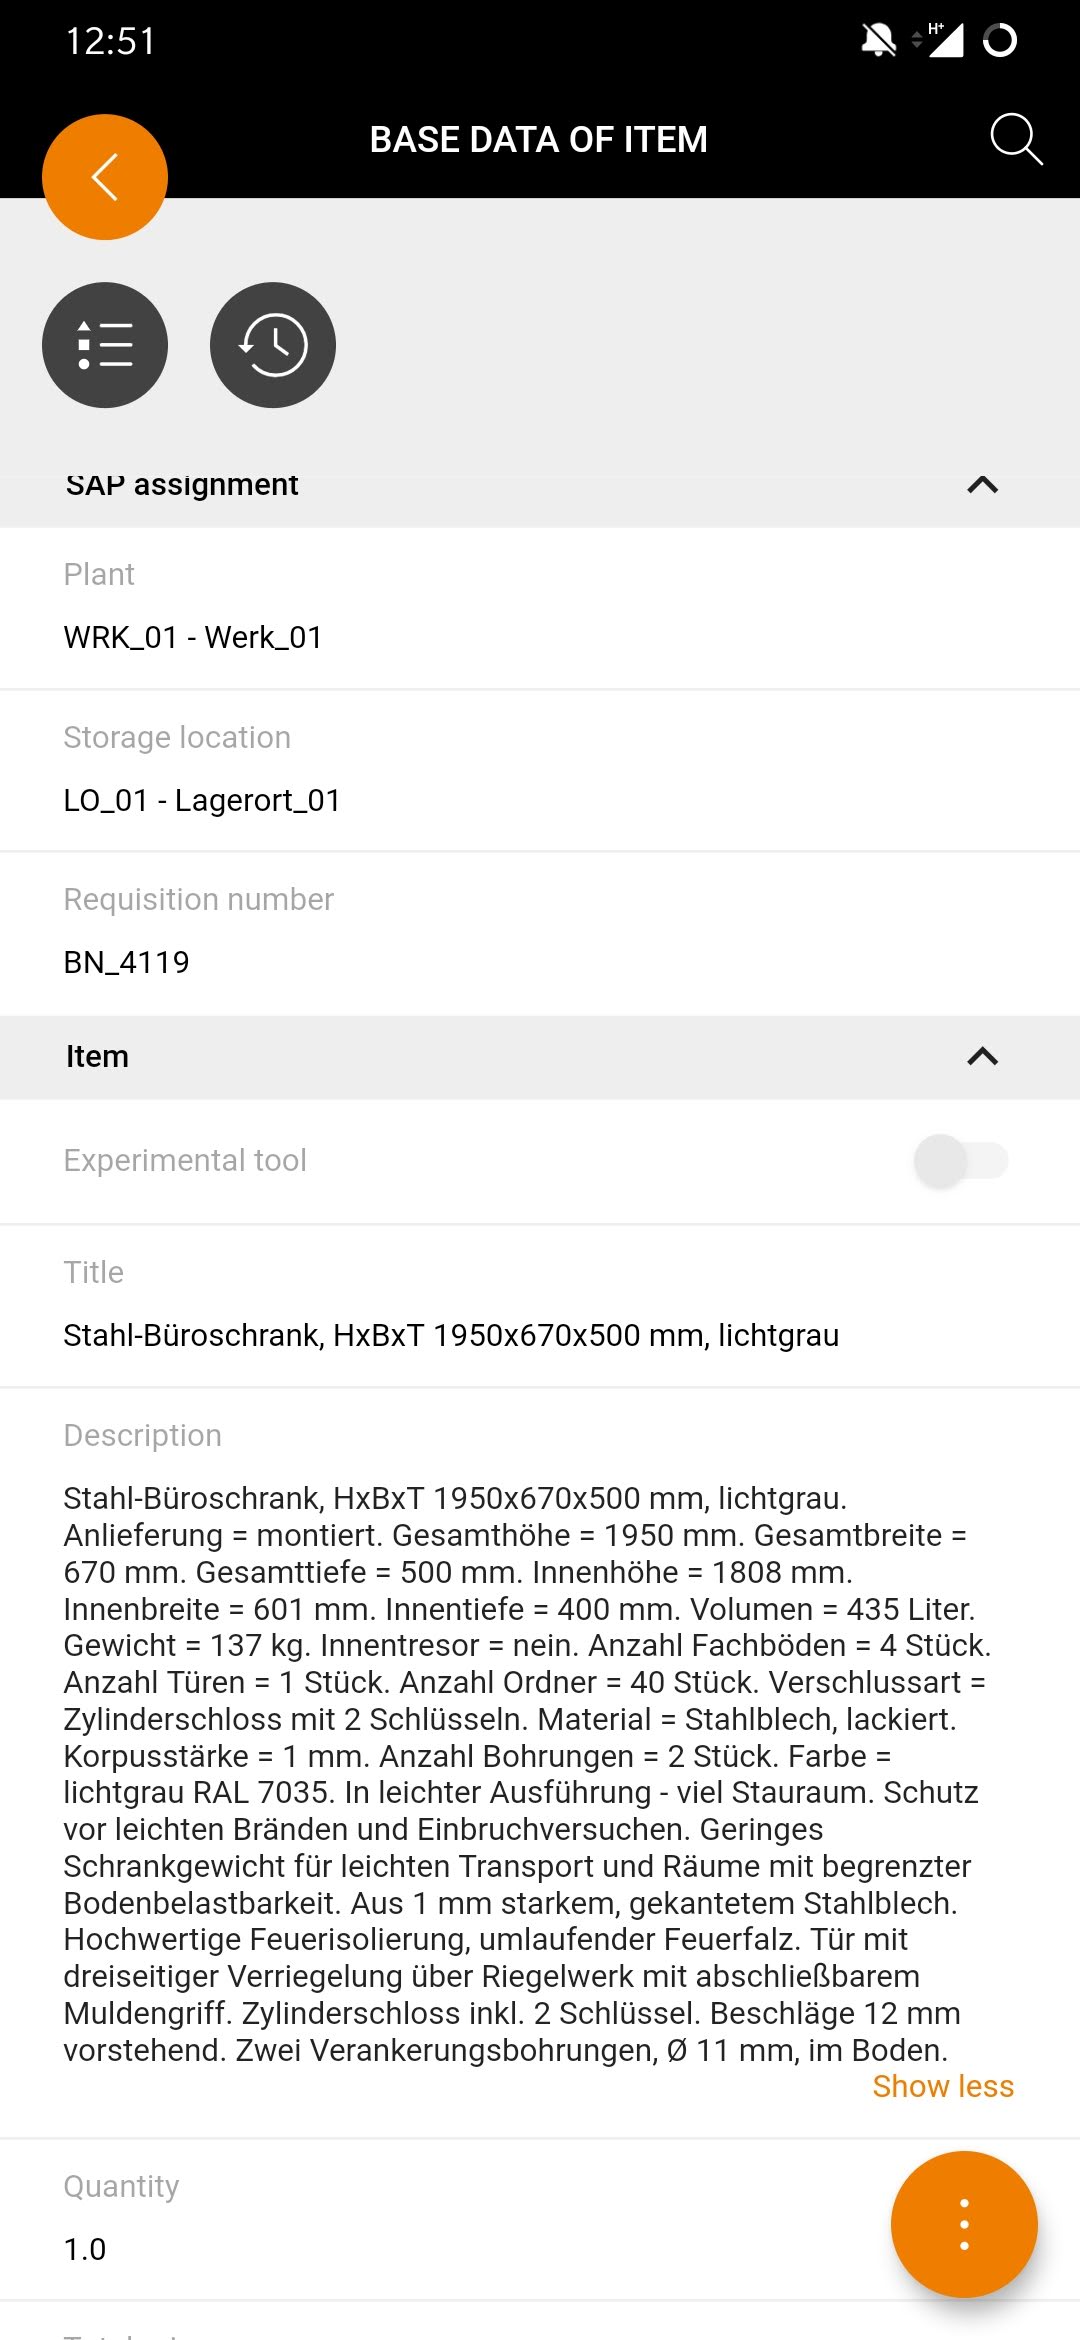
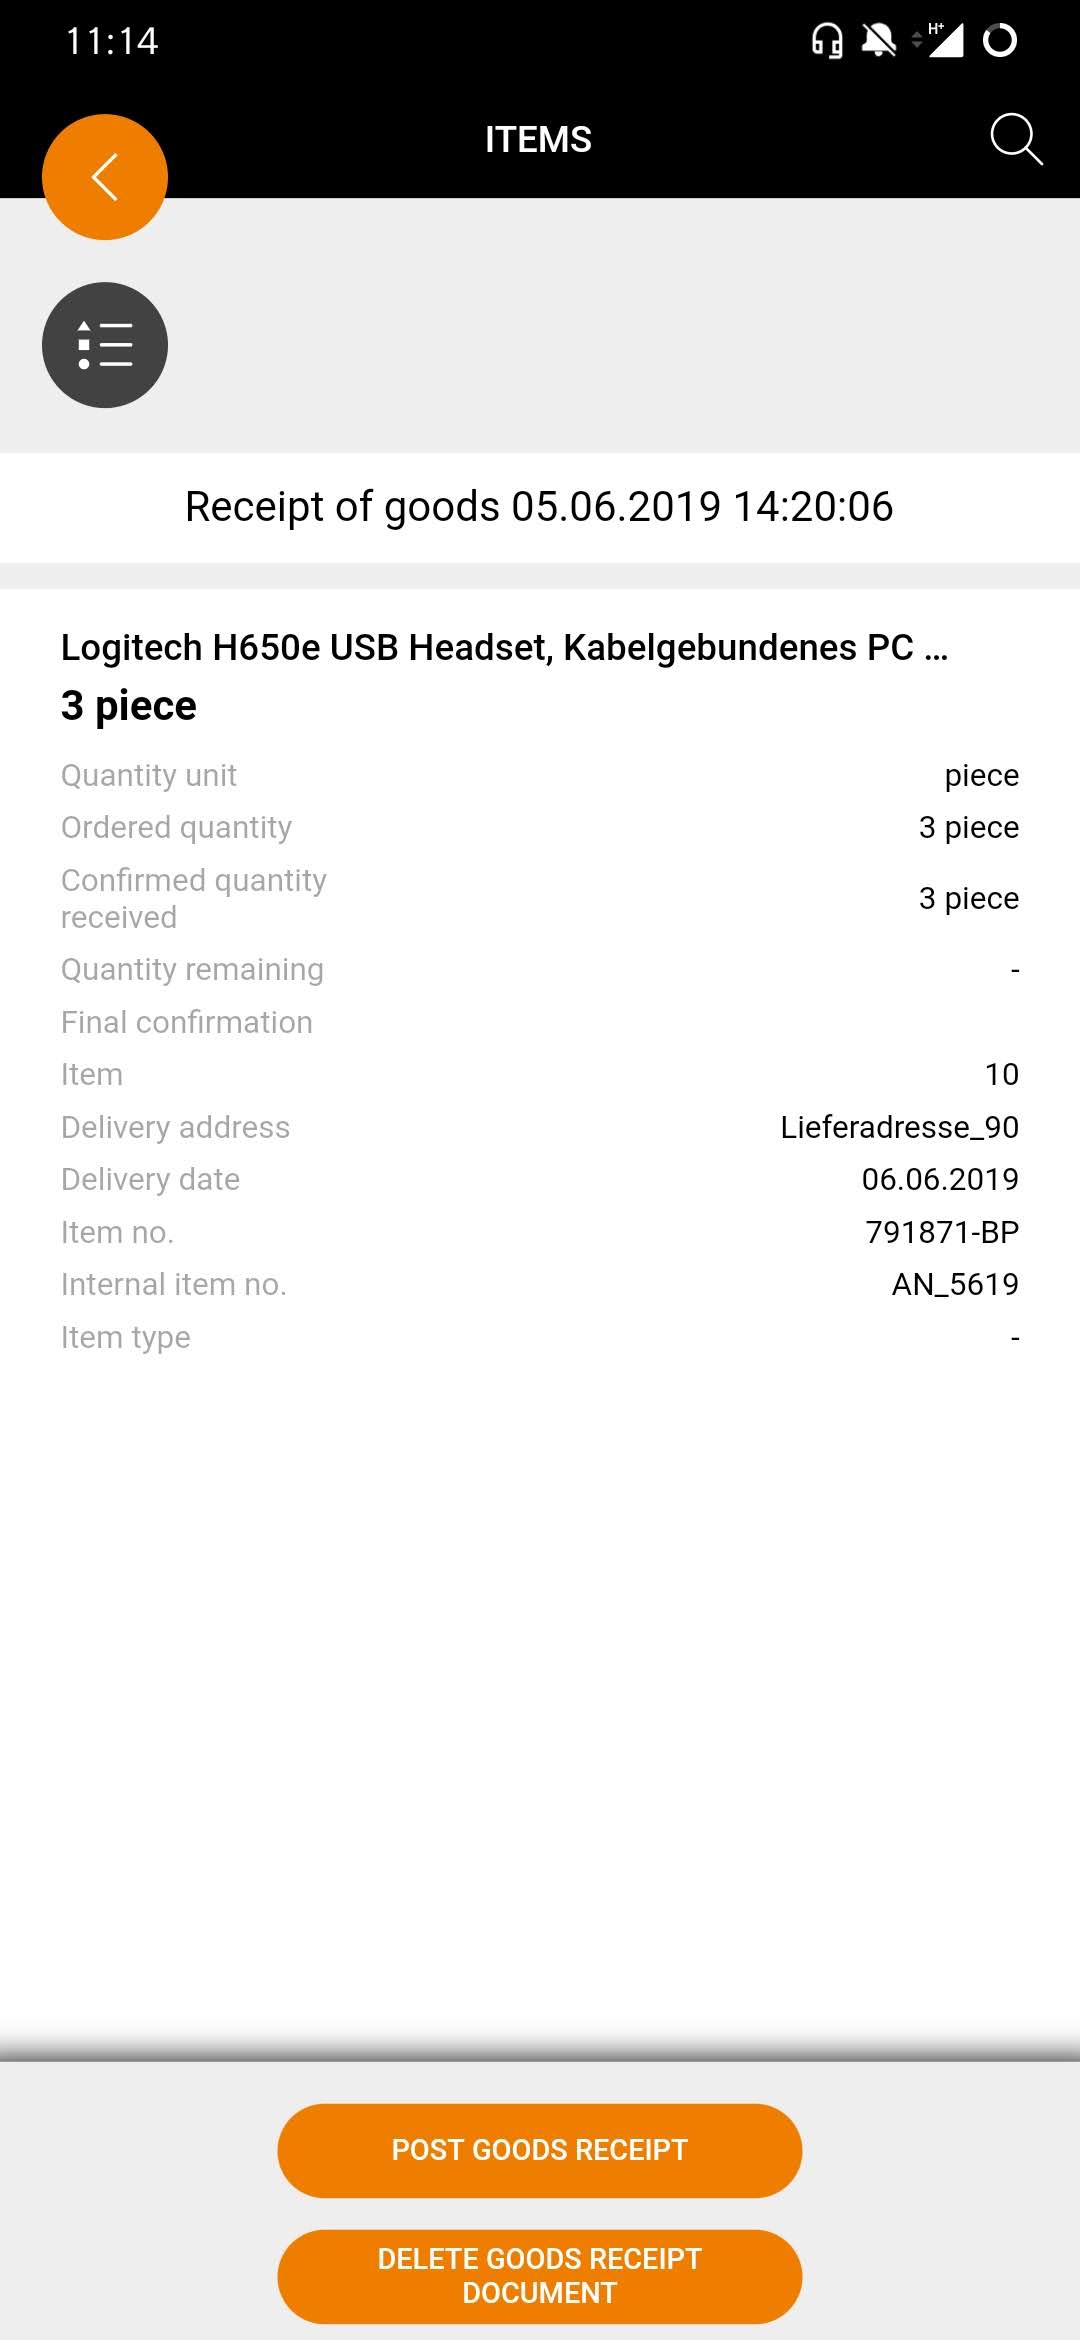
| Positions details
If you choose Items in the information overview of the purchase order, the next step displays the item list of the purchase order. The item list displays all relevant information of the items in a list. At the same time, you have access to the context-related document actions via the multi-action button at the bottom right of the screen. |
Dashboard
Customizable dashboard for optimum overview
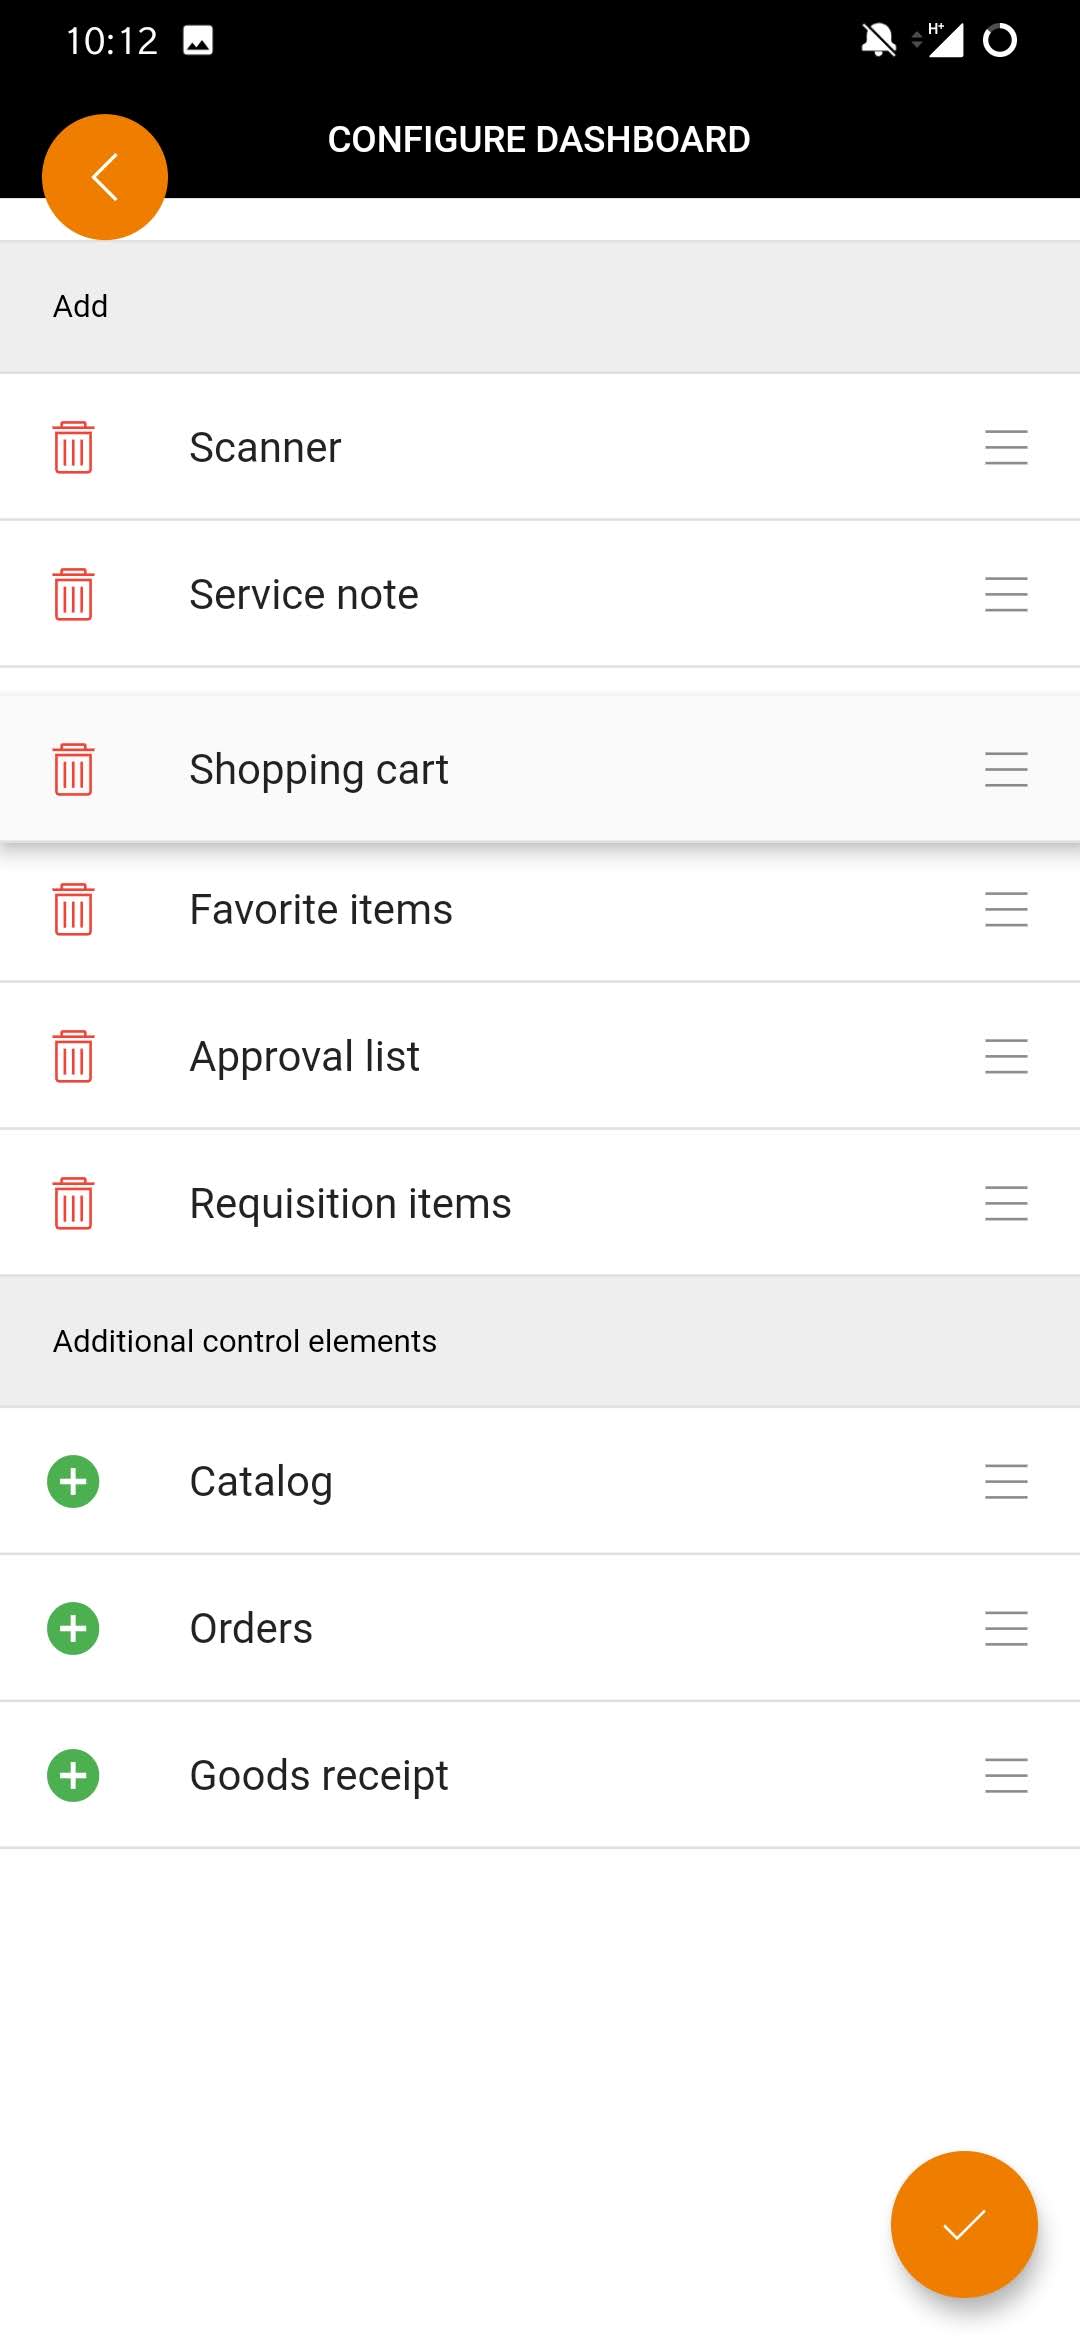
You can easily configure your dashboard yourself: Add or remove areas. The order of the individual areas in the dashboard can be modified by simply moving them. For example, you can sort the Onventis mobile app sections according to their personal relevance and thus create a unique and fast procurement experience.
Lightning-fast access to the desired area
Whether catalogues, orders, shopping baskets or release lists: The Onventis mobile app always offers access to your relevant areas with its individually adaptable dashboard. This allows you to keep an eye on your mobile procurement at all times and to flexibly orchestrate your processes on the move.
Dashboard overview
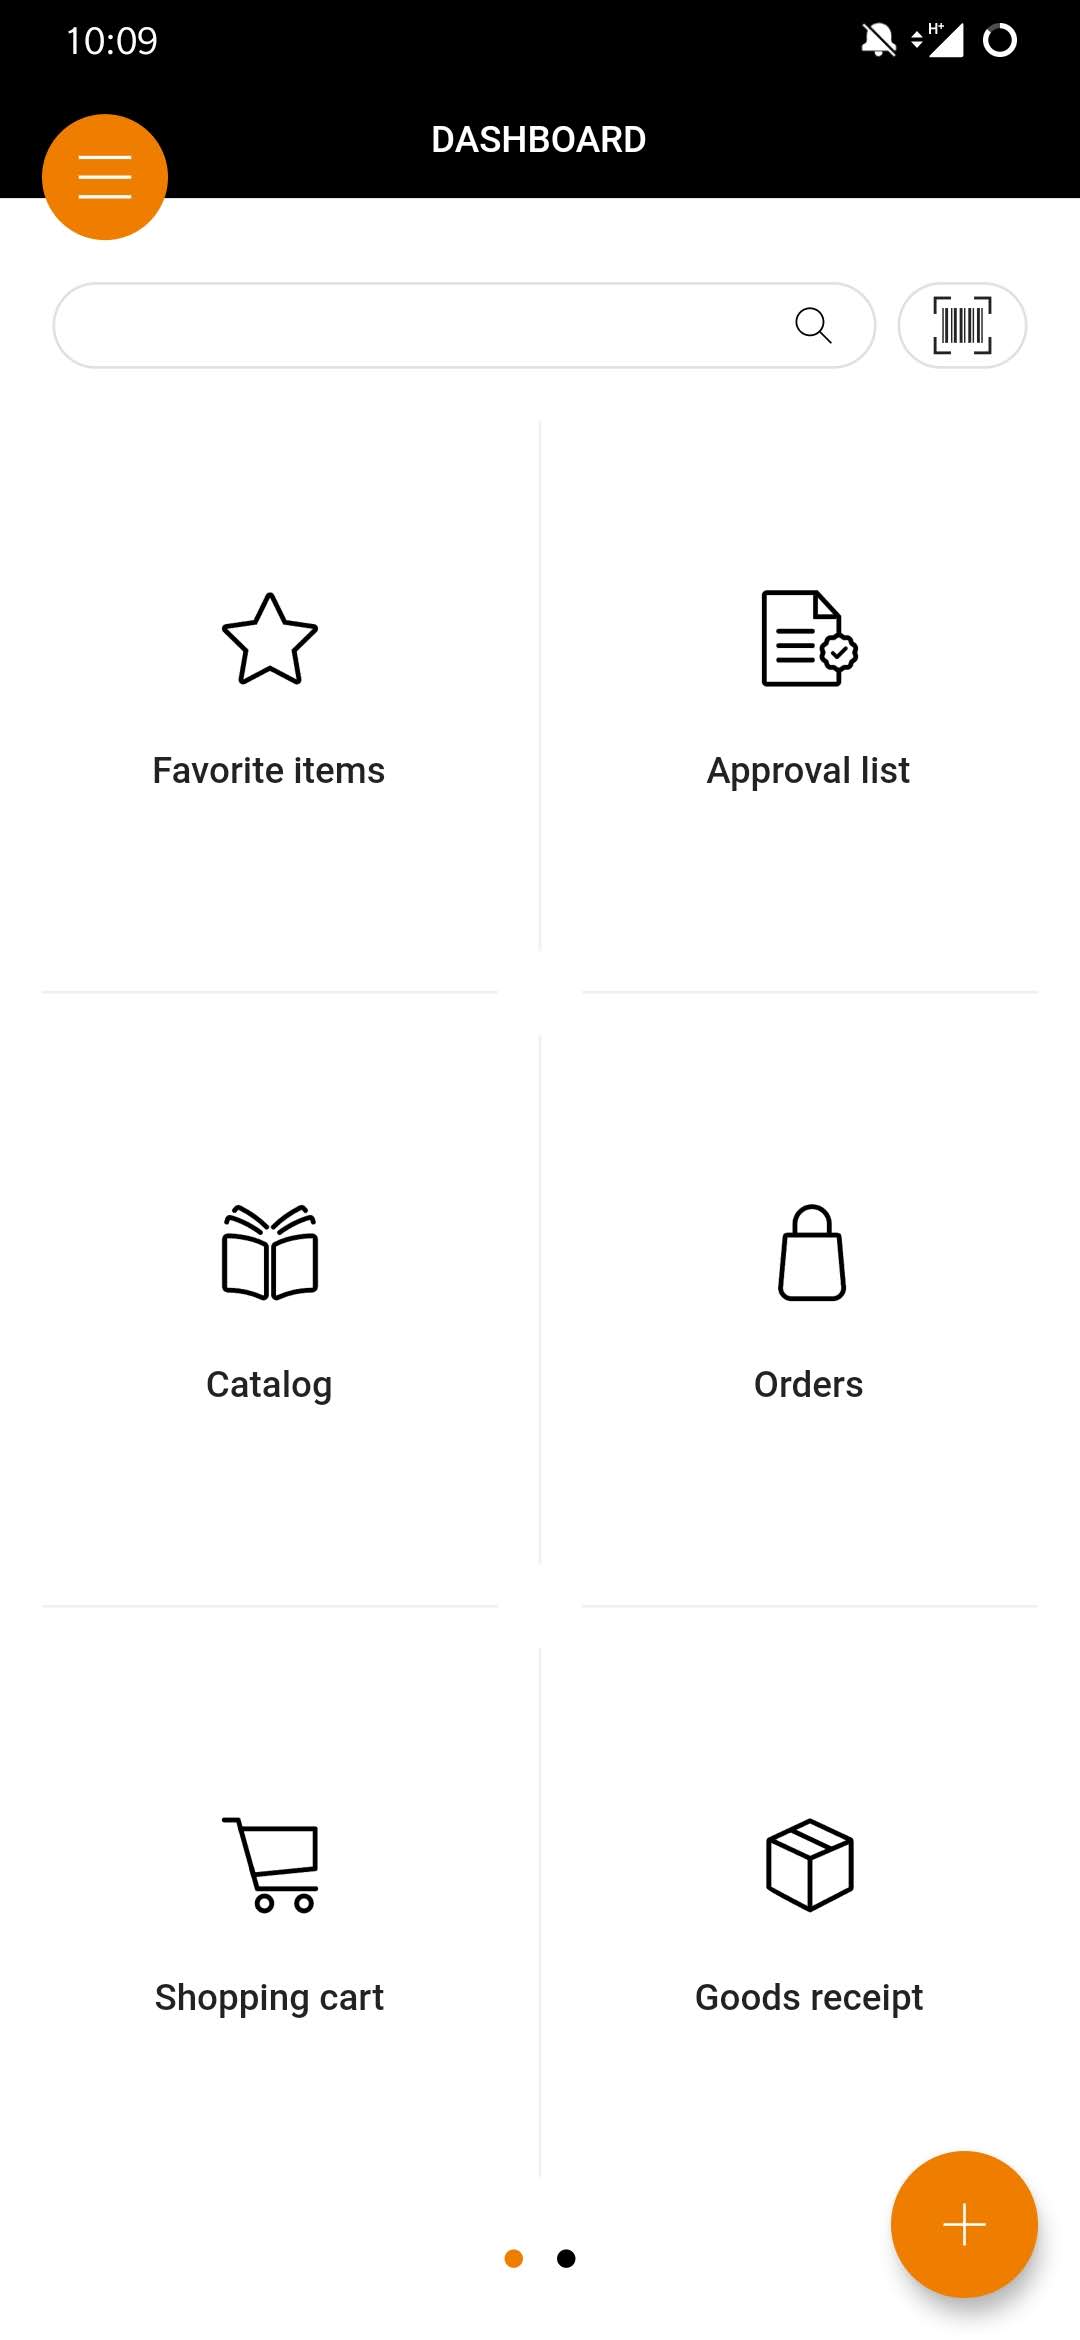
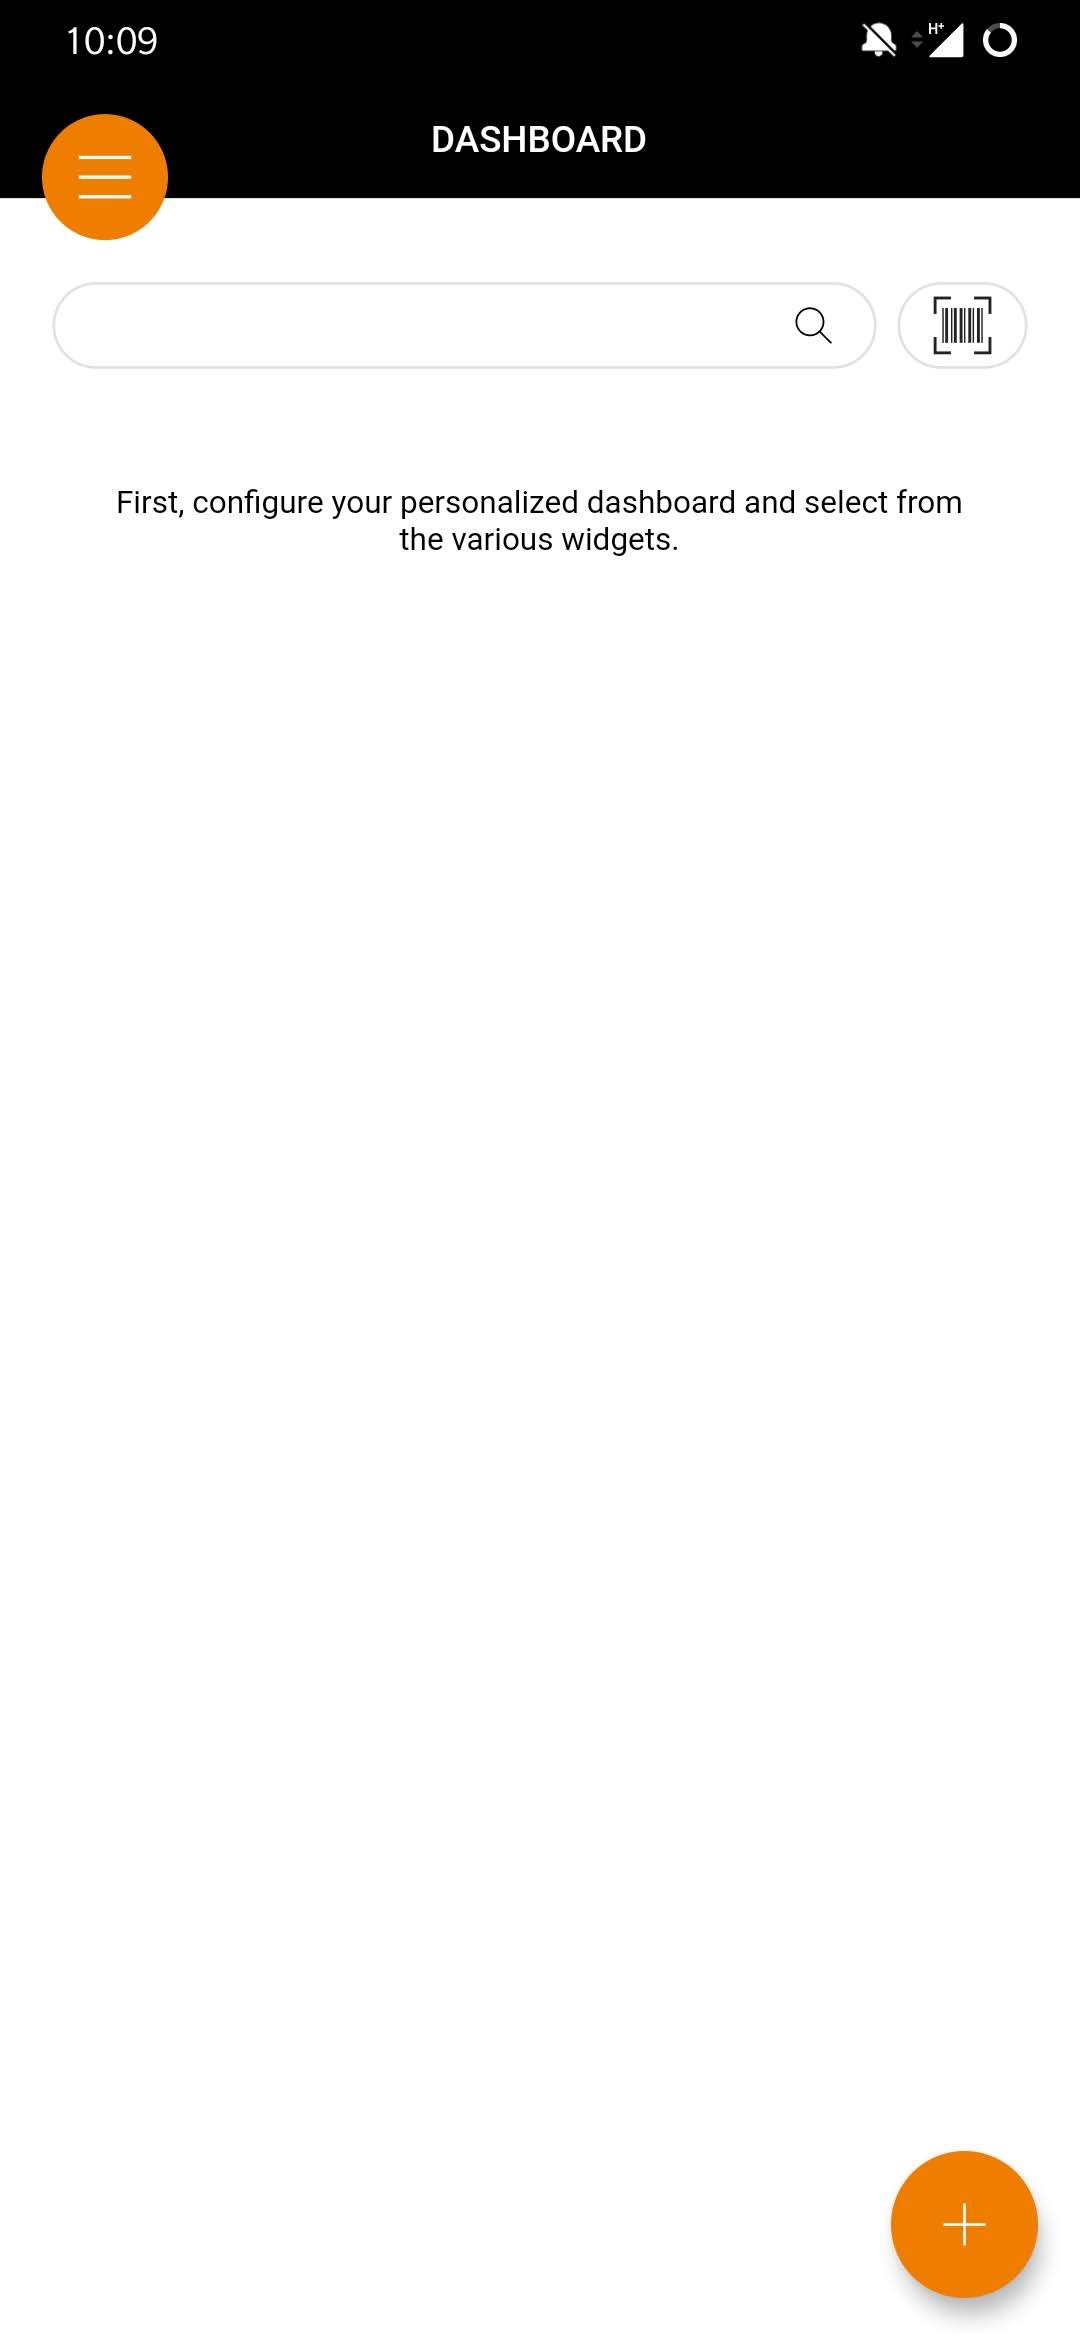
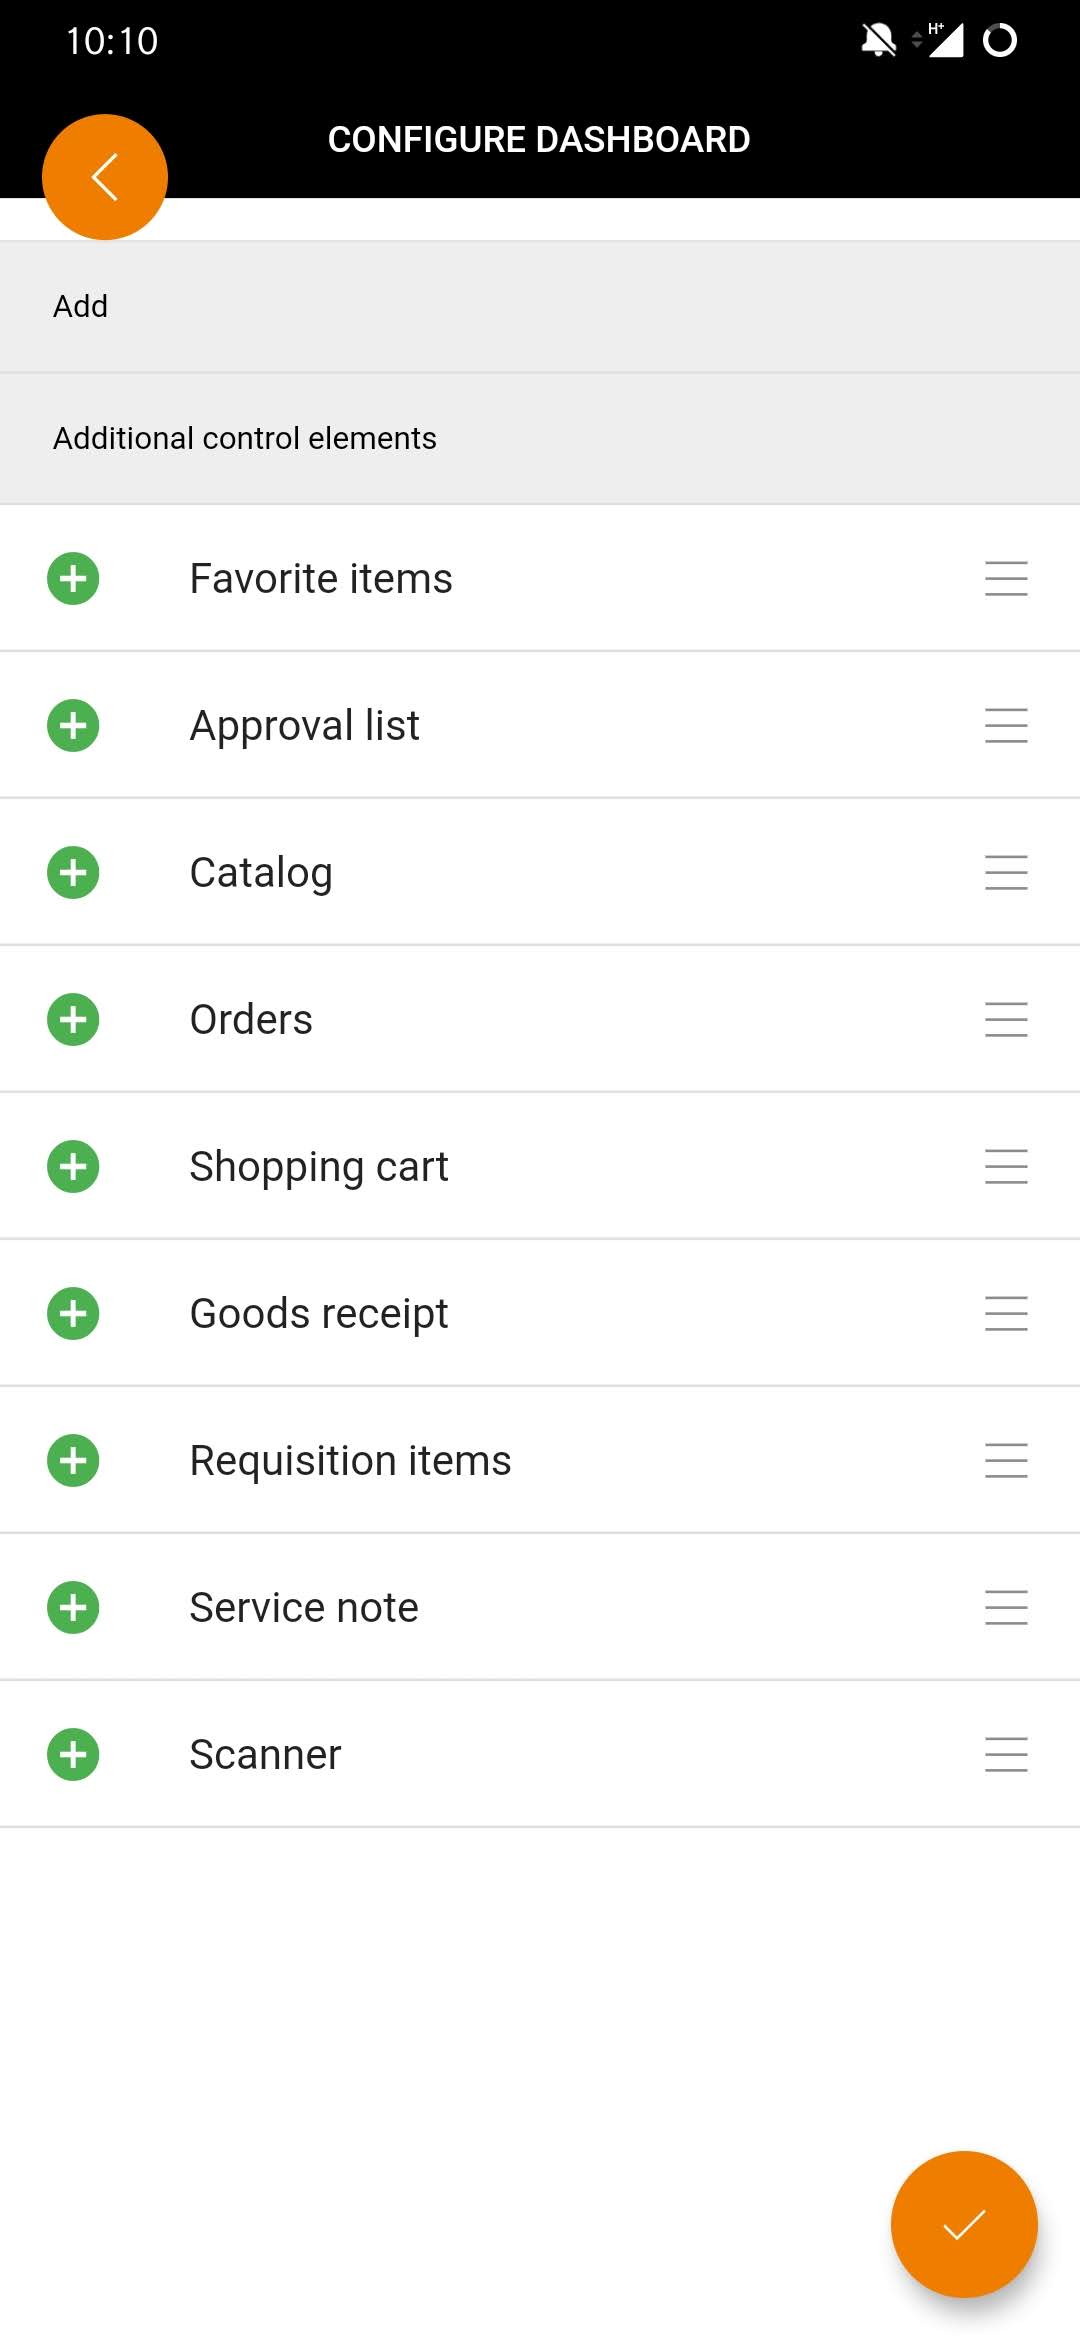
| Dashboard overview
Immediately after the first login to the new Onventis Mobile App, a pop-up message appears: “Your dashboard is not configured. Would you like to add widgets?”
With a single click on |
 , you can set up or customize your dashboard at any time.
Configuring the dashboard
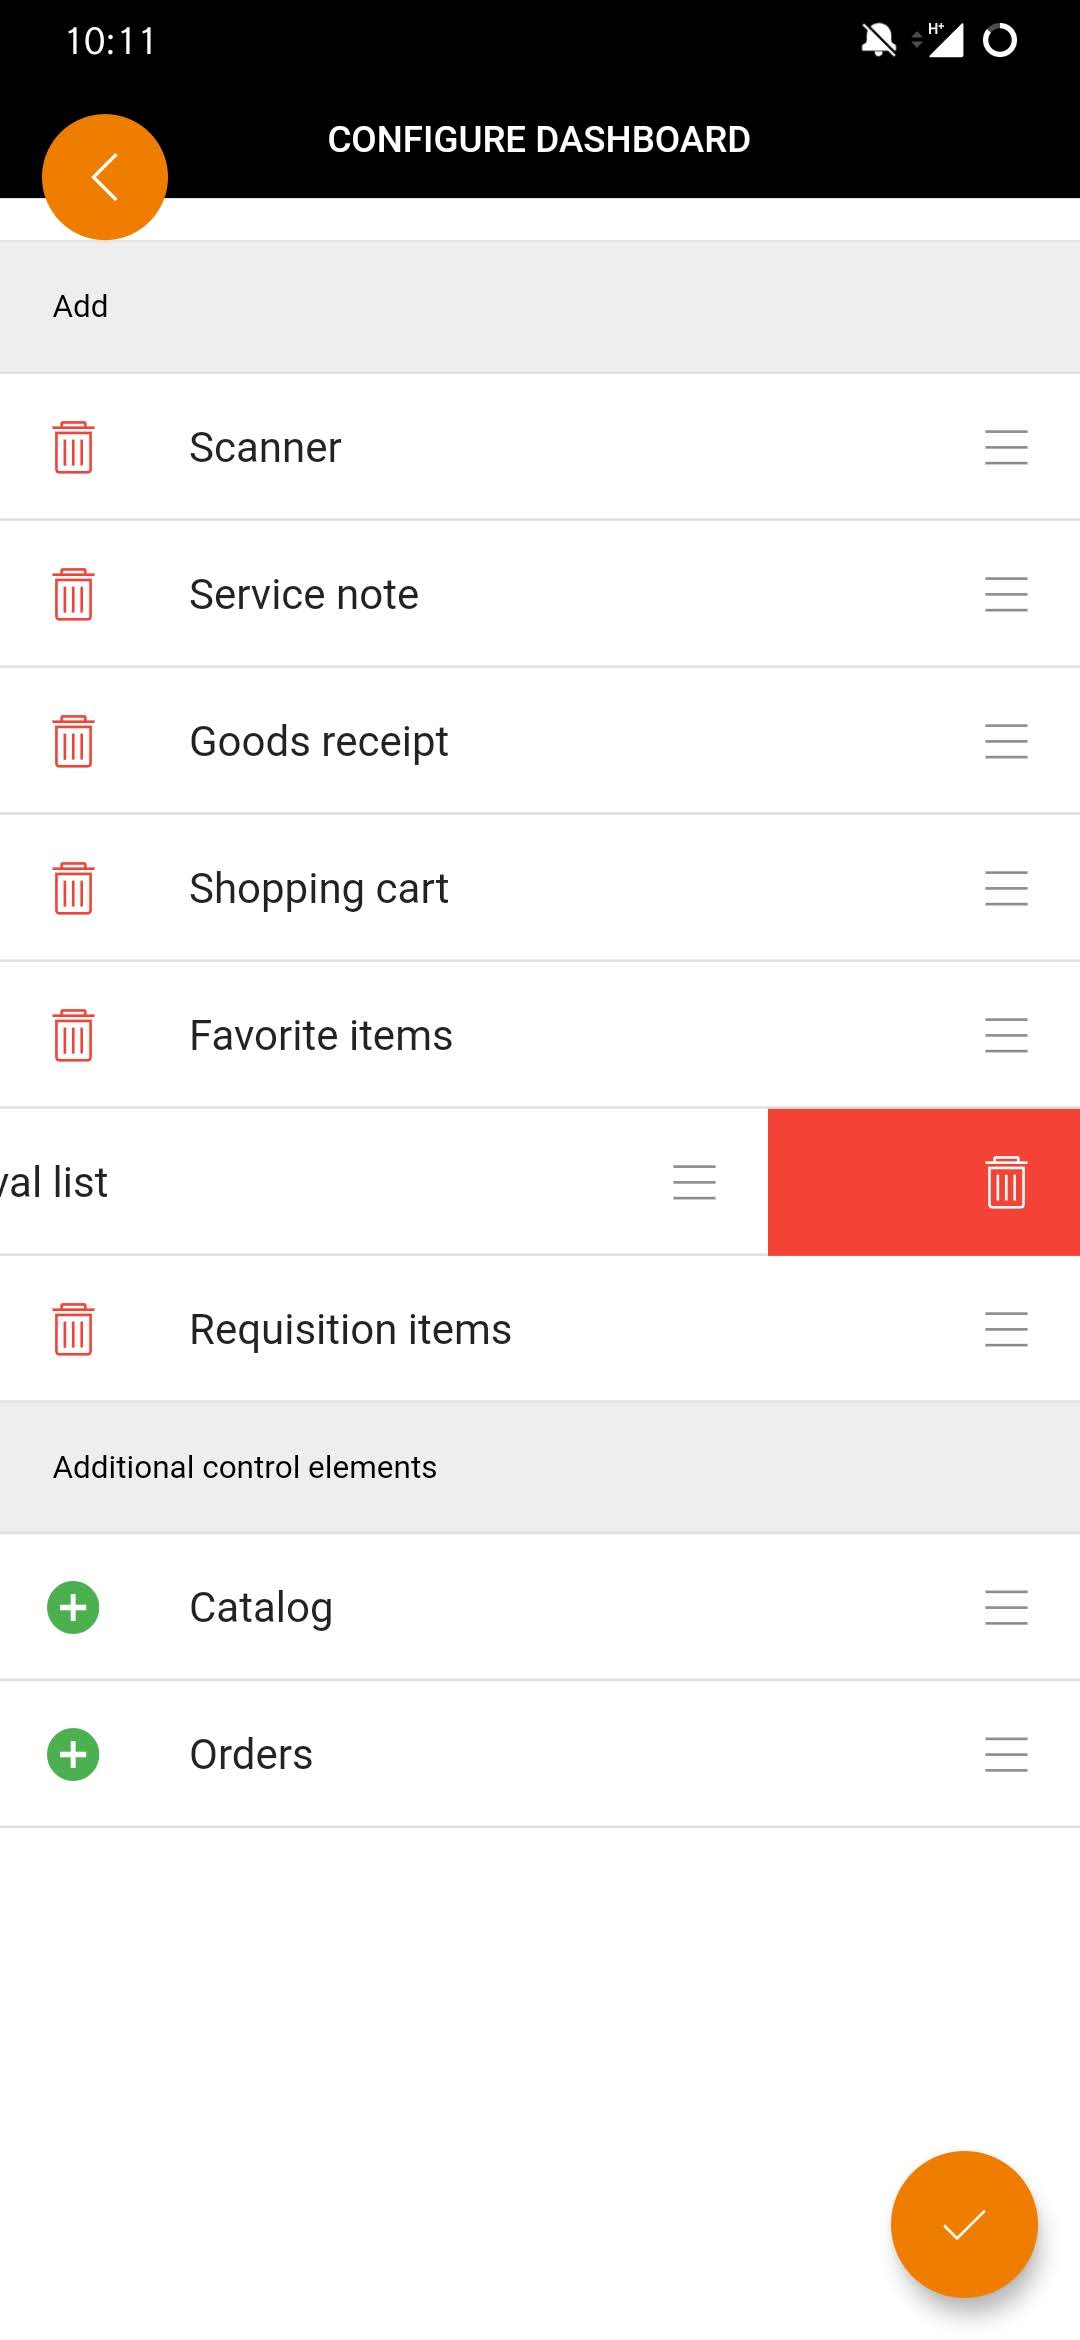
 will appear. Simply drag to the left and the item will be deleted.
Mobile approval list
Approve faster via mobile app
With the Onventis mobile app, approvals become child’s play. From the consumer to the buyer to the accounting department: multi-stage approval processes are carried out by all parties involved with just a few clicks. You can quickly approve or reject requisitions, purchase orders, performance records, order changes, and invoices. You can also use the comment function to enrich information.
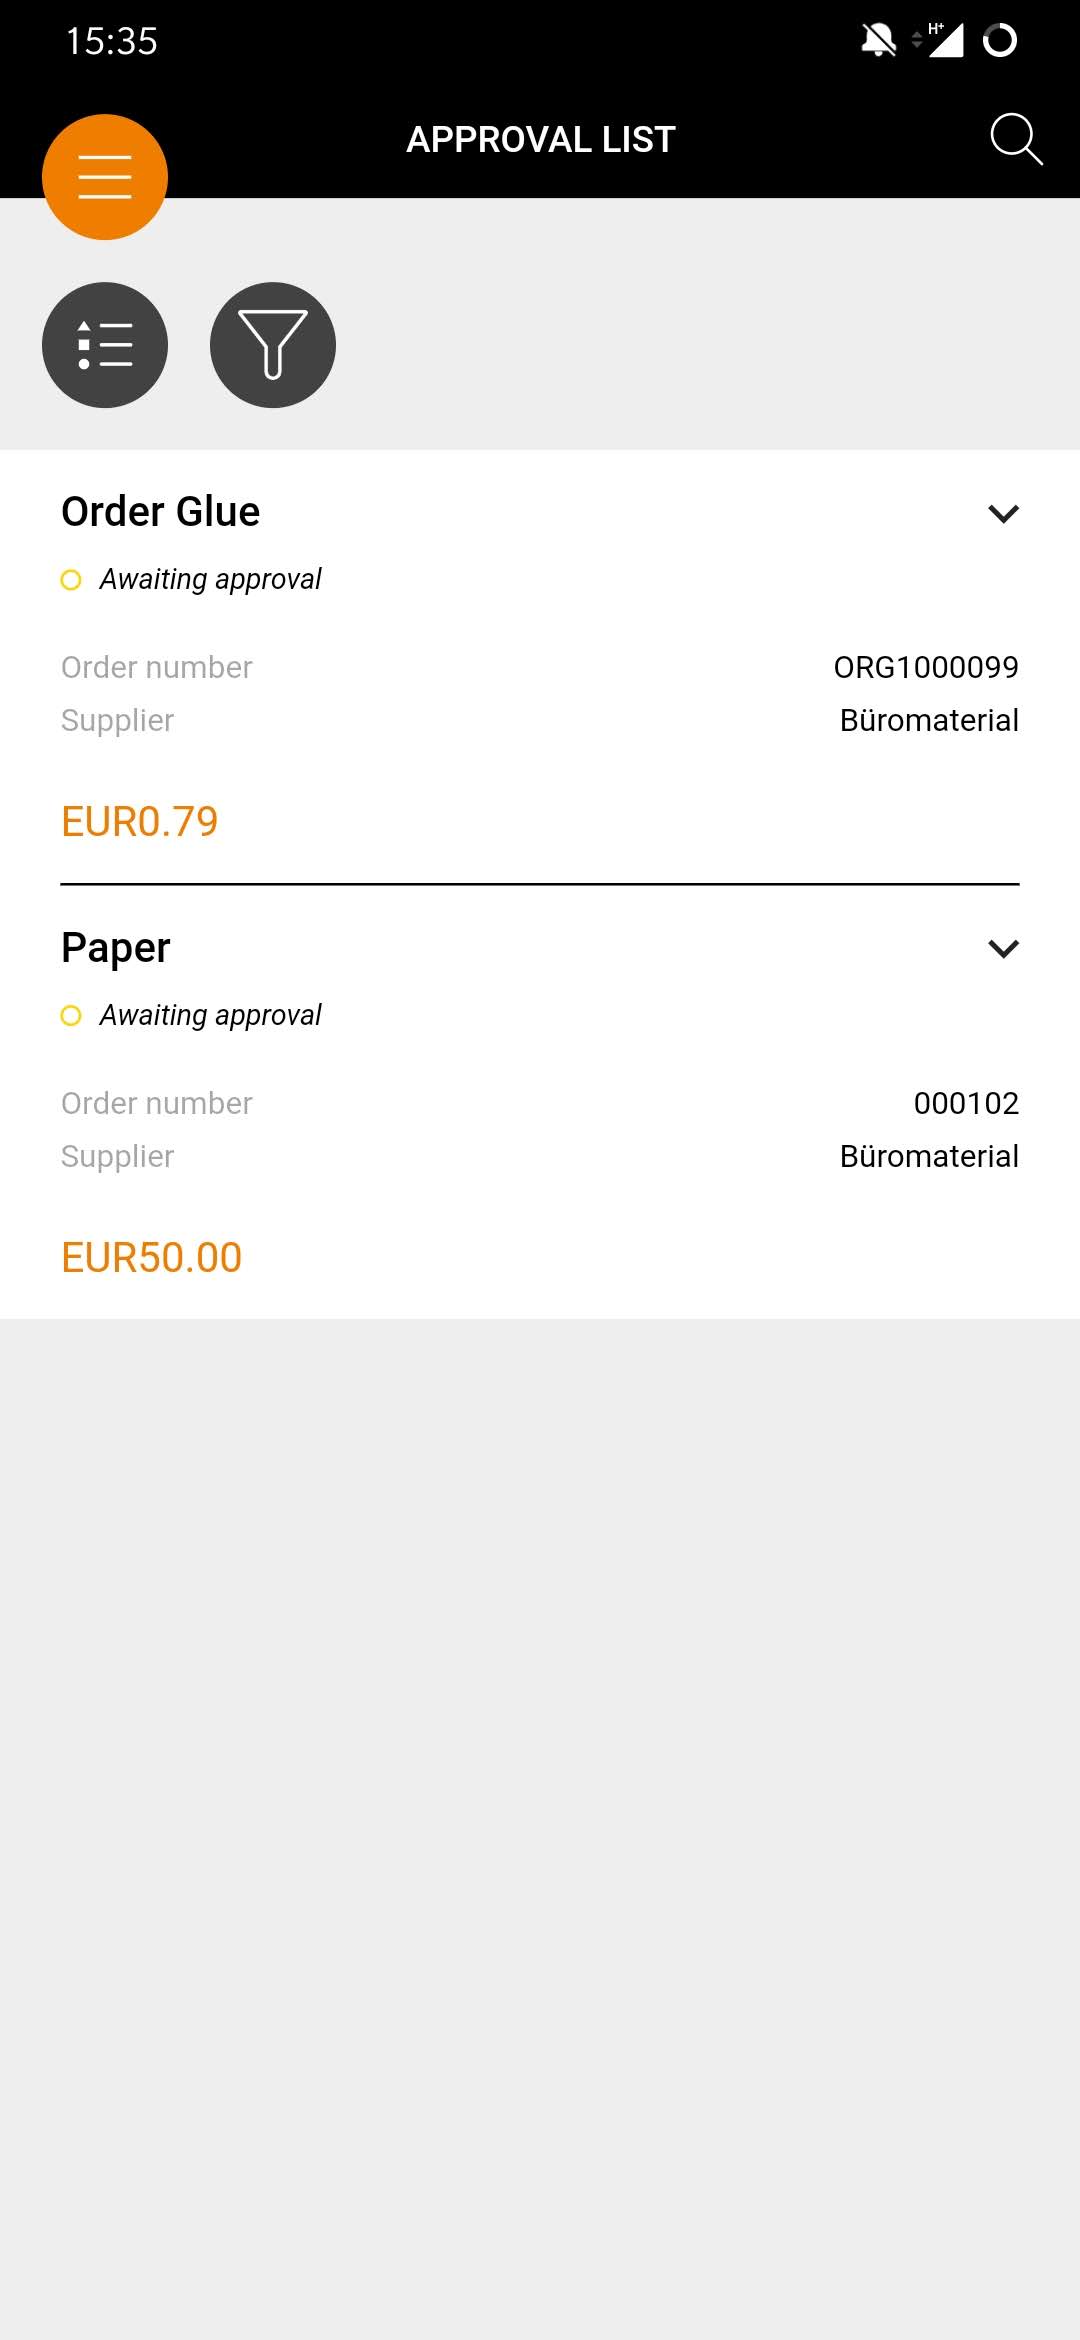
Actions of approval list

| Actions of the release list
In the approval list, you have the following functions available in a release document, depending on the configuration:
You can call up these actions for each item with a simple swipe to the left in the approval list. |
Approve release
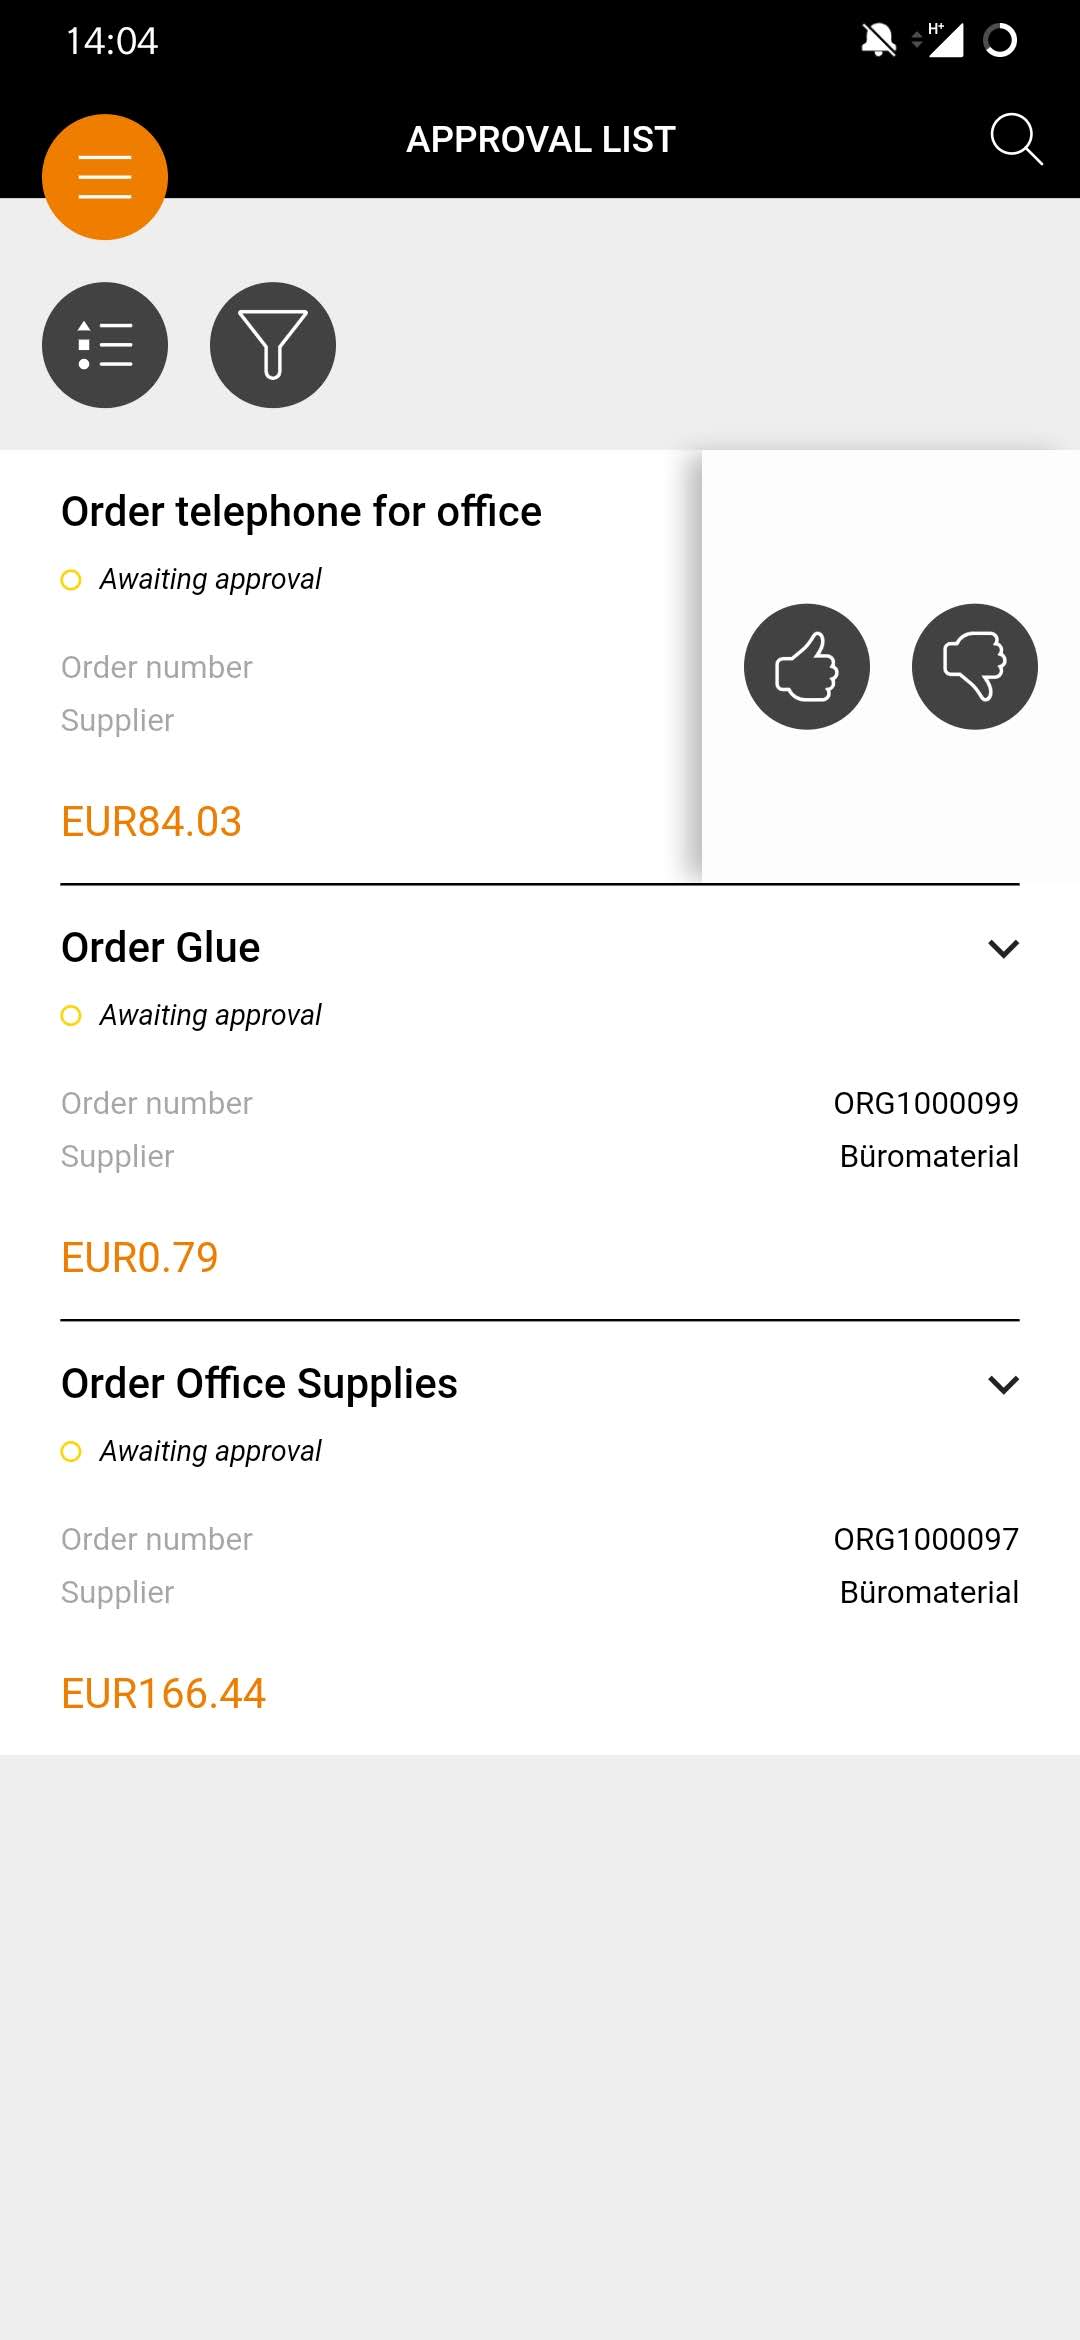
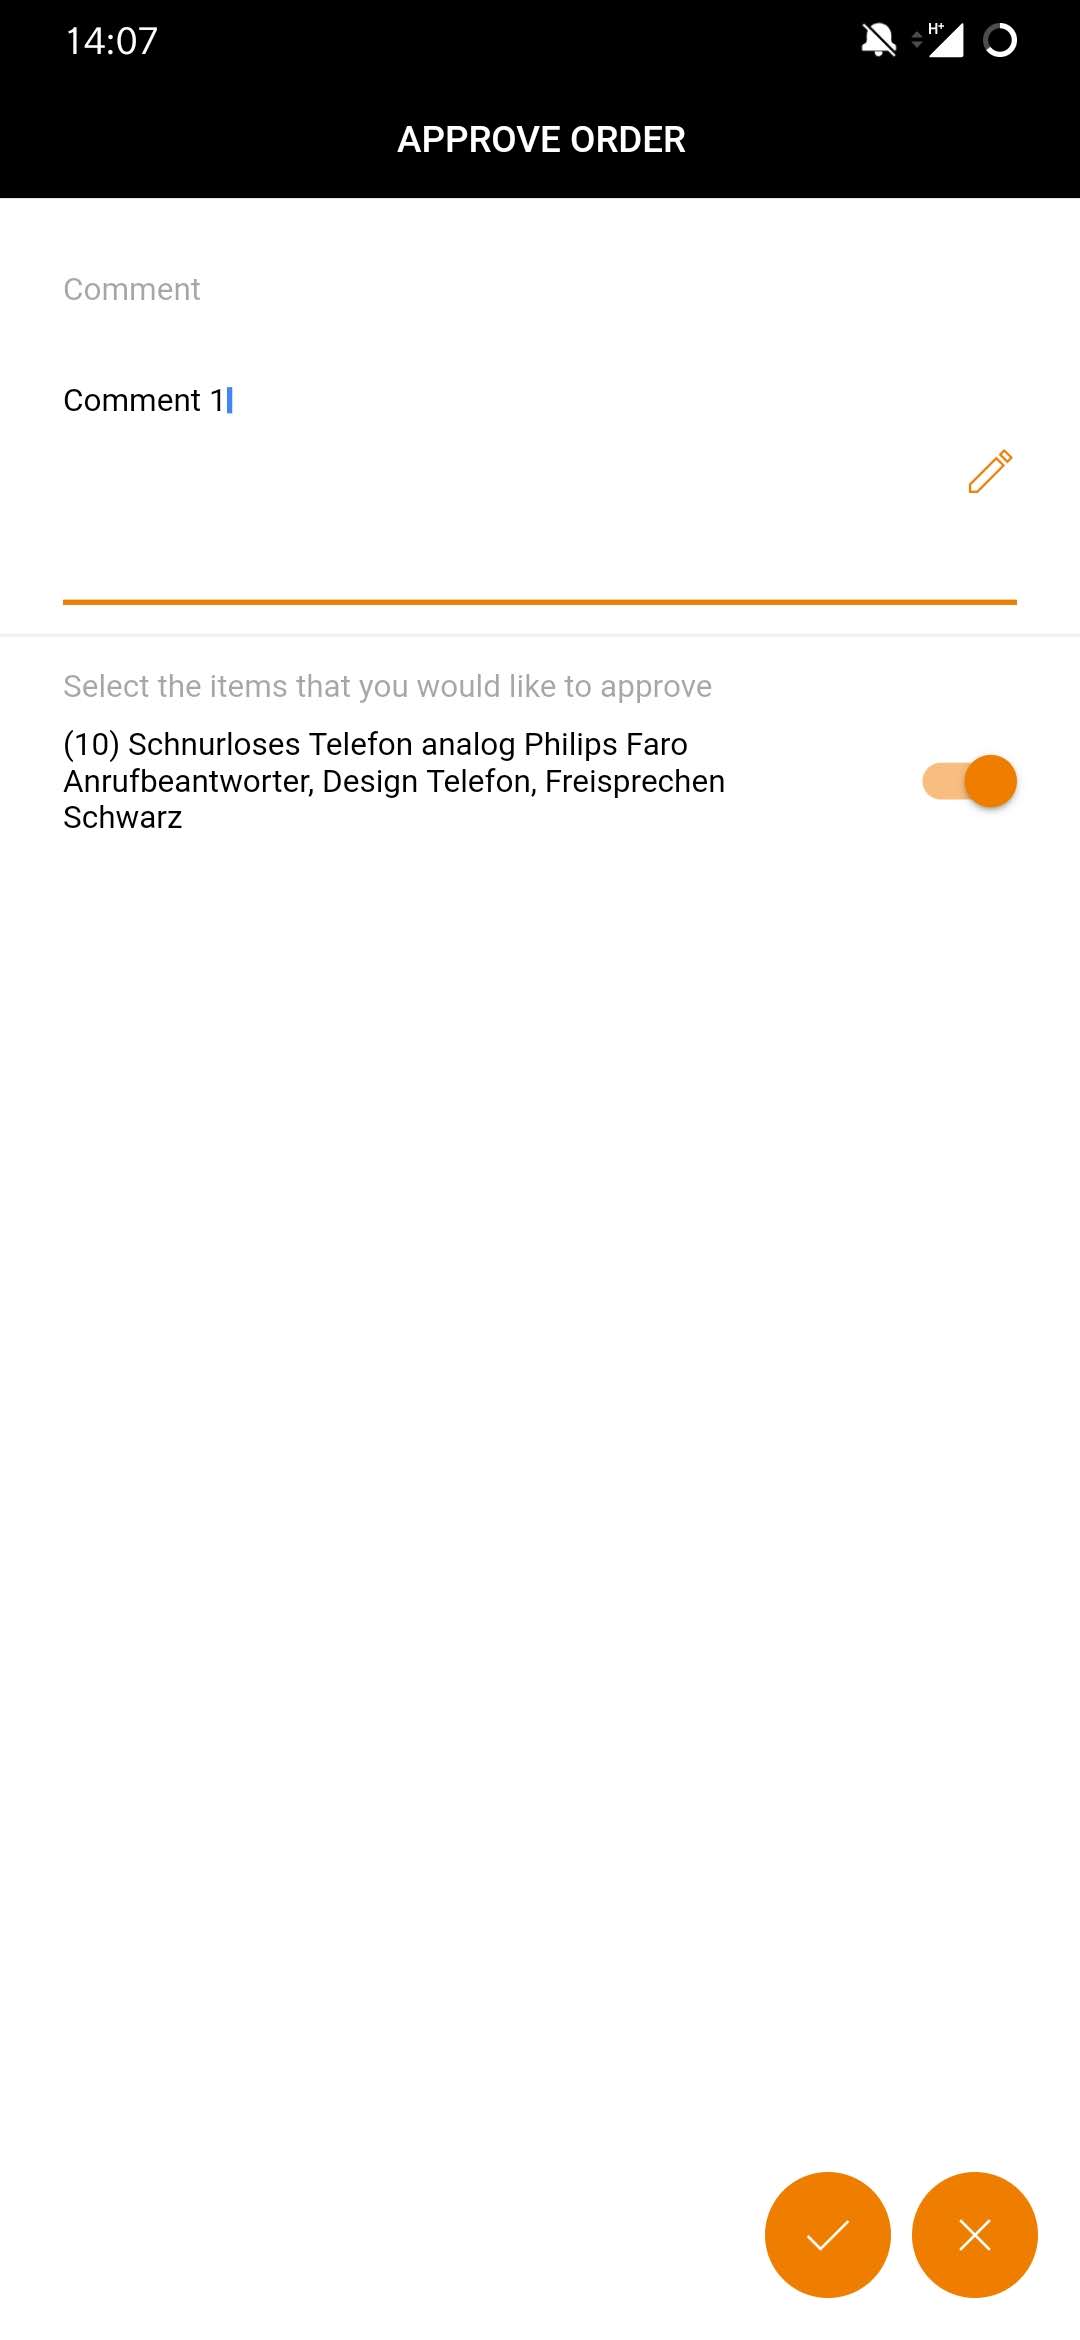
| Approve release
To release a document, simply swipe to the left in the list on the receipt. Now you can access the possible actions. Tap
. The document will be released. Please note: The release process of the mobile app is the same as the release process in Onventis Buyer and depends on the configuration. Depending on the configuration, your release procedure may differ from this description. |
 , select the items you want to release in the following window (via
Reject release


| Reject release
To reject a release, simply swip to the left in the list on the receipt. Now you can access the possible actions. Tap
. The release is rejected. Please note: The release process of the mobile app is the same as the release process in Onventis Buyer and depends on the configuration. Depending on the configuration, your release procedure may differ from this description. |
 , enter a comment on the rejection and confirm the rejection by tapping
Forward release
![]()
![]()
| Forward release
To forward a release, simply swipe to the left in the list on the receipt. Now you can access the possible actions. Tap
, select the user to whom you want to forward the share and confirm the forwarding by tapping
. The release will be forwarded to the selected user. Please note: The release process of the mobile app is the same as the release process in Onventis Buyer and depends on the configuration. Depending on the configuration, your release procedure may differ from this description. |

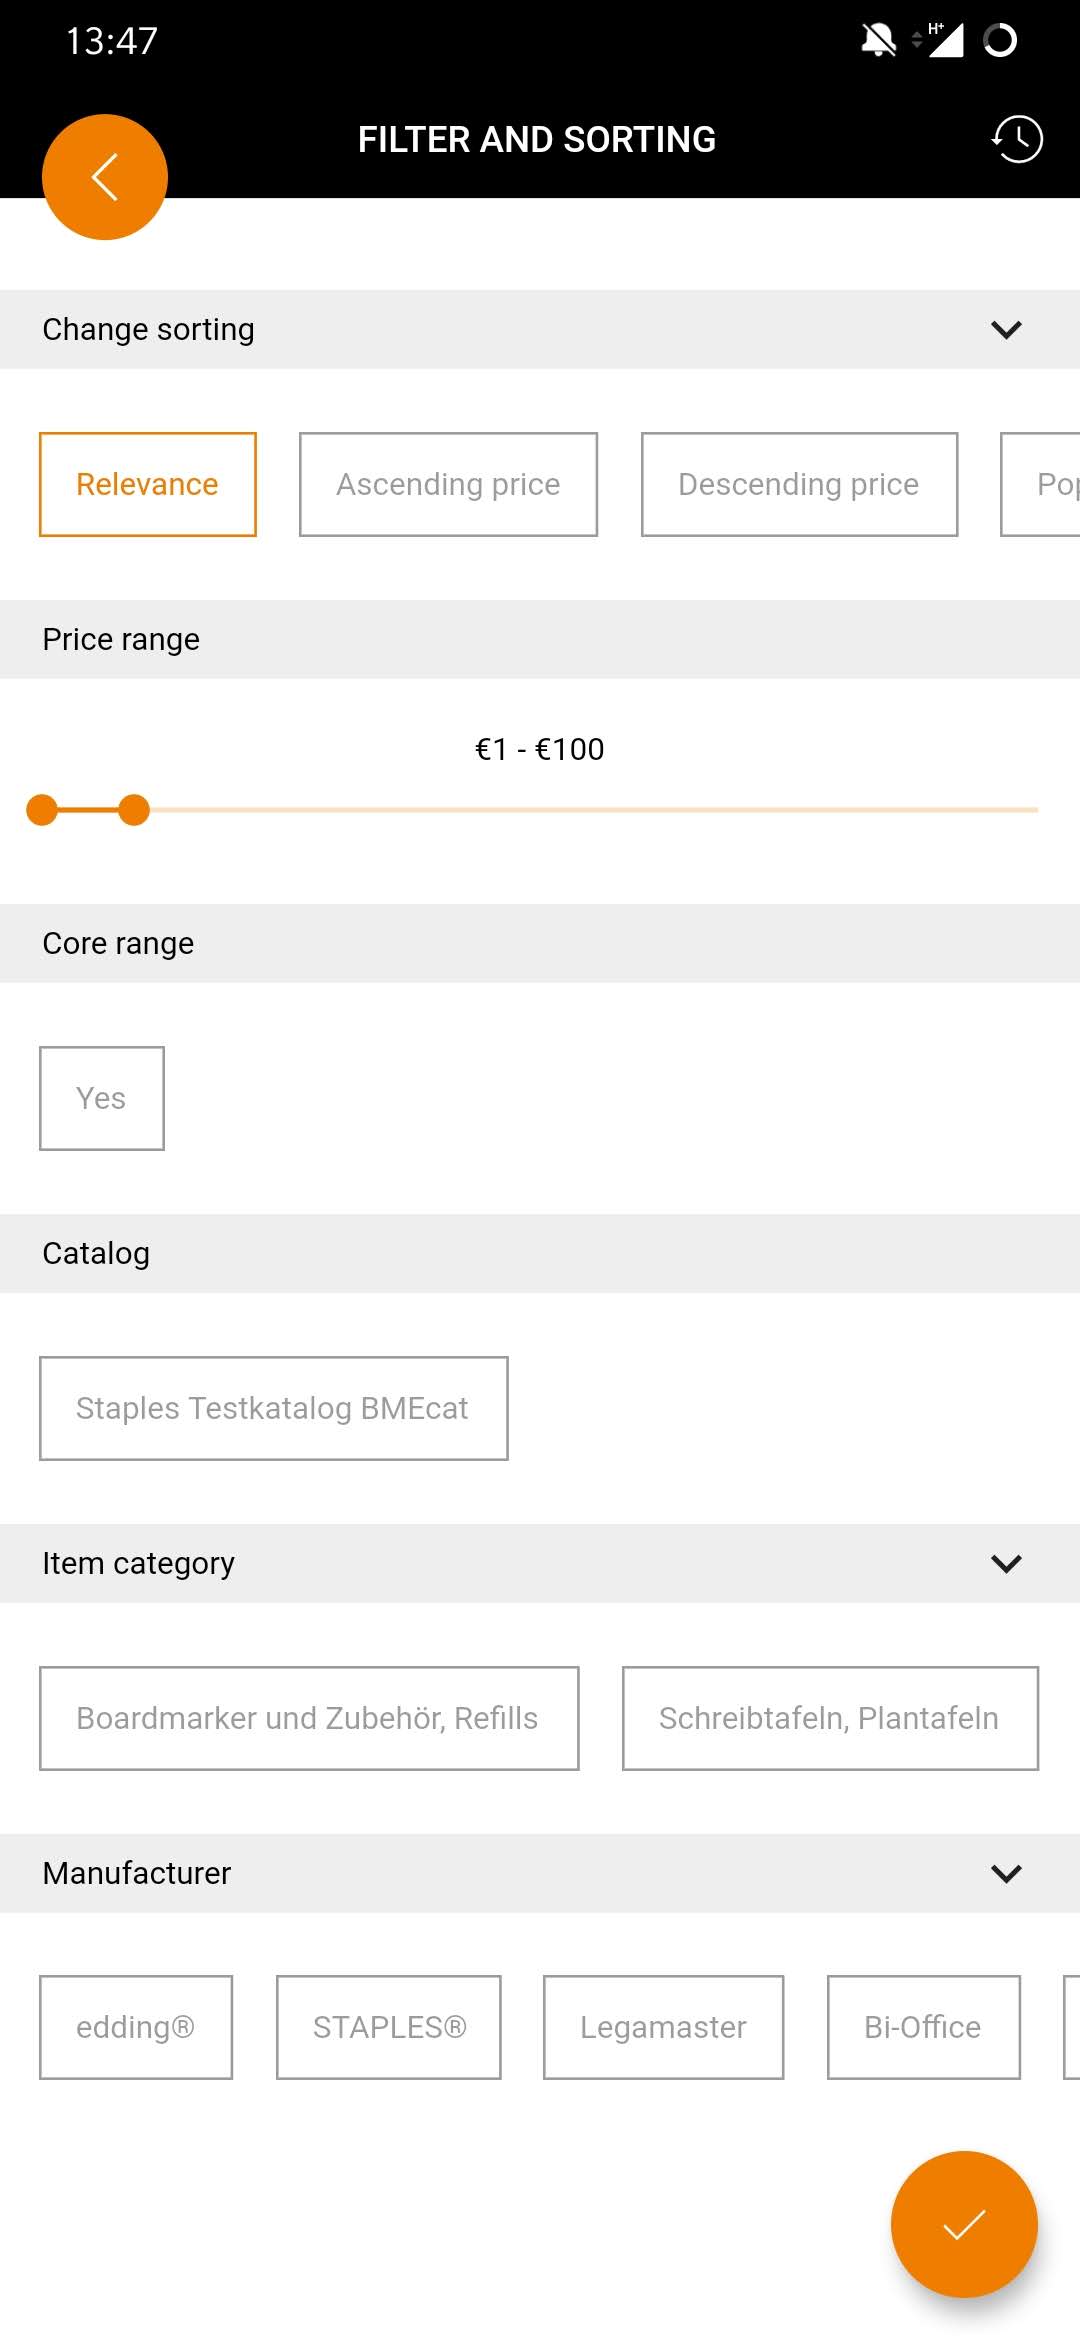
Sort & filter approval list
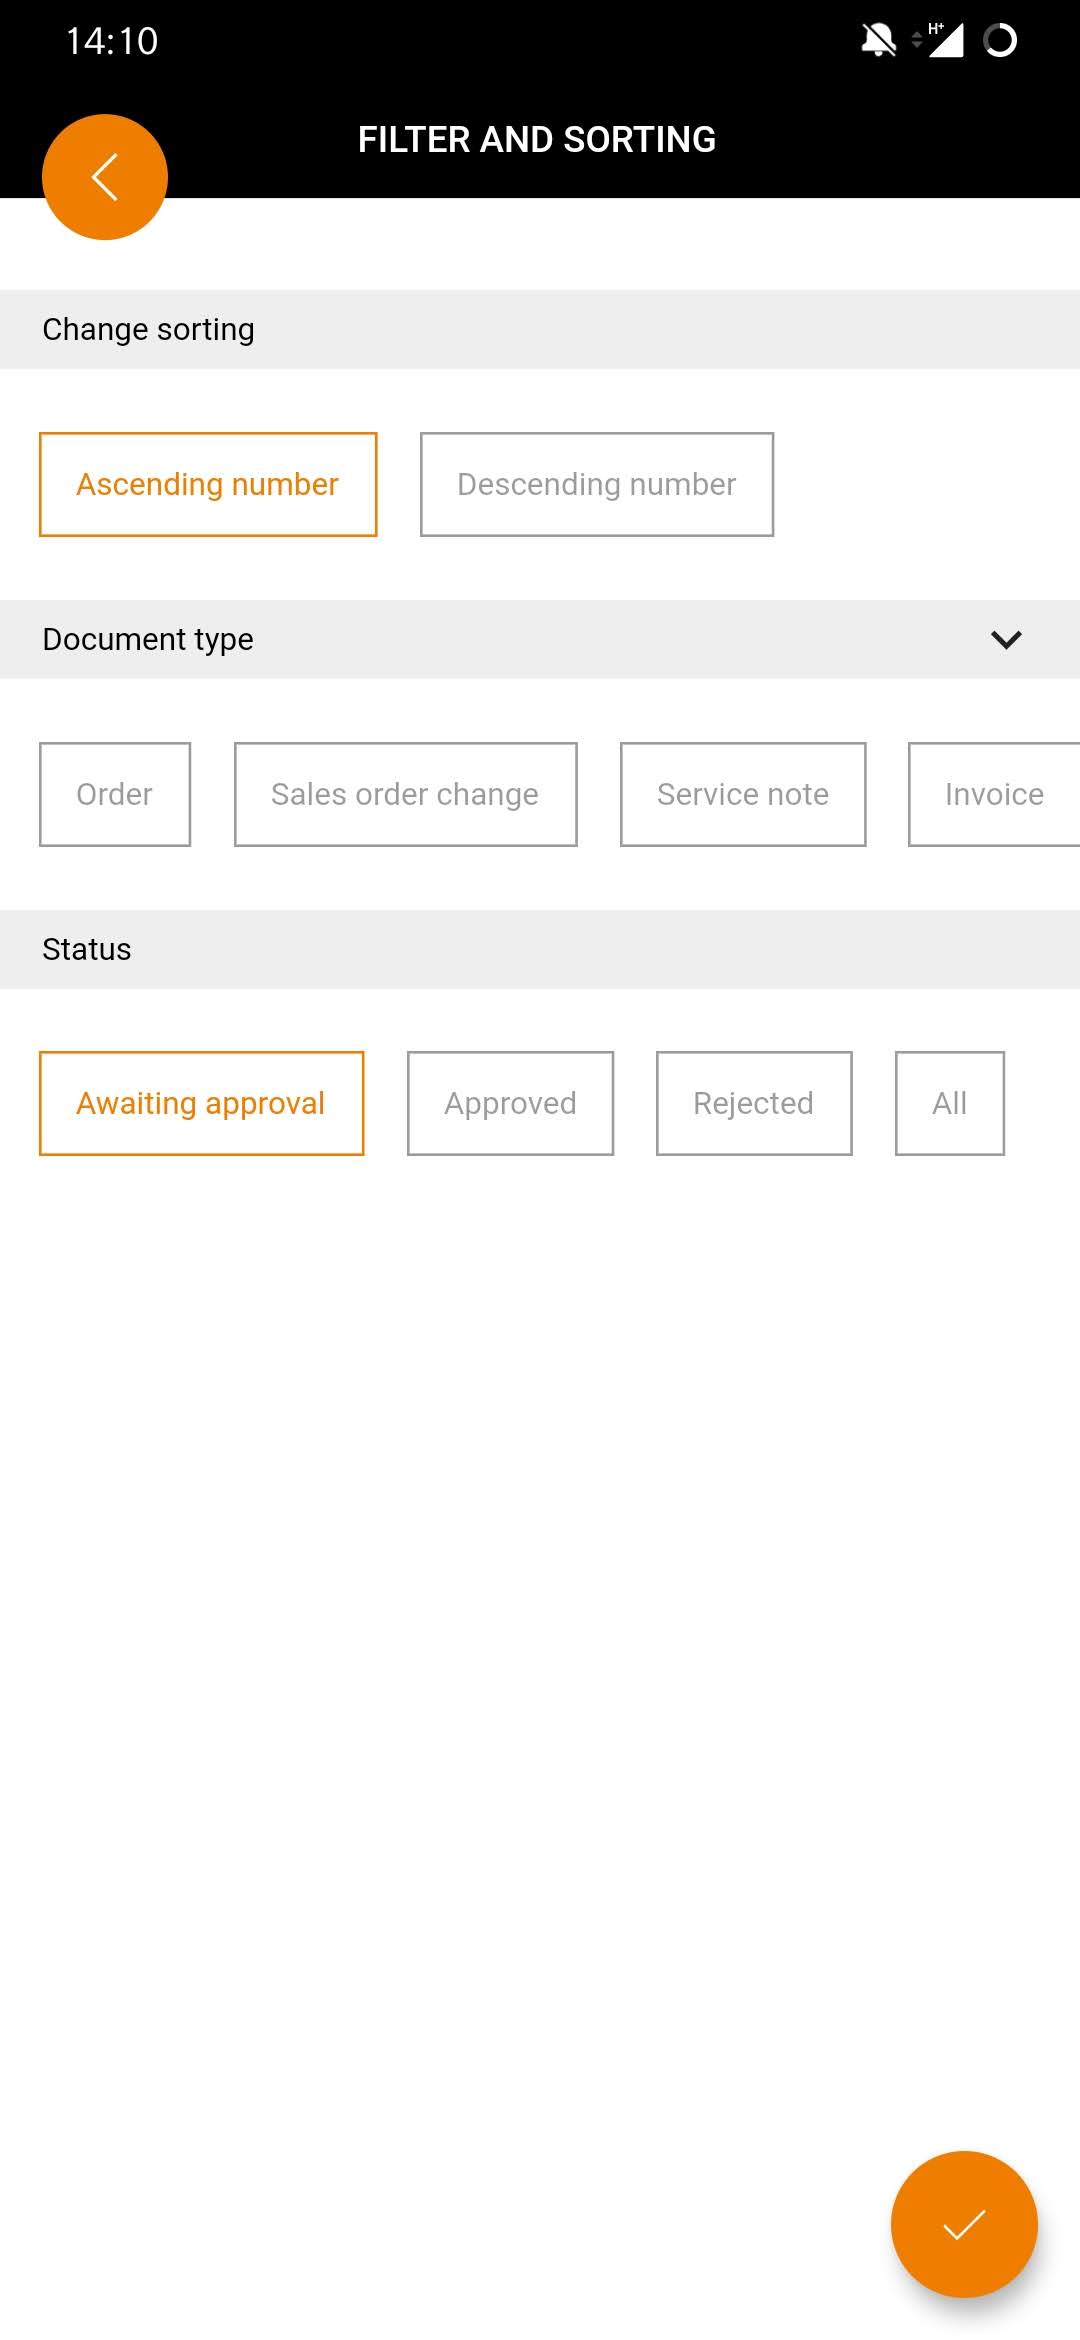
| Sort & filter approval list
To sort the share list, simply tap
. This takes you to the page for selecting sorting and filtering. Now simply select the desired sorting and the desired filters and confirm the selection by tapping on
. The sorting will be adjusted. If you select the filters, a small icon will appear in the upper right corner of the filter & sort page. If you press this button If filters are activated, the filter symbol in the list view of the release list will be coloured in your CI colour. This allows you to see whether filters are activated or not.
|


 , the sorting will be cancelled.
Display document information

| Display document information
If you want to see more information about the document to be released, simply click on the document in the approval list. You end up in the document itself (depending on rights) and can view the information. With this button
you are able to release, reject or forward the document, regardless of where you are in the document. |

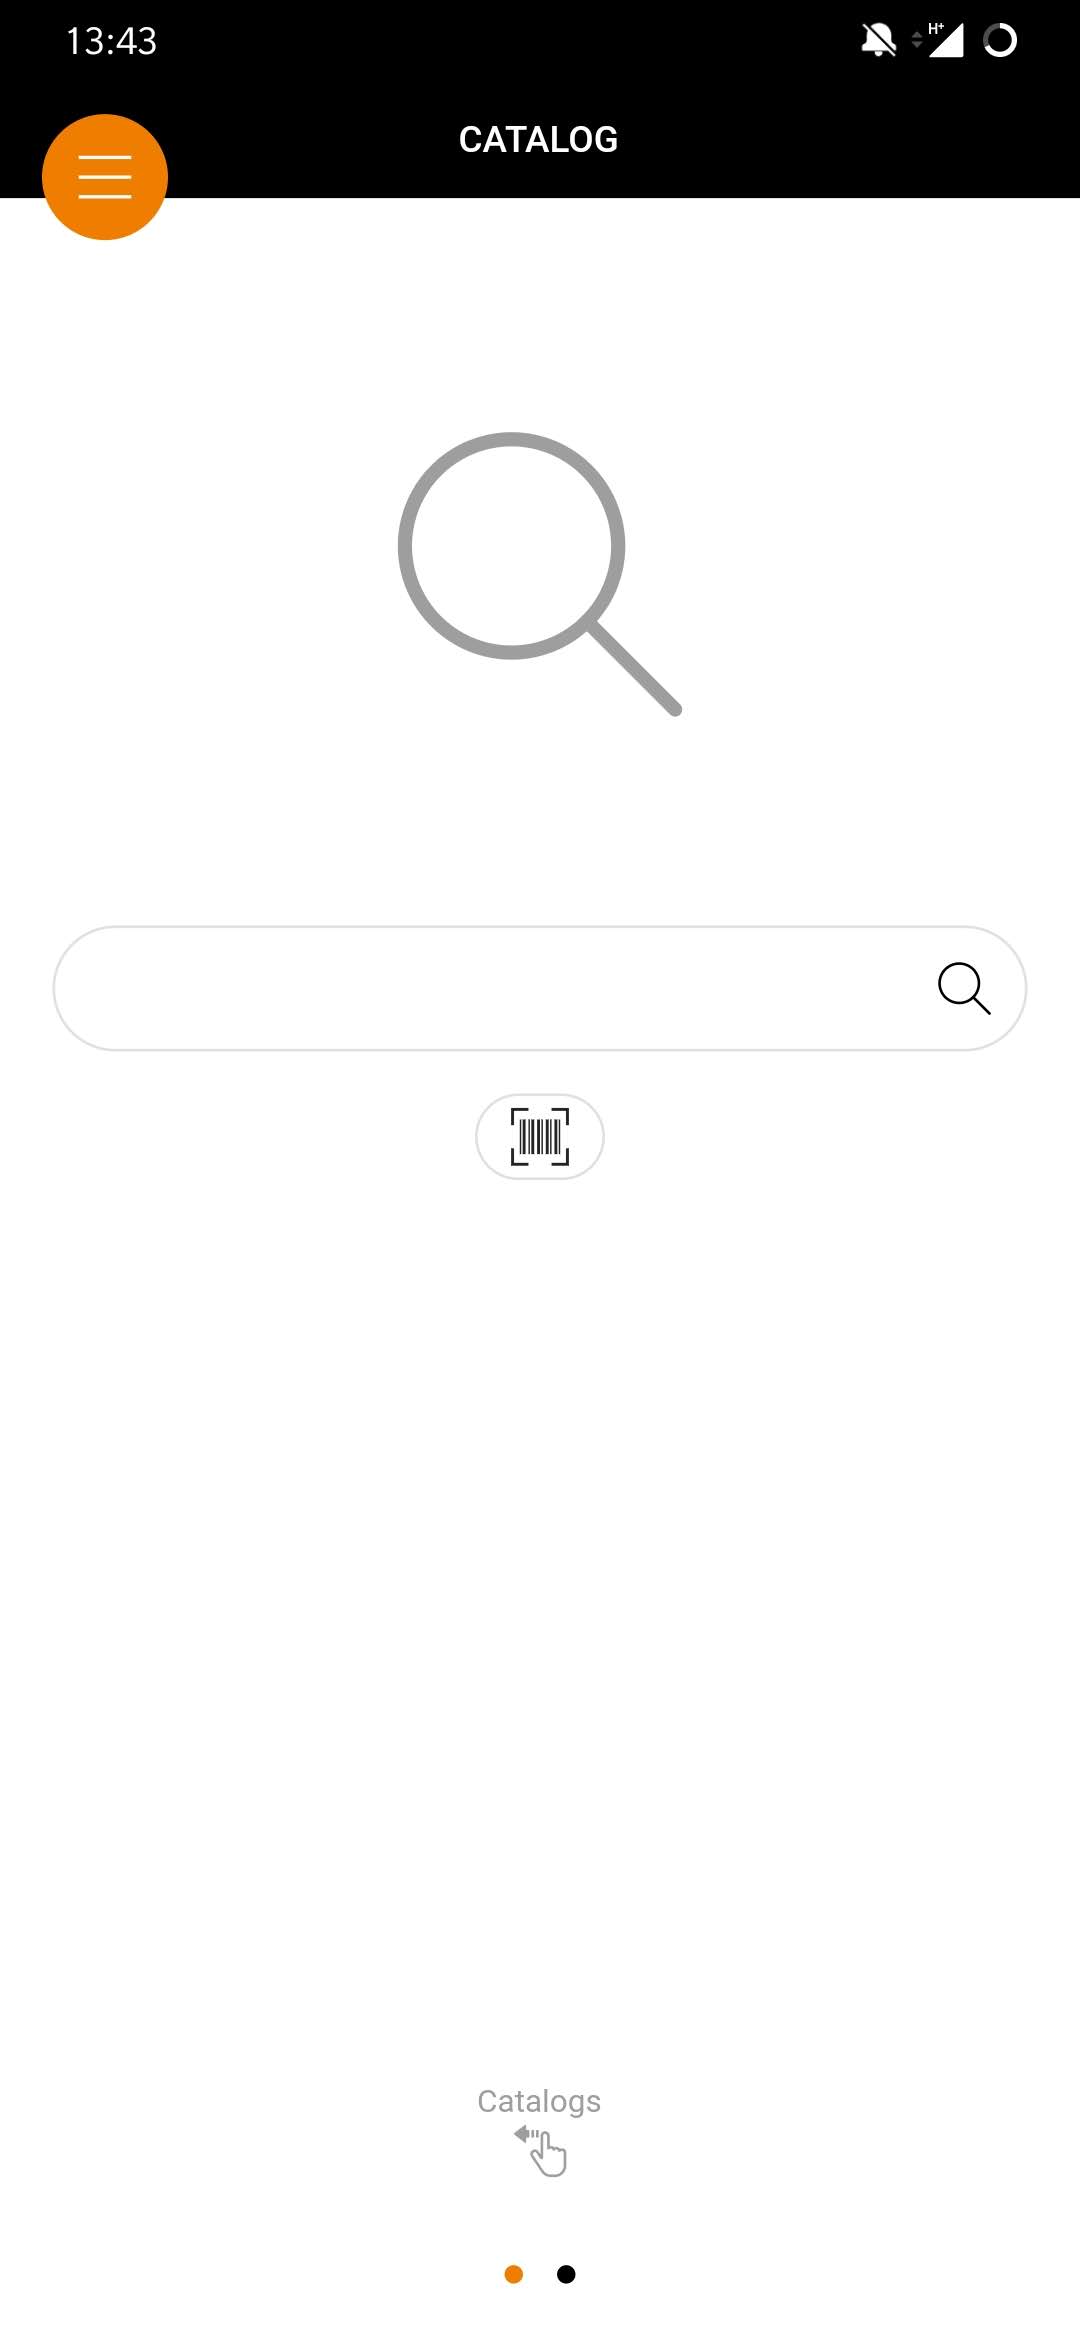
Mobile catalogues
Find articles in catalogues & shops
Whether products, assortments or services: with the Onventis mobile app you always have access to all catalogues and connected shops of your suppliers.
Search with QR-Scanner
The Onventis Mobile App makes it even easier and faster to find the articles you want using the QR scanner and practical overviews in the catalogues.
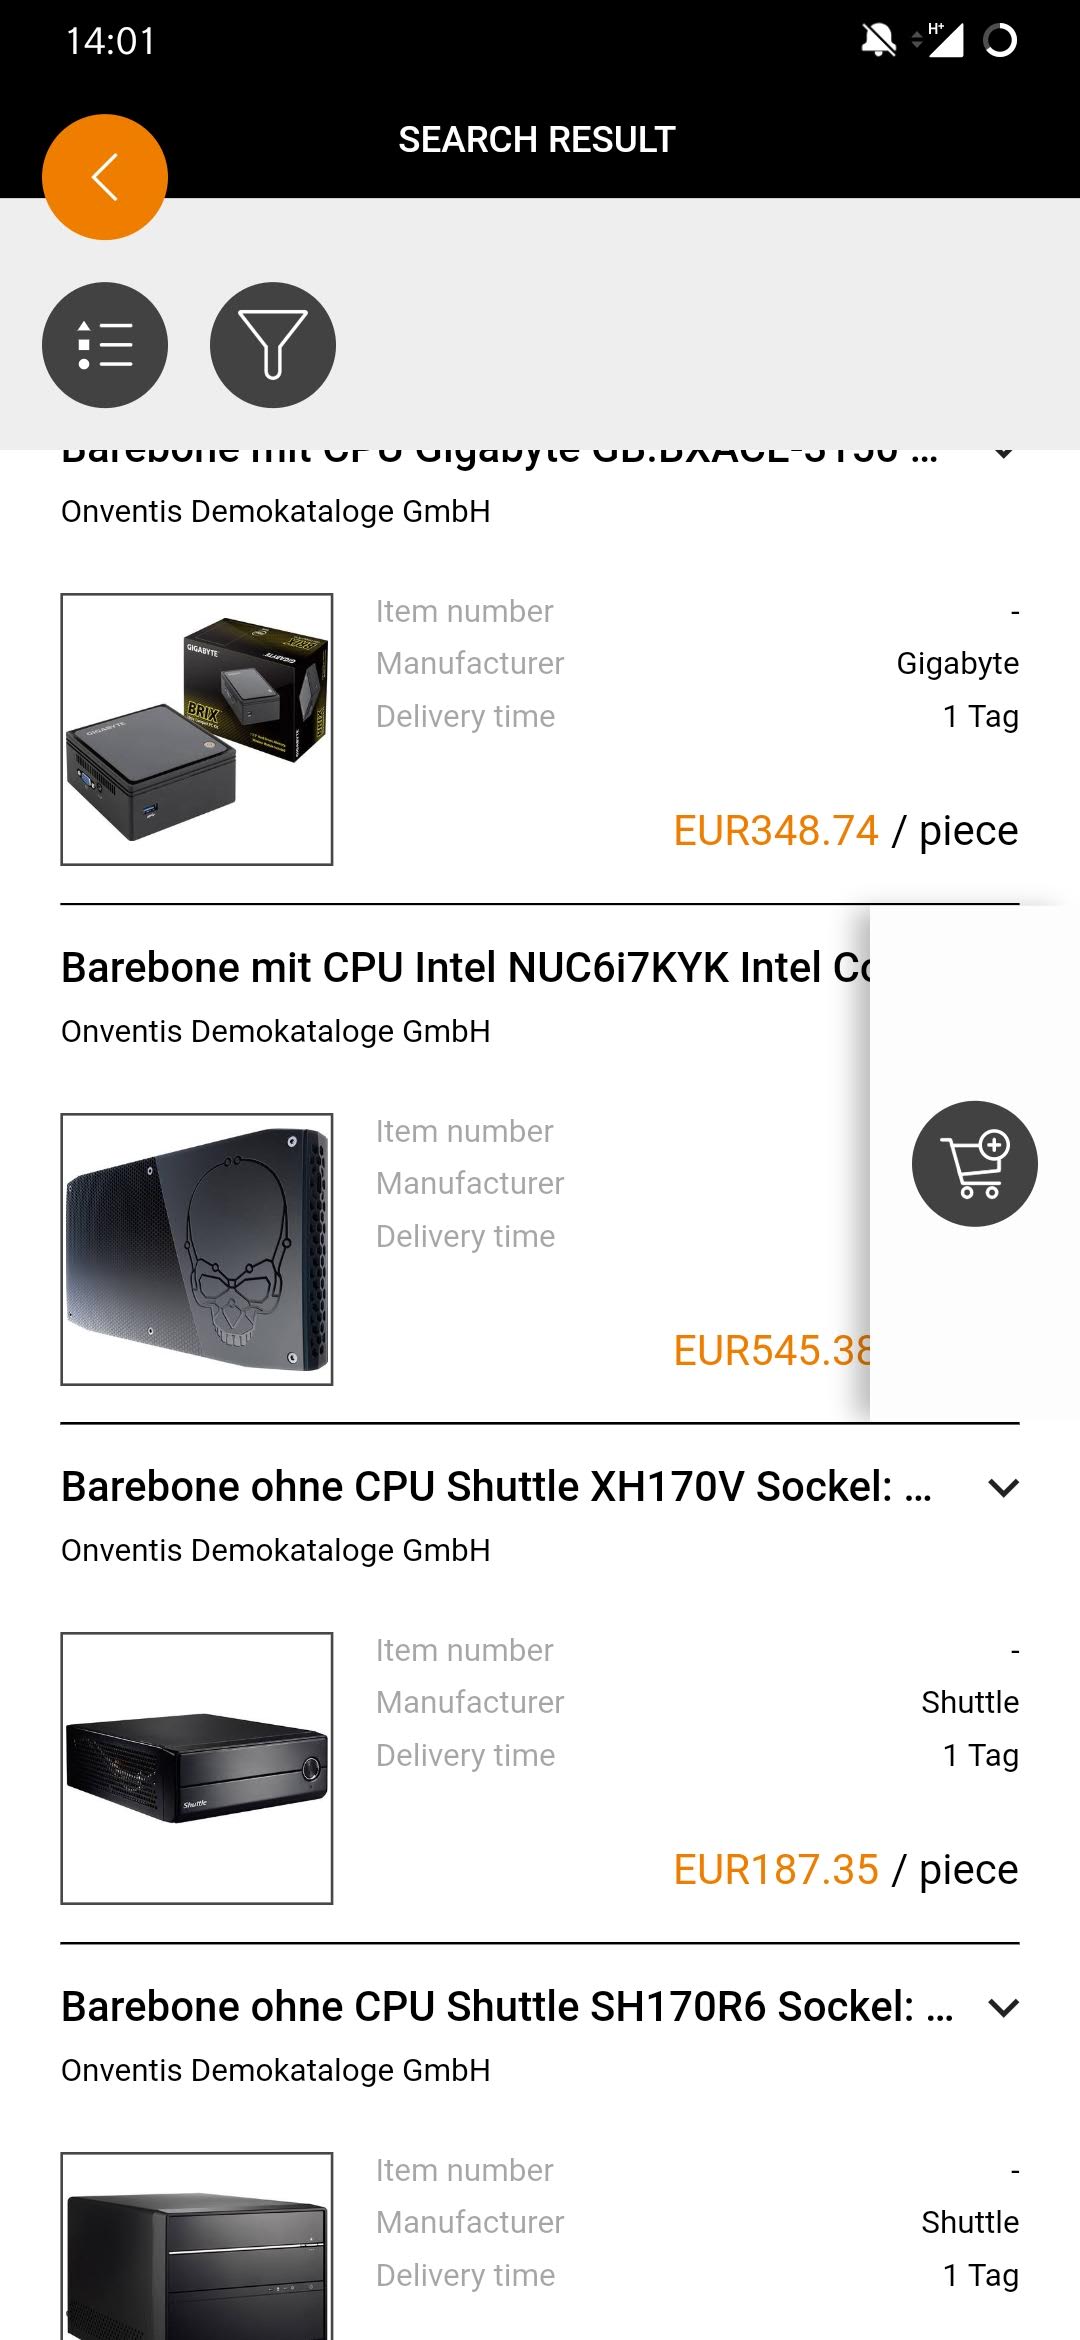
Catalogue search

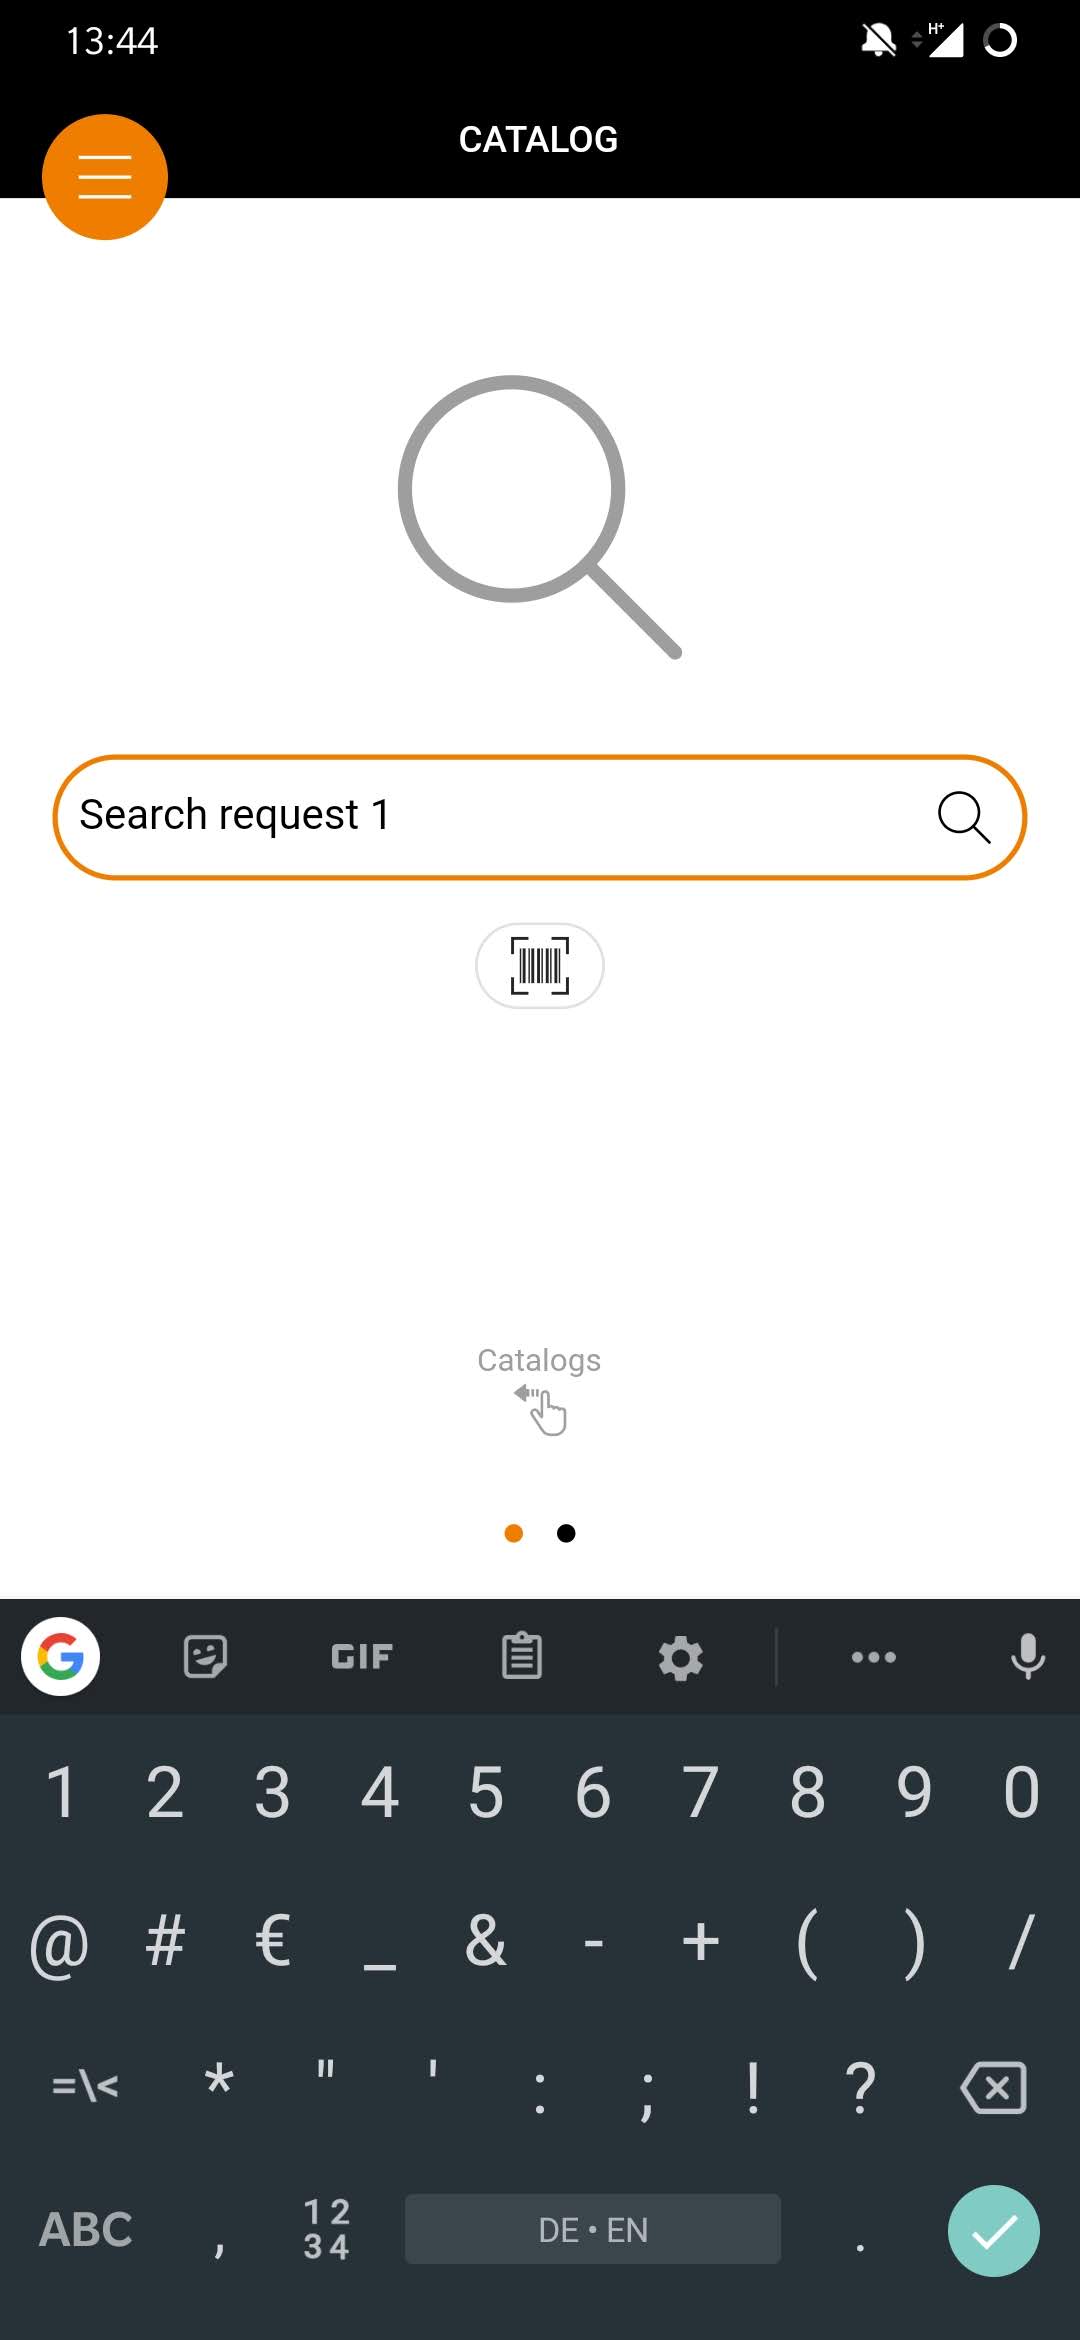
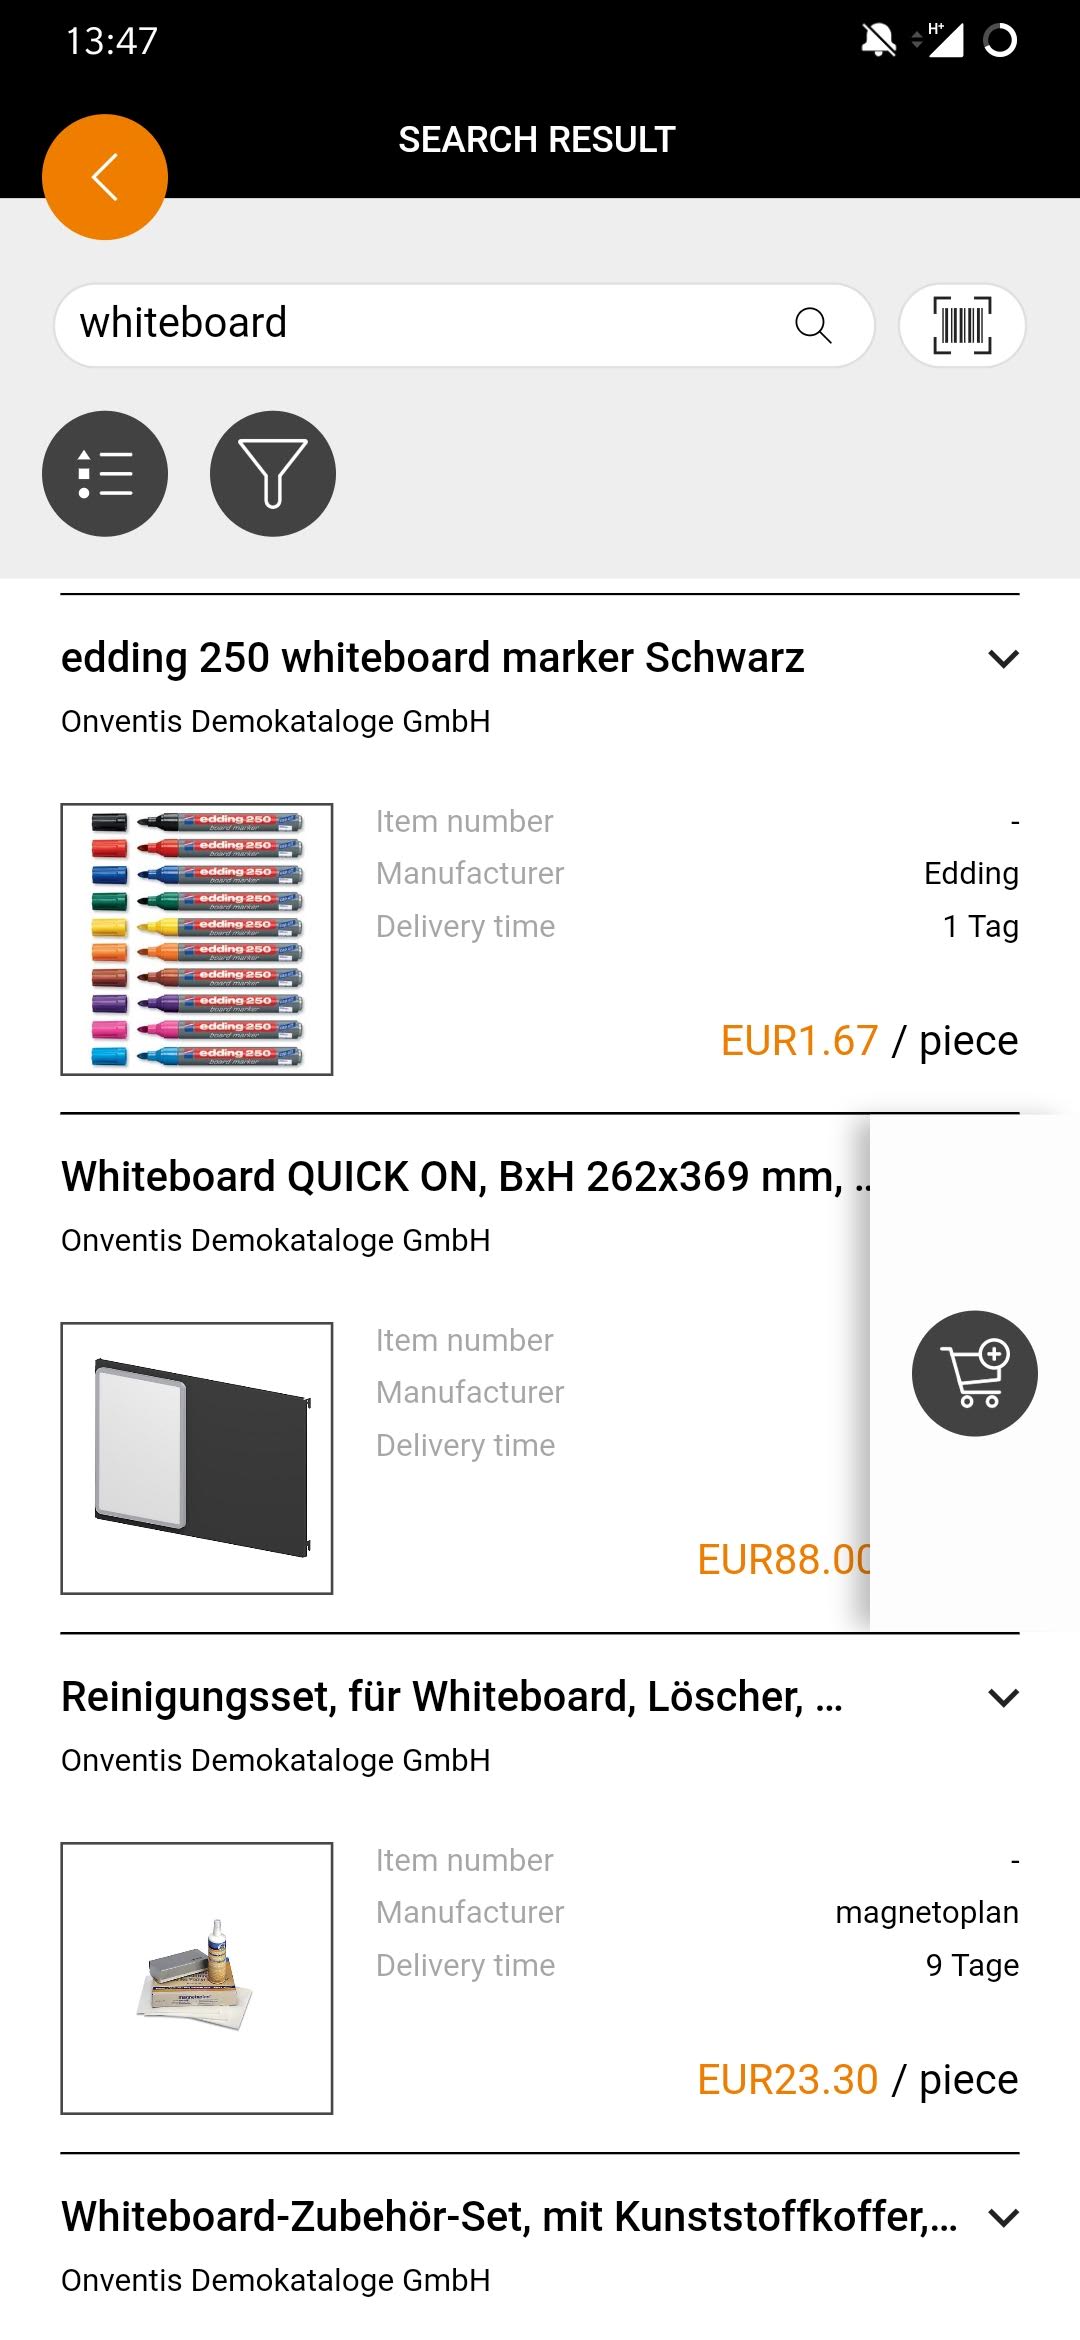
| Catalogue search
Using the catalogue search, you can easily serach for desired articles in your defined catalogue assortment across all catalogues. You can call up the catalogue search via the menu item Catalogues. By clicking on
you can still filter the results of the search query and sort them differently. If a filter is activated, the filter button will be colored with your CI color. |

Scanning articles

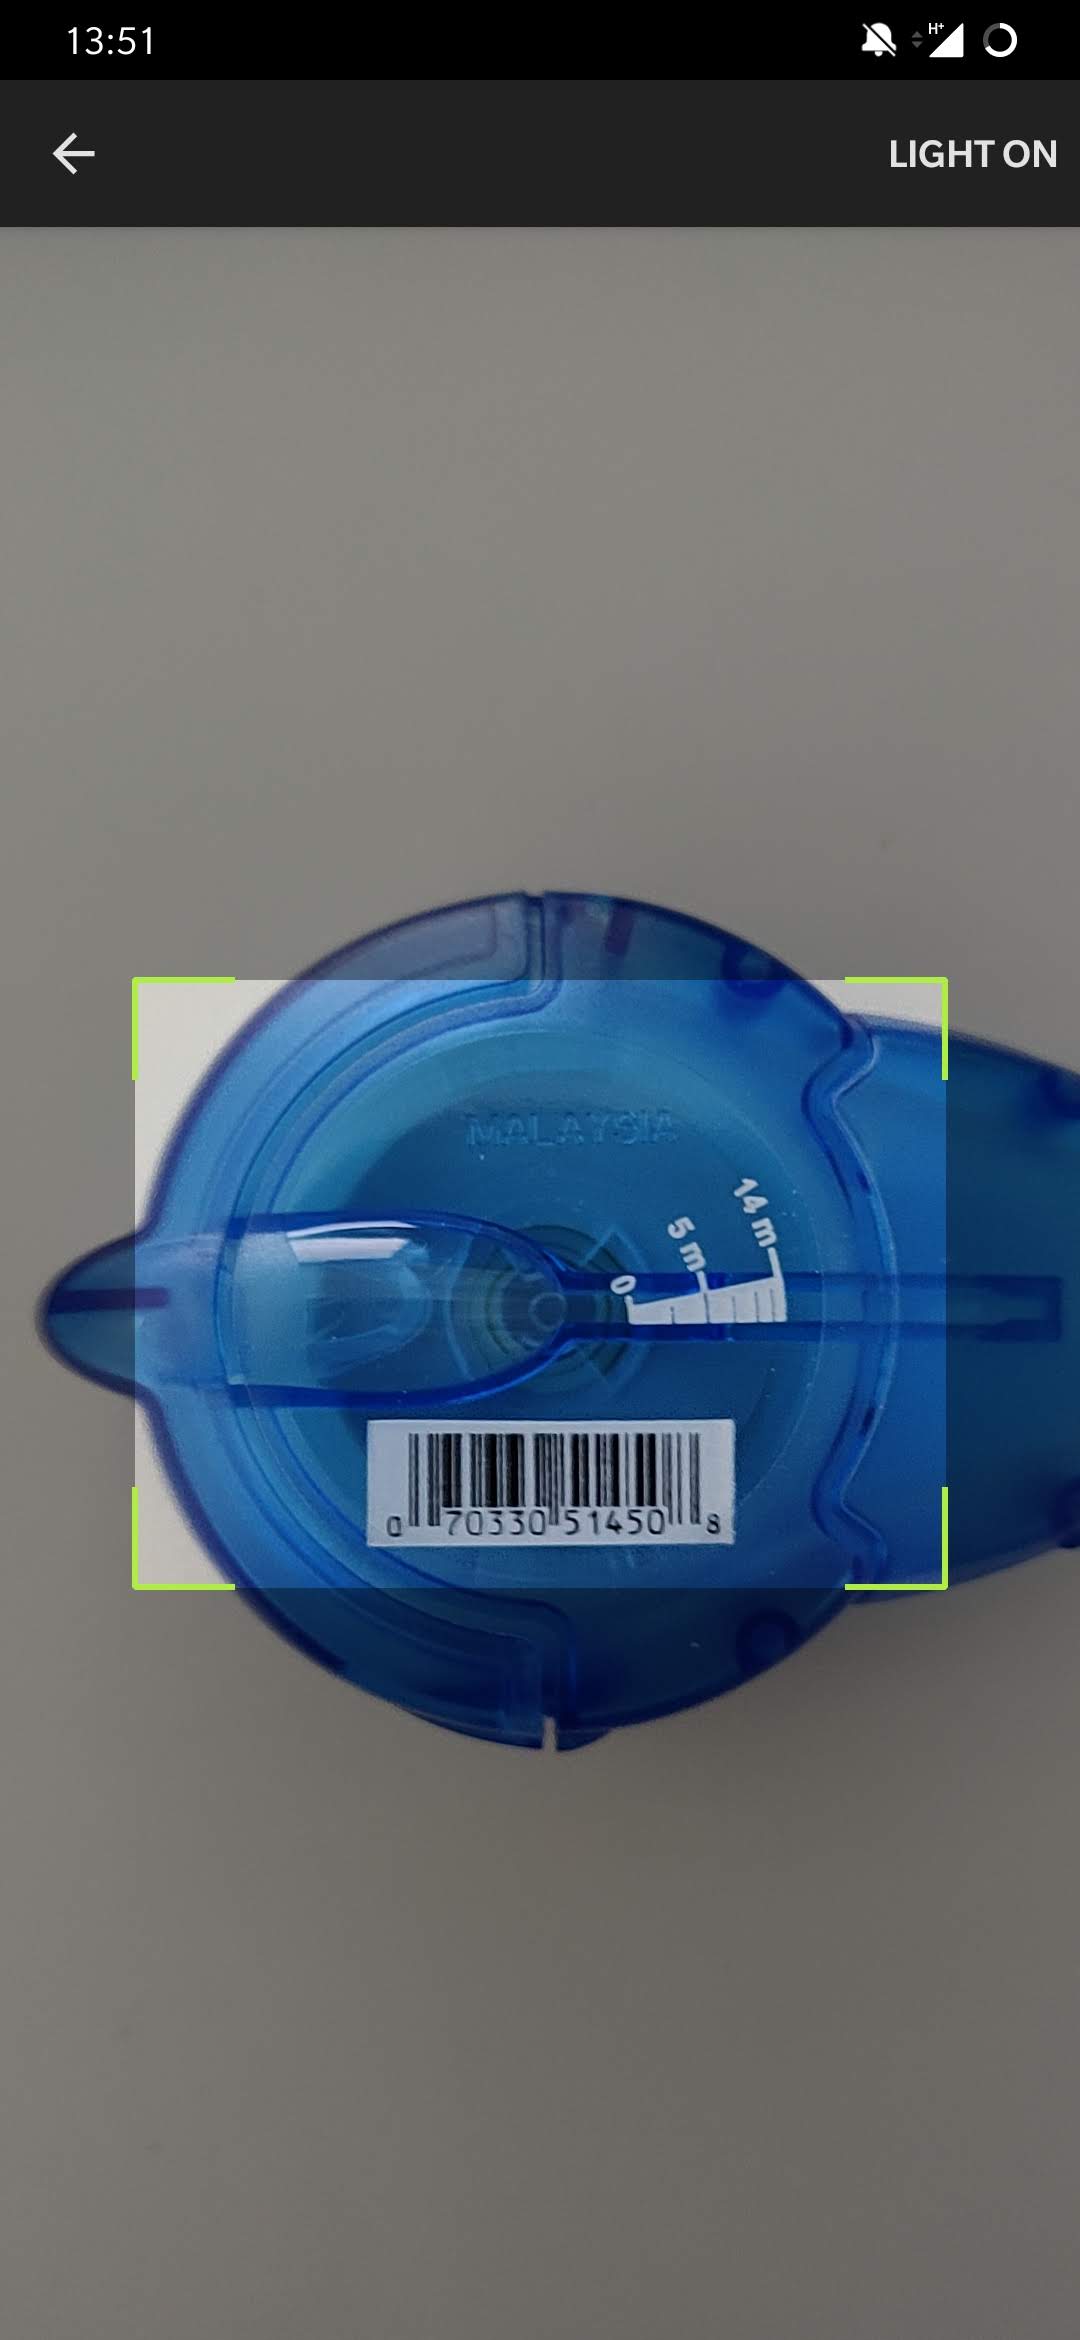

| Scanning articles
The scanner can be accessed from the menu or Catalog Search or your Dashboard. Simply click on By pressing the button
you can enable the lamp of your smartphone so that you can also scan codes in darker areas without problems. Tap Please note: To use the scanner, you must allow the Onventis mobile app to access your camera in your settings. Otherwise the scanner cannot be used. |
Catalogue navigation
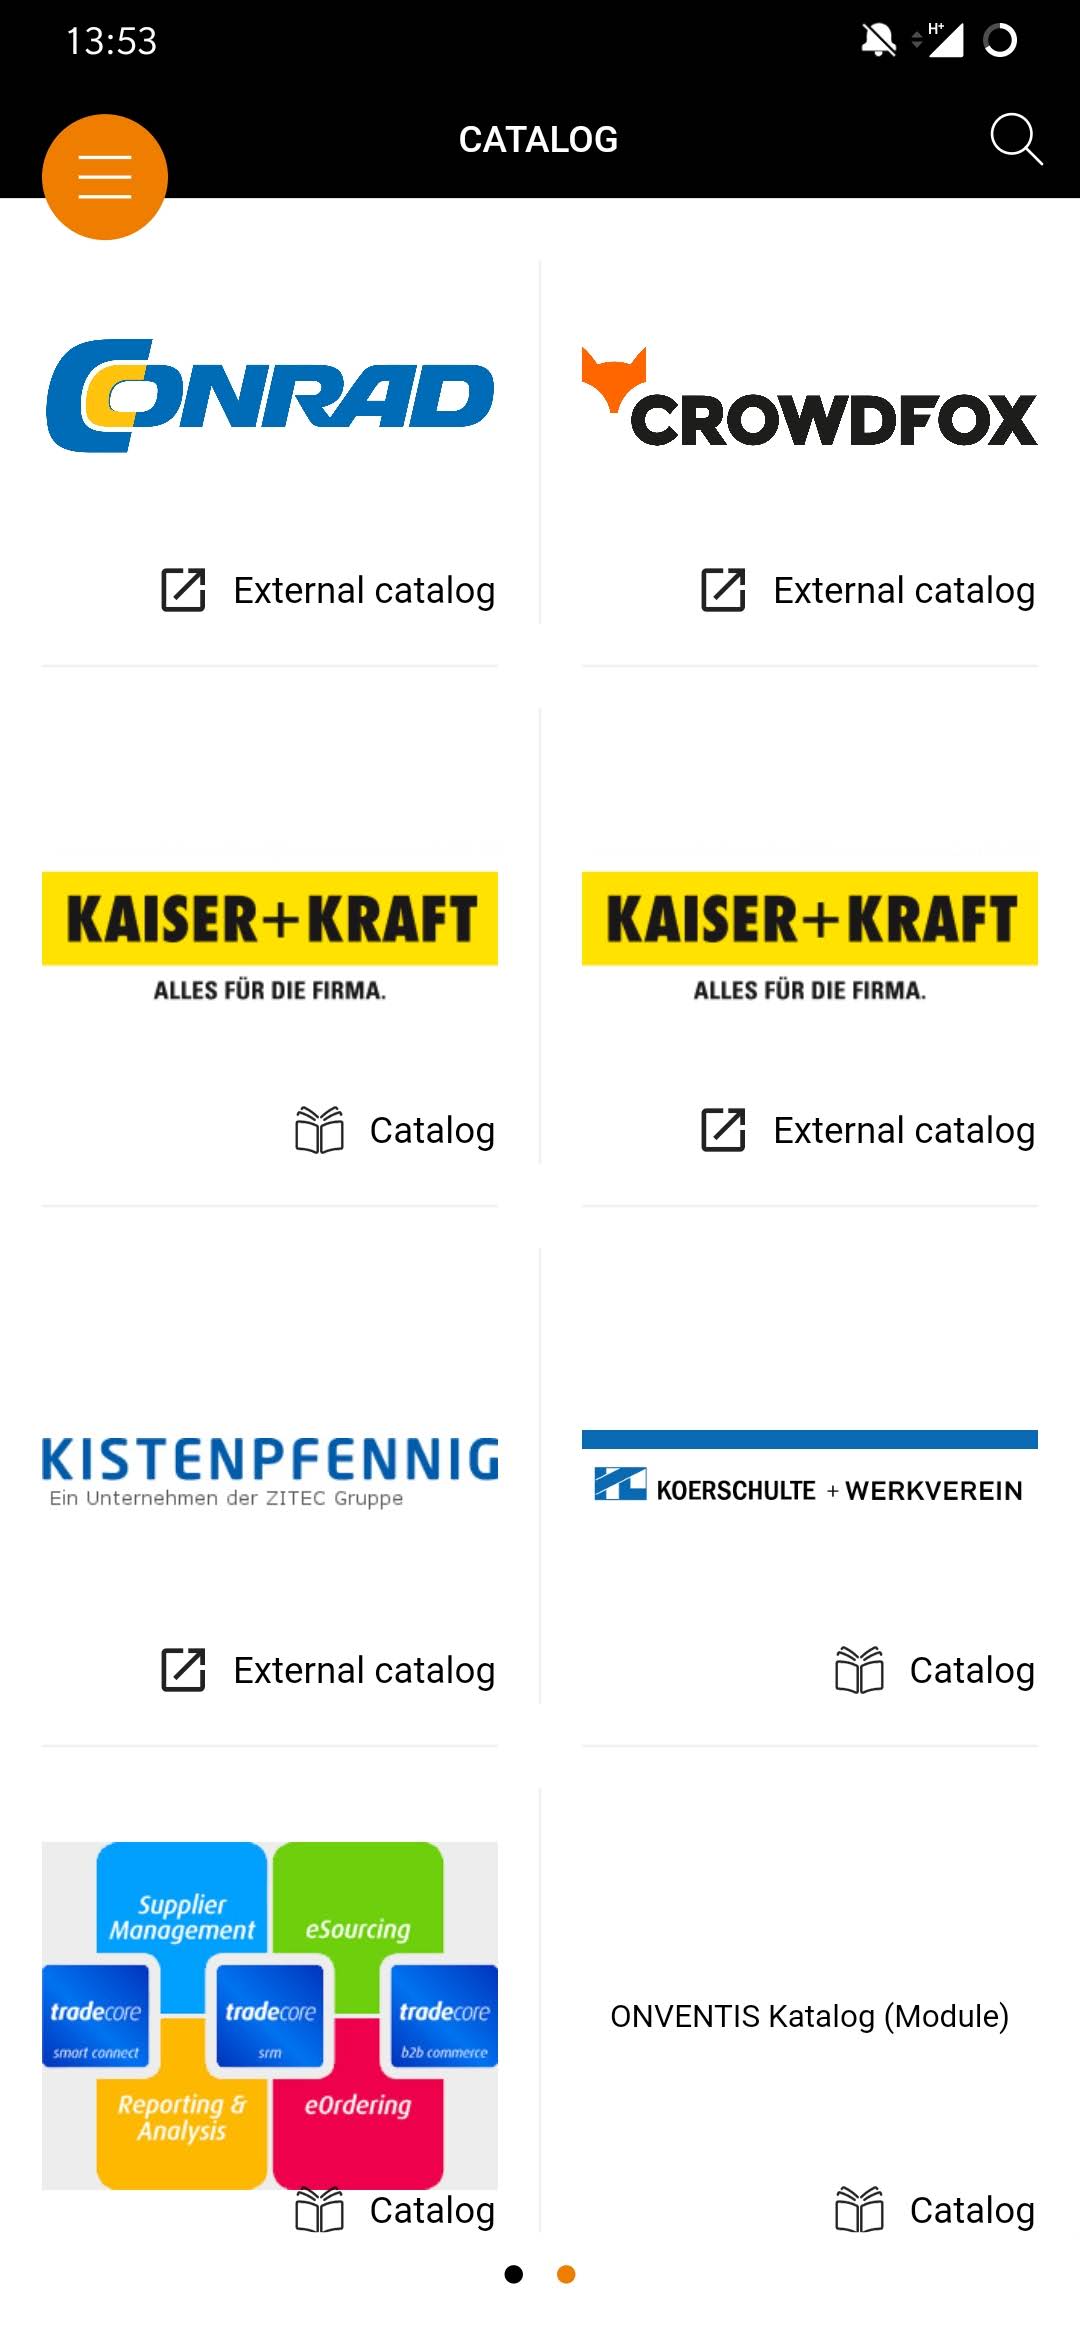
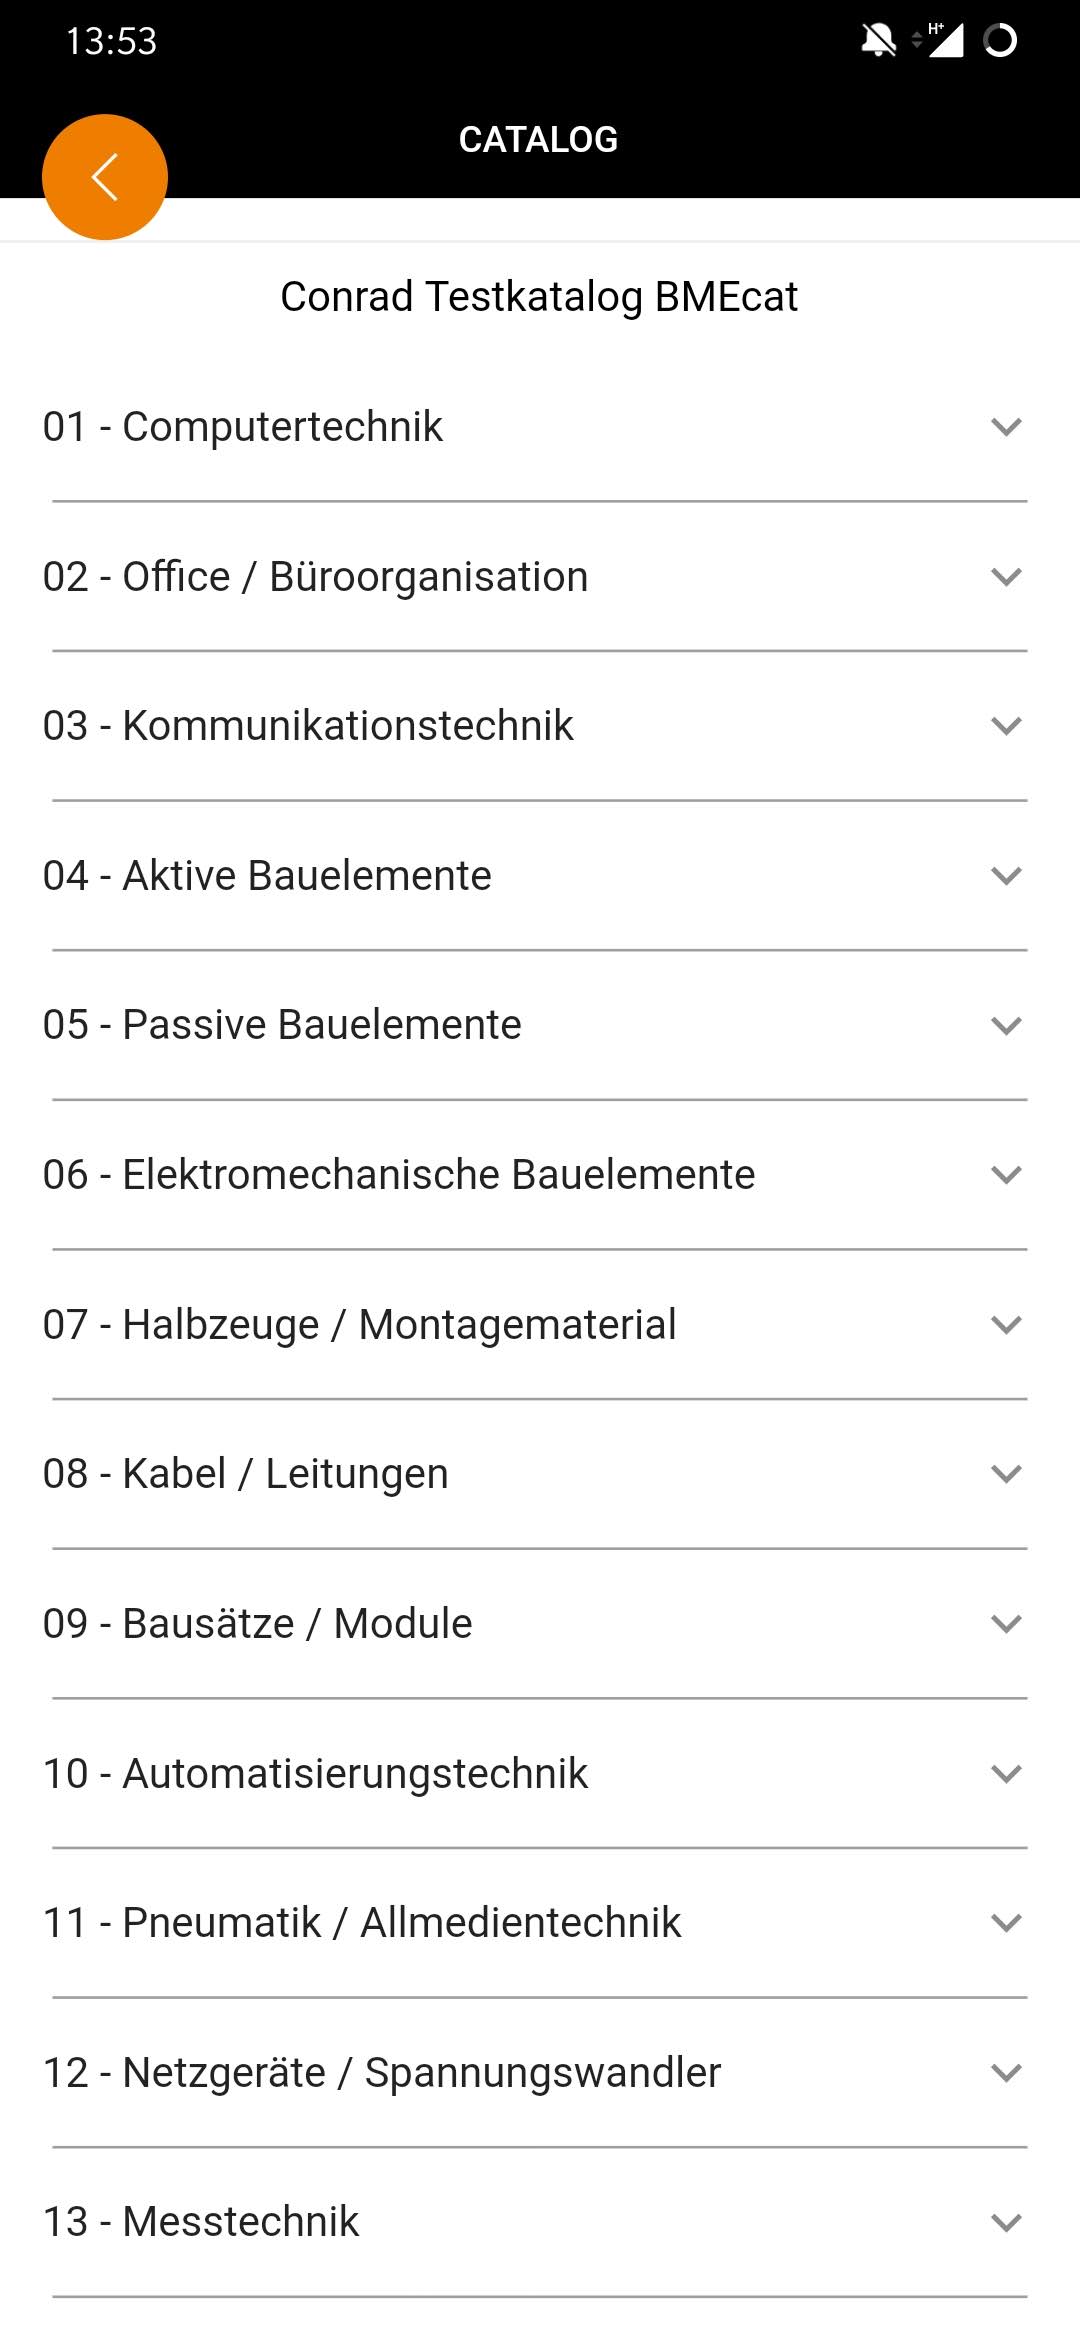
| Catalogue navigation
To access the catalogue navigation, simply swipe from the catalogue search to the left.
Now you can see all your catalogues stored and assigned in your account listed in tiles. By scrolling down you can view all your catalogues. To call up a catalogue, simply tap on it. If it is an internal catalog and no external catalog (like OCI or cXML) you can navigate to the articles in a category by simply tapping on the respective category. |

Use external shops (OCI & cXML)
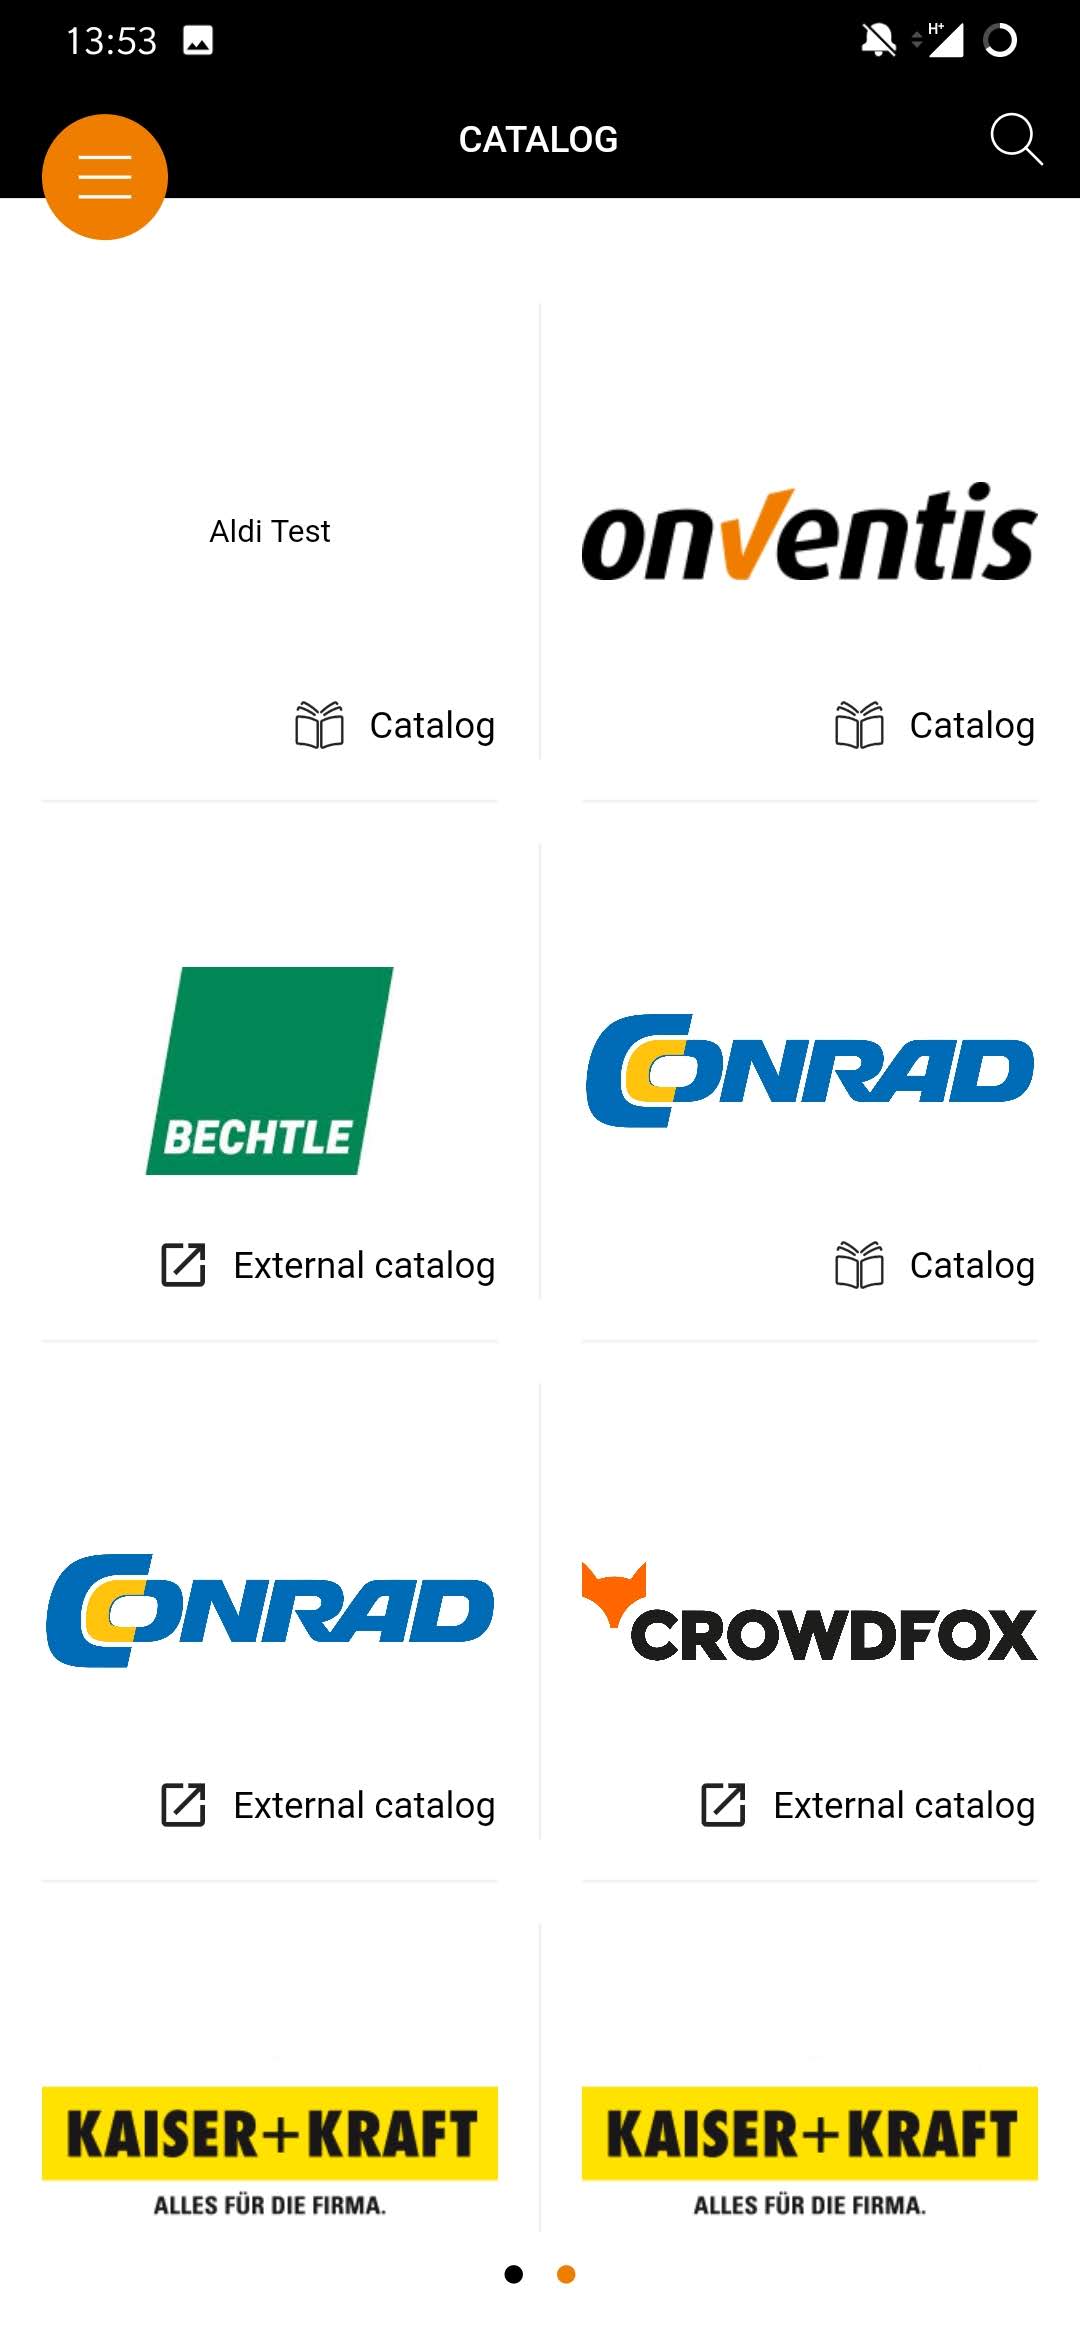

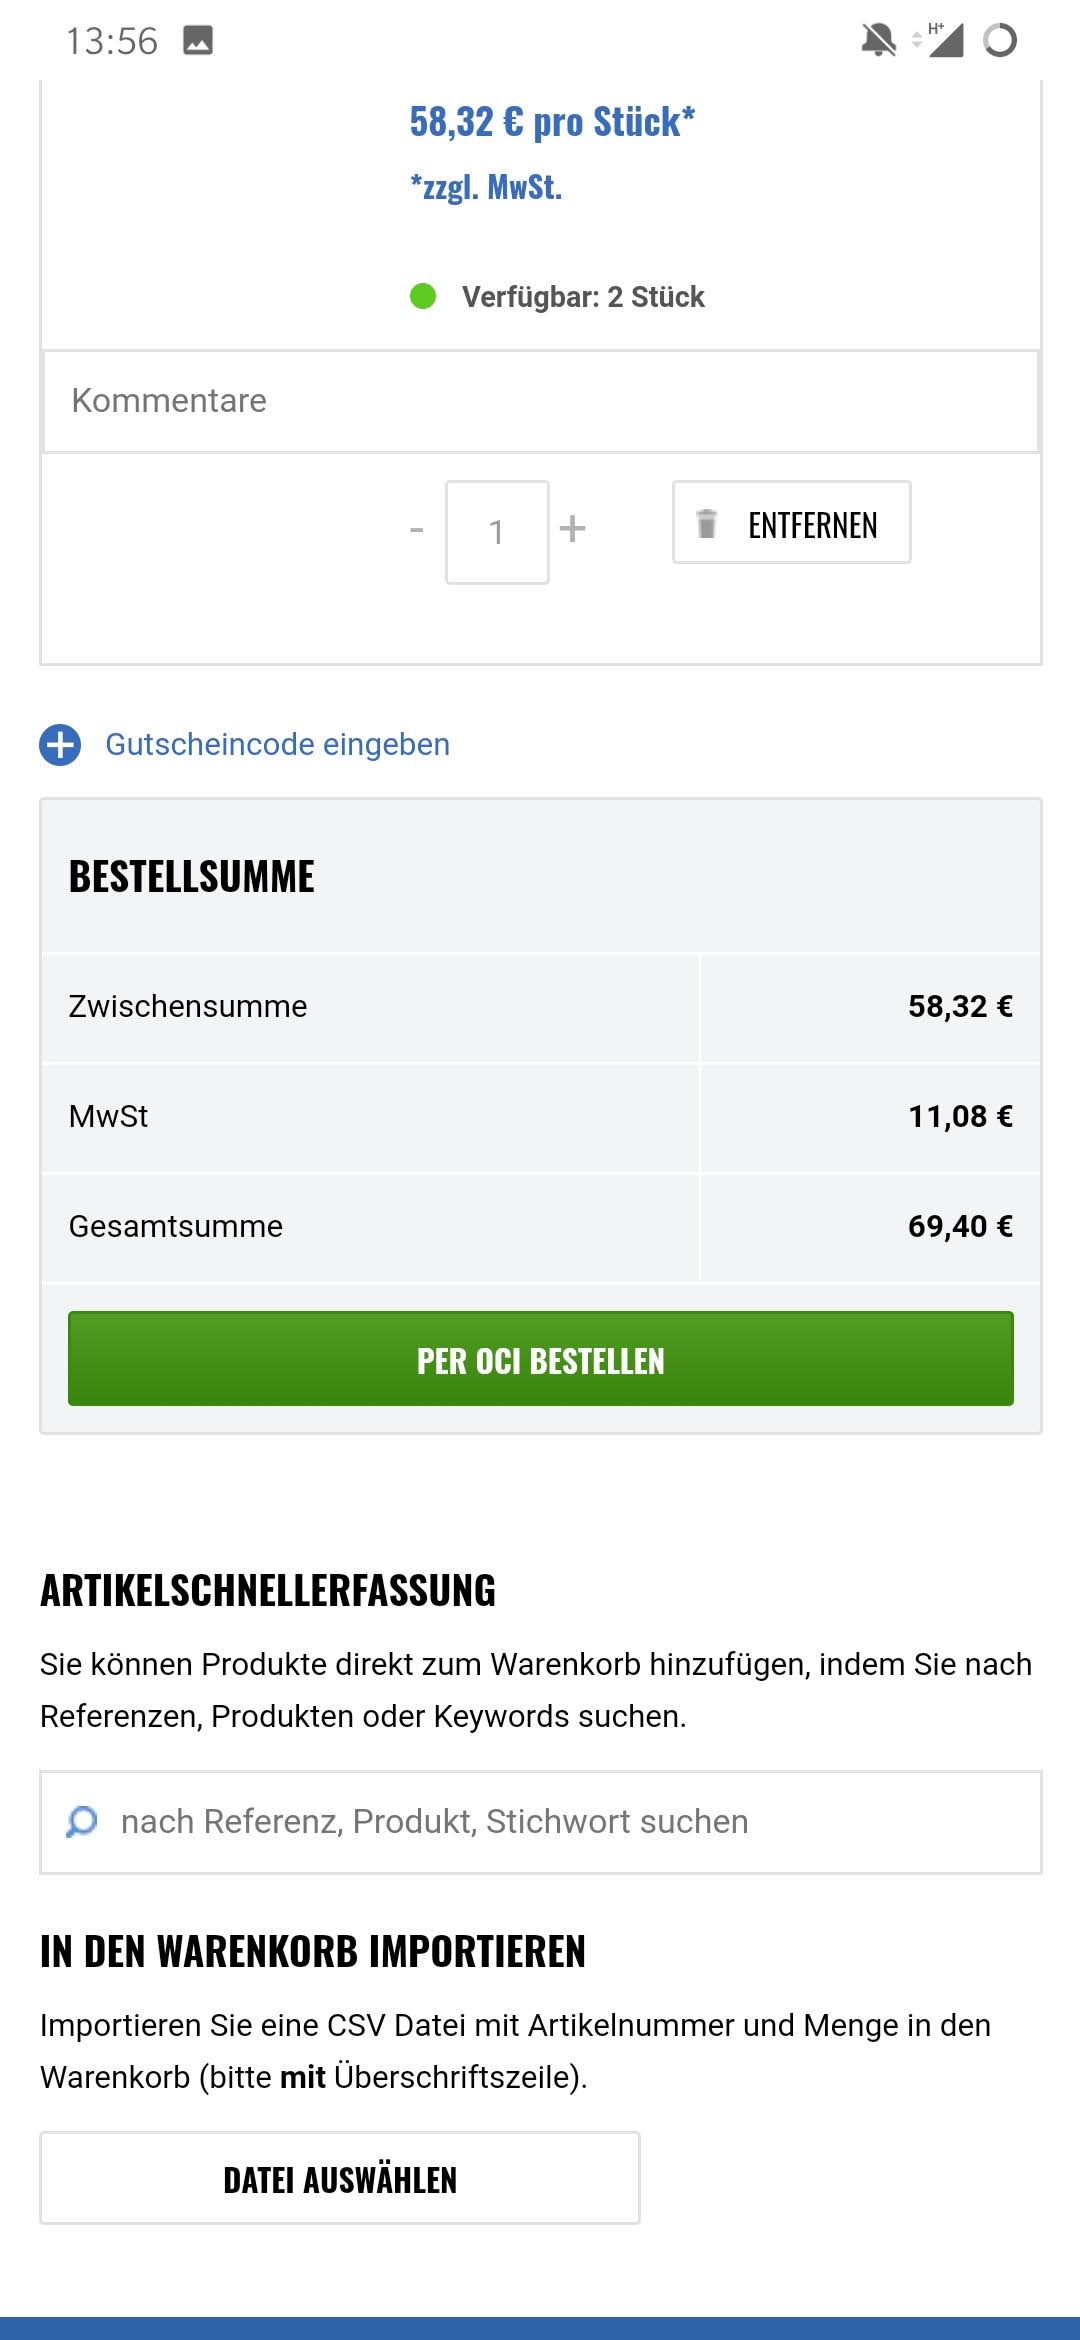
| OCI & cXML
You can also call up your OCI and cXML catalog via the mobile app. To do this, go to the overview of your catalogues. You can recognize an external catalog by the button
. The selected catalogue will be opened in your mobile browser. Select the desired products and transfer the shopping basket with a click to the shopping basket conclusion of the external shop. The shopping cart will be transferred to the Onventis App (confirm this in the pop-up window when transferring the shopping cart). |
Retrieve article information

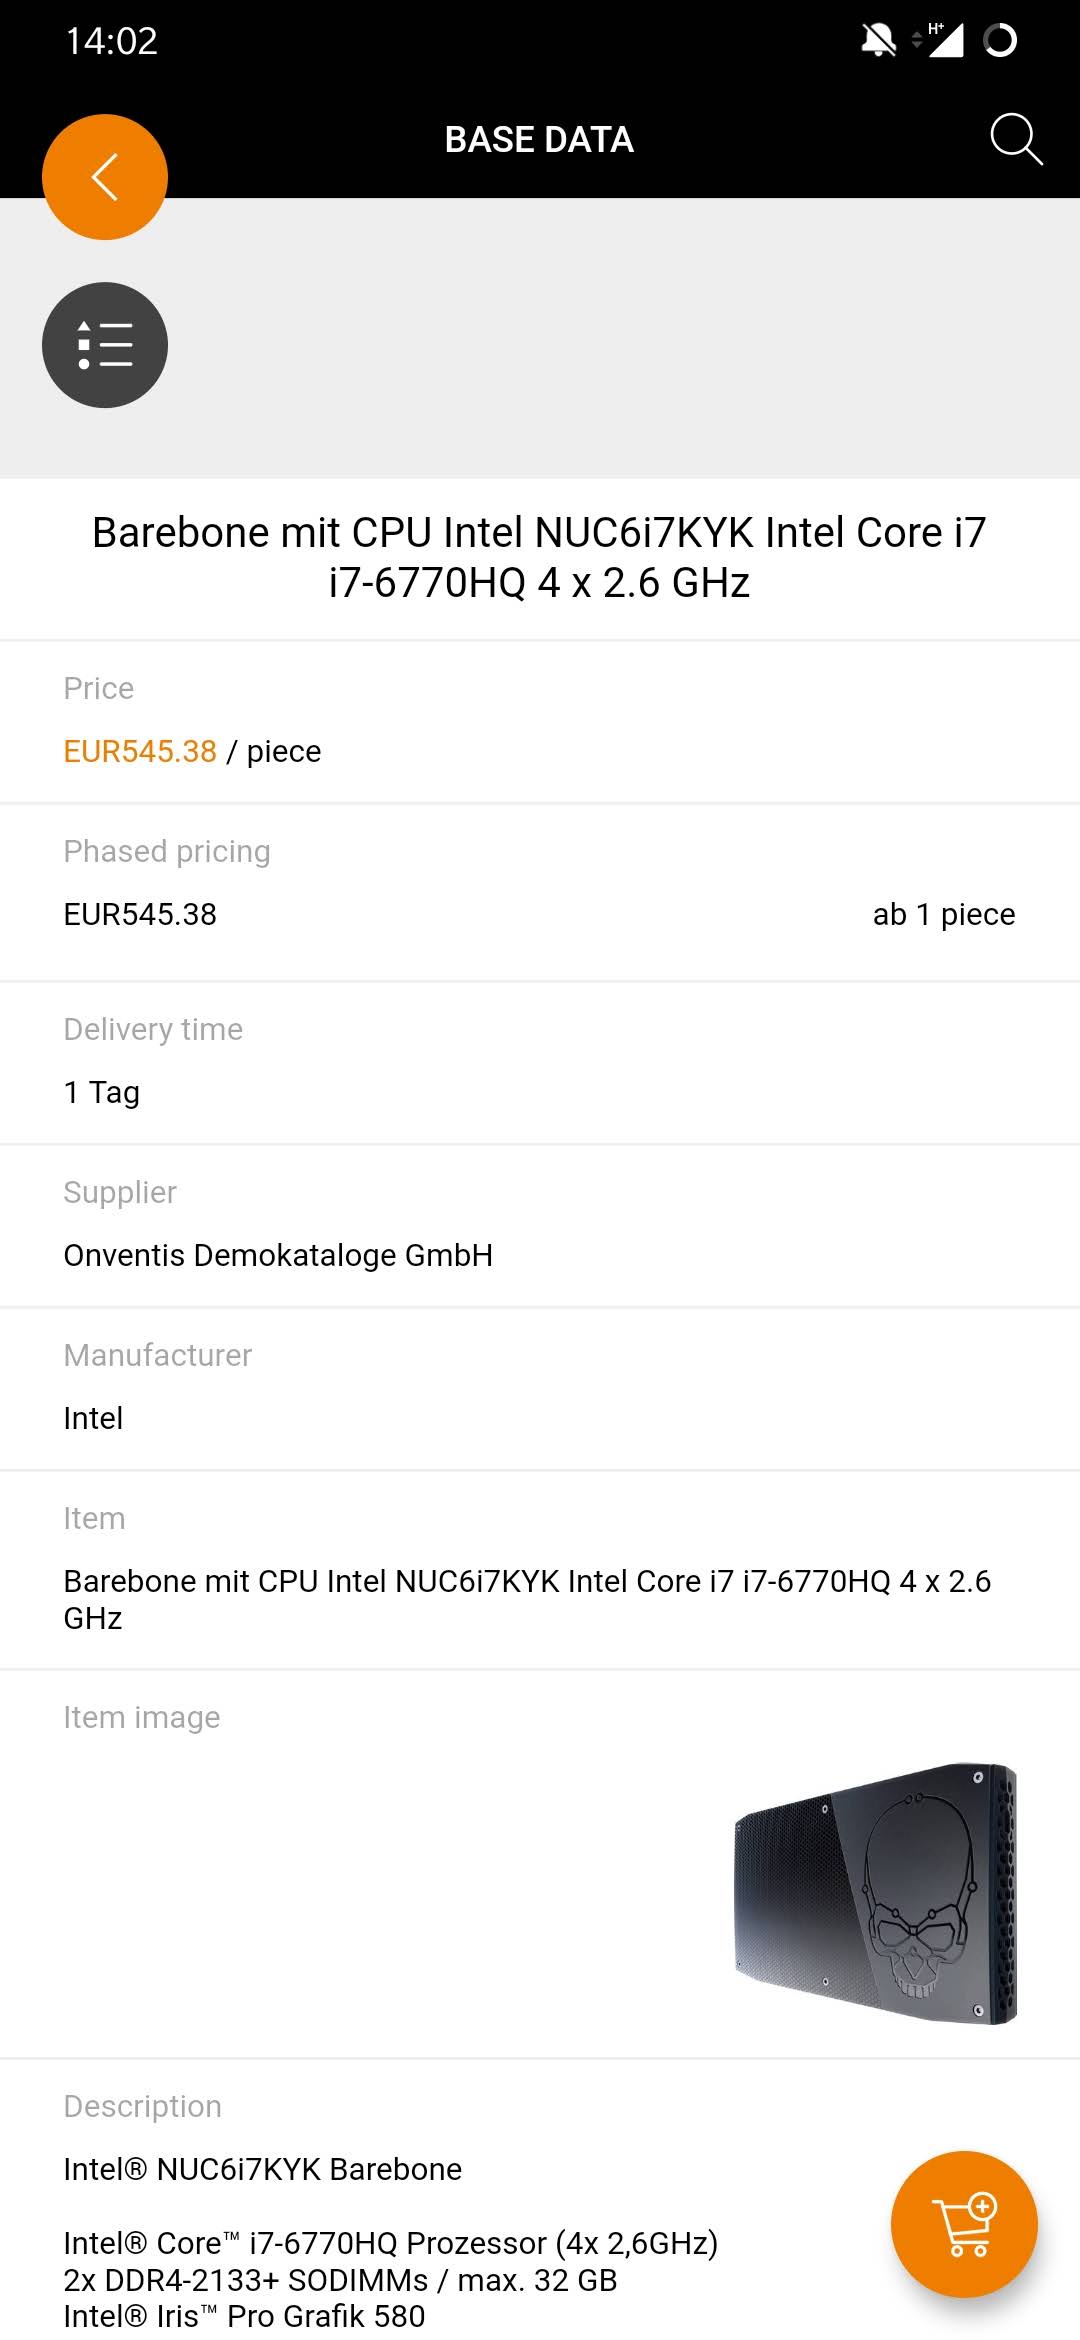
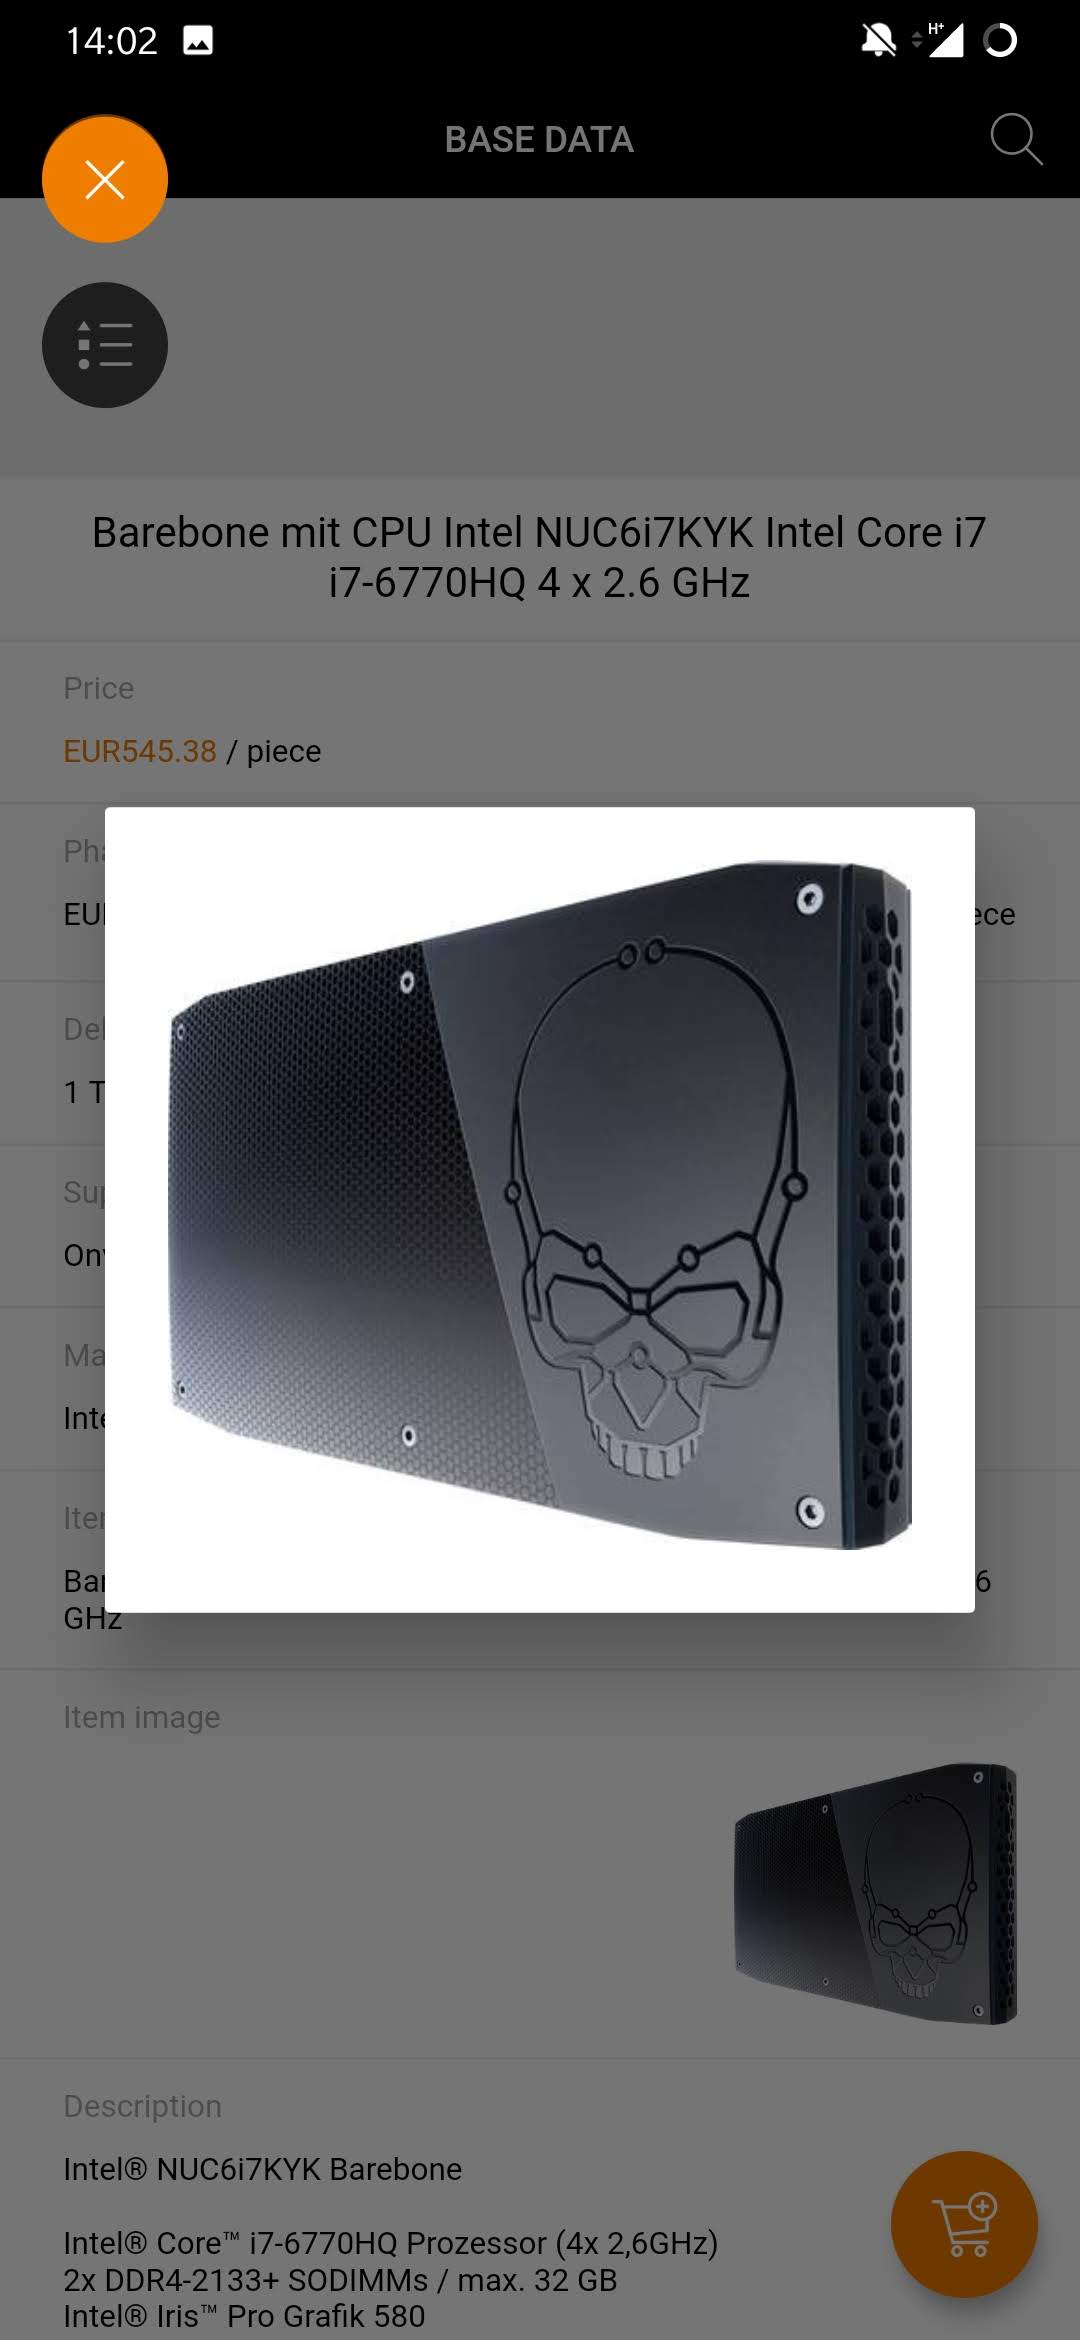
| Retrieve article information
The article list gives you an overview of all products and all relevant information in a compact and clear way. If you would like to learn more about a particular item in your list, simply tap on the item in question. The relevant information is then displayed. With a simple click on the photo in the item details you can enlarge it with a simple tap. You can close the enlarged view by clicking |
 or by simply clicking next to the image.
Add item to shopping cart
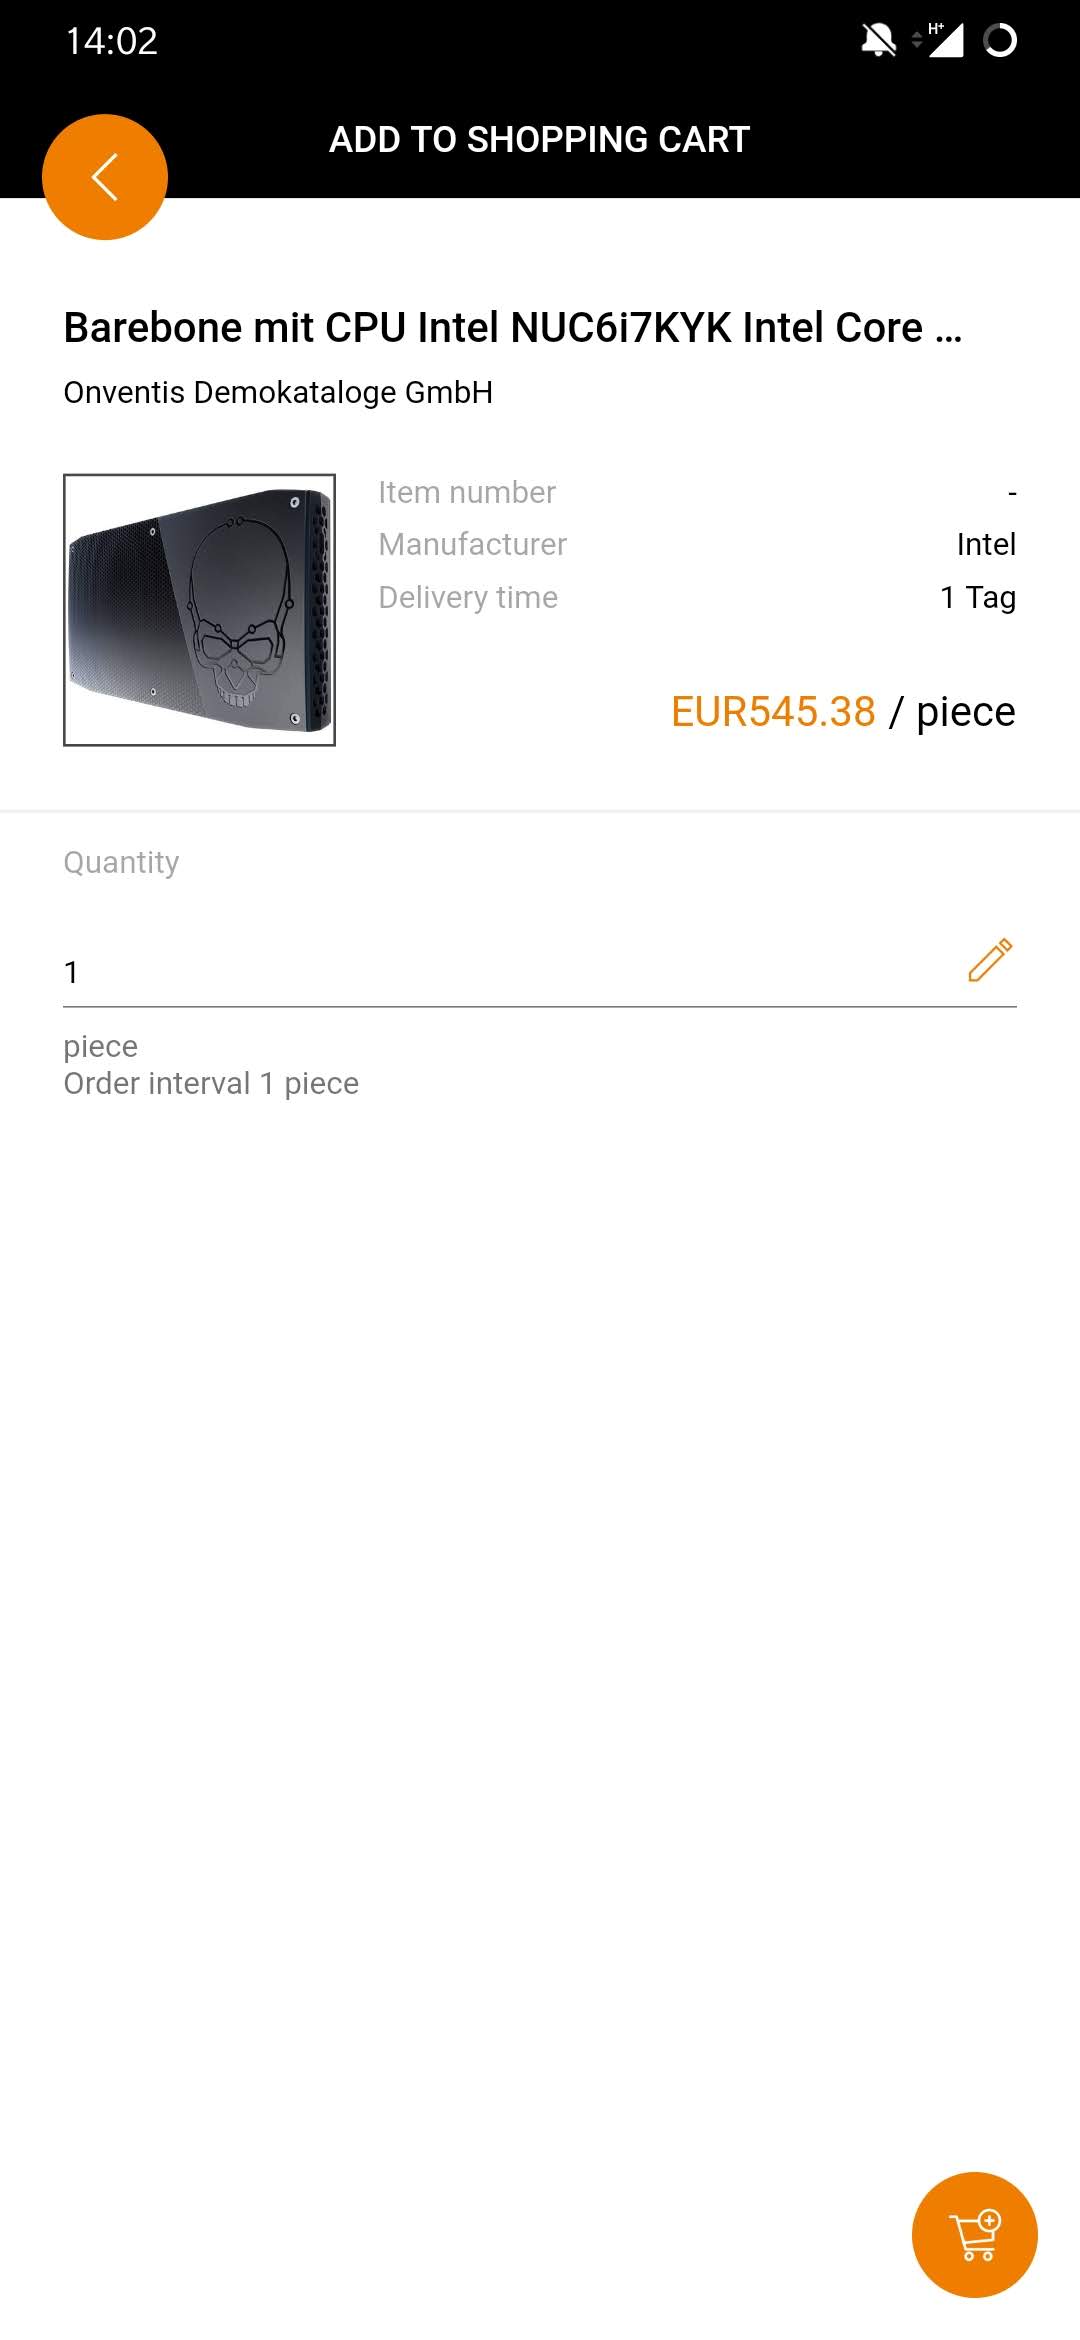
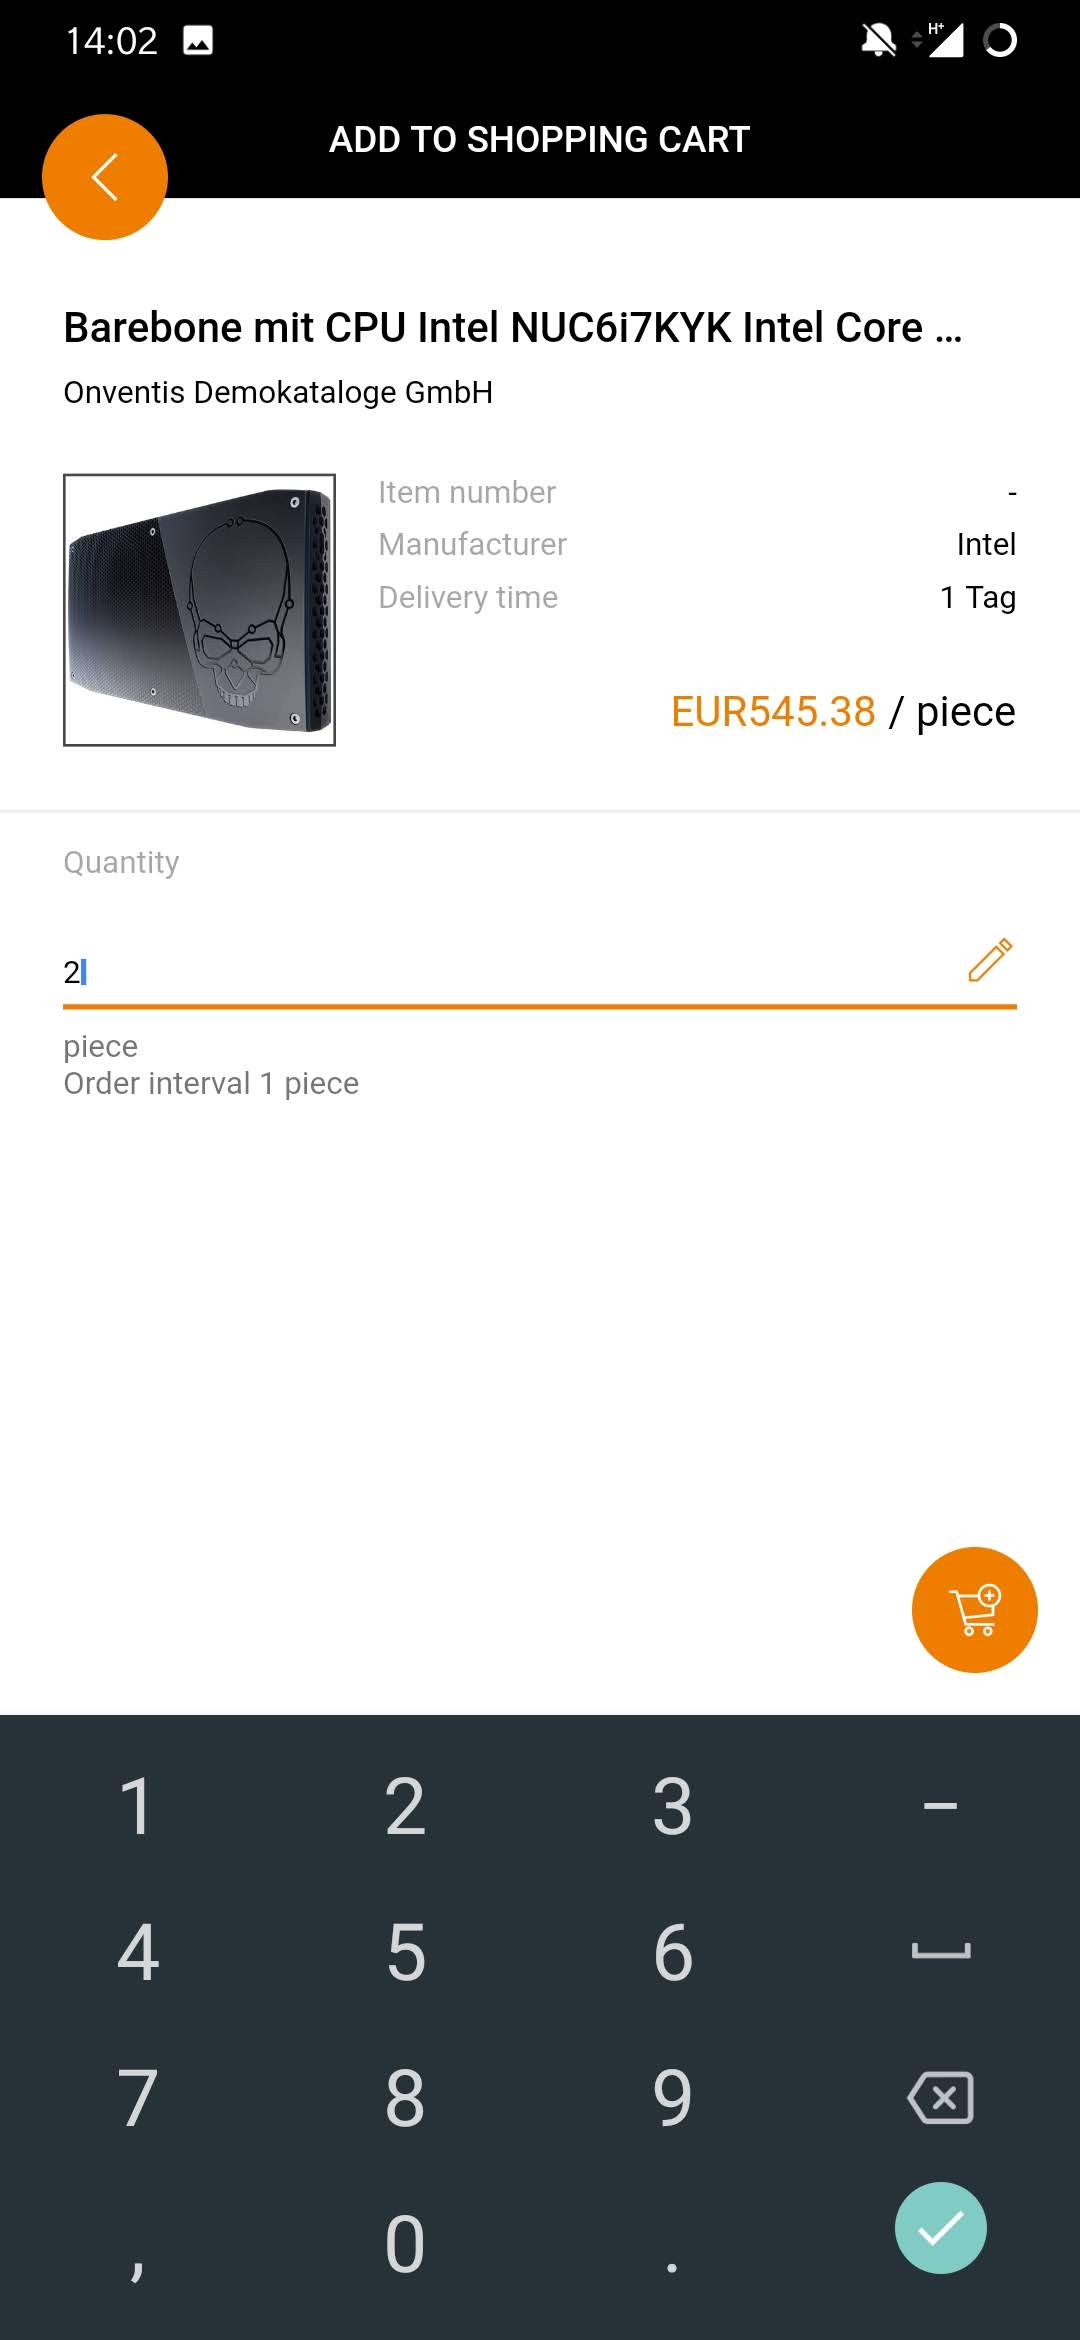
| Add article to shopping cart
You can easily add items from the list by moving a swipe to the left and tapping on the displayed icon in the shopping cart
. Alternatively, you can also tap
in item detail view. In the following step you enter the desired quantity of the article and confirm the quantity selection with a click on
. |


Mobile shopping cart
Sending the shopping cart quickly and easily
The shopping cart in the Onventis Mobile App makes the completion of your order as clear and efficient as possible. With the shopping cart you send your orders, edit item details, such as the delivery address and account assignment information, and split the shopping cart at any time. You can also use the ad hoc address and benefit from the high-performance auto search function for account assignment processing.
Shopping cart overview

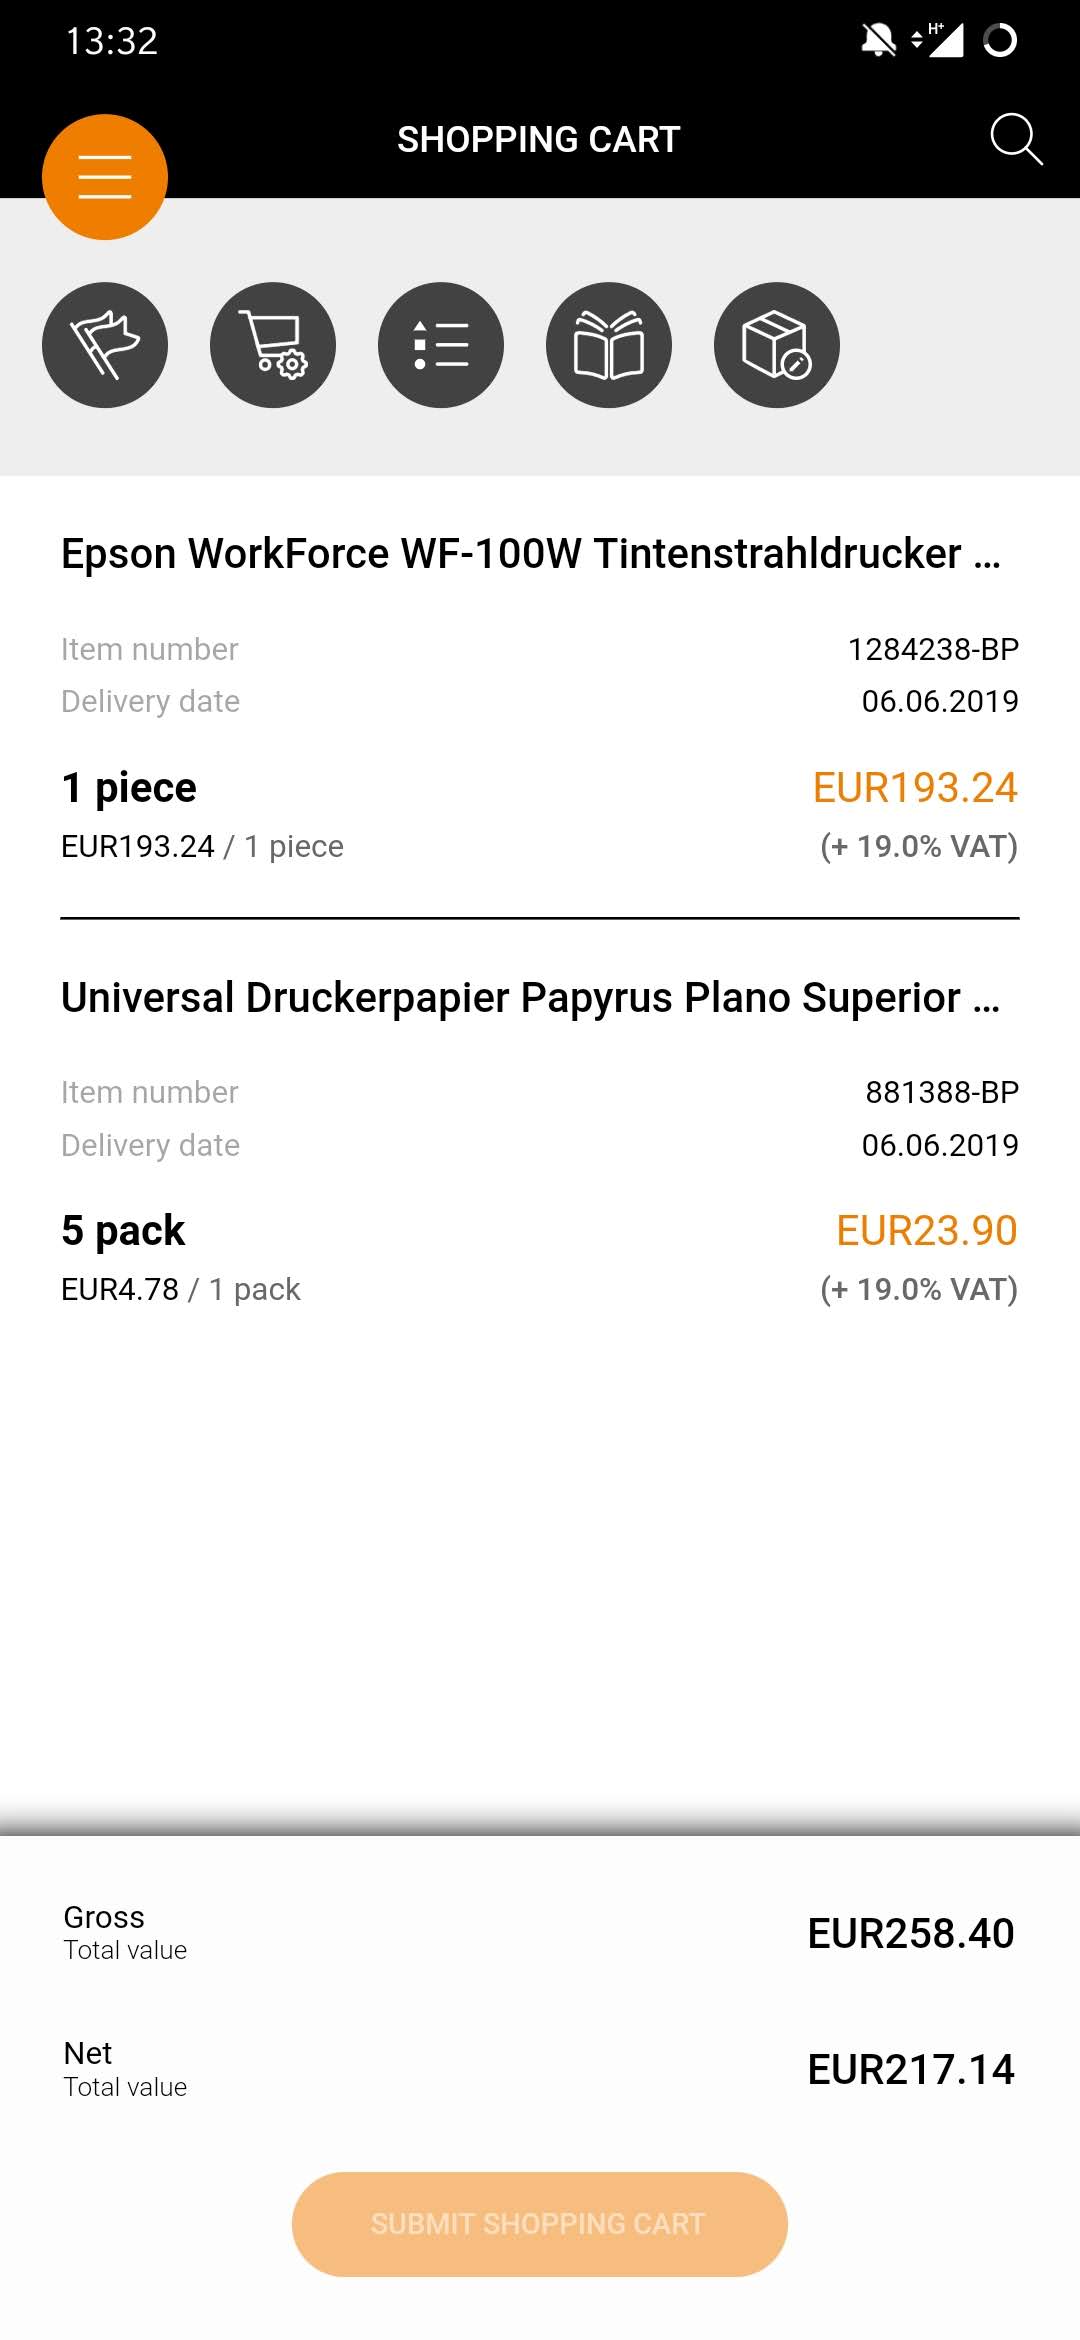
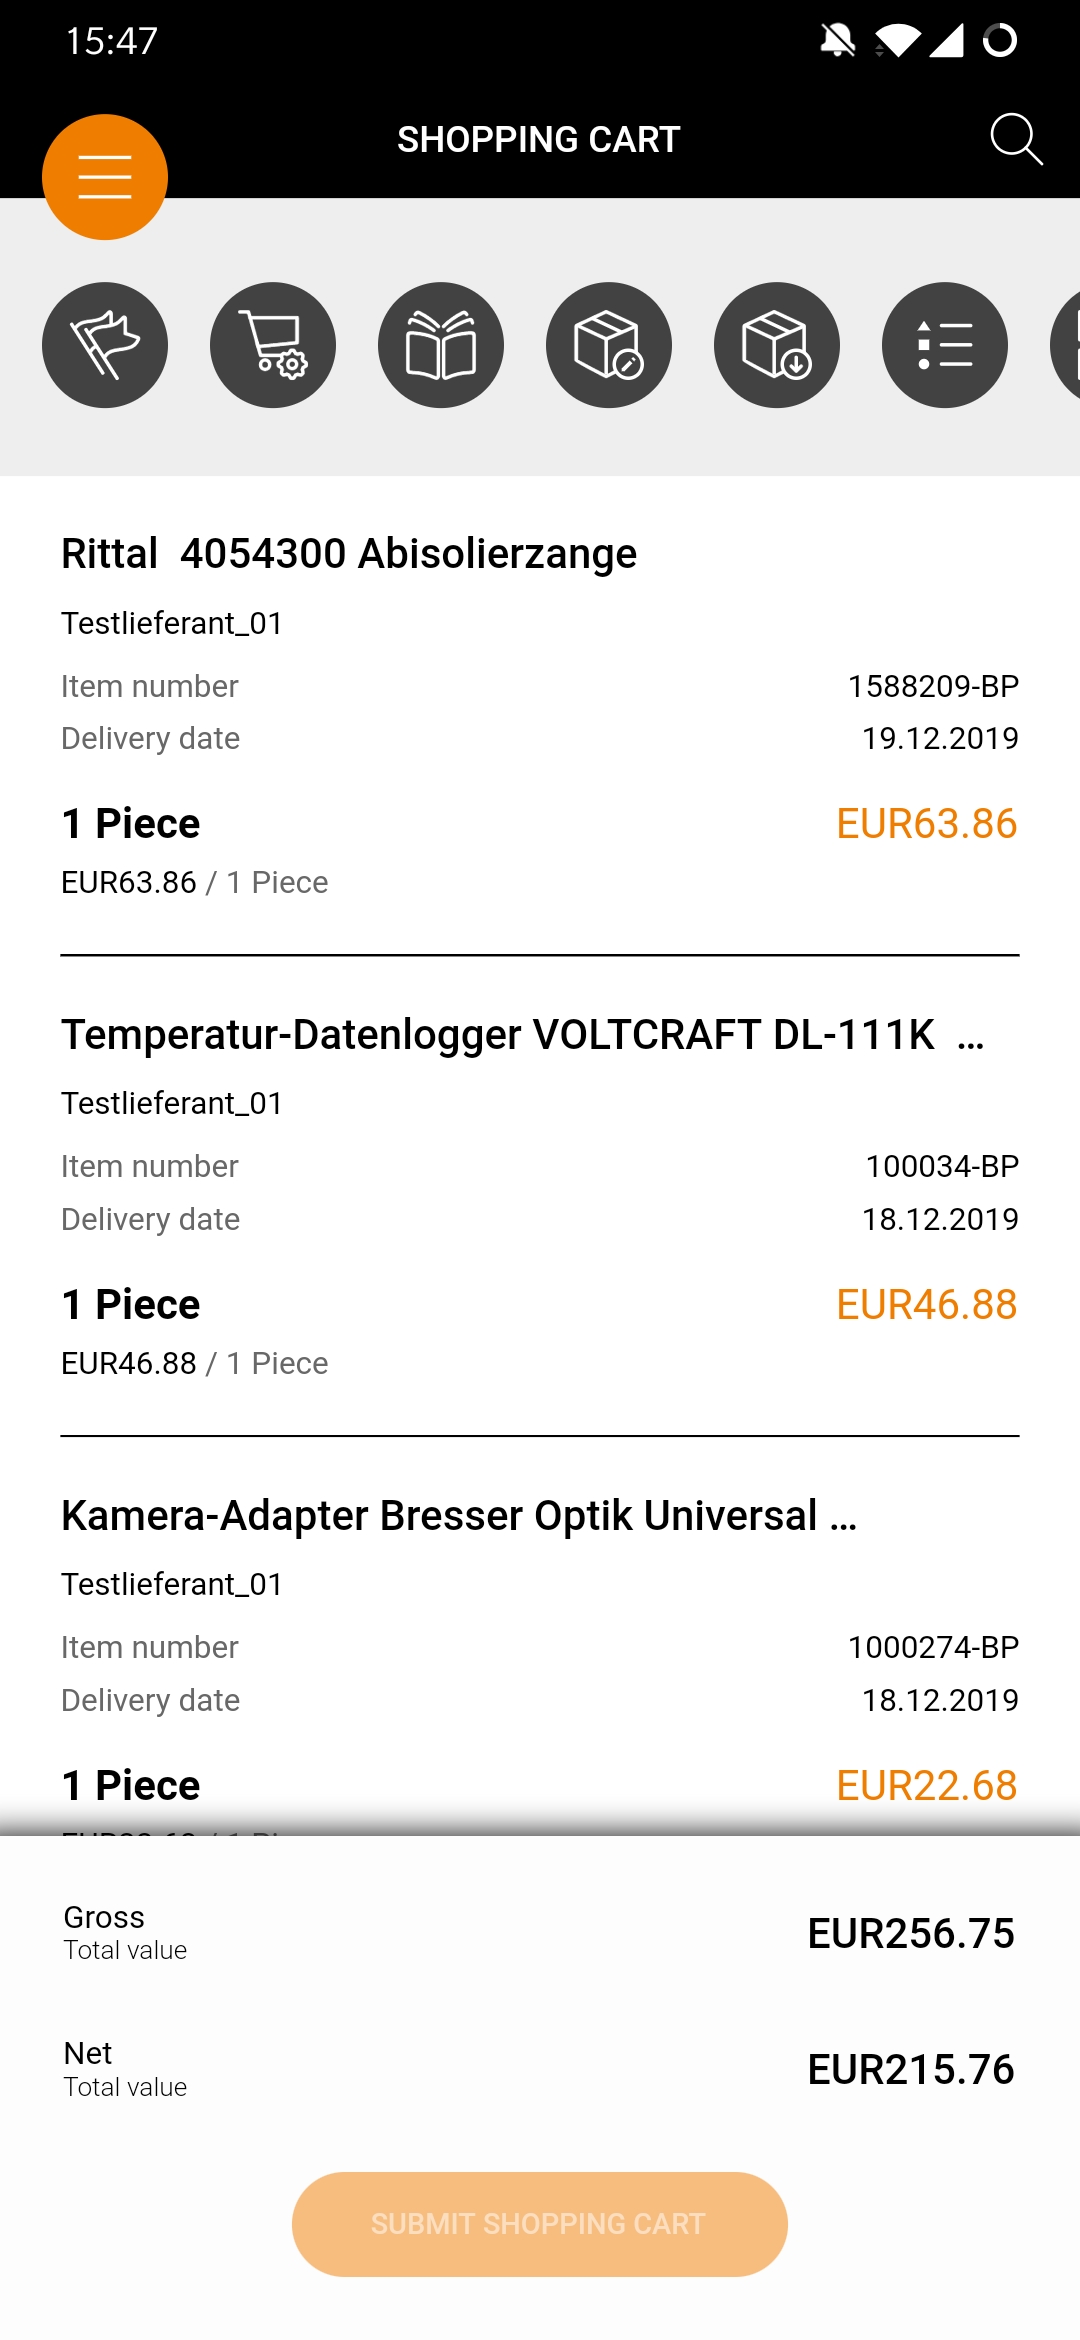
| Shopping cart overview
The shopping cart overview can be reached via the menu where you will find all the products that you have placed in the shopping cart. Each product already provides you with the most important information in the overview. You can also use swipe gestures to recall specific position actions. Further functions can be found in the header of the shopping cart. The shopping cart summary shows you the current value of your shopping cart. Please note: To be able to send a shopping cart, the desired items must be “marked”. |
Actions in shopping cart
Change quantity

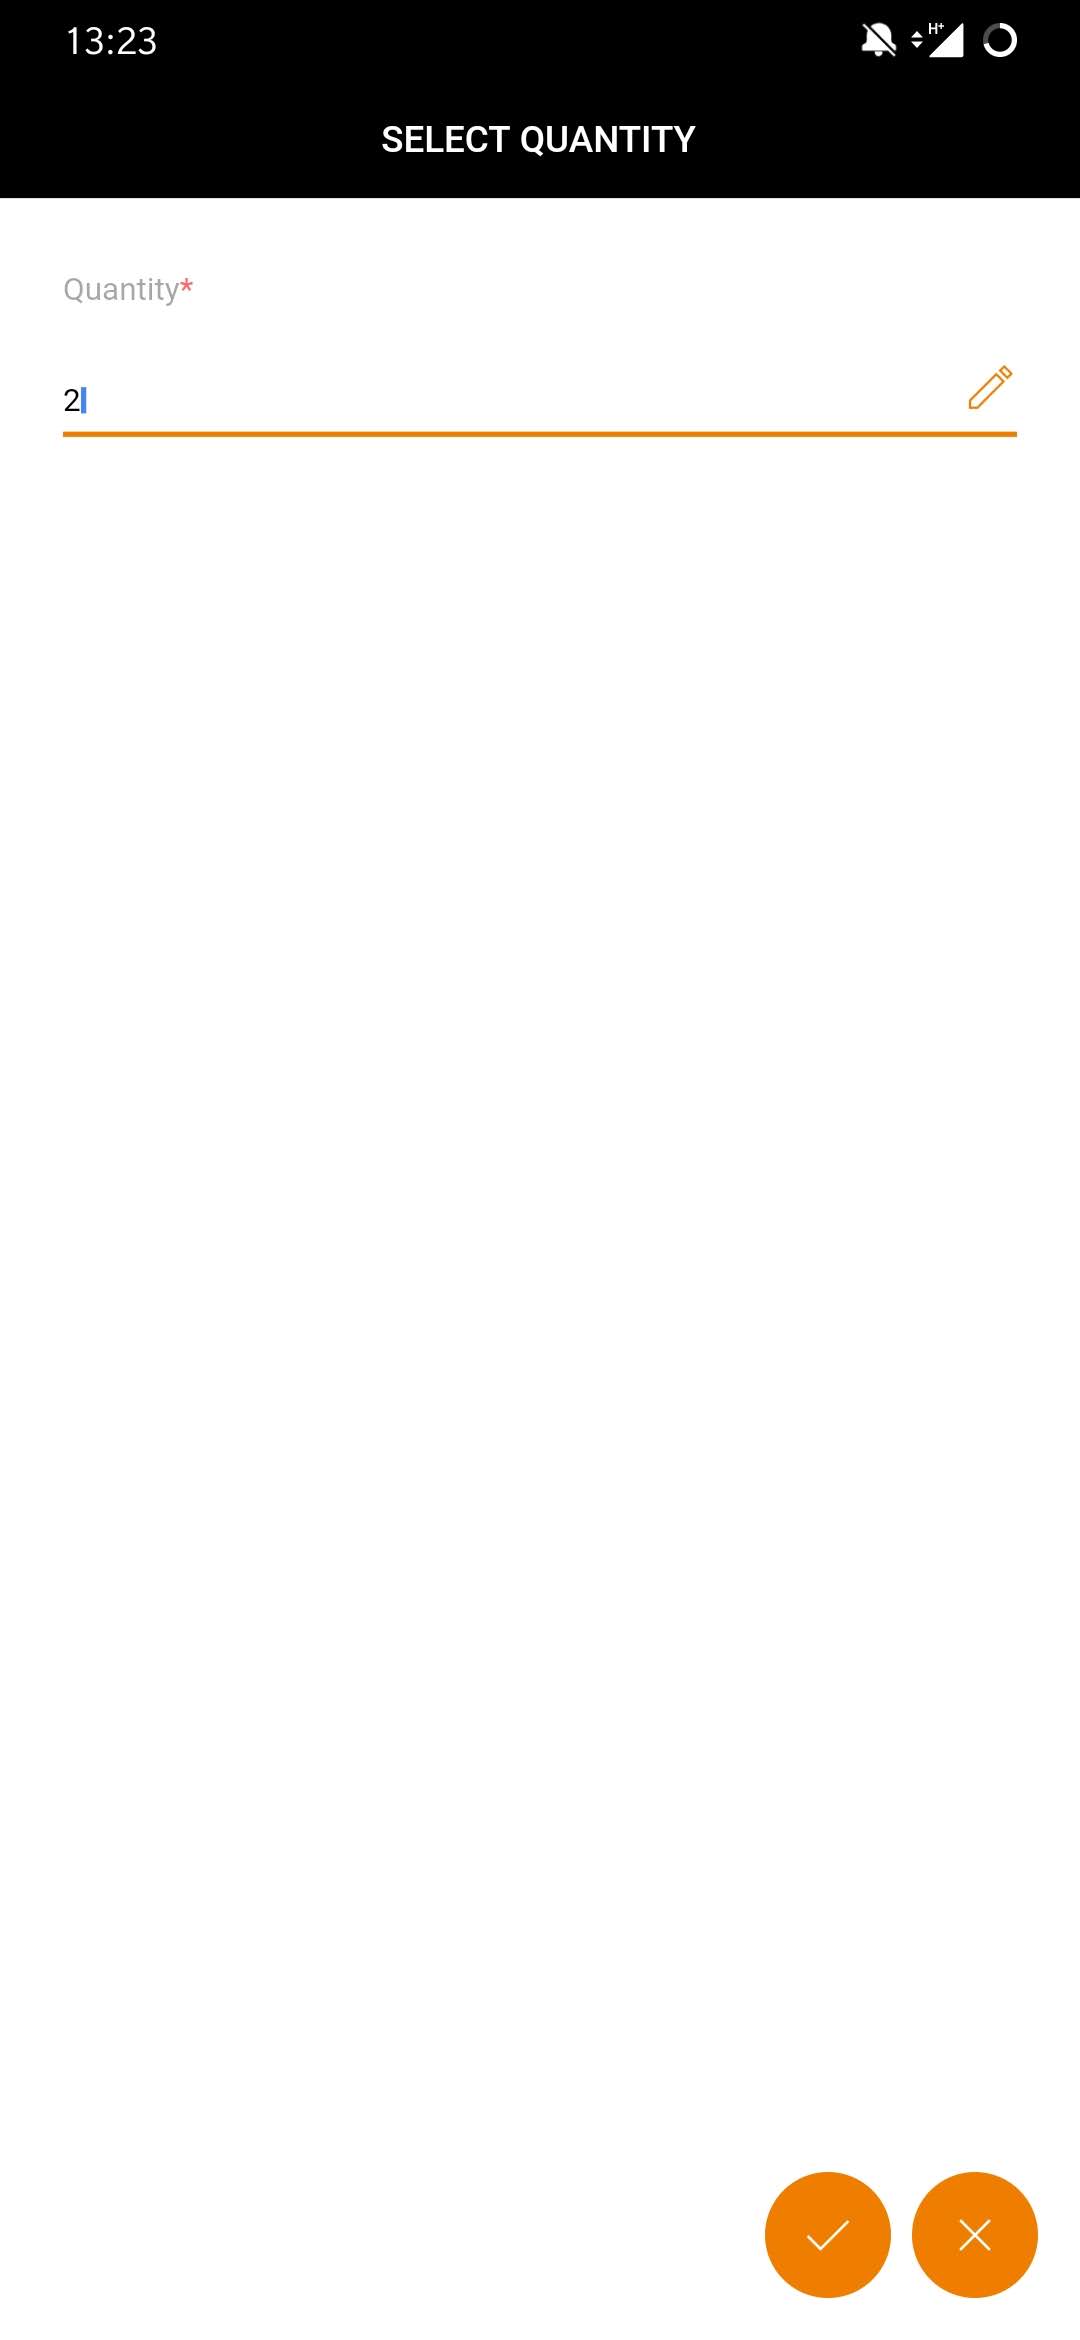
| Change quantity
You can change the quantity per position quickly and easily without having to click into the position. In the first step, swipe to the left. The so-called “Position menu” opens. From the position menu, click on the “Change quantity” icon
. The system allows you to change the quantity. Confirm the new quantity with
, done! |


Copy position

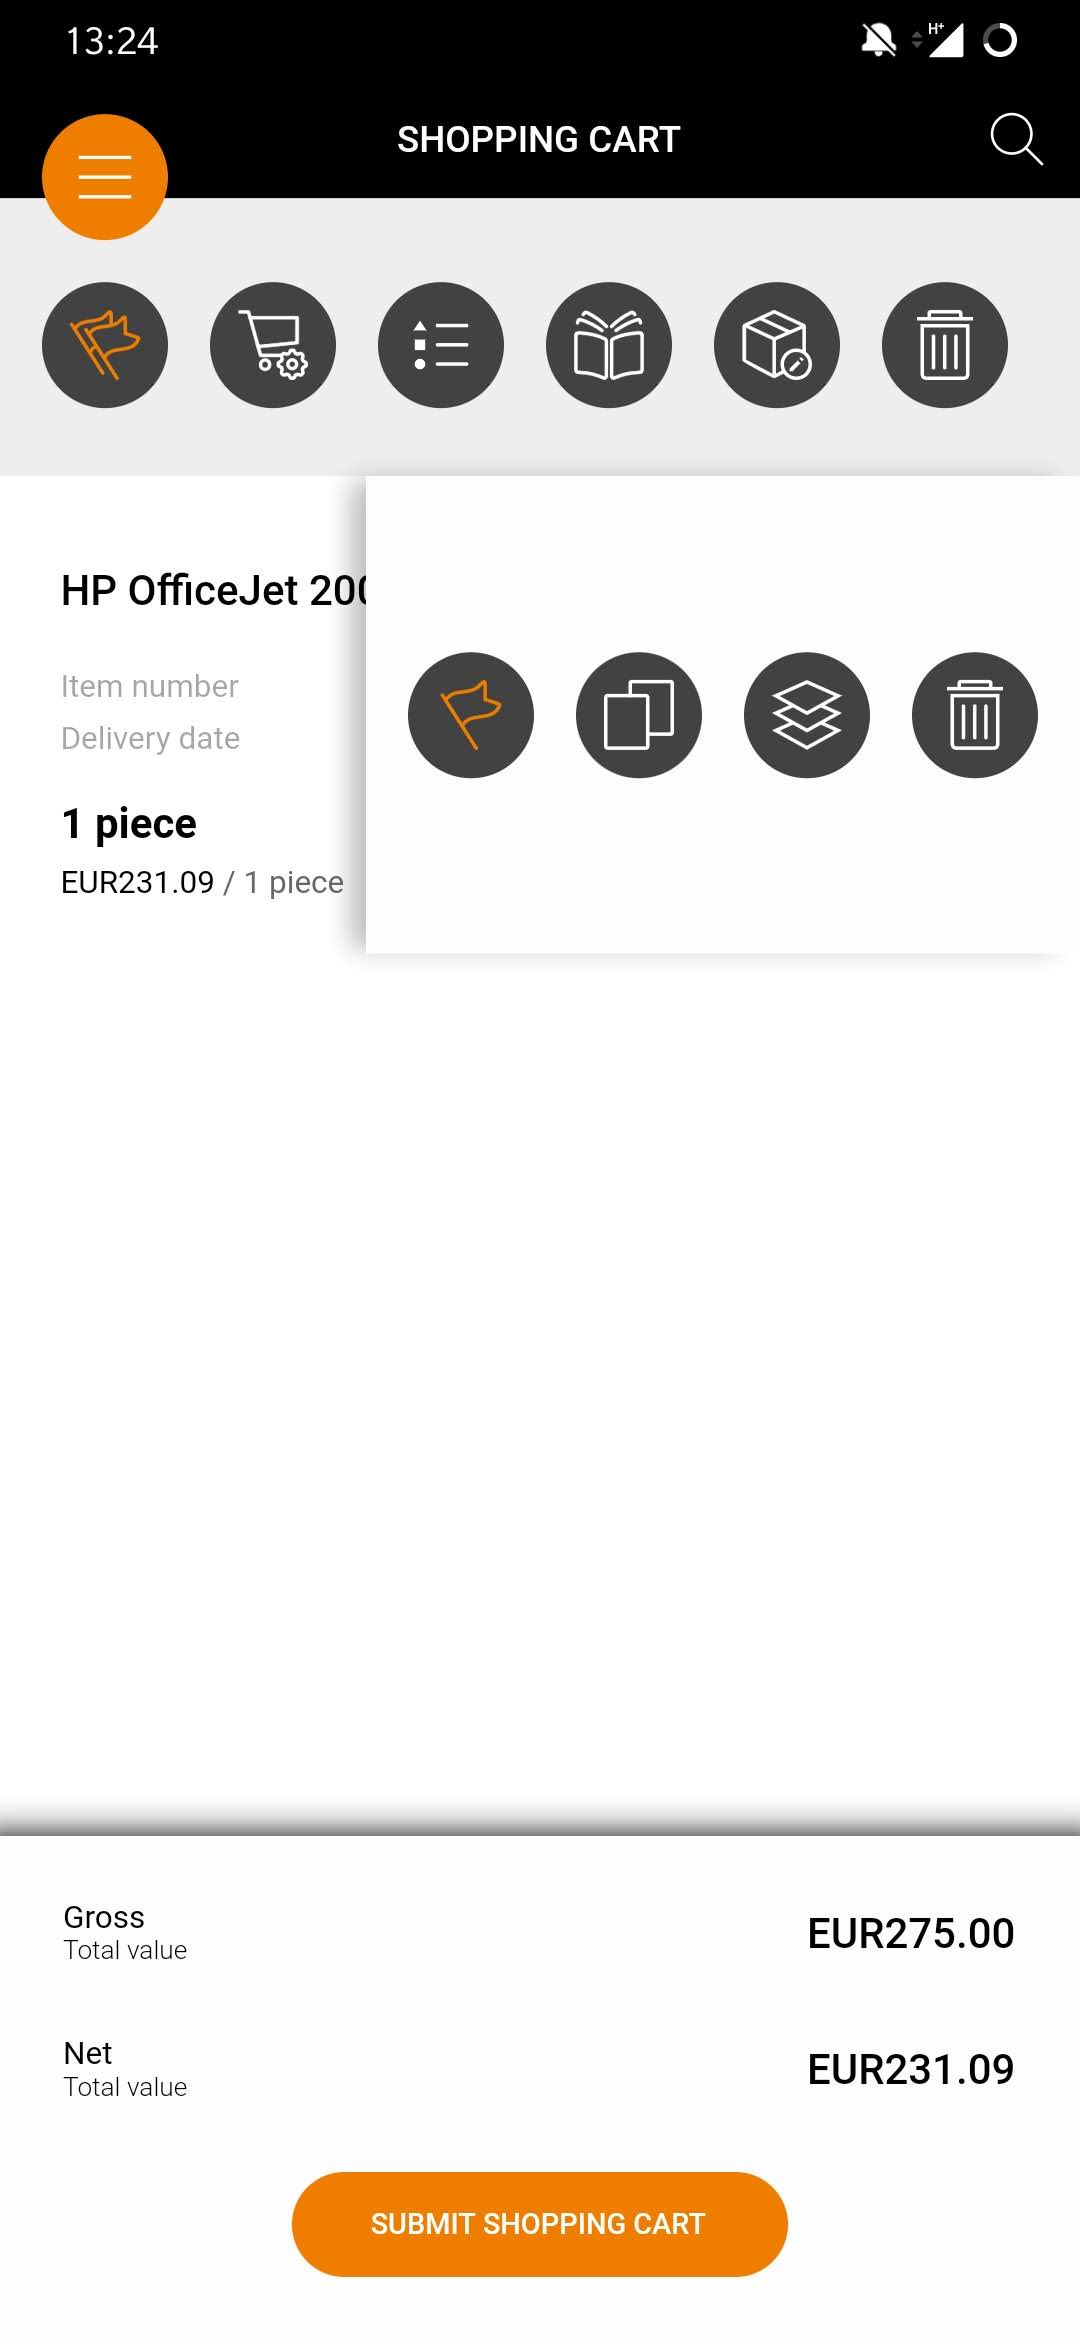
| Copy position
To copy an item, wipe the item to the left in the first step. The so-called “Position menu” opens. Now click on the “Copy position” icon You confirm this action in a second step by clicking on
. The item will be copied and added to your shopping cart as another item. |

 in the position menu.
Delete position

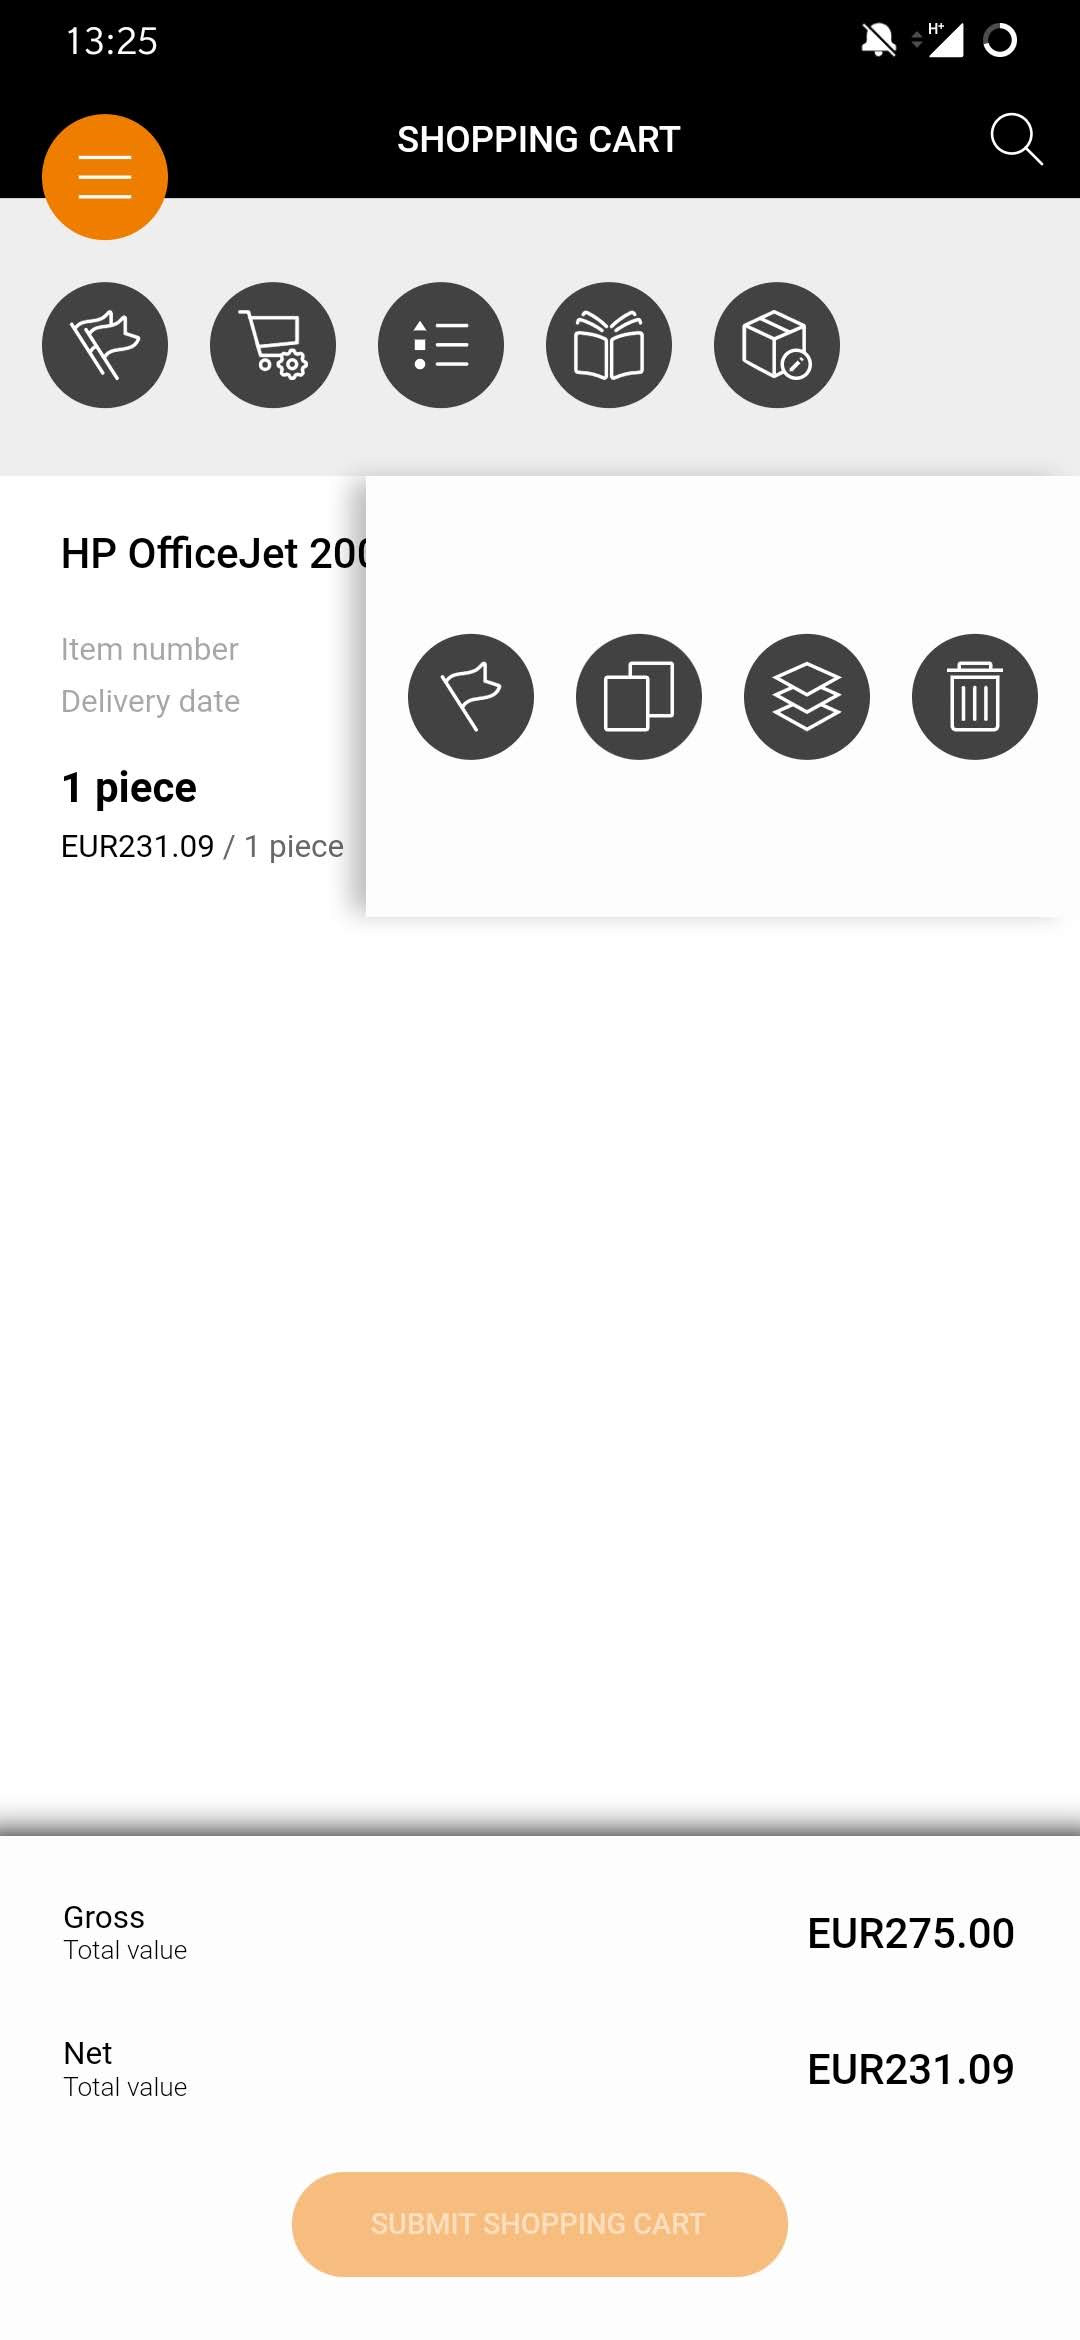
| Delete position
To delete a position, wipe the position to the left in the first step. The so-called “Position menu” opens. Now click on the “Delete position” icon You confirm this action in a second step by clicking on |

 . The item will be deleted from your shopping cart.
Mark position
| Mark position
You can copy any individual item in the shopping cart to add them to your order. The items that you have selected will be sent with the shopping cart. To select a position, wipe the position to the left in the first step. The so-called “Position menu” opens. Now click on the “Mark position” icon
If a position is selected, you can deselect this position by clicking again on |

Mark all positions

| Mark all positions
You can mark all items with a single click and add them to your order and to the “Send shopping cart” action. To do this, simply click on You can also recognize the marking of positions by this icon
|
Delete all positions
| Delete all positions
First mark all items in your shopping cart by clicking on
. Then a delete button appears in the shopping cart header. Click on
. All items have been removed from the shopping cart. |

Adjust shopping cart header data
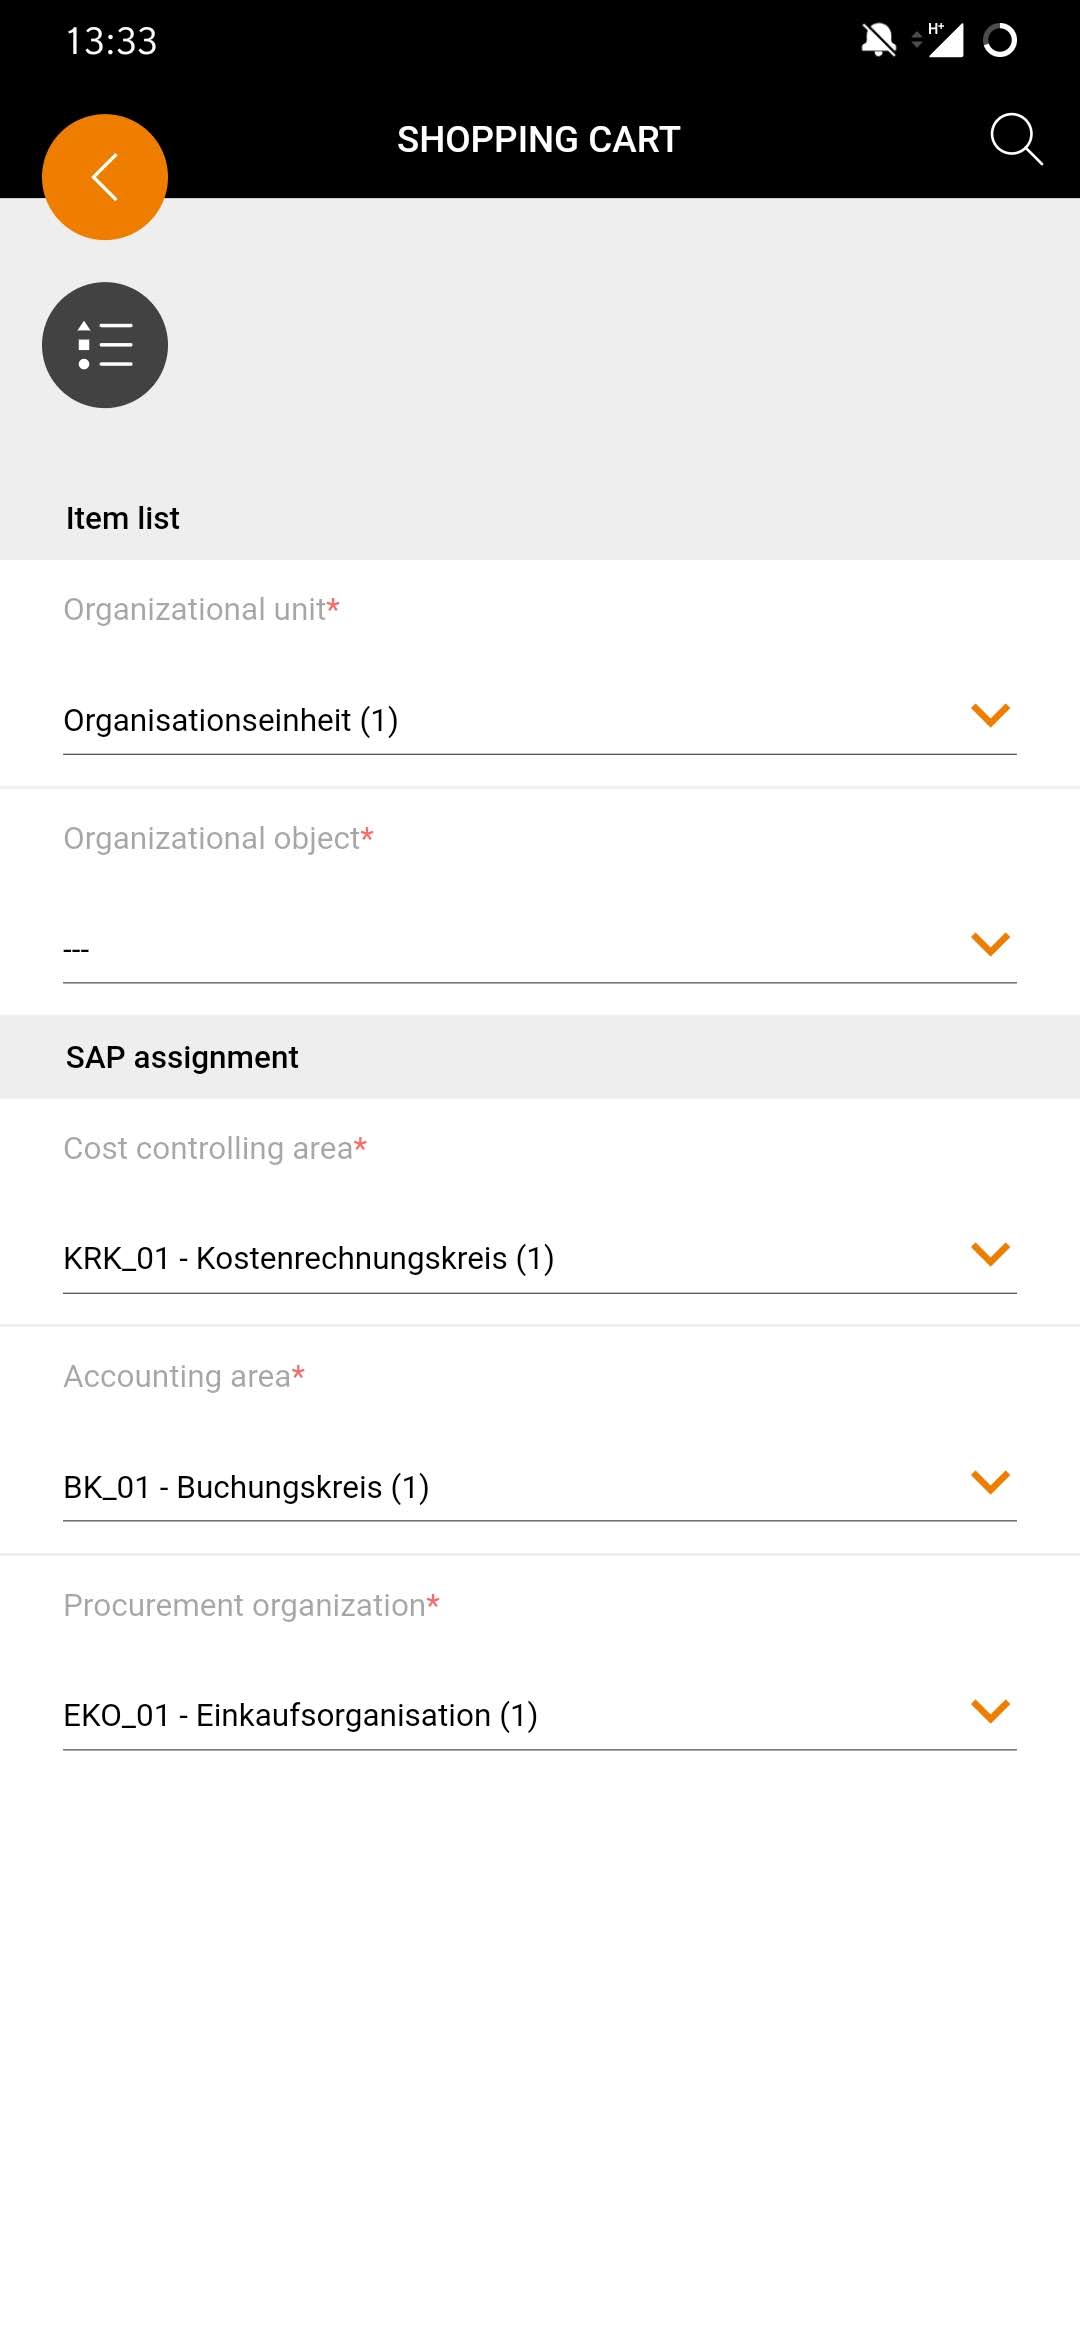
| Adjust shoppig cart header data
In the shopping cart, for example, if you want to change your organizational unit or organizational object, or the controlling area or company code, you can do this easily in the app. To do this, click on
in the shopping cart header. You reach a page in which you can change the header data of the shopping basket. |

Enter user-defined text items

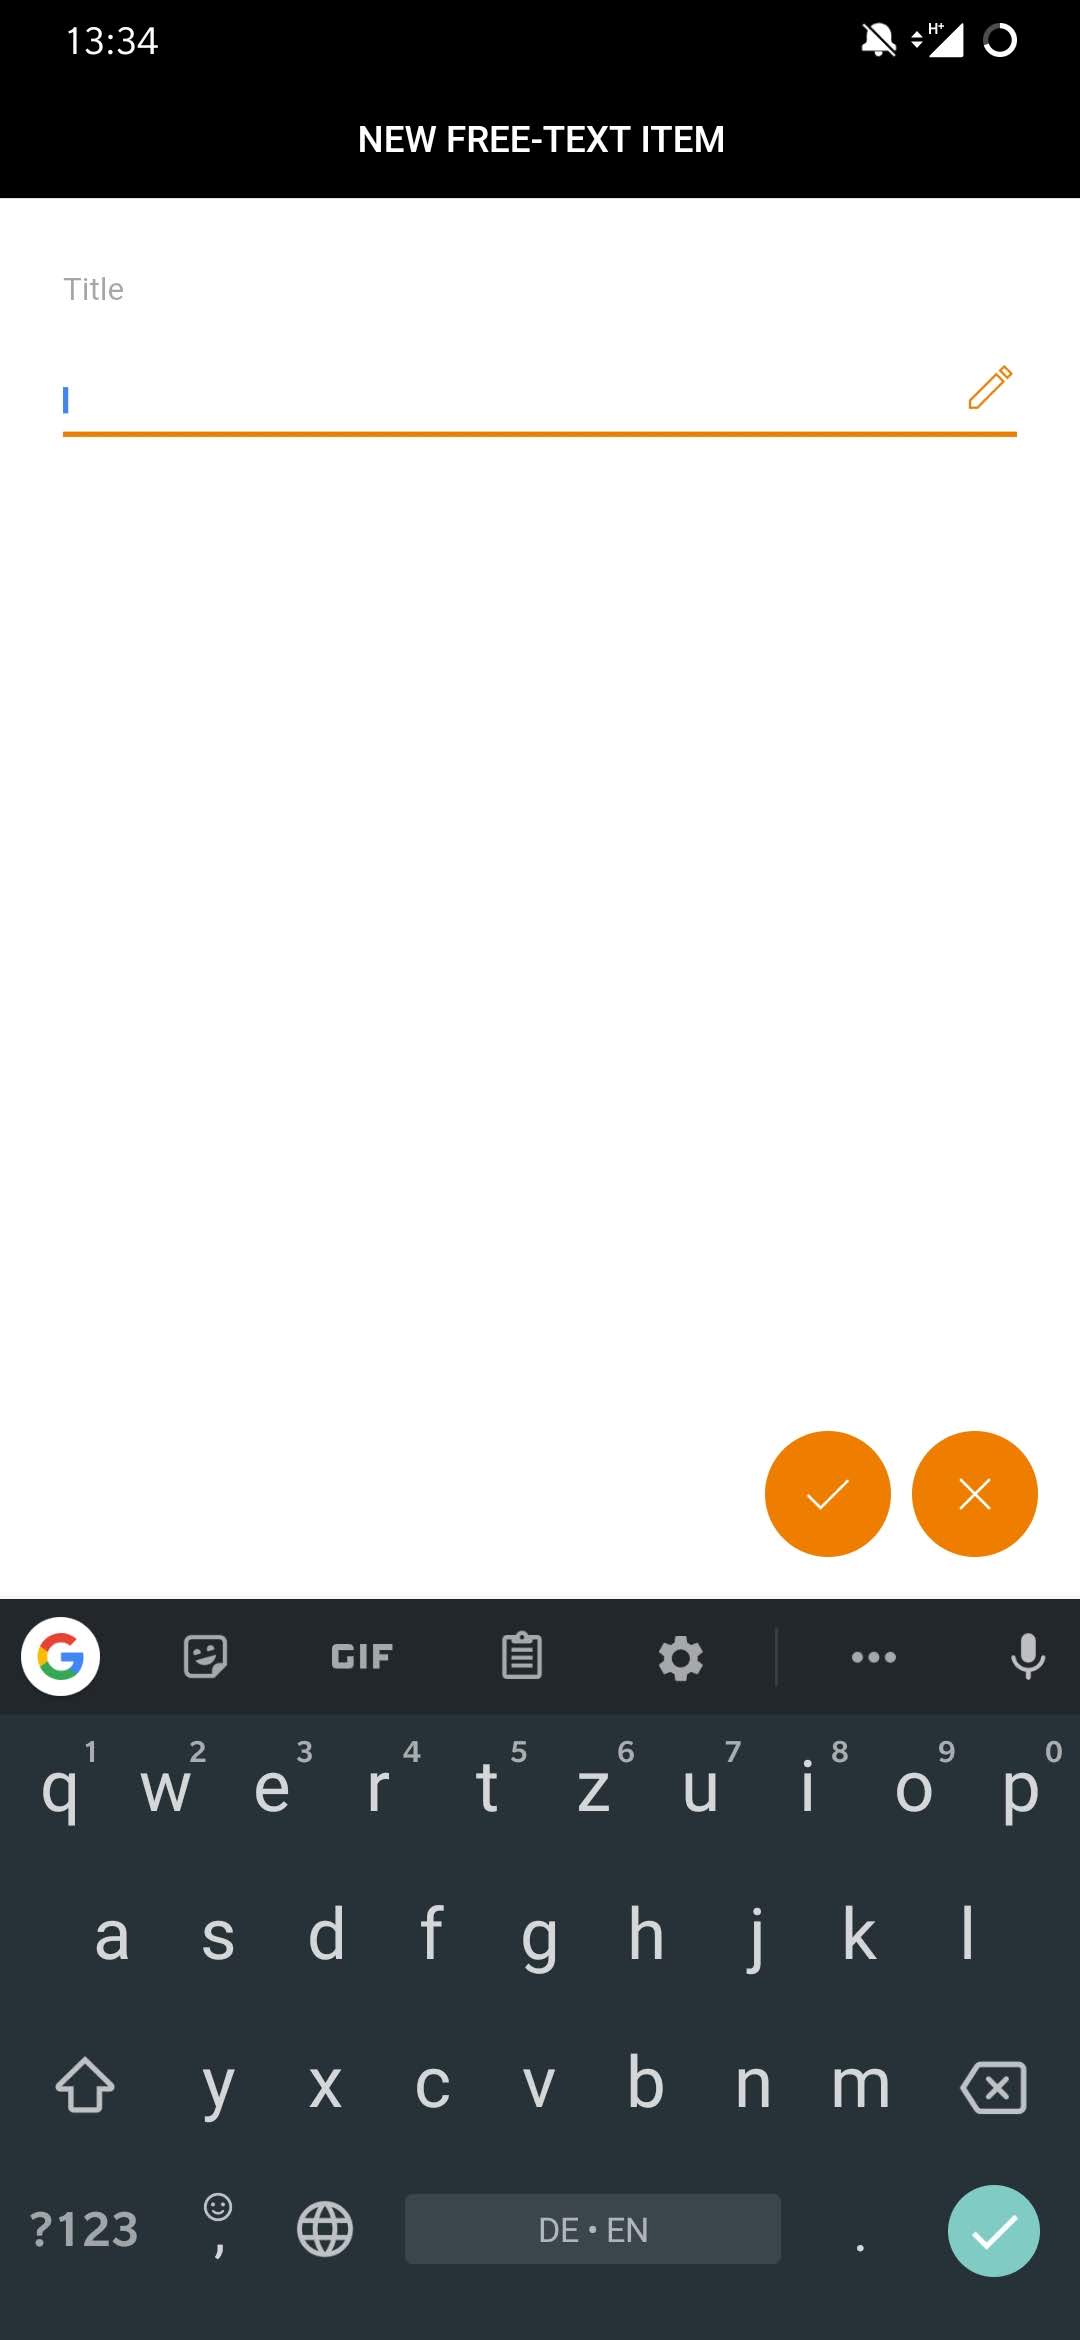
| Enter user-defined text item
You can also enter free text items in the shopping cart of the Onventis App. To do this, click in the shopping cart header on Now enter the title of the free text position and confirm by clicking on |
 .
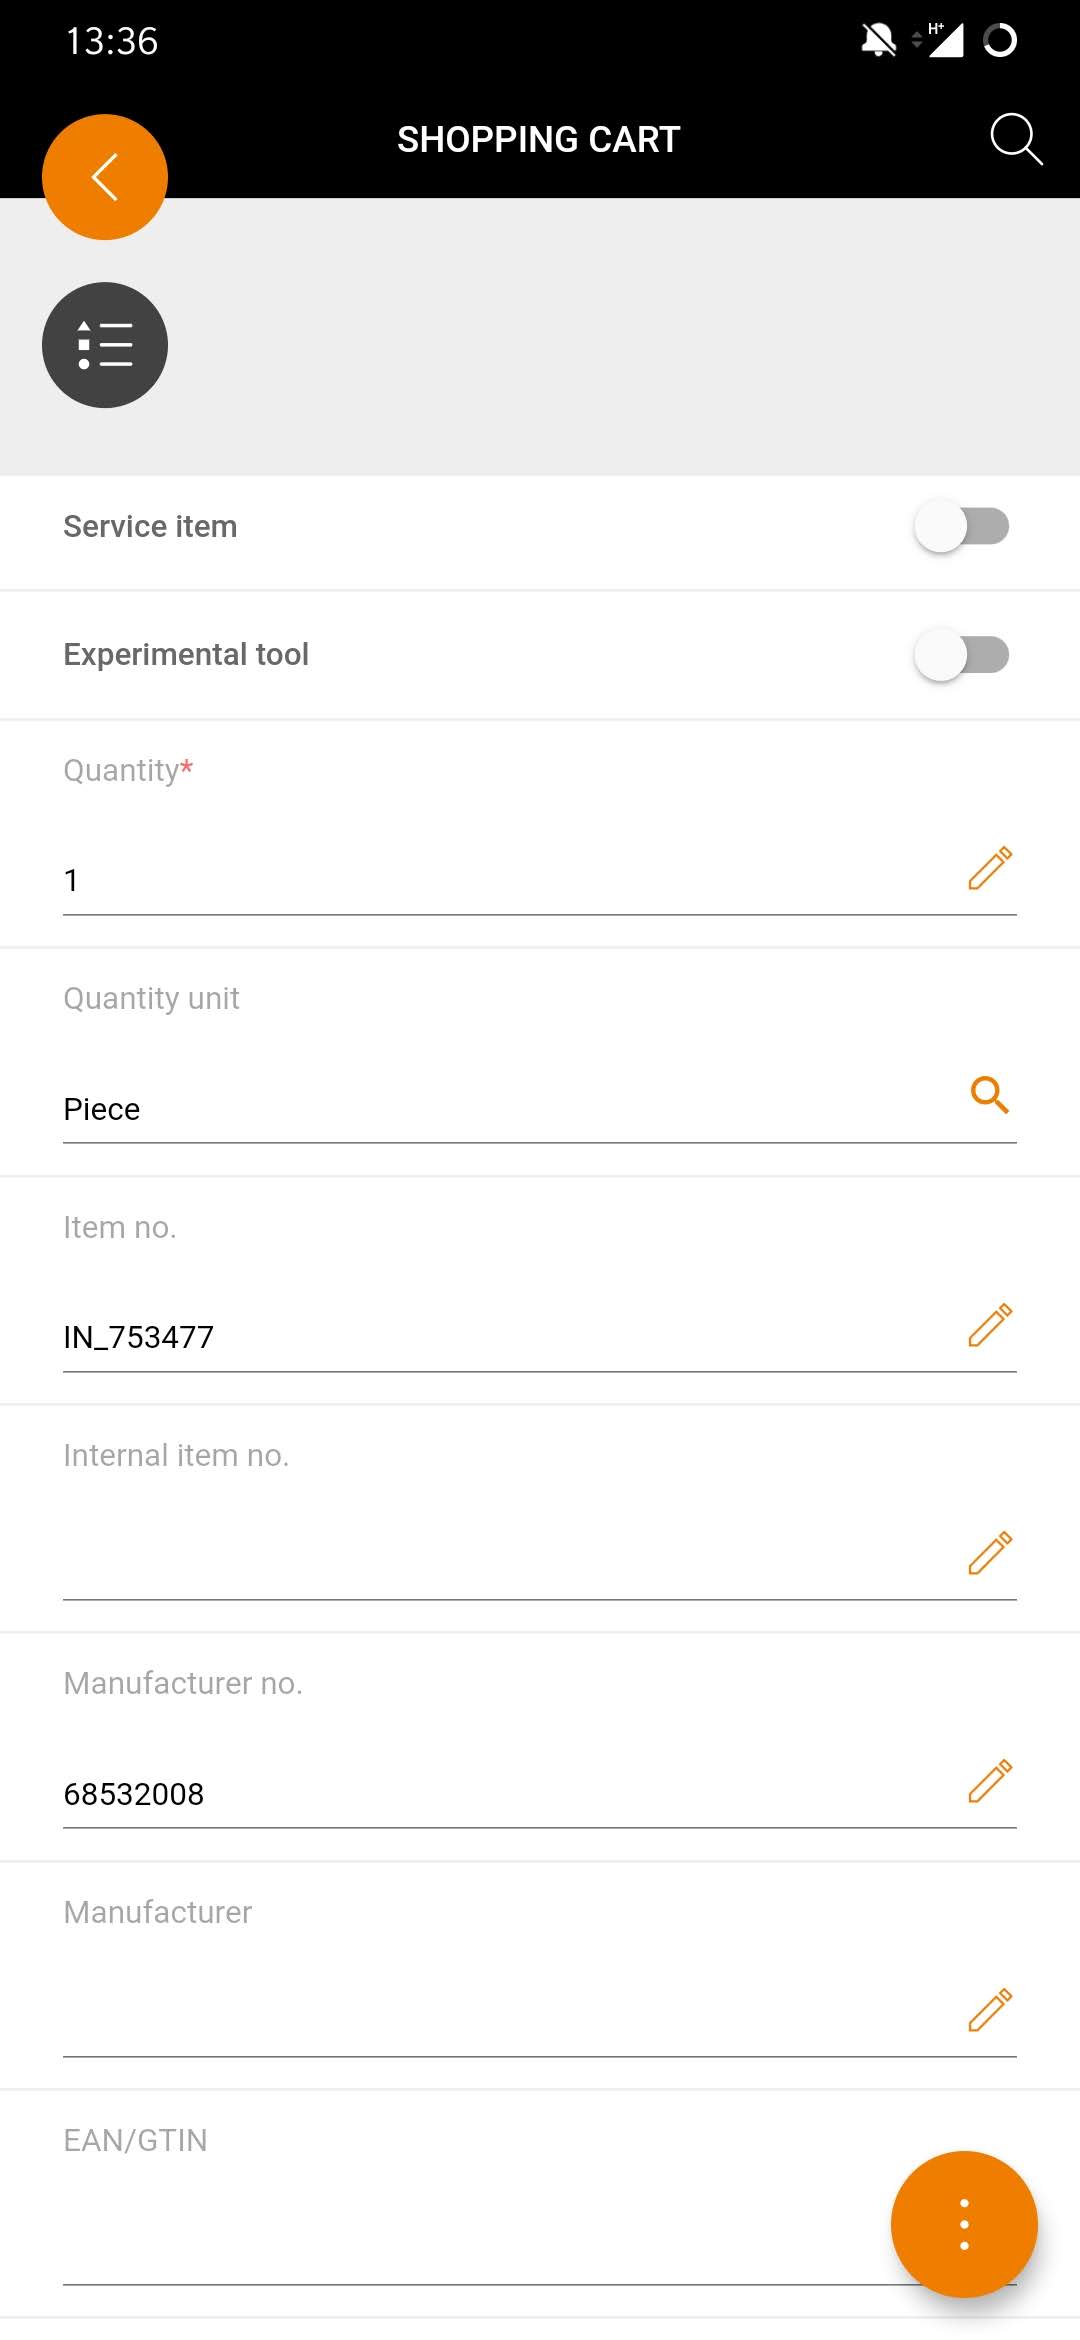
. . The free text position is placed in your shopping cart. Now click on the free text position in the shopping basket and fill in the desired position data. (cf. Fig. 2)
Direct entry
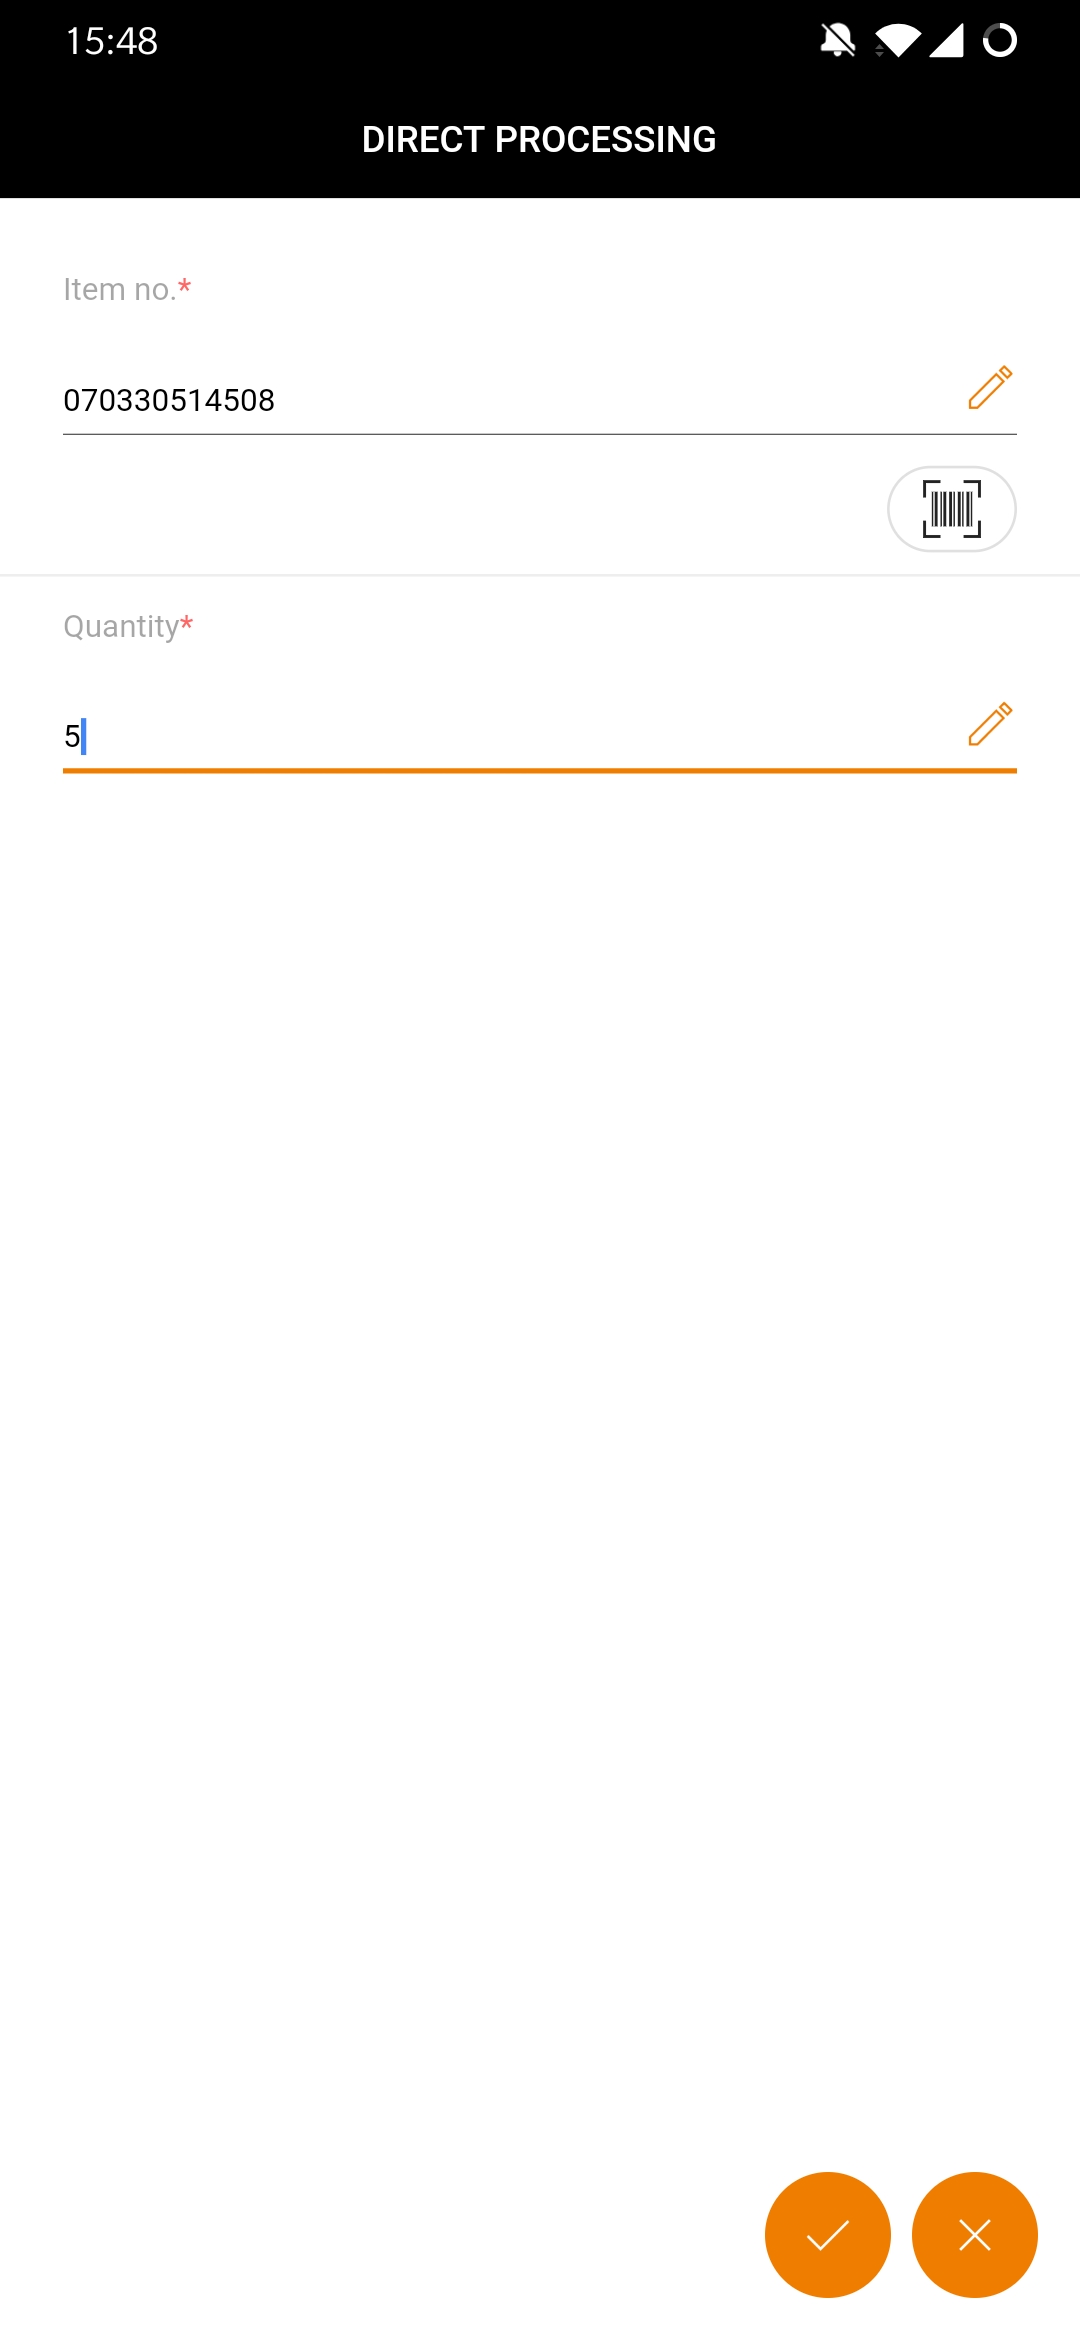
| Direct entry
Using the “Direct article entry” function, you can add articles directly to the shopping basket by entering the article number. To do this, tap on “Direct entry” in the shopping cart header. On the next page, enter the article number and the article quantity and confirm with The item will then be added to your shopping cart. Alternatively, you can scan the bar code of the article using the scanner |
 .
. to transfer the article number to the Article No. field.
Changing the organizational unit / organizational object
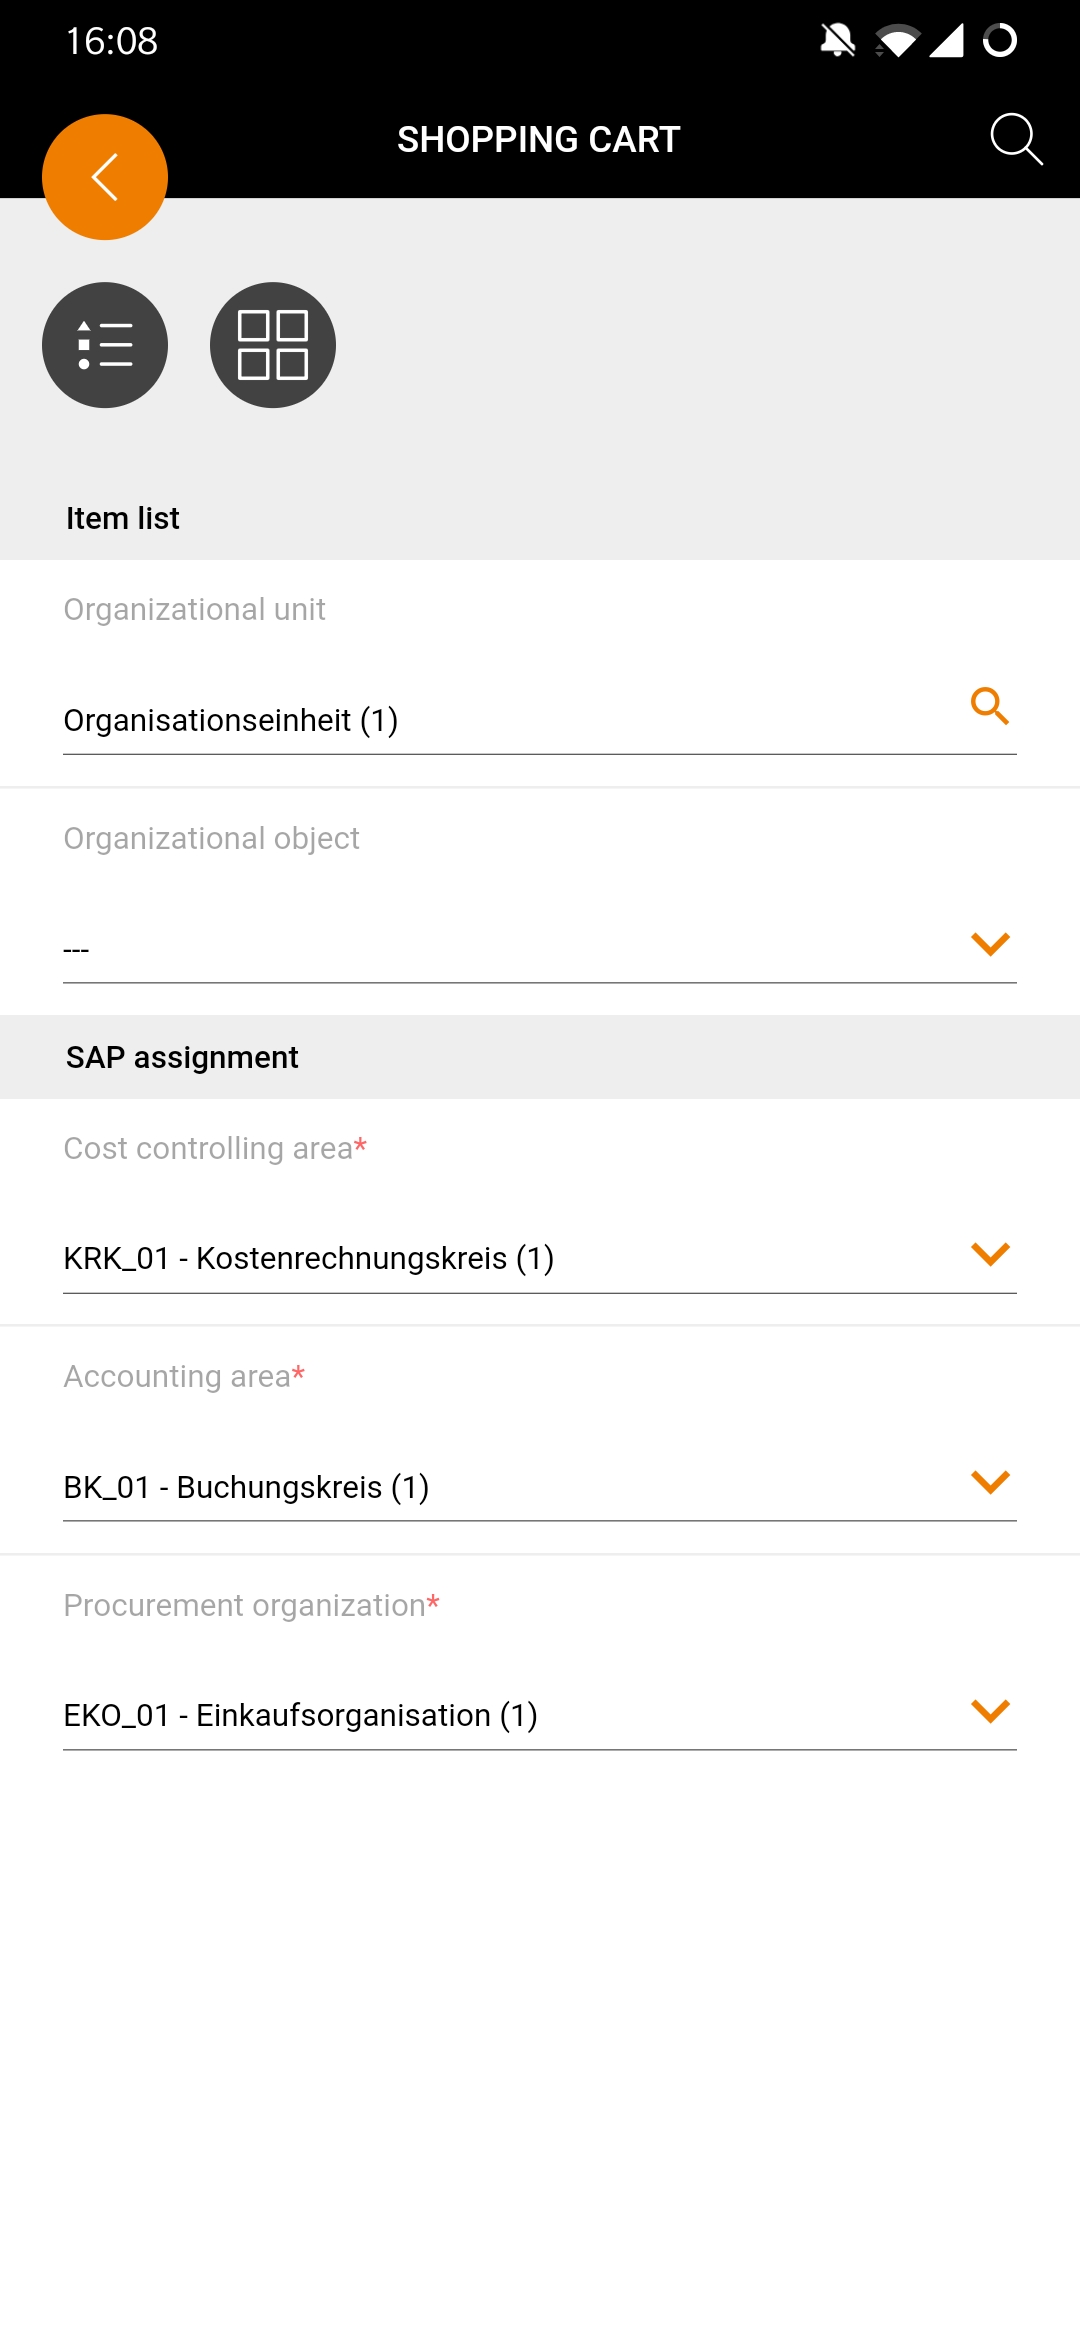
| Changing the organizational unit / organizational object
To change the organizational unit / object in the shopping cart, tap the icon Then a new page opens where you can select the organizational unit and the organizational object. Select the required organizational unit and the organizational object and go back one page with the ” back-button” The menu allows you to navigate to the customized catalogs. |
 in the shopping cart header .
 .
.Edit item details

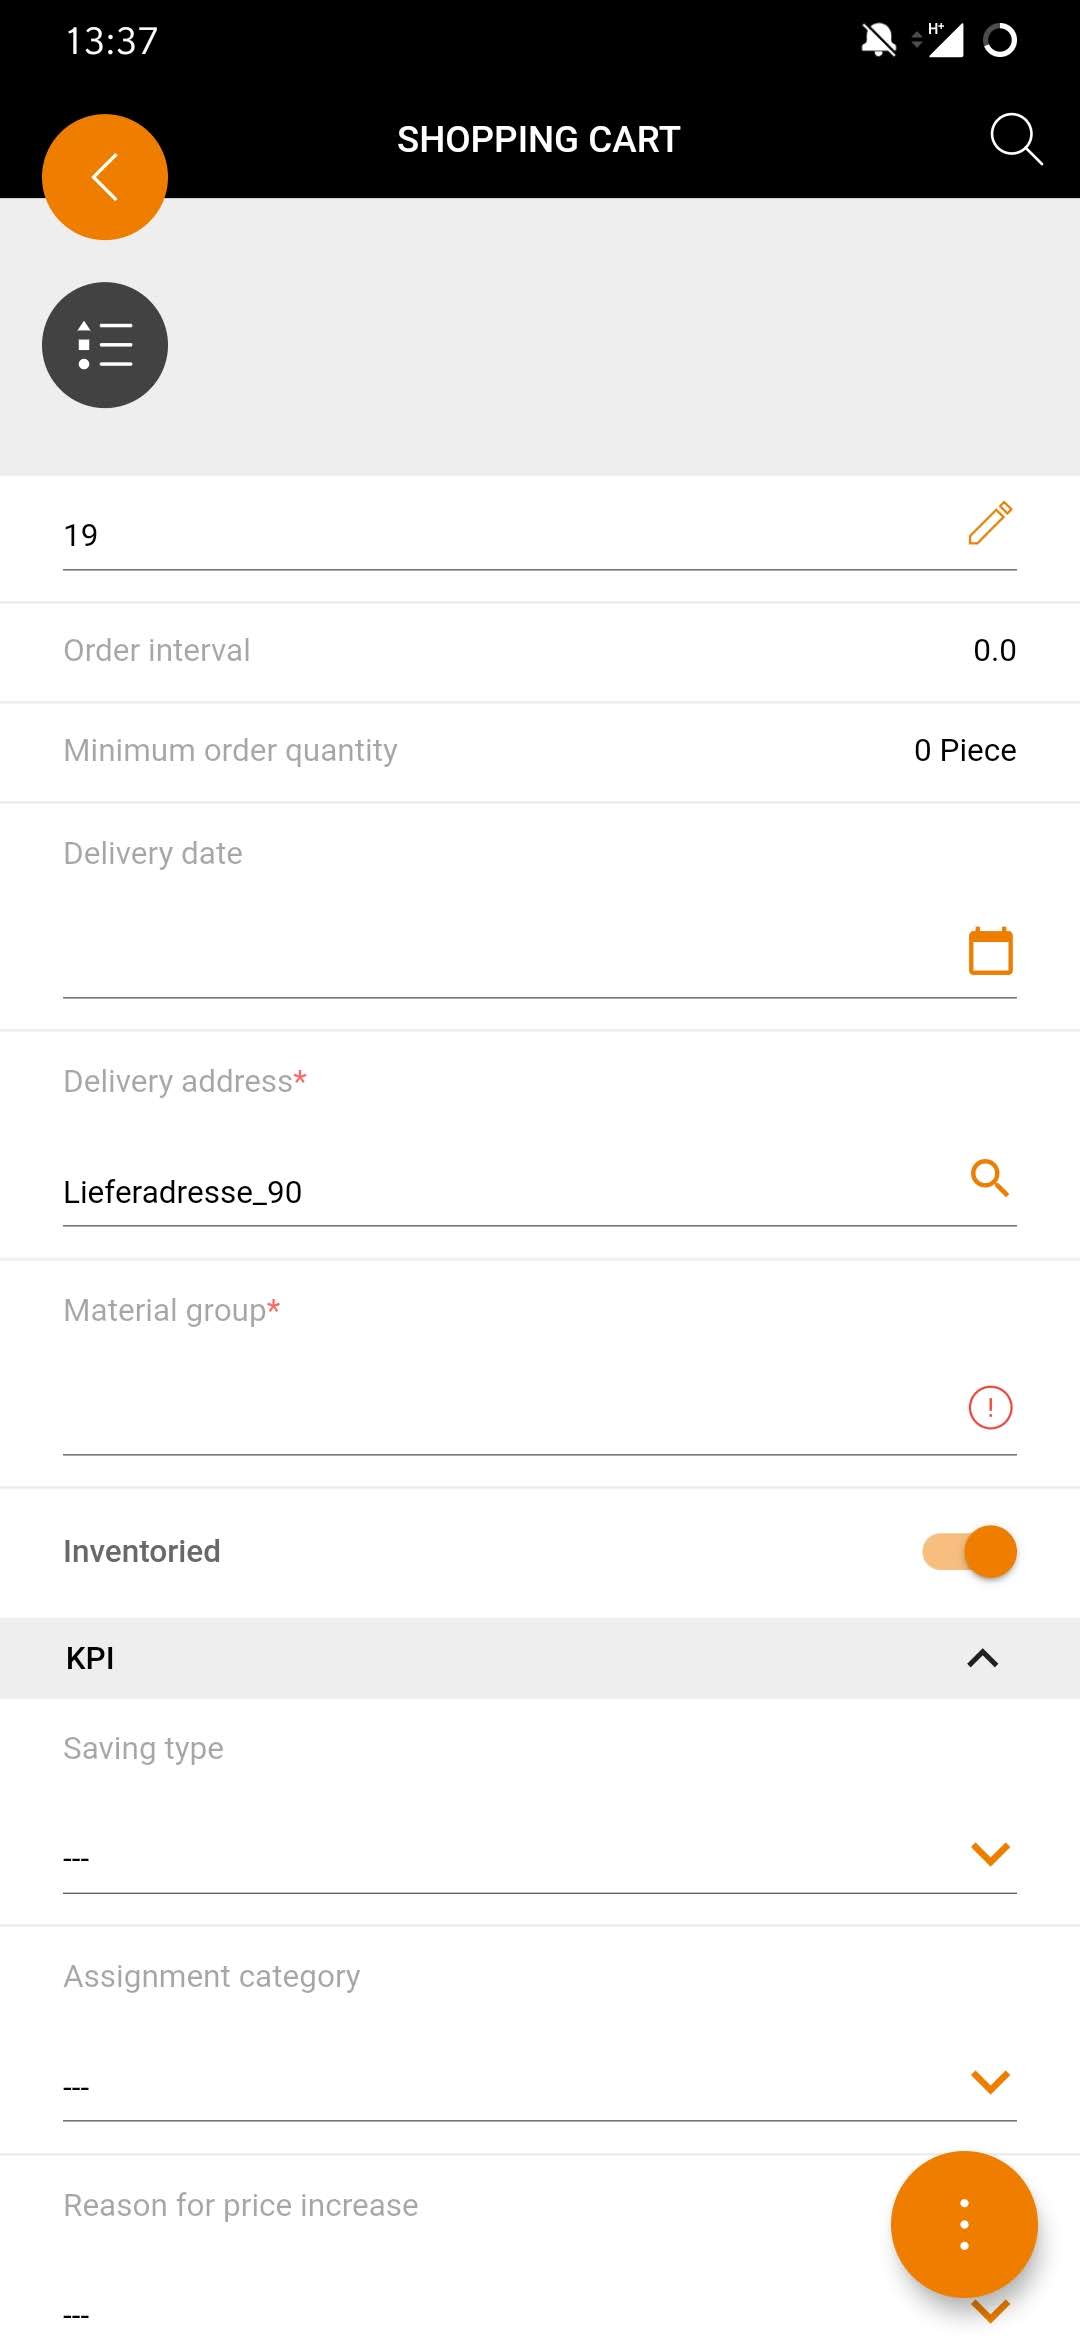
| Edit item details
Item details can be edited quickly and easily by clicking on the item in the shopping cart. This will take you to the item details page where you can change account assignment, delivery address, KPI’s, etc. The fields that can be edited are indicated by a coloured pencil or a coloured magnifying glass. Whenever you see a colored magnifying glass
, the underlying field for editing includes an auto search function. Depending on your entries, relevant hits will be displayed here. This enables you to fill in fields quickly and easily, even with large amounts of data. |
Use ad hoc delivery address

| Use AdHoc delivery address
You can now define ad hoc addresses for shopping cart items. To do this, select your entry for ad hoc address in the selection field of the delivery address. As soon as you have selected this, a new window will open in which you can enter the ad hoc address. So here’s what you do:
|
 .
.Add delivery schedule to a line item
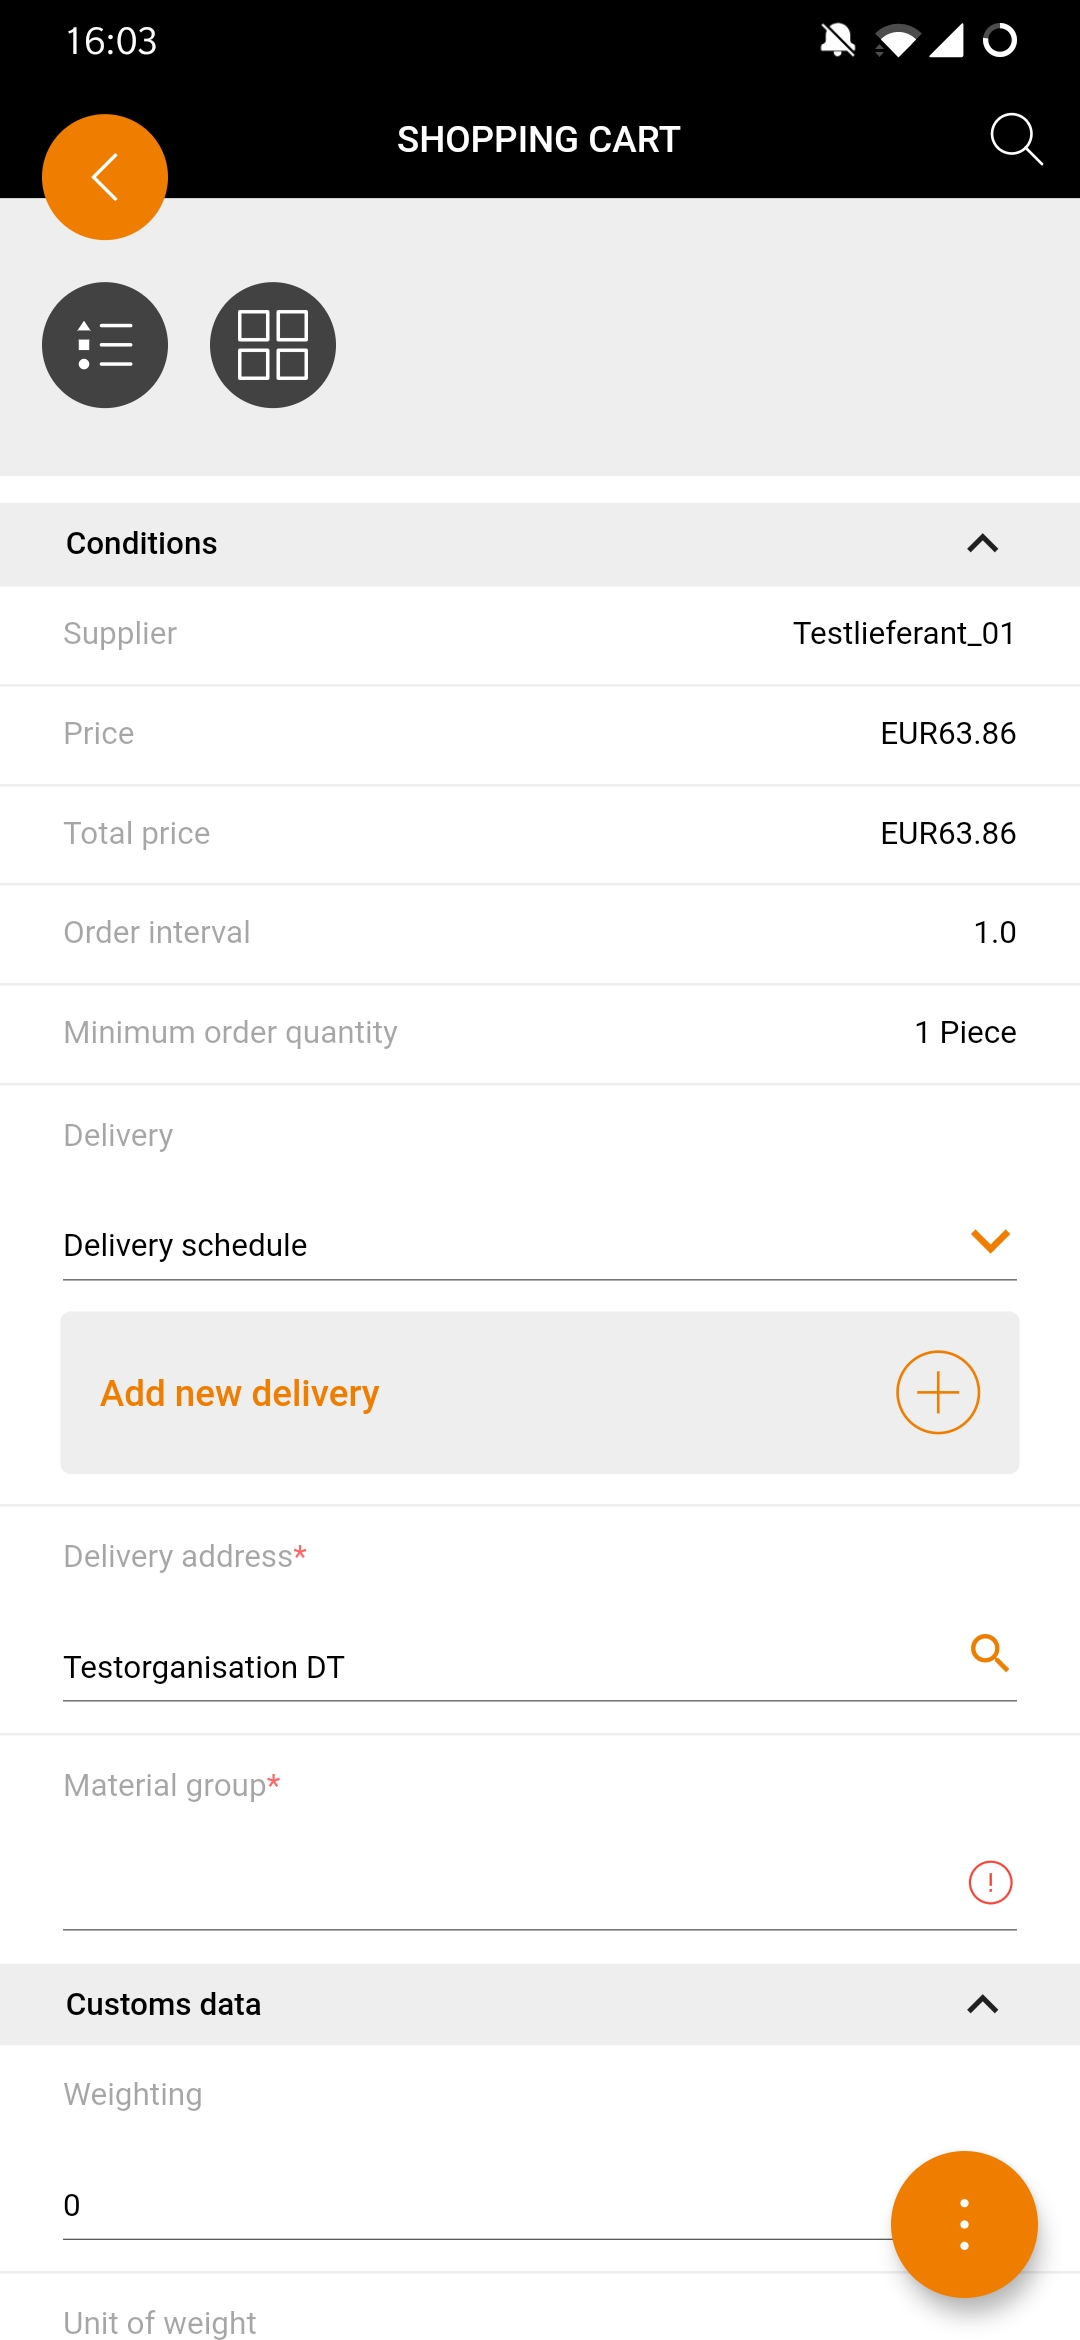
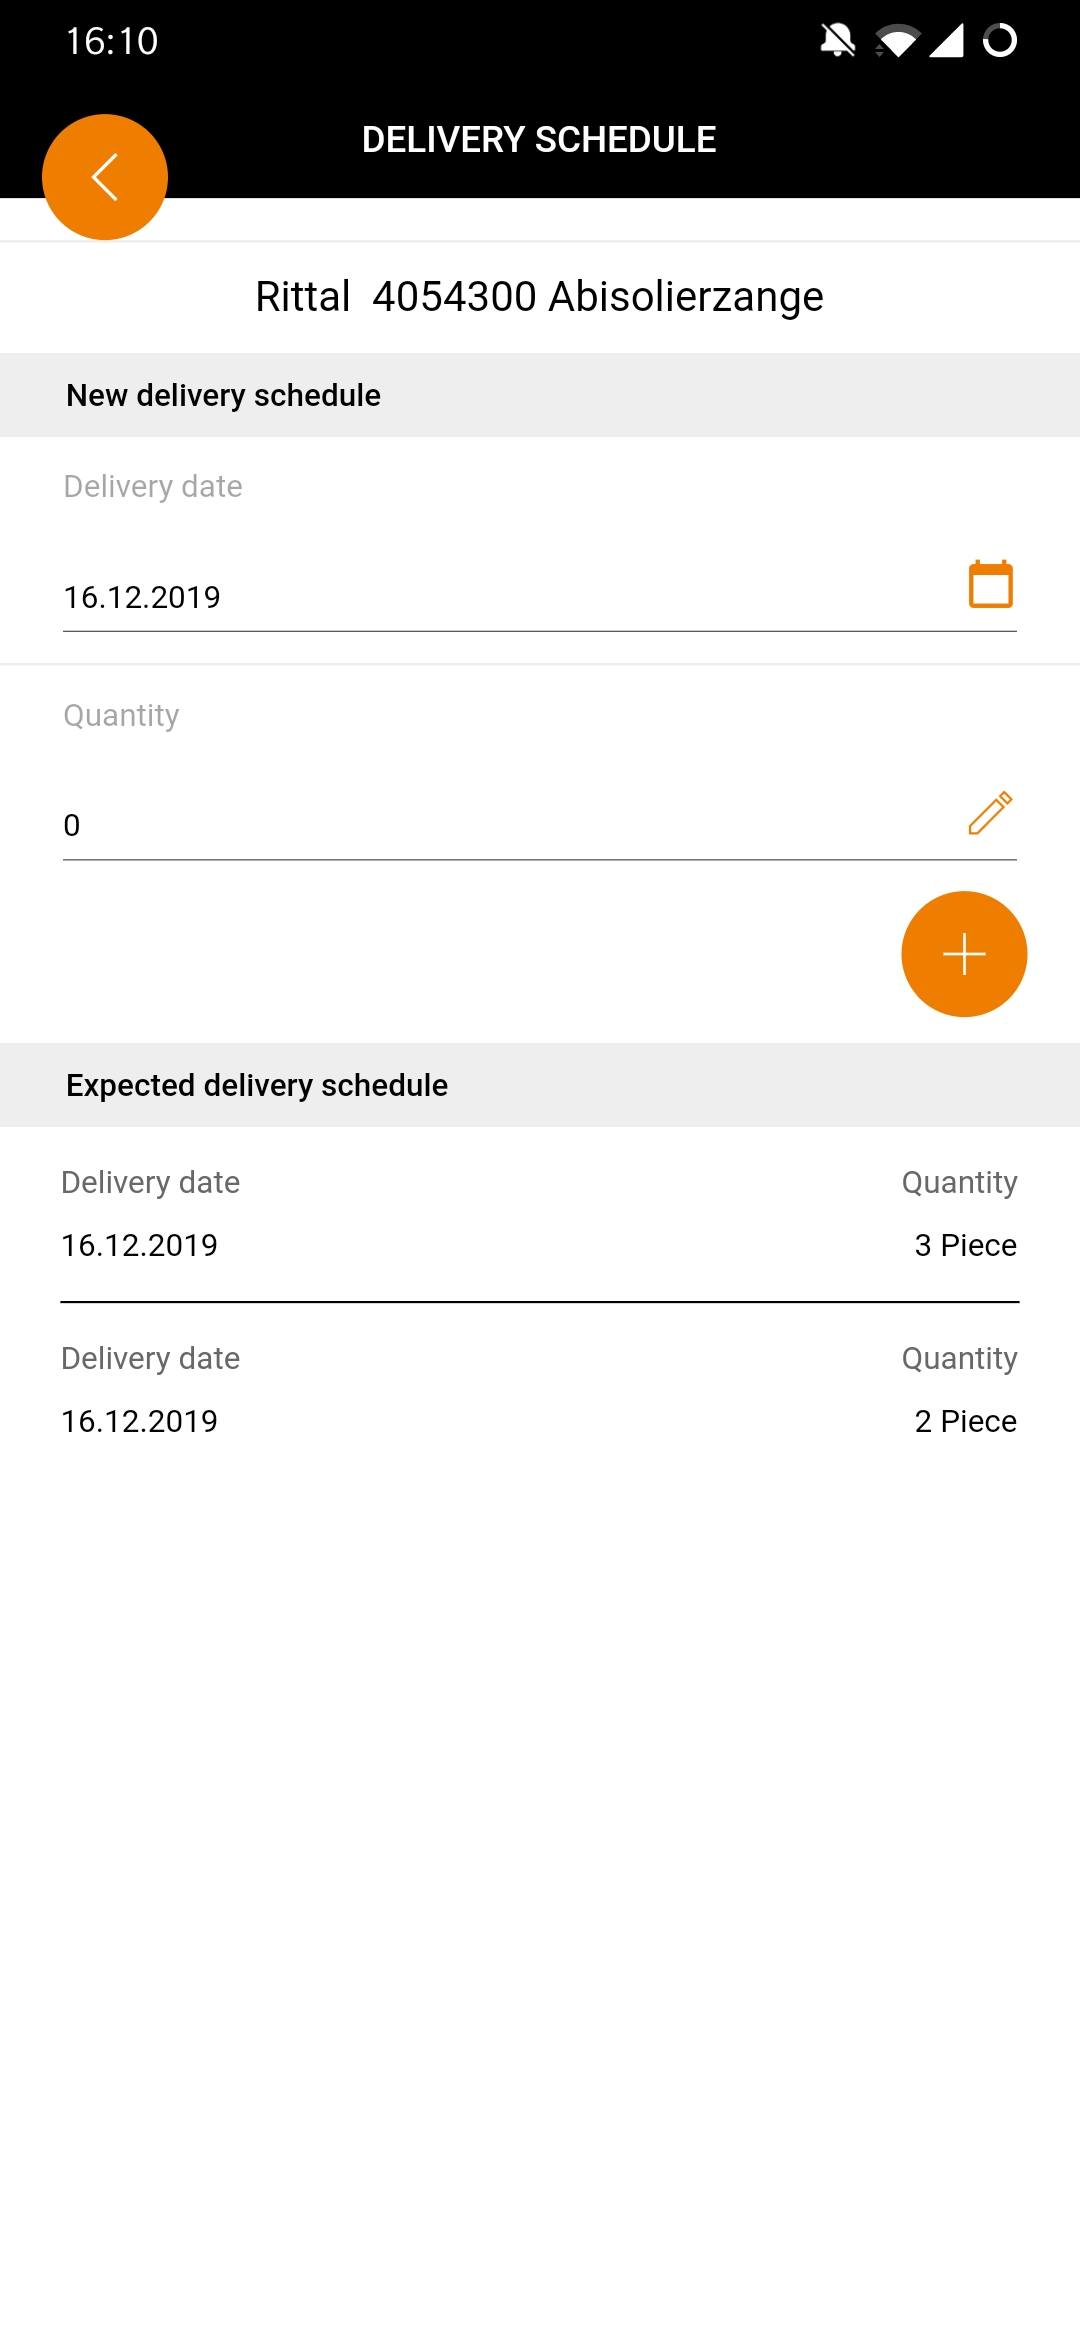
| Add delivery schedule to a line item
To divide an order into several deliveries, select the required article in your shopping basket. Then scroll down until you see the “Delivery” field and select “Delivery Schedule” from the drop-down menu. On the next page, you can enter the date of the planned delivery schedule and the quantity to be delivered. Then confirm your entries with the “add button” In the section “Planned delivery schedules” you can view the individual delivery dates. |
 and repeat the process for further delivery schedules.
Carry out multiple account assignment of an item
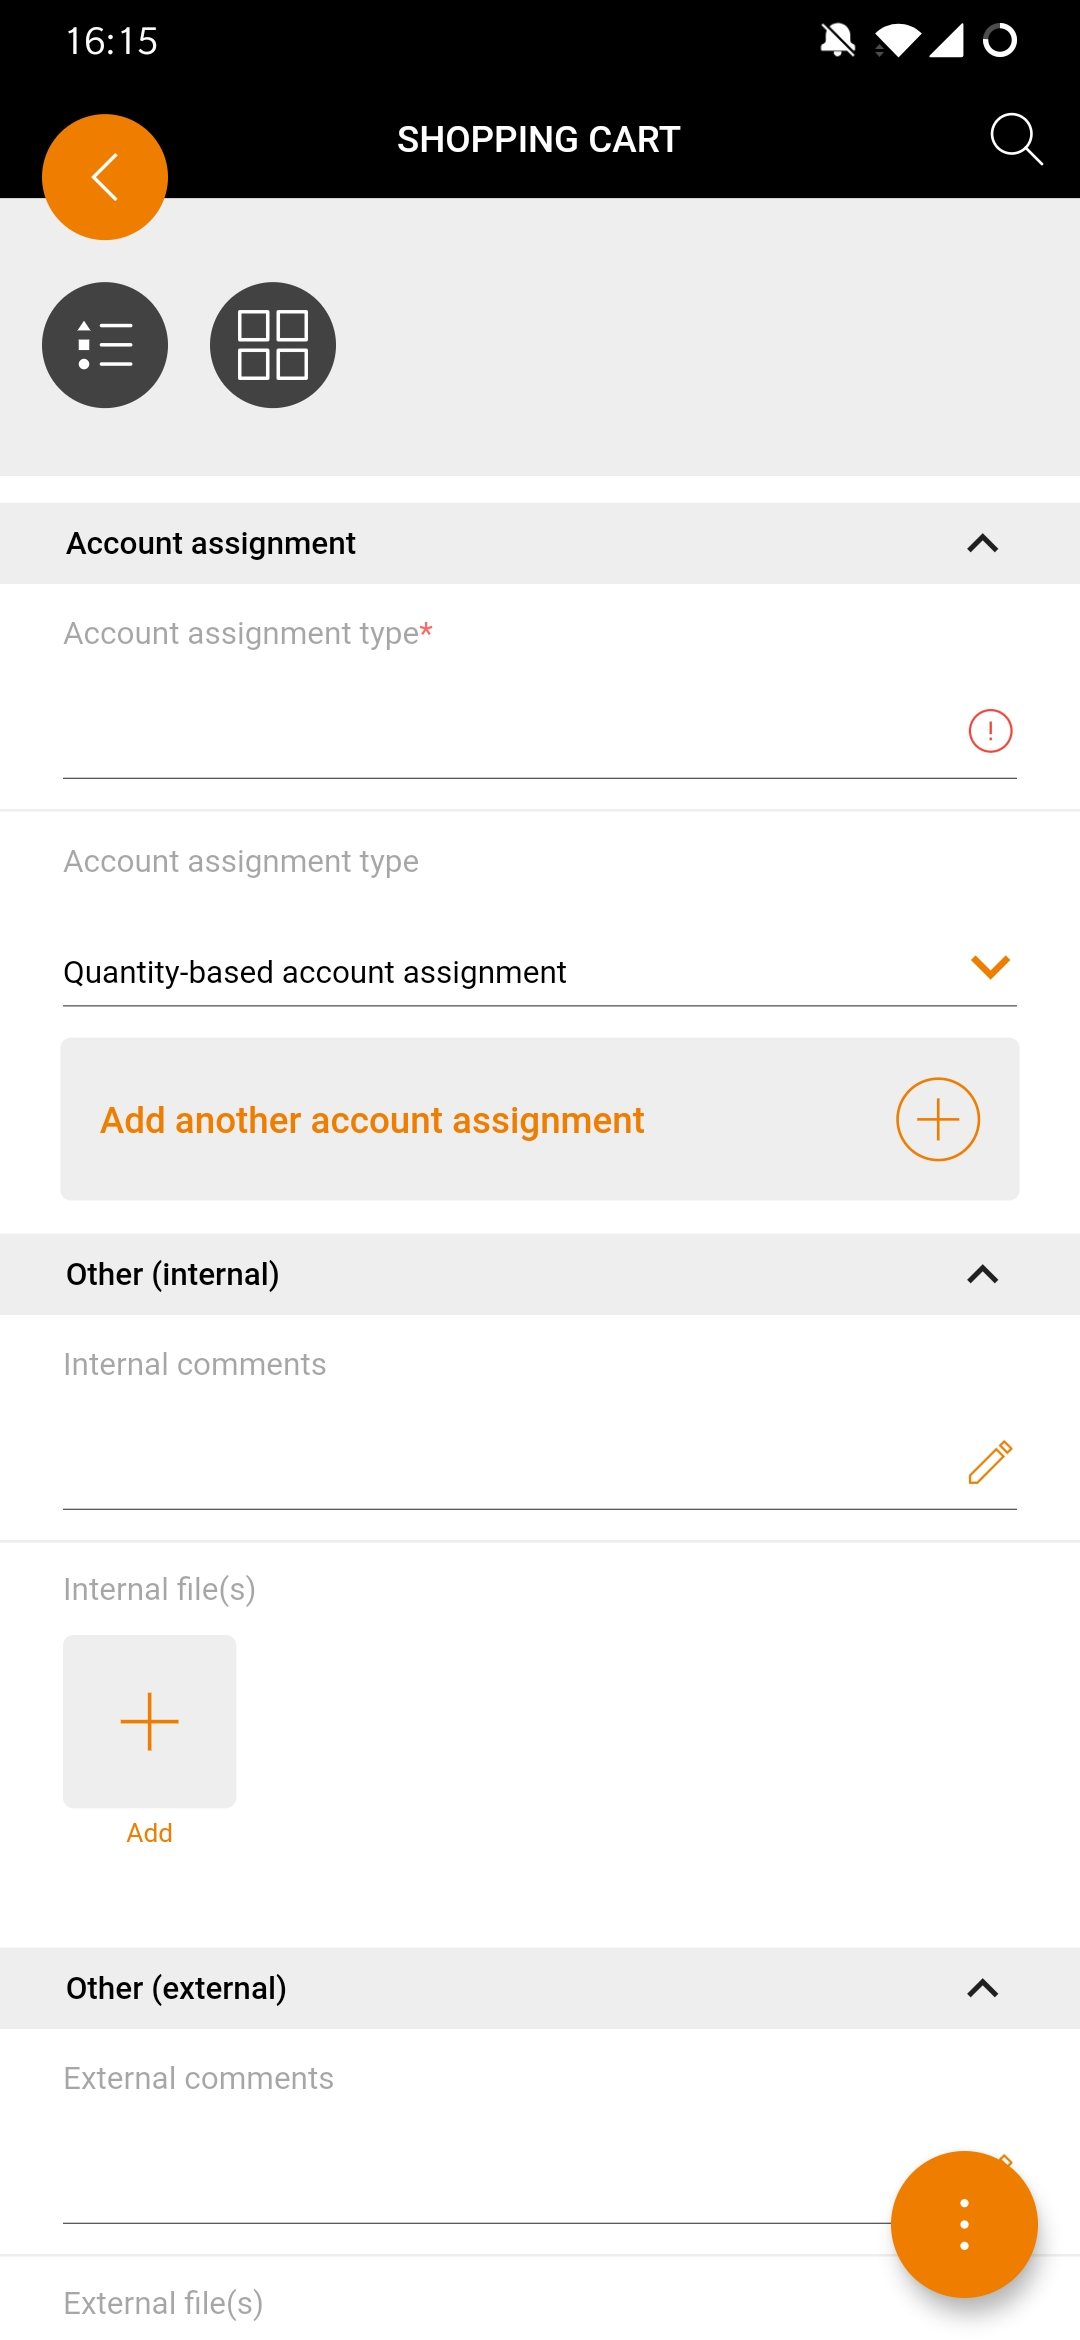
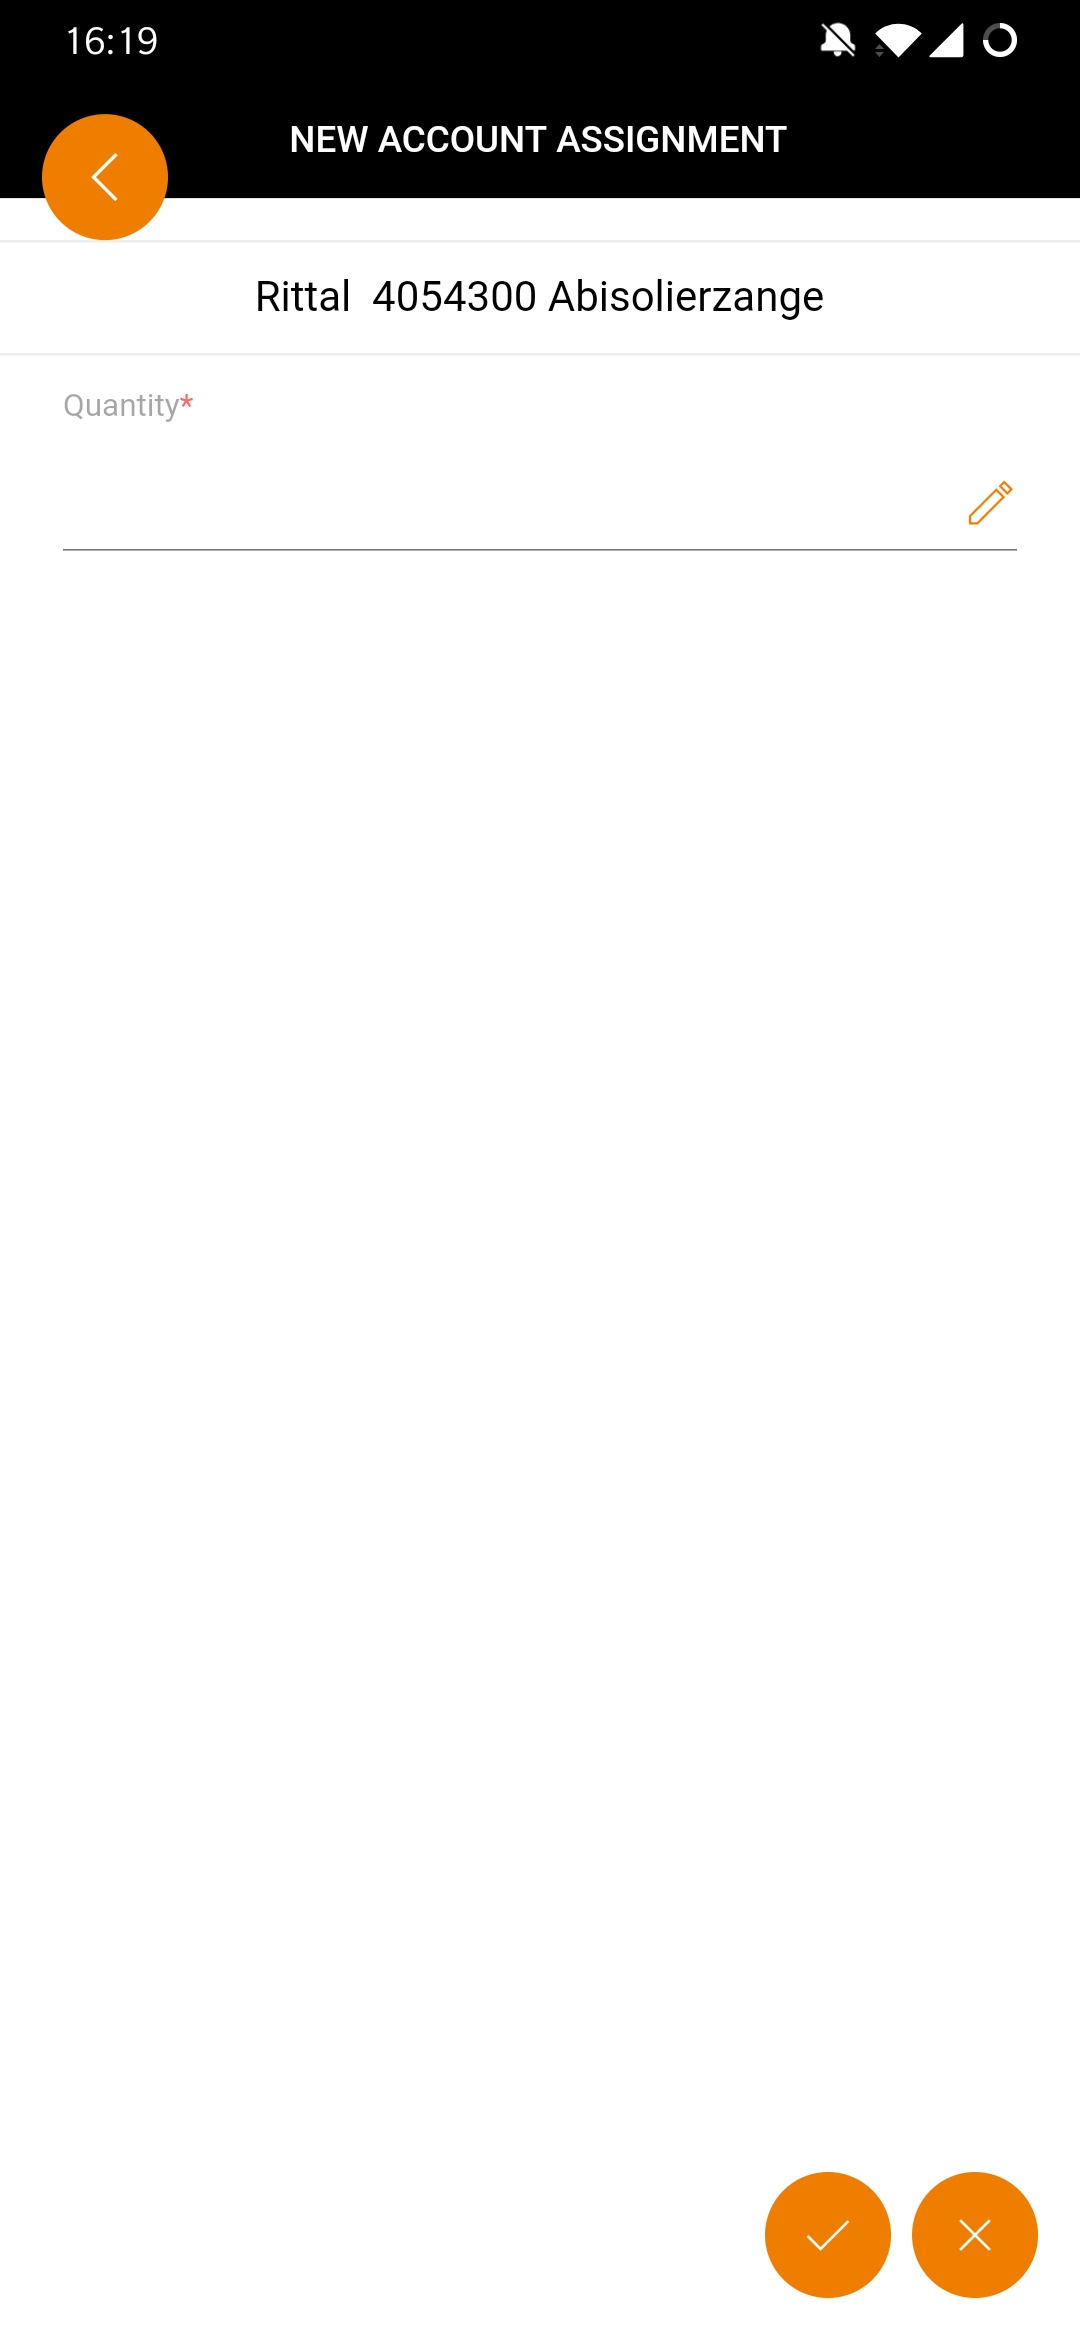
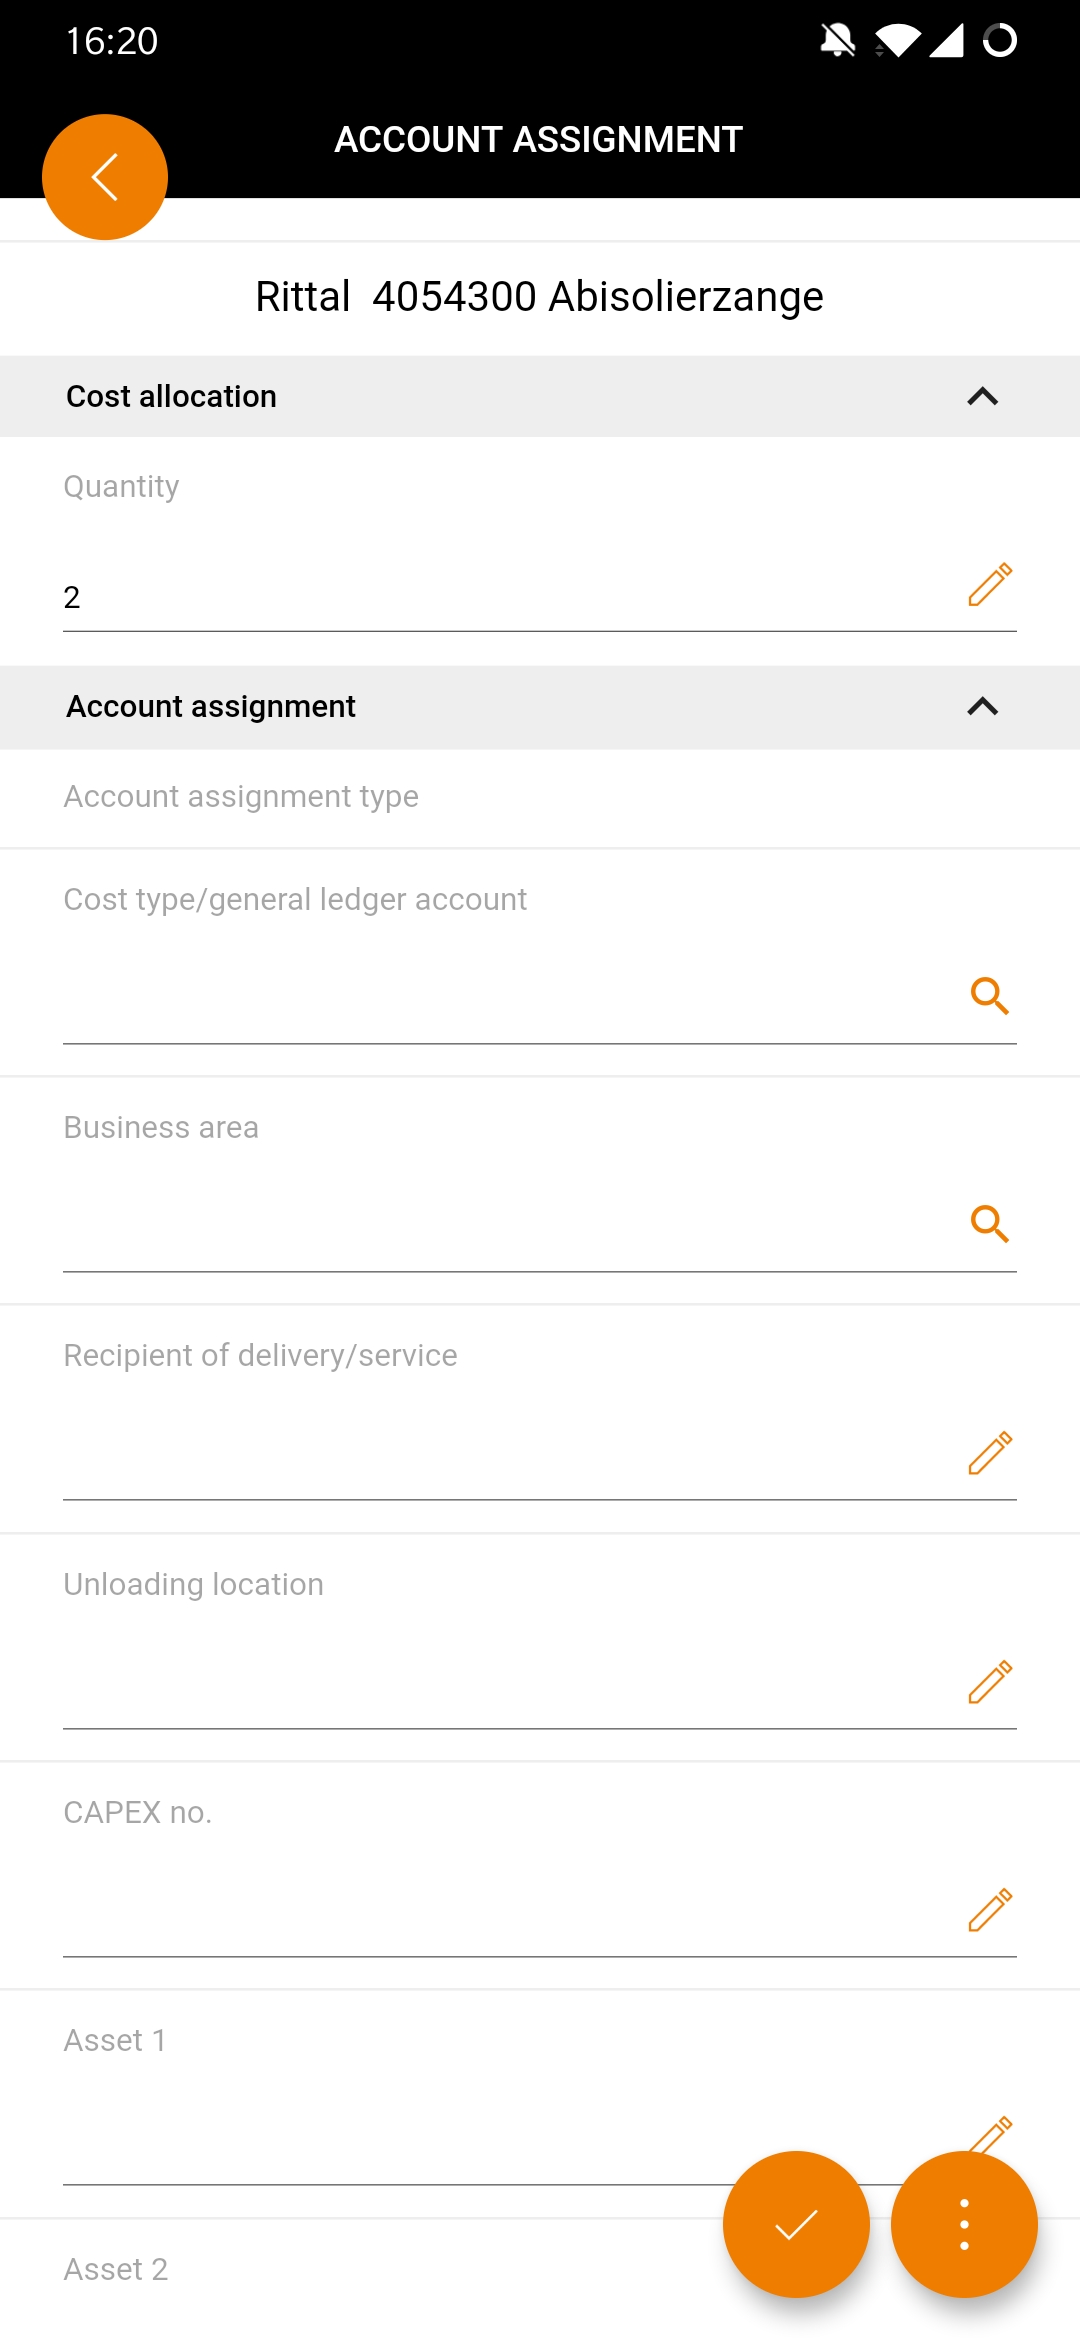
| Carry out multiple account assignment of an item
You can use the multiple account assignment function to assign one item to several G/L accounts. To do this, tap on an item in the shopping basket and scroll down on the next page until you reach the “Account assignment” section. Here you type into the field “Multiple account assignment” and select “Quantitative account assignment” or “Percentage account assignment”. On the next page, enter the desired quantity or percentage and confirm with Afterwards you can make further settings, e.g. enter the cost element or assign the position of a cost center. Confirm your entries again with |
 .
. .
.Mobile orders
Mobile ordering – clearly structured, efficient and at any time
No matter whether you want to view orders, track the order status or send, copy or delete orders – the Onventis Mobile App maps your order processes holistically. Within an order, you will find all relevant information on individual items and will be able to view or download follow-on documents and file attachments. In this way you always have an overview of your orders.
The order list

| The order list
In the order list you can find all orders. With the icon
, select sorting and confirm. The list reloads and sorts the documents in the desired order using the selected filters. The various orders can also be opened or closed by clicking on The icon With the help of the magnifying glass |
 you can change the order list in the sorting or filter it according to certain criteria. Simply press the button
 indicates whether there are file attachments in the respective document.
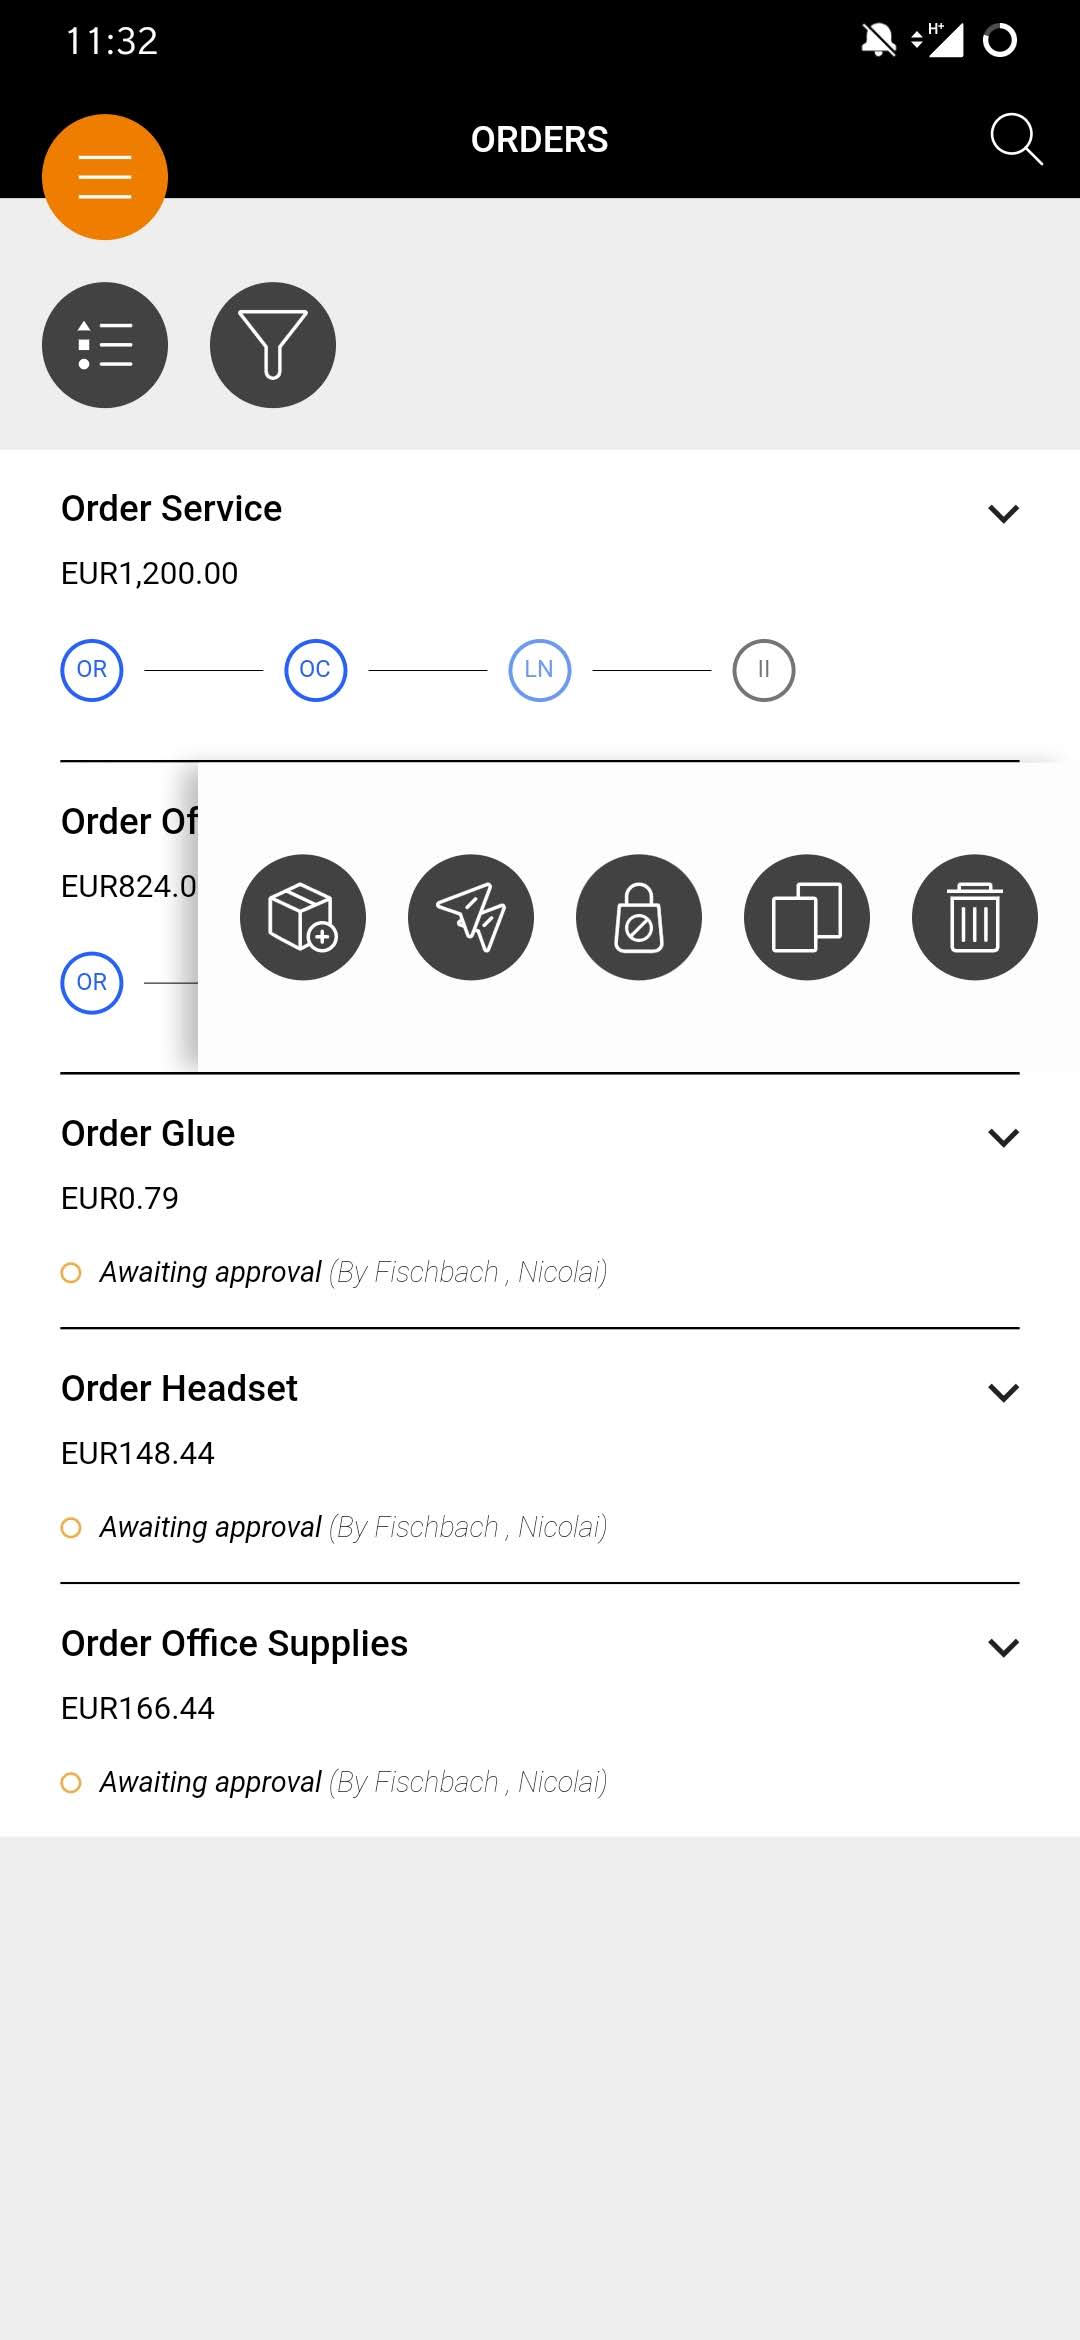
Actions in the order list
| Actions in the order list
You have exactly two options for calling up purchase order actions:
. |

Submit an order


| Submit an order
To dispatch an order, wipe on the document to the left and tap on the symbol “Send order”
. Confirm this procedure in the following window, and the order will be dispatched. Please note: For sending an order with the status “In registration”, all mandatory fields must be filled out. If an order already exists that does not contain all mandatory fields, you must adjust the information and data in Onventis Buyer. Alternatively, you can send the order by tapping on the receipt and then on the “multi-actions” button
. Then tap on |


 and confirm the selection.
Duplicate order


| Duplicate order
To copy an order, wipe the document to the left and tap the “Copy order” icon
. You confirm this procedure in the following window, which sends the order. Alternatively, you can copy the order by tapping on the receipt and then on the “multi-actions” button
. Then tap on |


 and confirm the selection. The copied order will be added to your order list with the status “In entry”.
Register service note
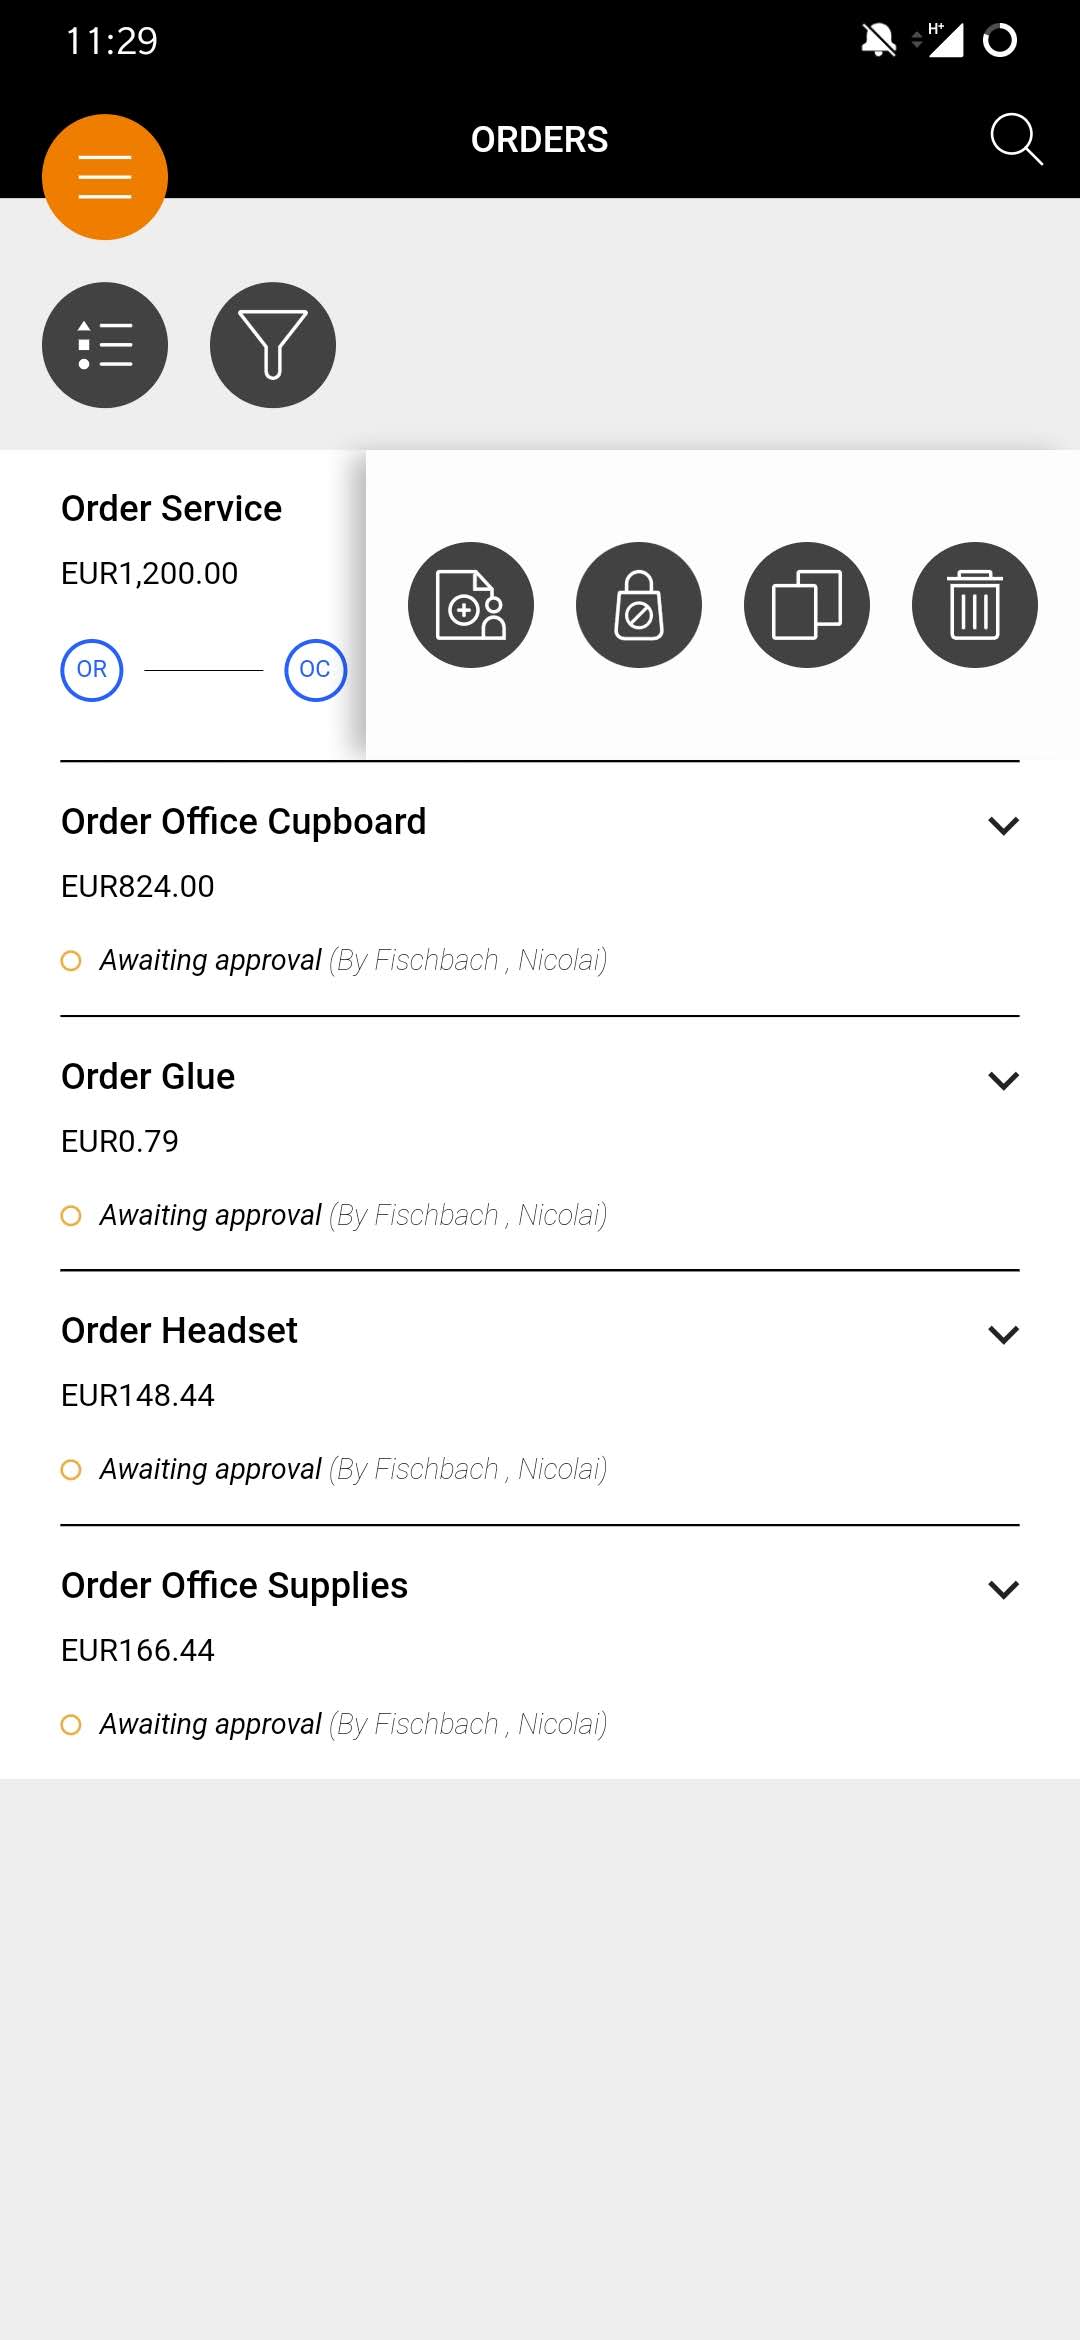
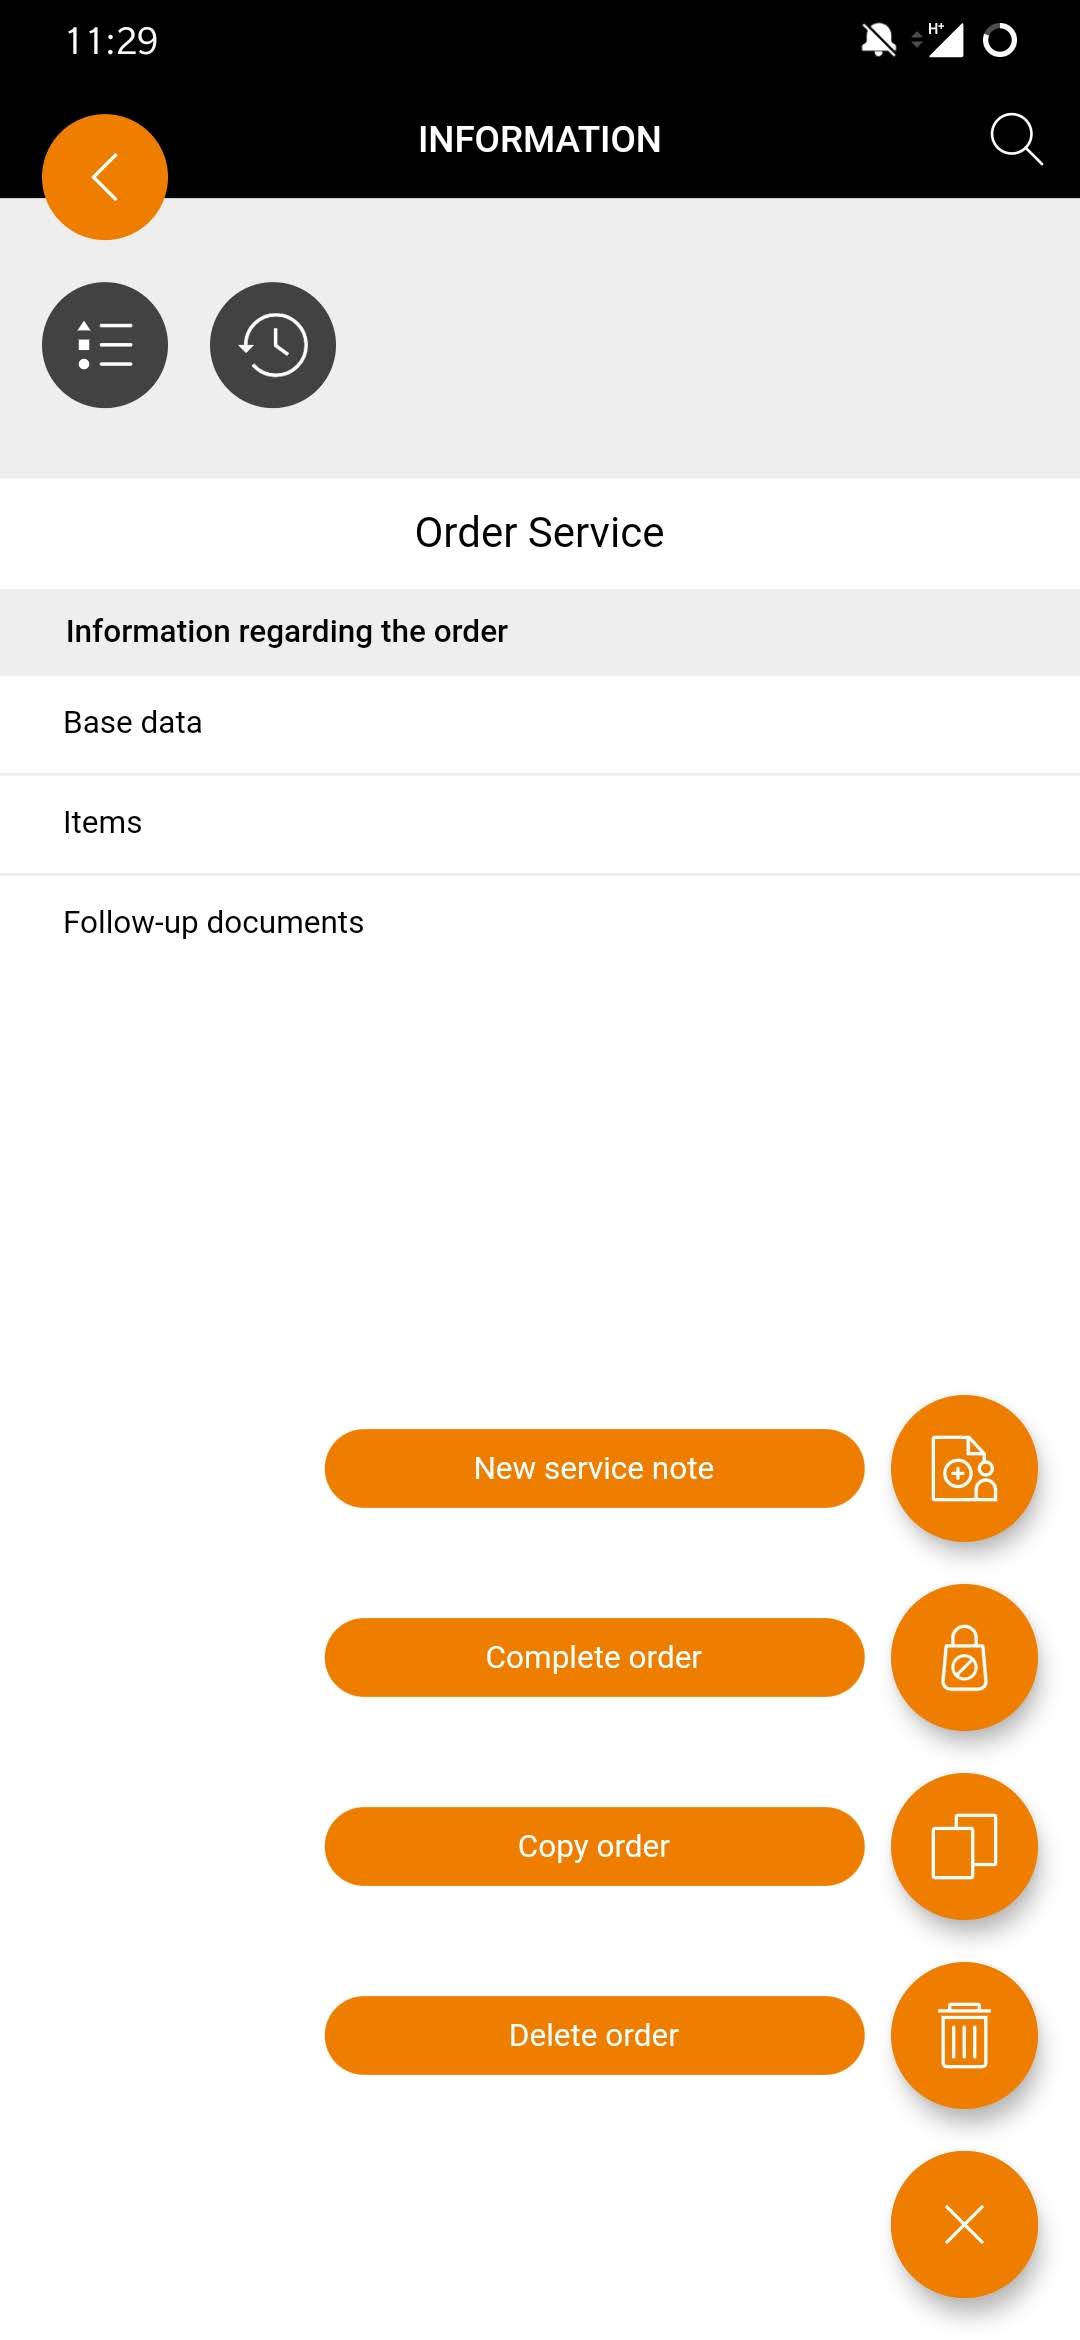
| Register service note
To register a service note, wipe the document to the left and tap the “New service note” icon
. Confirm this procedure in the subsequent window, the service note will be generated and you will be forwarded to the new service note. Alternatively, you can register a new service note by tapping on the document and then on the “Multi-actions” button
. Then tap on
and confirm the selection. The proof of performance is registered and you are forwarded to the new proof of performance. |


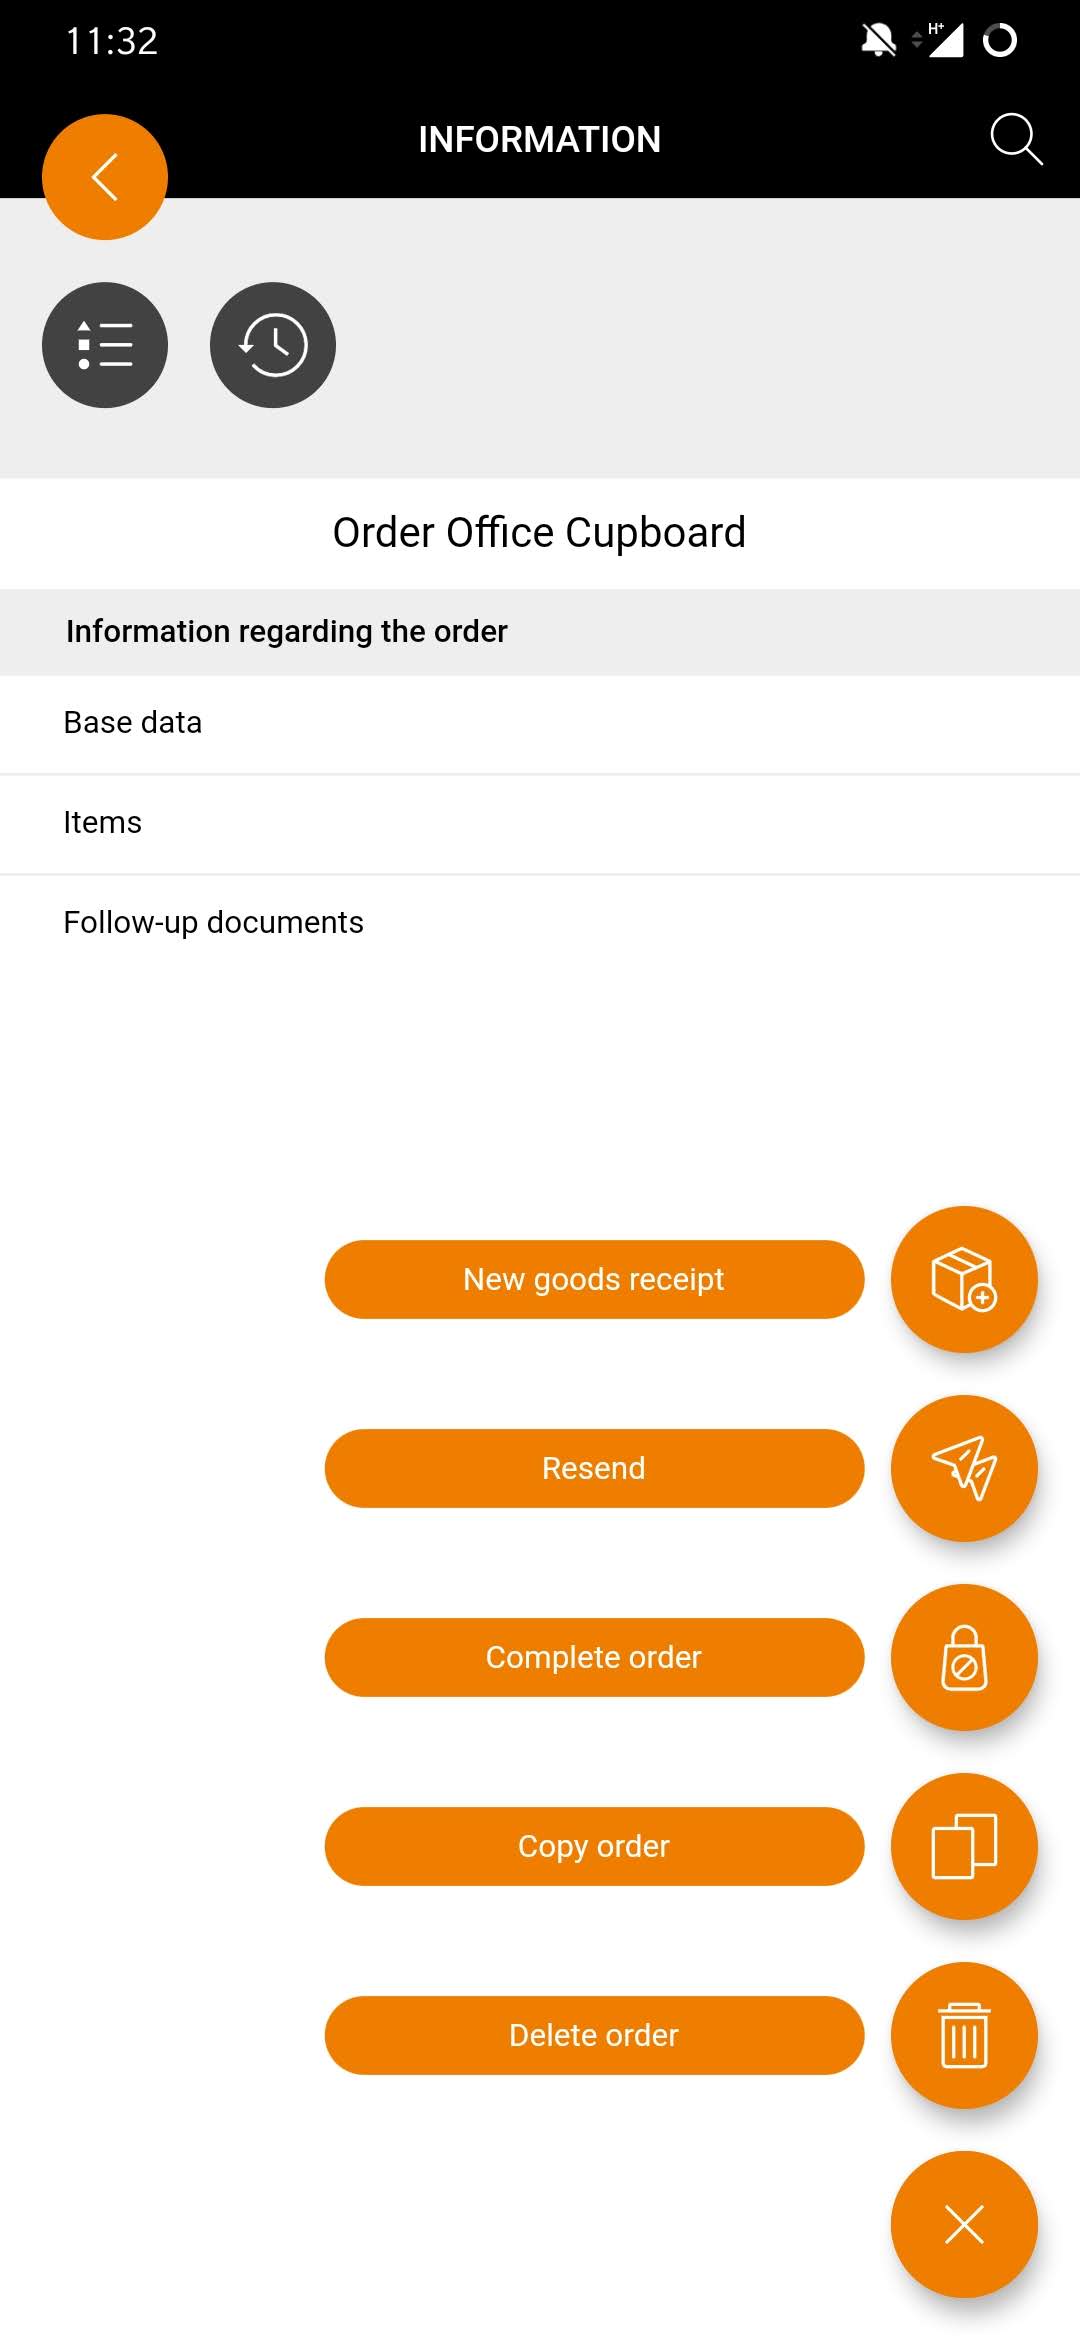
Register good receipts

| Register good receipts
To register a new goods receipt, wipe the document to the left and tap the “New goods receipt” icon
. You confirm this process in the subsequent window, the goods receipt is created and you are forwarded to the new goods receipt. Alternatively, you can register a new goods receipt by tapping on the document and then on the “multi-actions” button
. Then tap on |


 and confirm the selection. The goods receipt is registered and you are forwarded to the new goods receipt document.
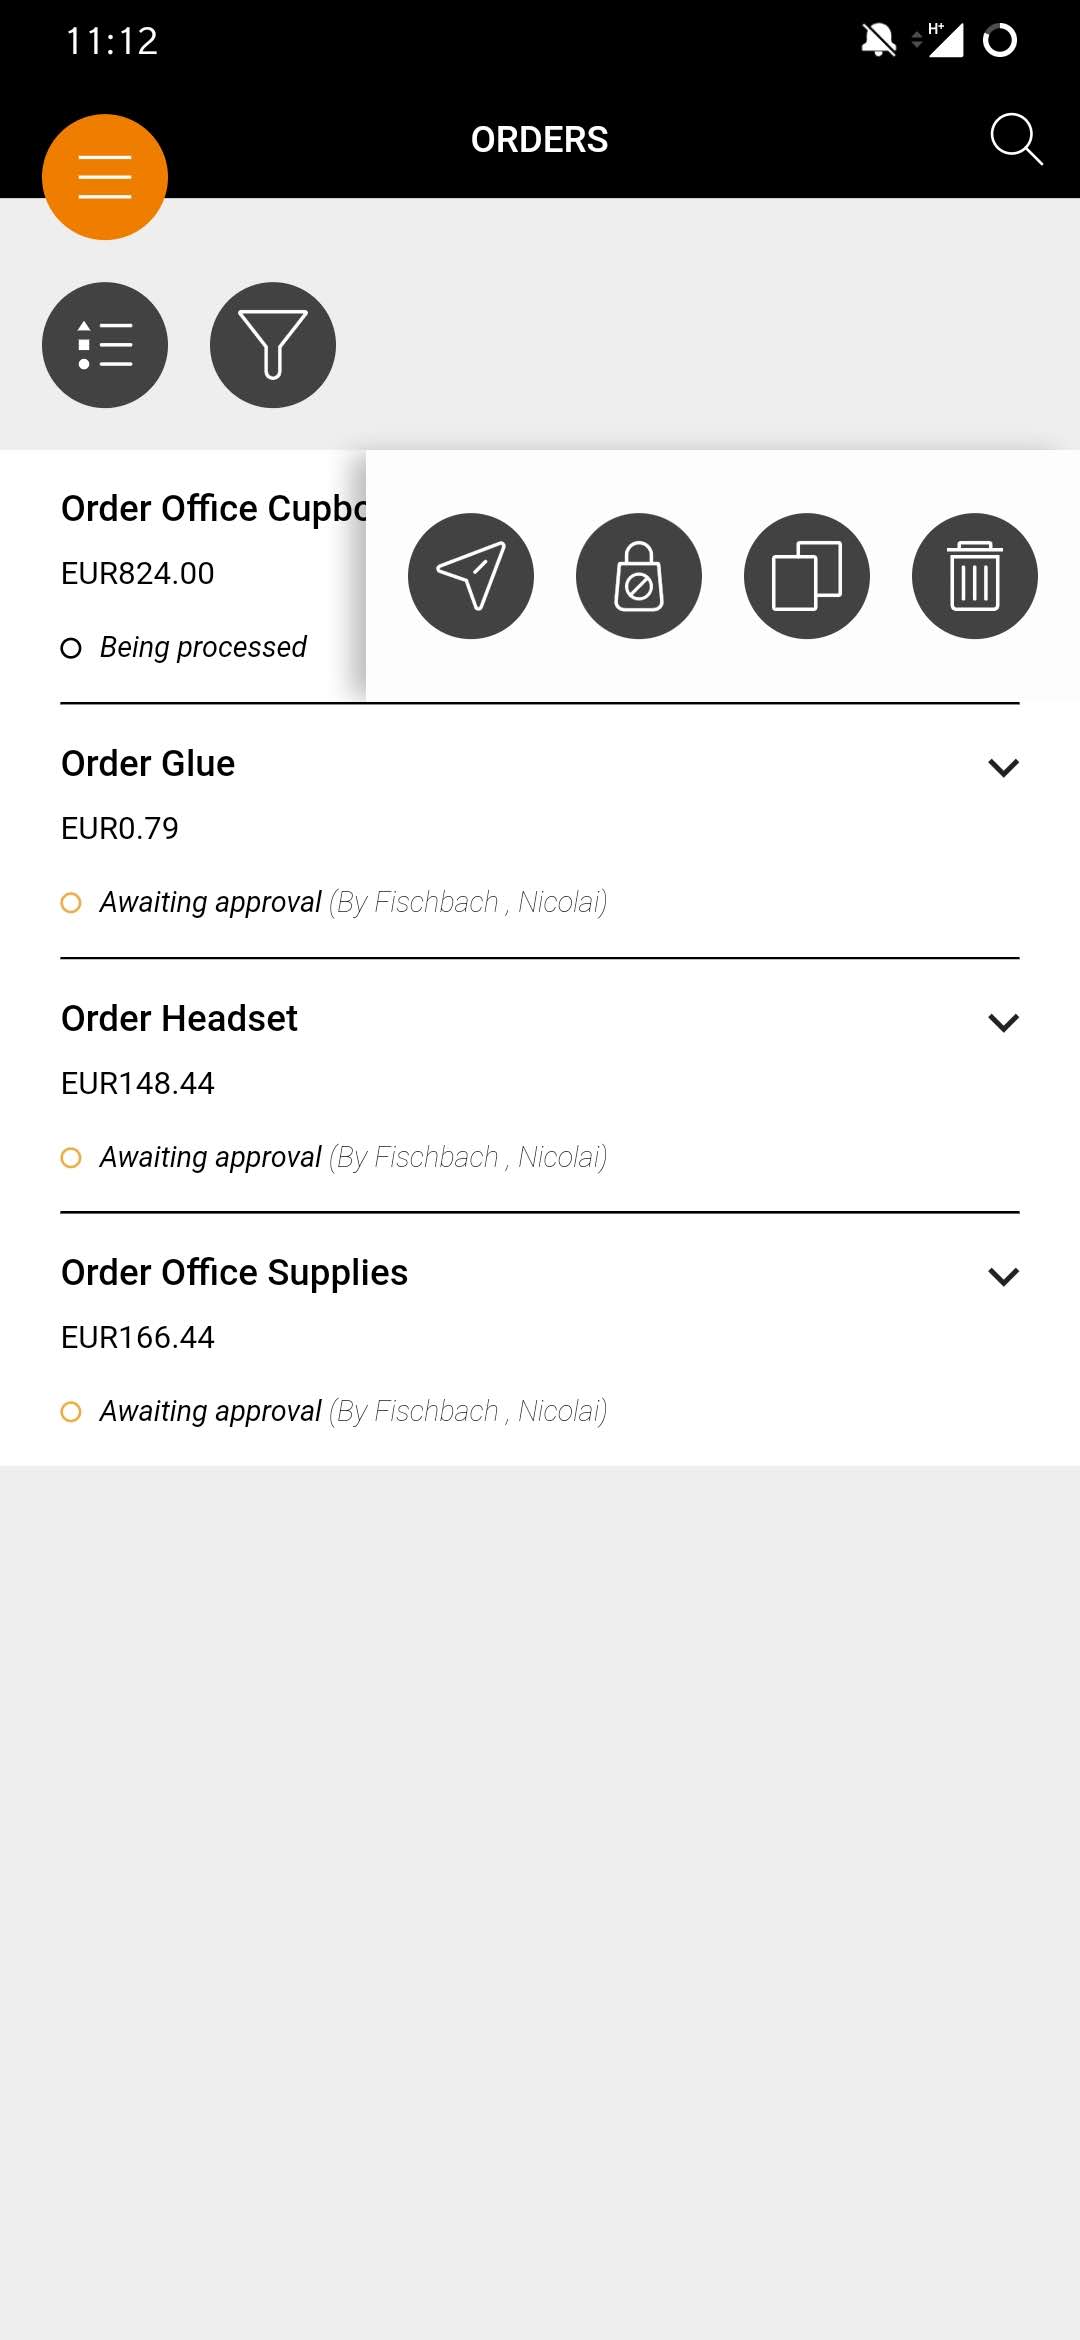
Delete order


| Delete order
To delete an order, wipe the document to the left and tap the “Delete order” icon
. You confirm this process in the next window, the order will be deleted. Alternatively, you can delete an order by tapping on the receipt and then on the “multi-actions” button
. Then tap on
and confirm the selection. The order will be deleted. |


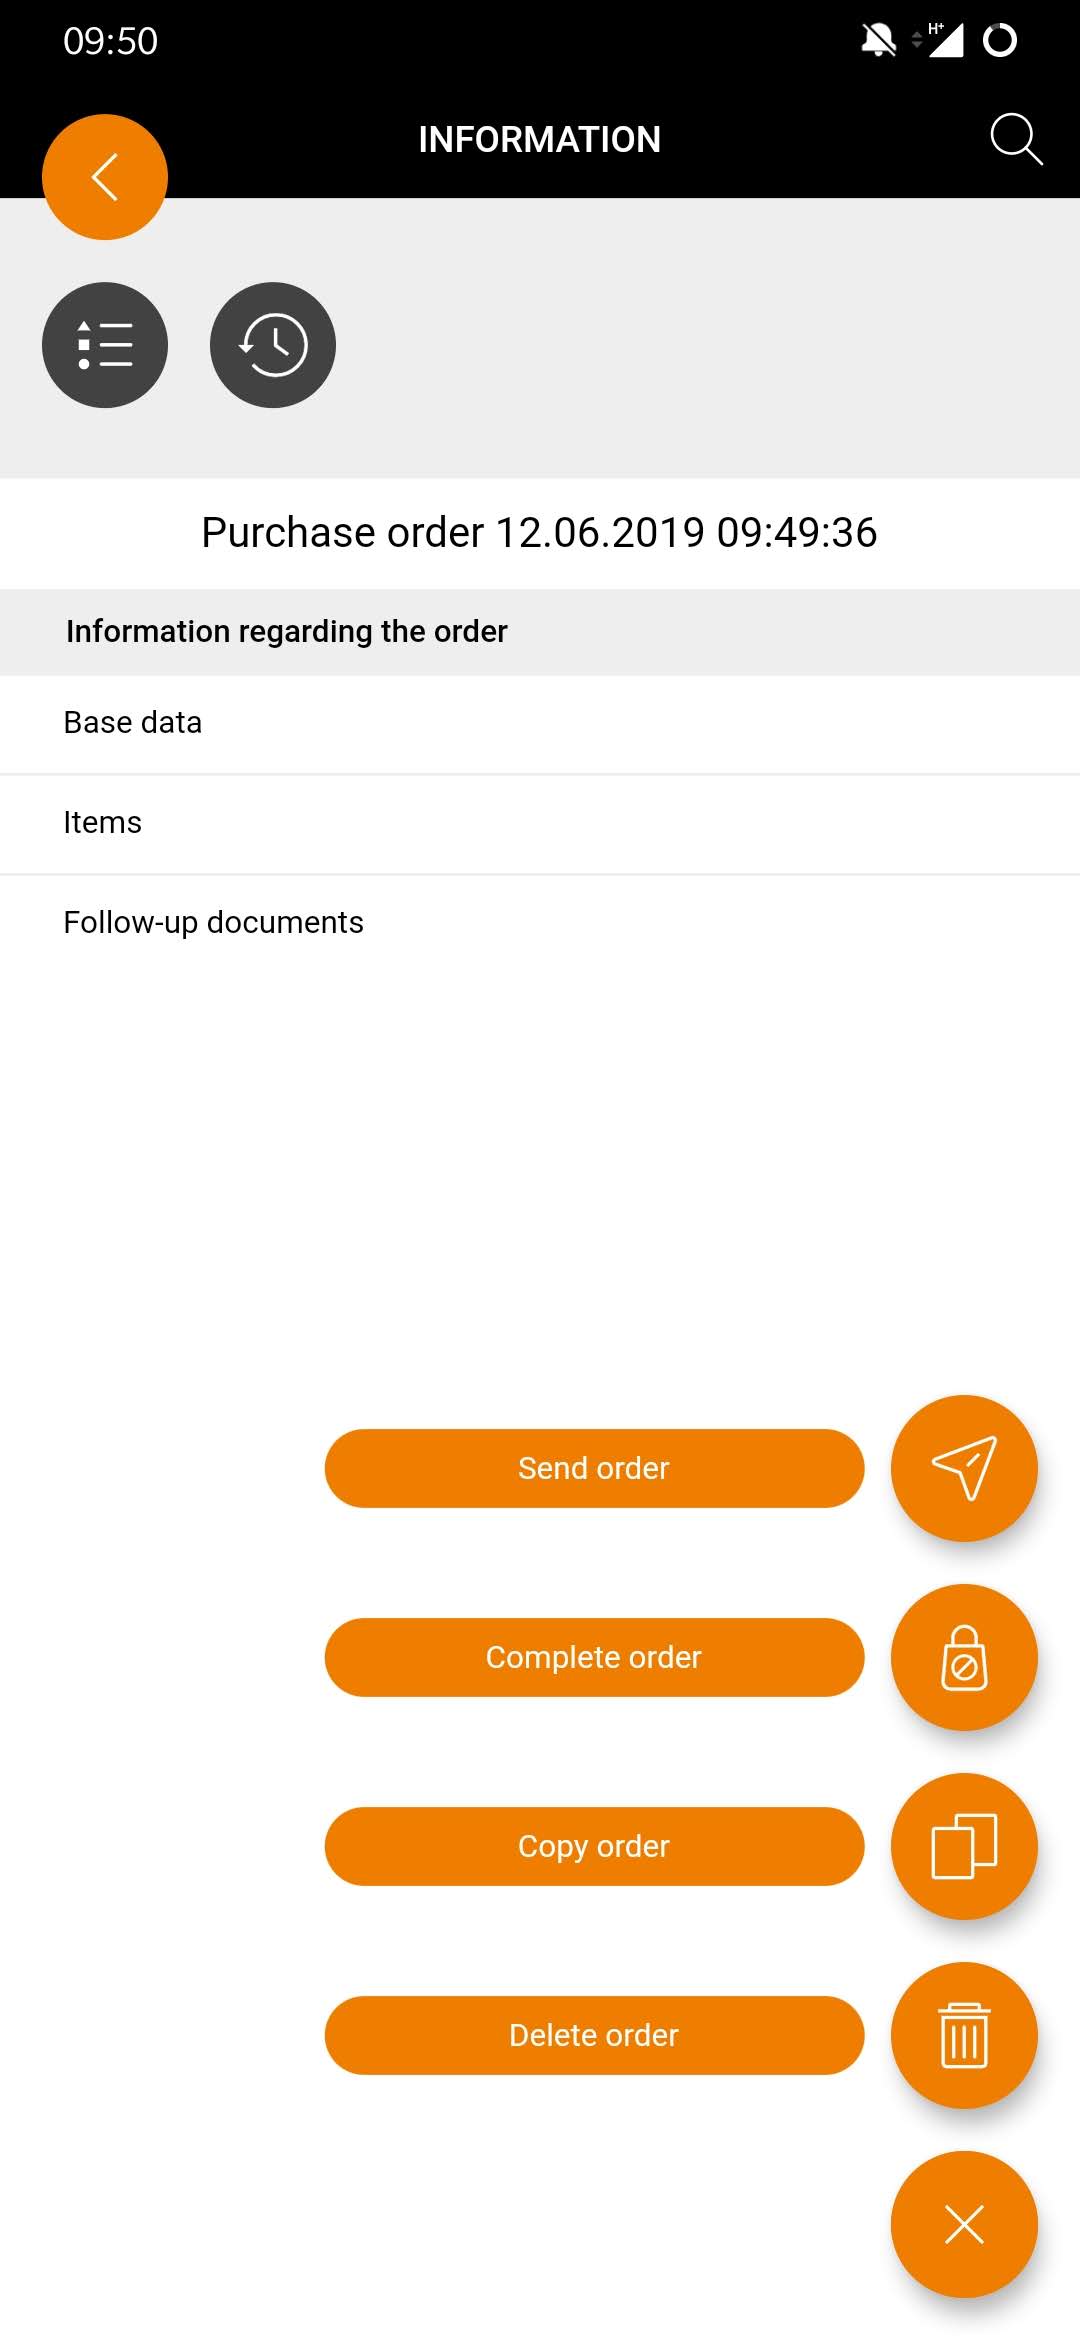
Finish order

| Finish order
To complete an order, wipe the document to the left and tap the “Complete Order” icon
. You confirm this process in the next window, the order will be completed. Alternatively, you can complete an order by tapping on the receipt and then on the “multi-actions” button
. Then tap on
and confirm the selection. The order is completed.
|


Display order details

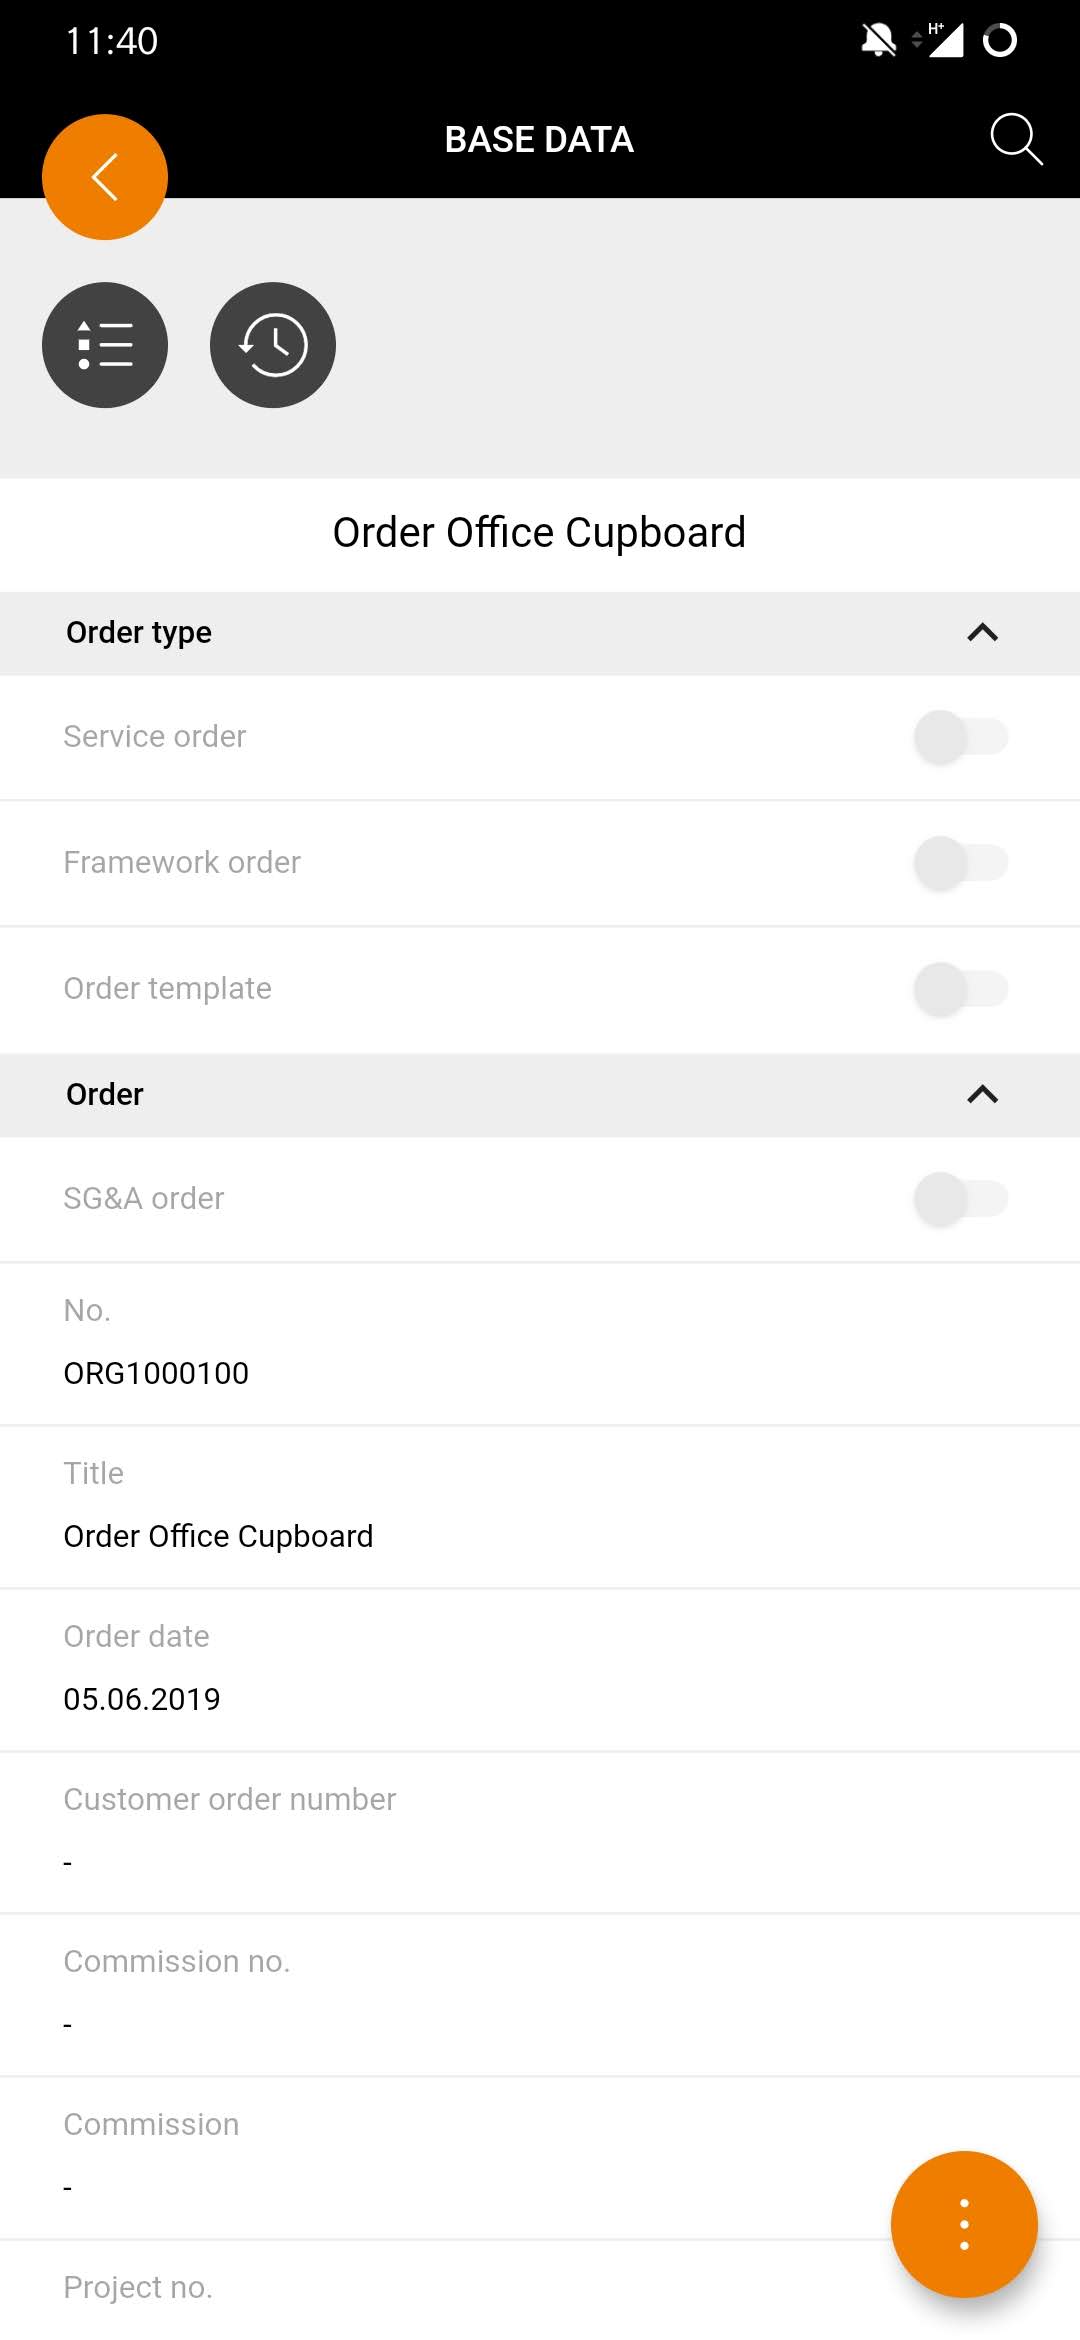
| Display order details
You can find more detailed information about an order by simply following the next steps.
The base data contains all information on the header data of the purchase order. In addition, you can always execute the document functions, regardless of where you are in the document. To do this, tap the “more actions” button
and select the desired action. |

View order items
| View order items
If you want to view order items, tap on “Items”. First of all you will be shown the position list, which already contains the most important details about the individual positions. To view even more detailed information on a particular position, simply tap on the desired position and then select “base data”. The position information will be displayed. You can also execute the document functions no matter where you are in the document. To do this, tap the “More Actions” button
and select the desired action. |

Retrieve follow-on documents for the purchase order

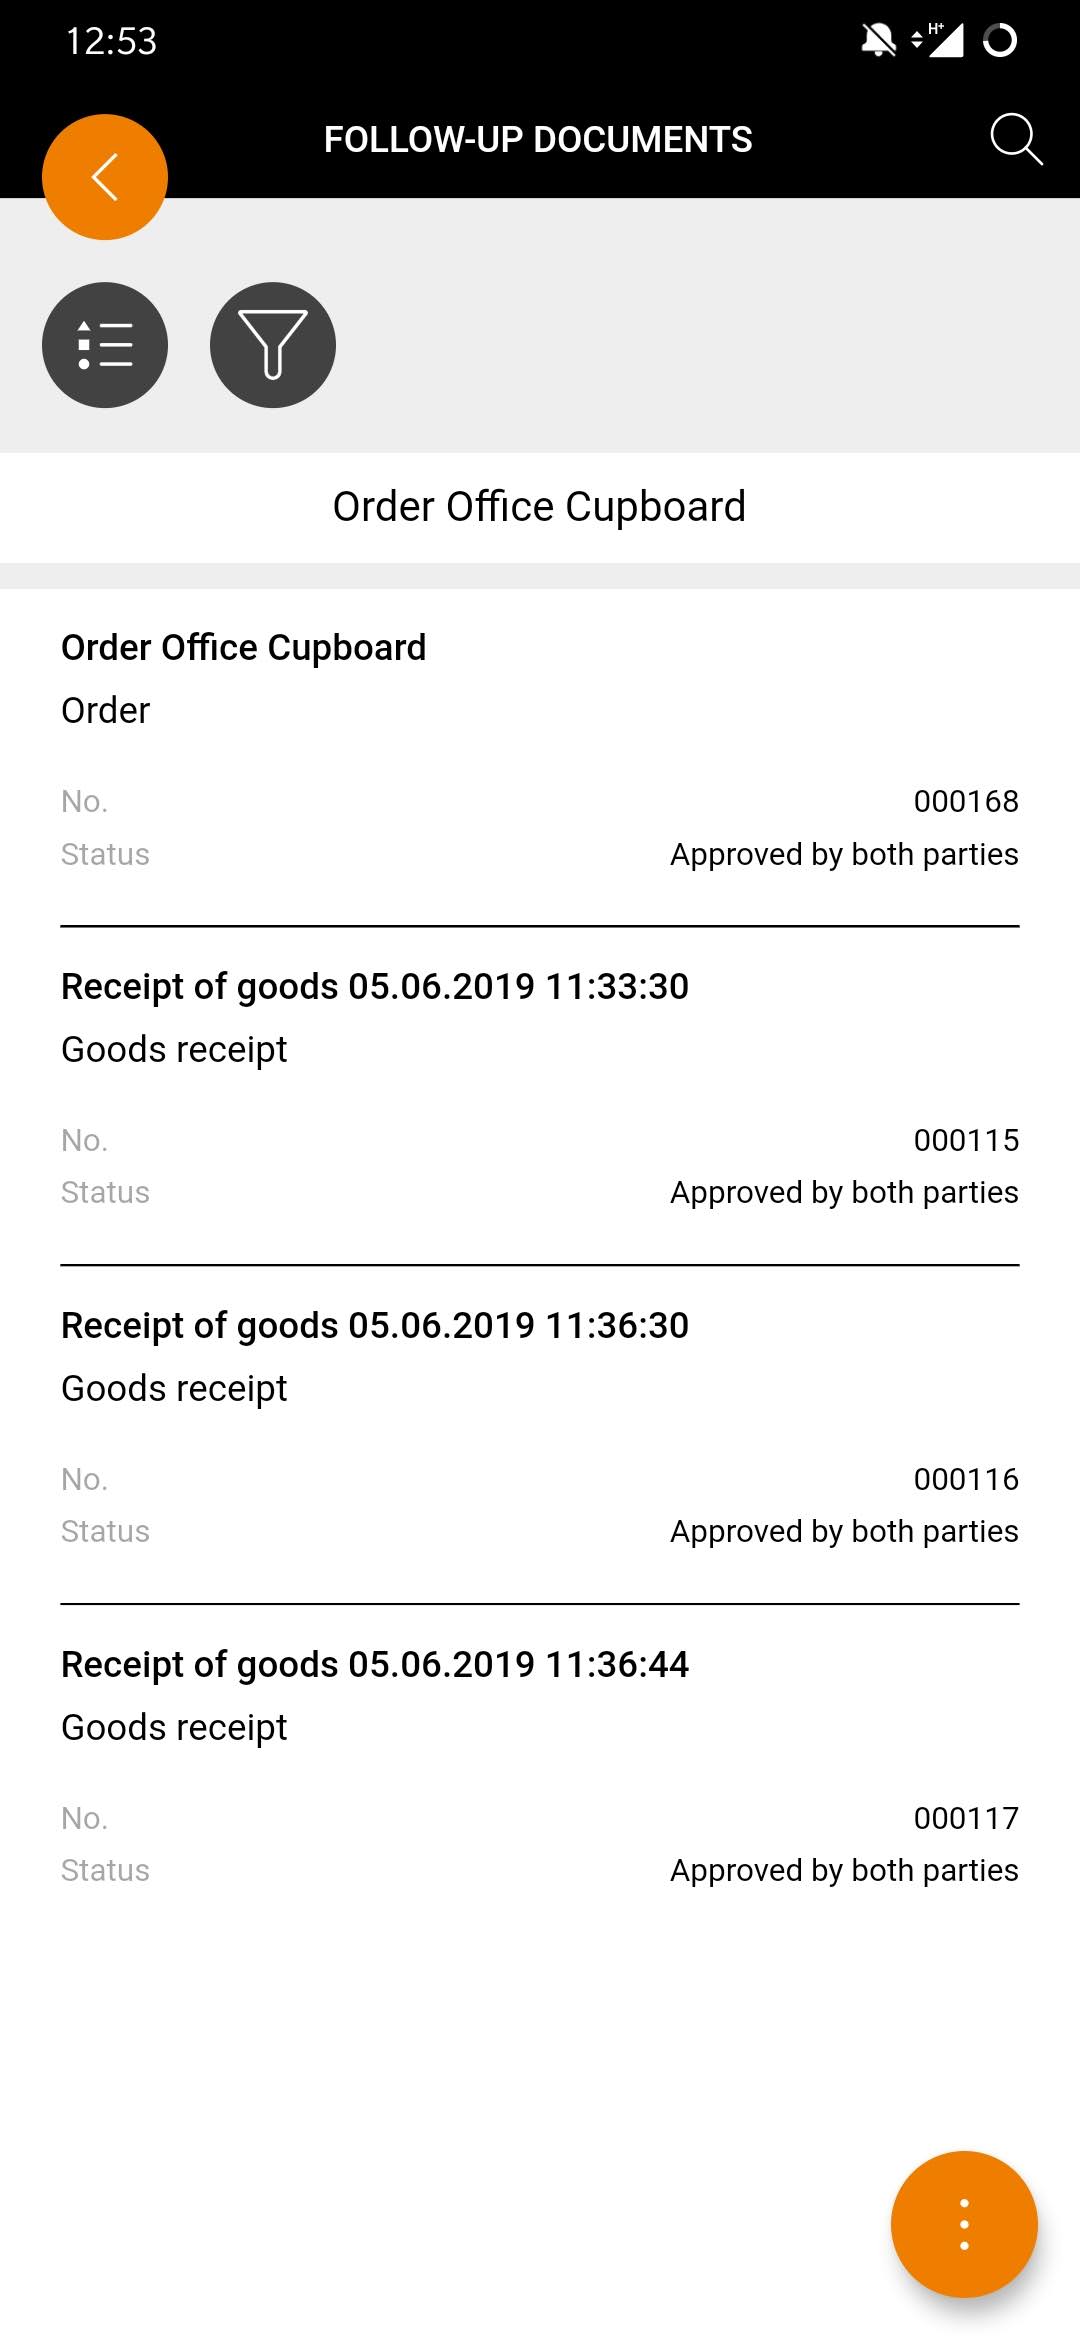
| Retrieve follow-on documents for the purchase order
If you want to view the follow-on documents for the order, tap on “Follow-on documents”. First of all, the system displays a list of all existing follow-on documents that already contain the most important details for the individual follow-on documents. To view even more detailed information on the respective follow-on documents, simply tap on the desired follow-on document. You are forwarded to the corresponding follow-on document.
|
Retrieve order document history

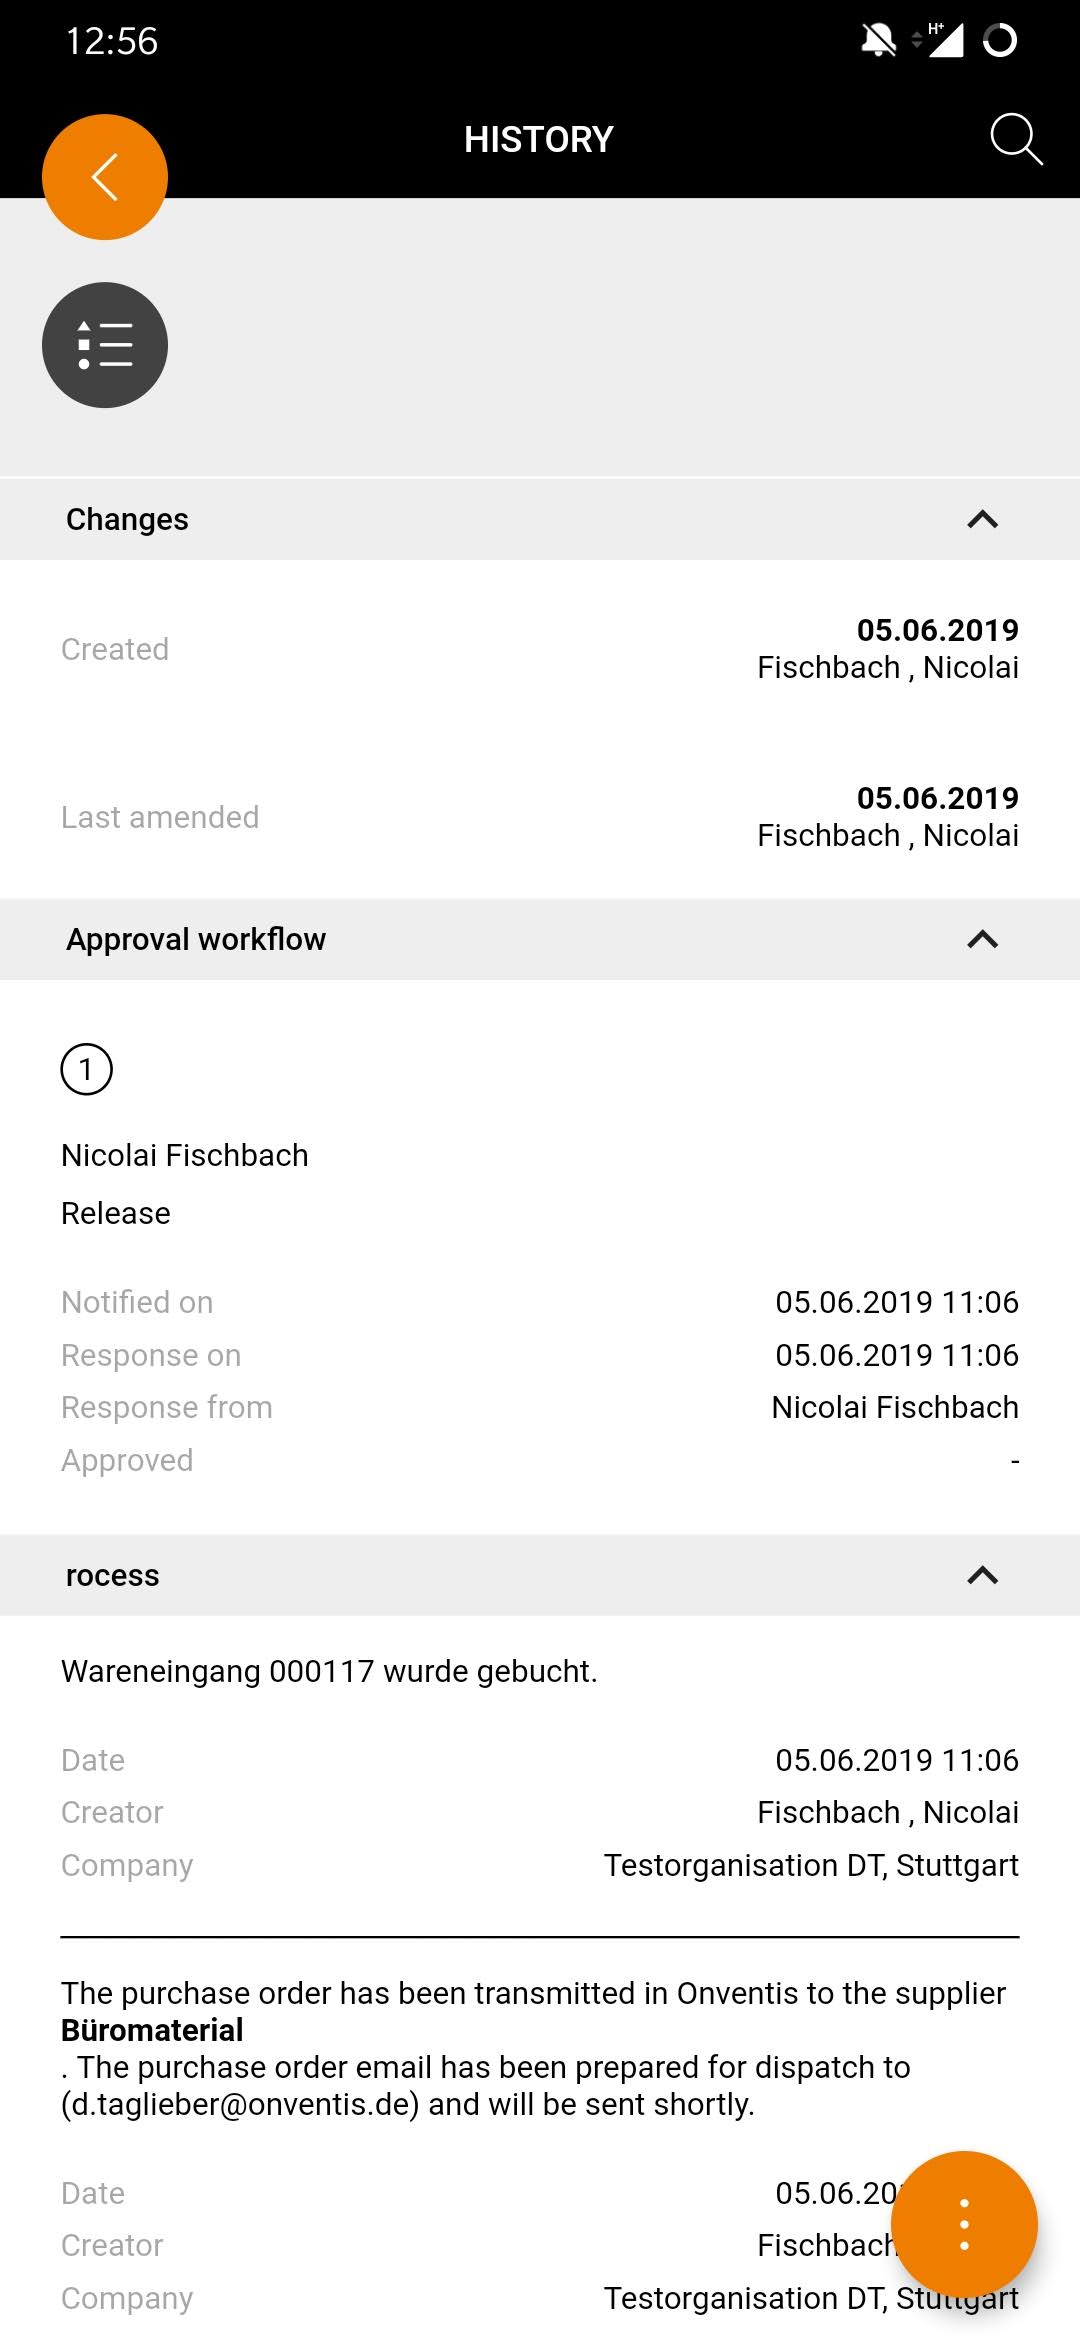
| Retrieve order document history
Naturally, you can also view the document history at any time via Onventis Mobile. To do this, tap on the respective document. If you are in the document, the following “history-button” will be displayed in the header
. Just tap it and a new page opens where you can view information about the release and progress of the document. |

Retrieve and delete attached files
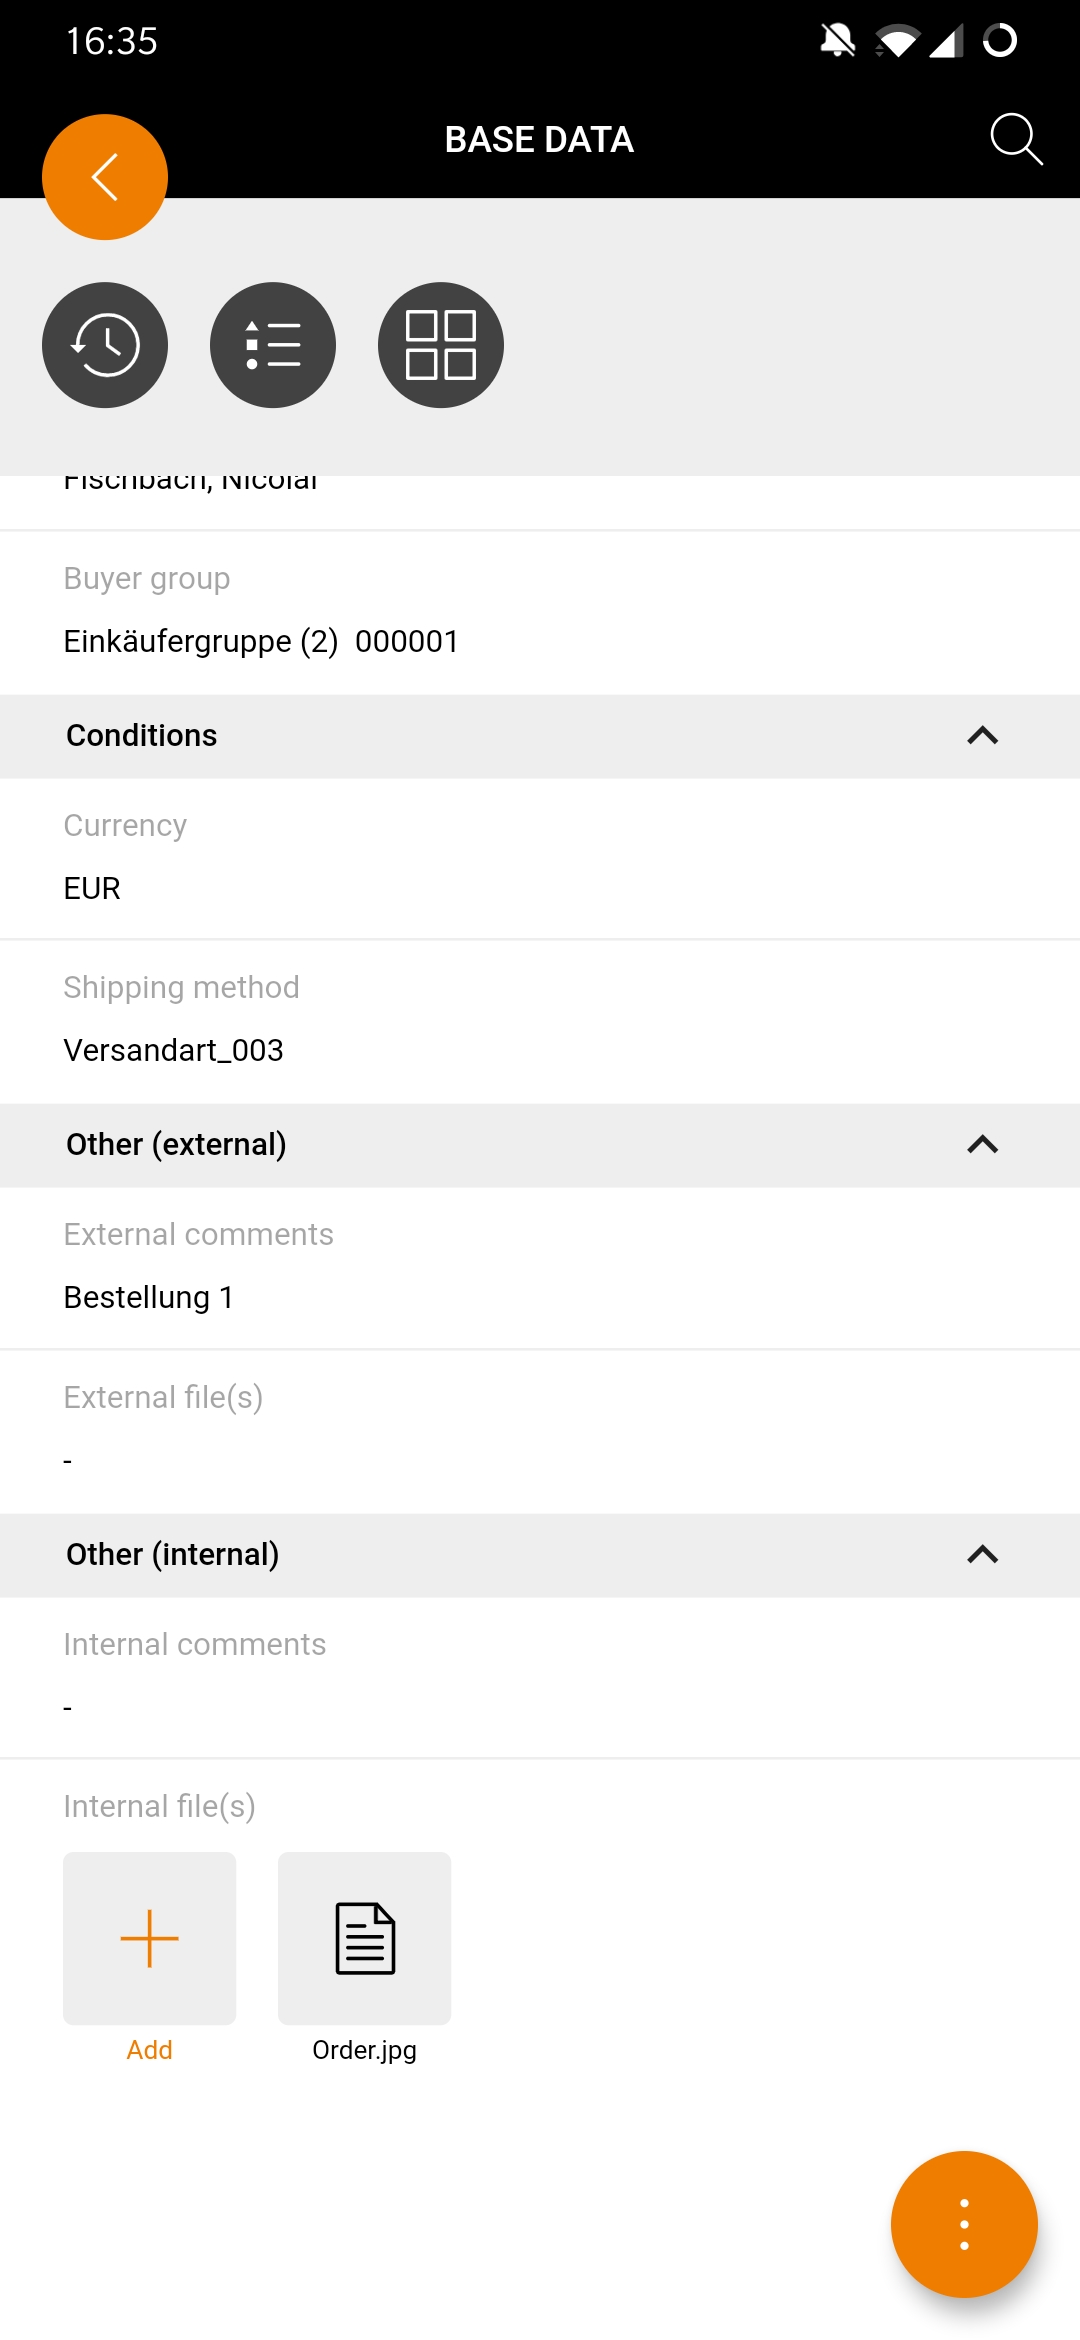
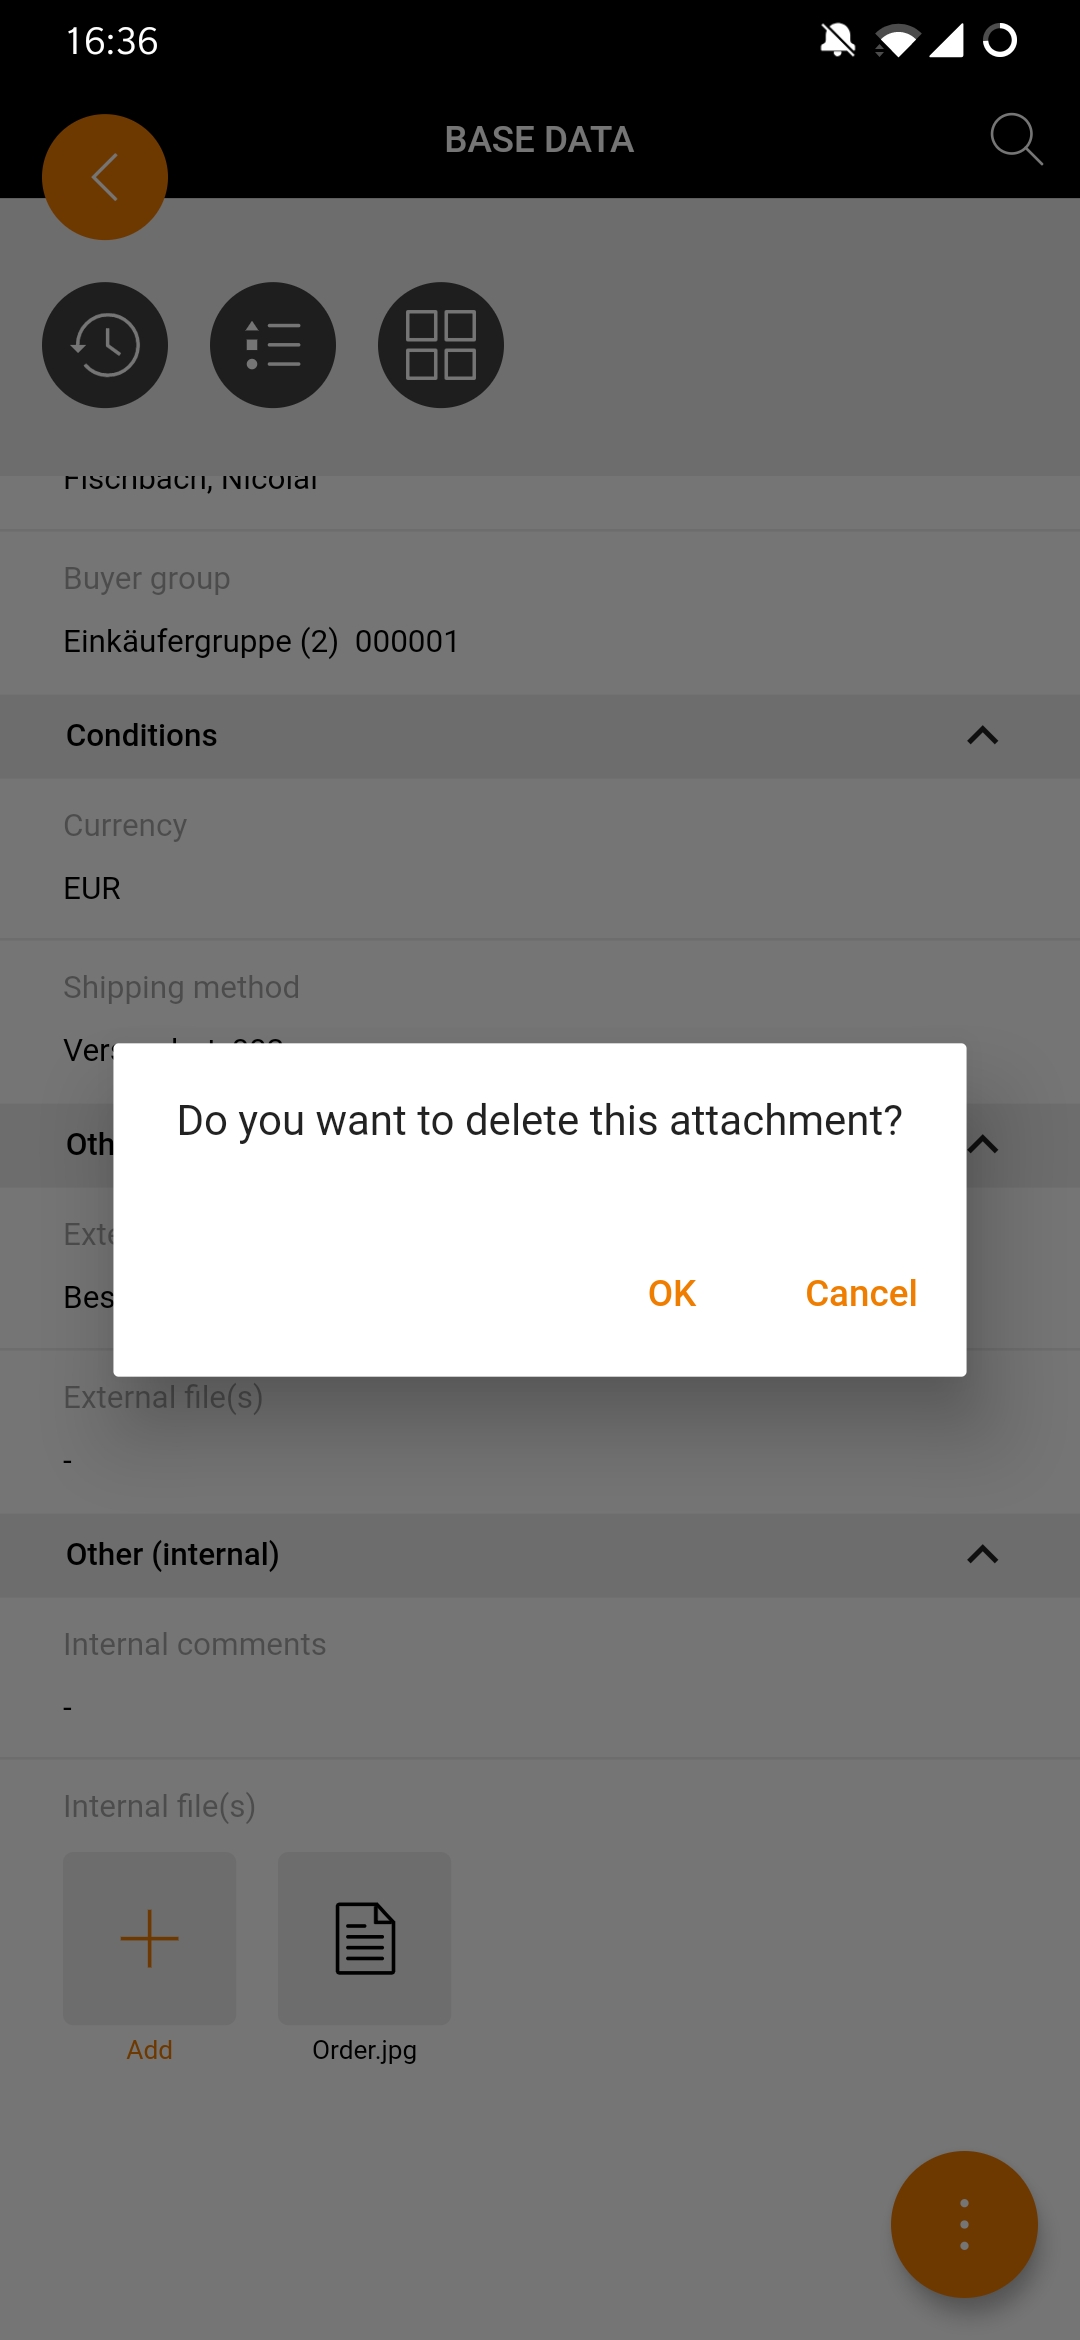
| Retrieve and delete attached files
If file attachments are available in a document, you can of course display and delete them. You can already see in the list of your orders whether you can find file attachments on the document or not. Just look out for the paper clip If you see one, the document contains file attachments. You can also recognize file attachments by this icon A simple tap opens the attachment, but if you hold it down longer, a message to delete the attachment appears. Please note: Depending on the device and operating system of your smartphone, certain programs must be installed on your device in order to display certain file formats. For example, to view a PDF, you need a PDF reader/PDF viewer on Android smartphones. |
 .
. .
.Mobile goods receipt
Post goods receipts immediately
Forgotten or incorrect goods receipt transactions now belong to the past. If goods are delivered to a specific location, the employee in charge is able to create and post the goods receipt there directly and easily. Even urgent deliveries can be recorded in this way as partial goods receipts. If the goods are booked at any delivery location, any authorized person can view the goods receipt via the Onventis Mobile App.
Mobile flexibility even in the event of short or incorrect deliveries
With the Onventis Mobile App, processing goods receipts that have already been booked is no problem at all. In case of incorrect or short deliveries or incorrect bookings, you can cancel or delete goods receipts at any time and from any location and thus react flexibly to everyday situations.
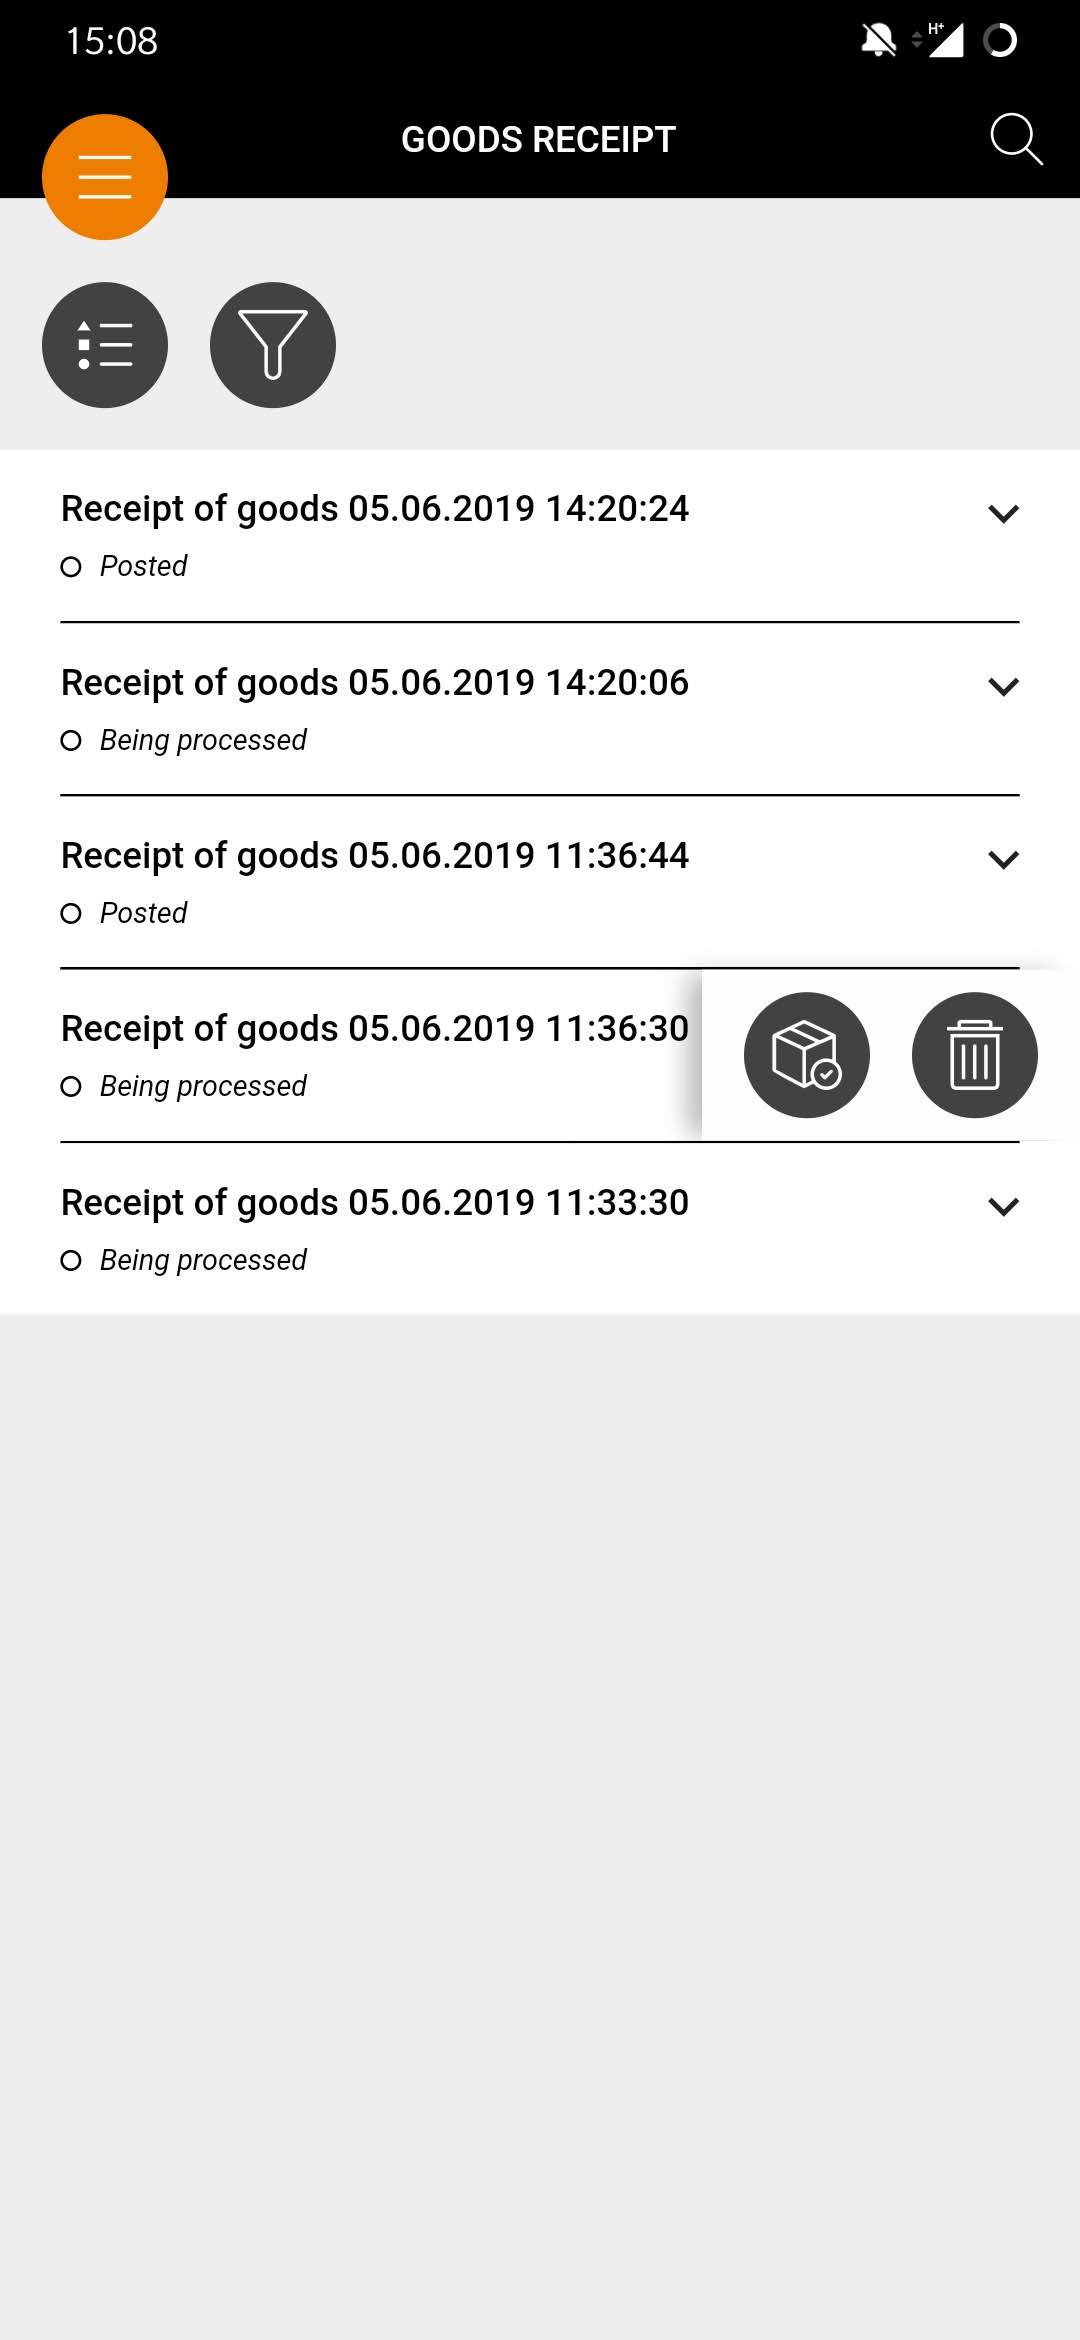
List of goods receipt
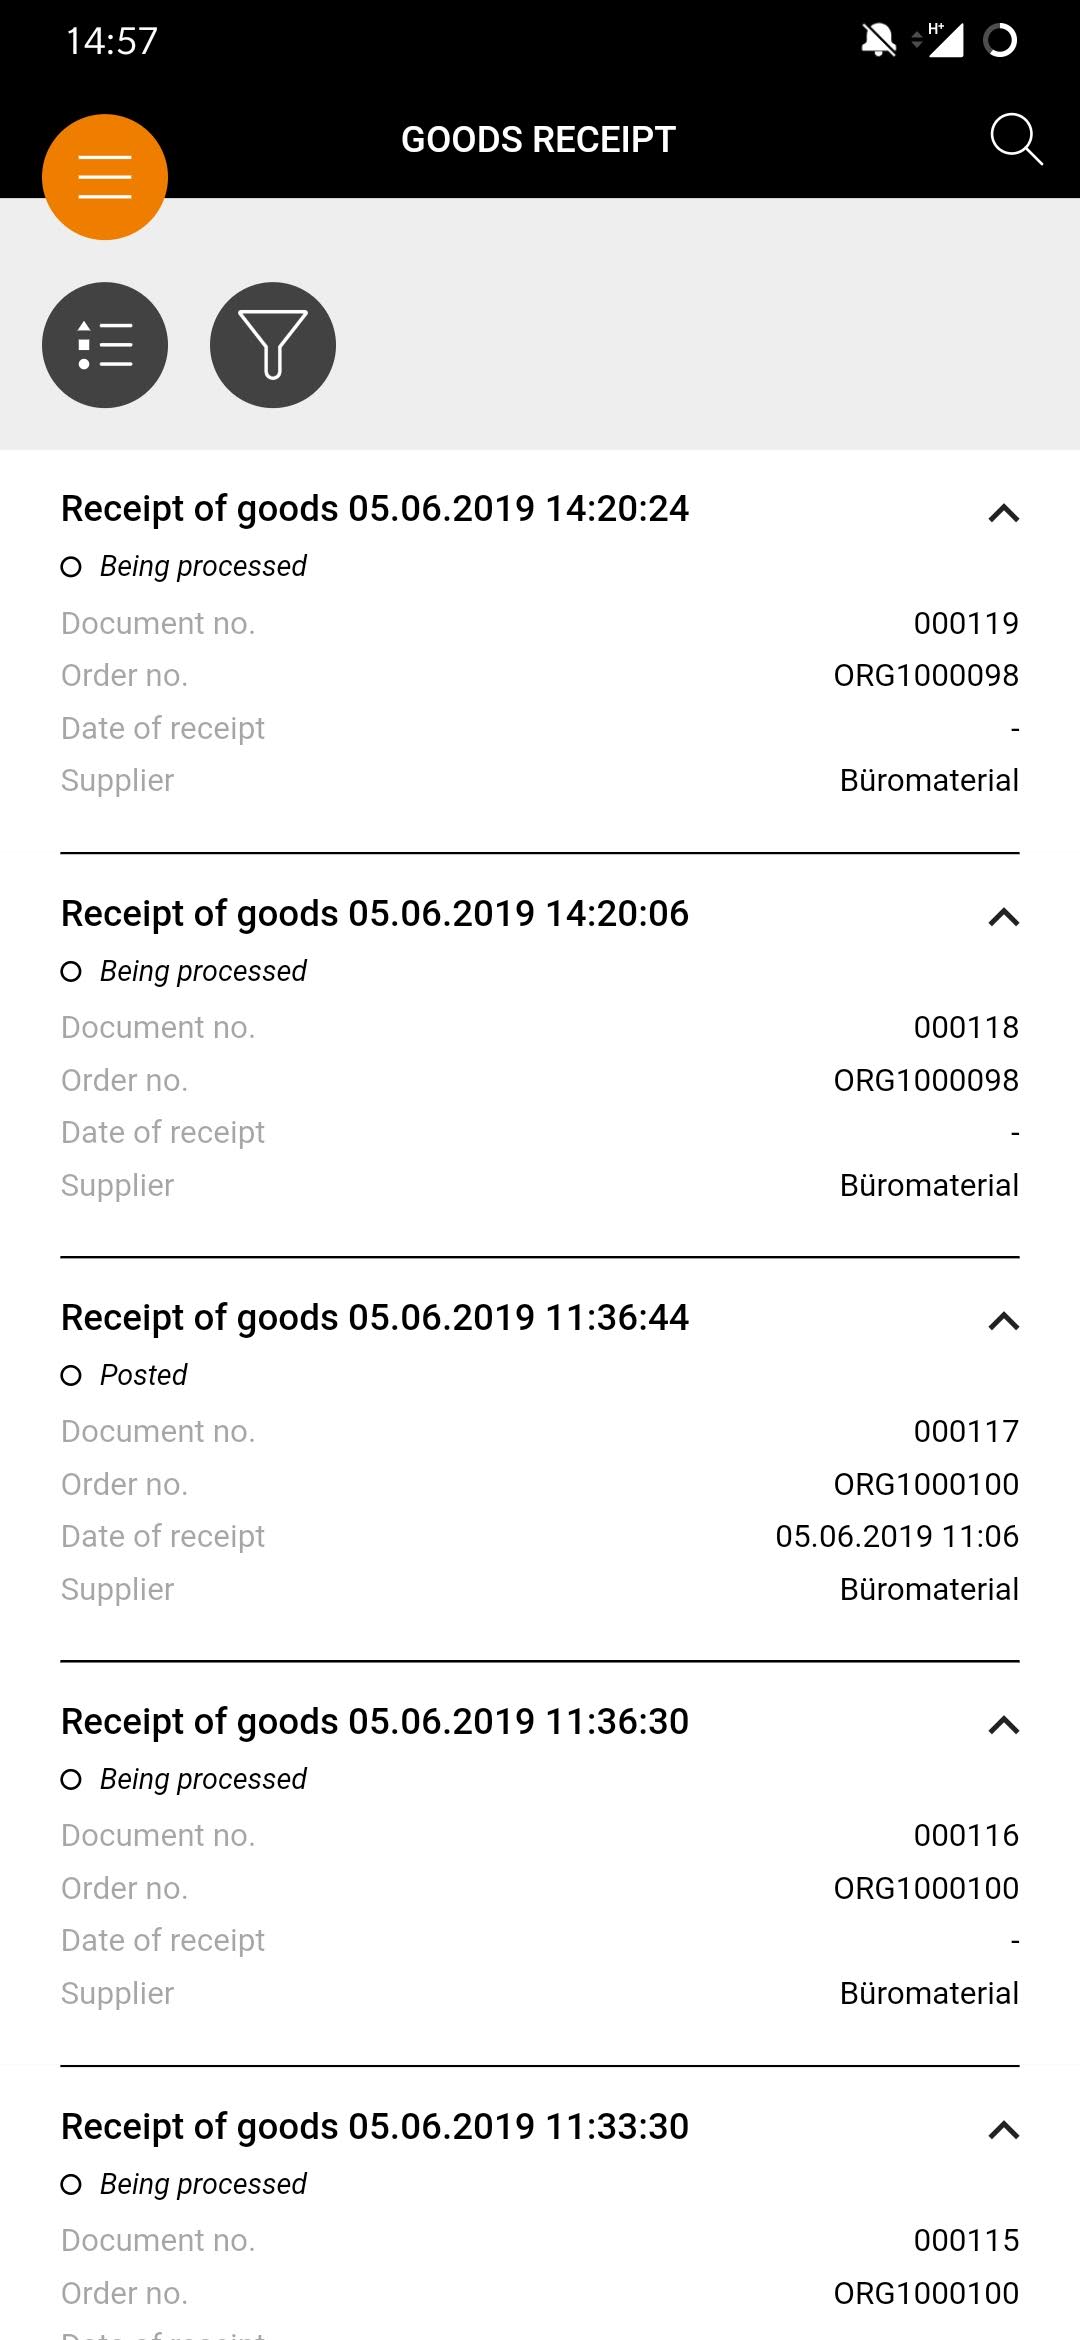
| List of good Receipts
The goods receipt list contains all goods receipt documents. You can use the icon
to change the goods receipt list in the sort sequence. Simply press the button
, select sorting and confirm. The list reloads and sorts the documents in the required order. You can also expand or collapse the various goods receipt documents by clicking on
. Expand the individual documents in the list if you want to see more information in the list. The icon indicates whether there are file attachments in the respective document. You can use
to open a search window and browese for a specific goods receipt document. |


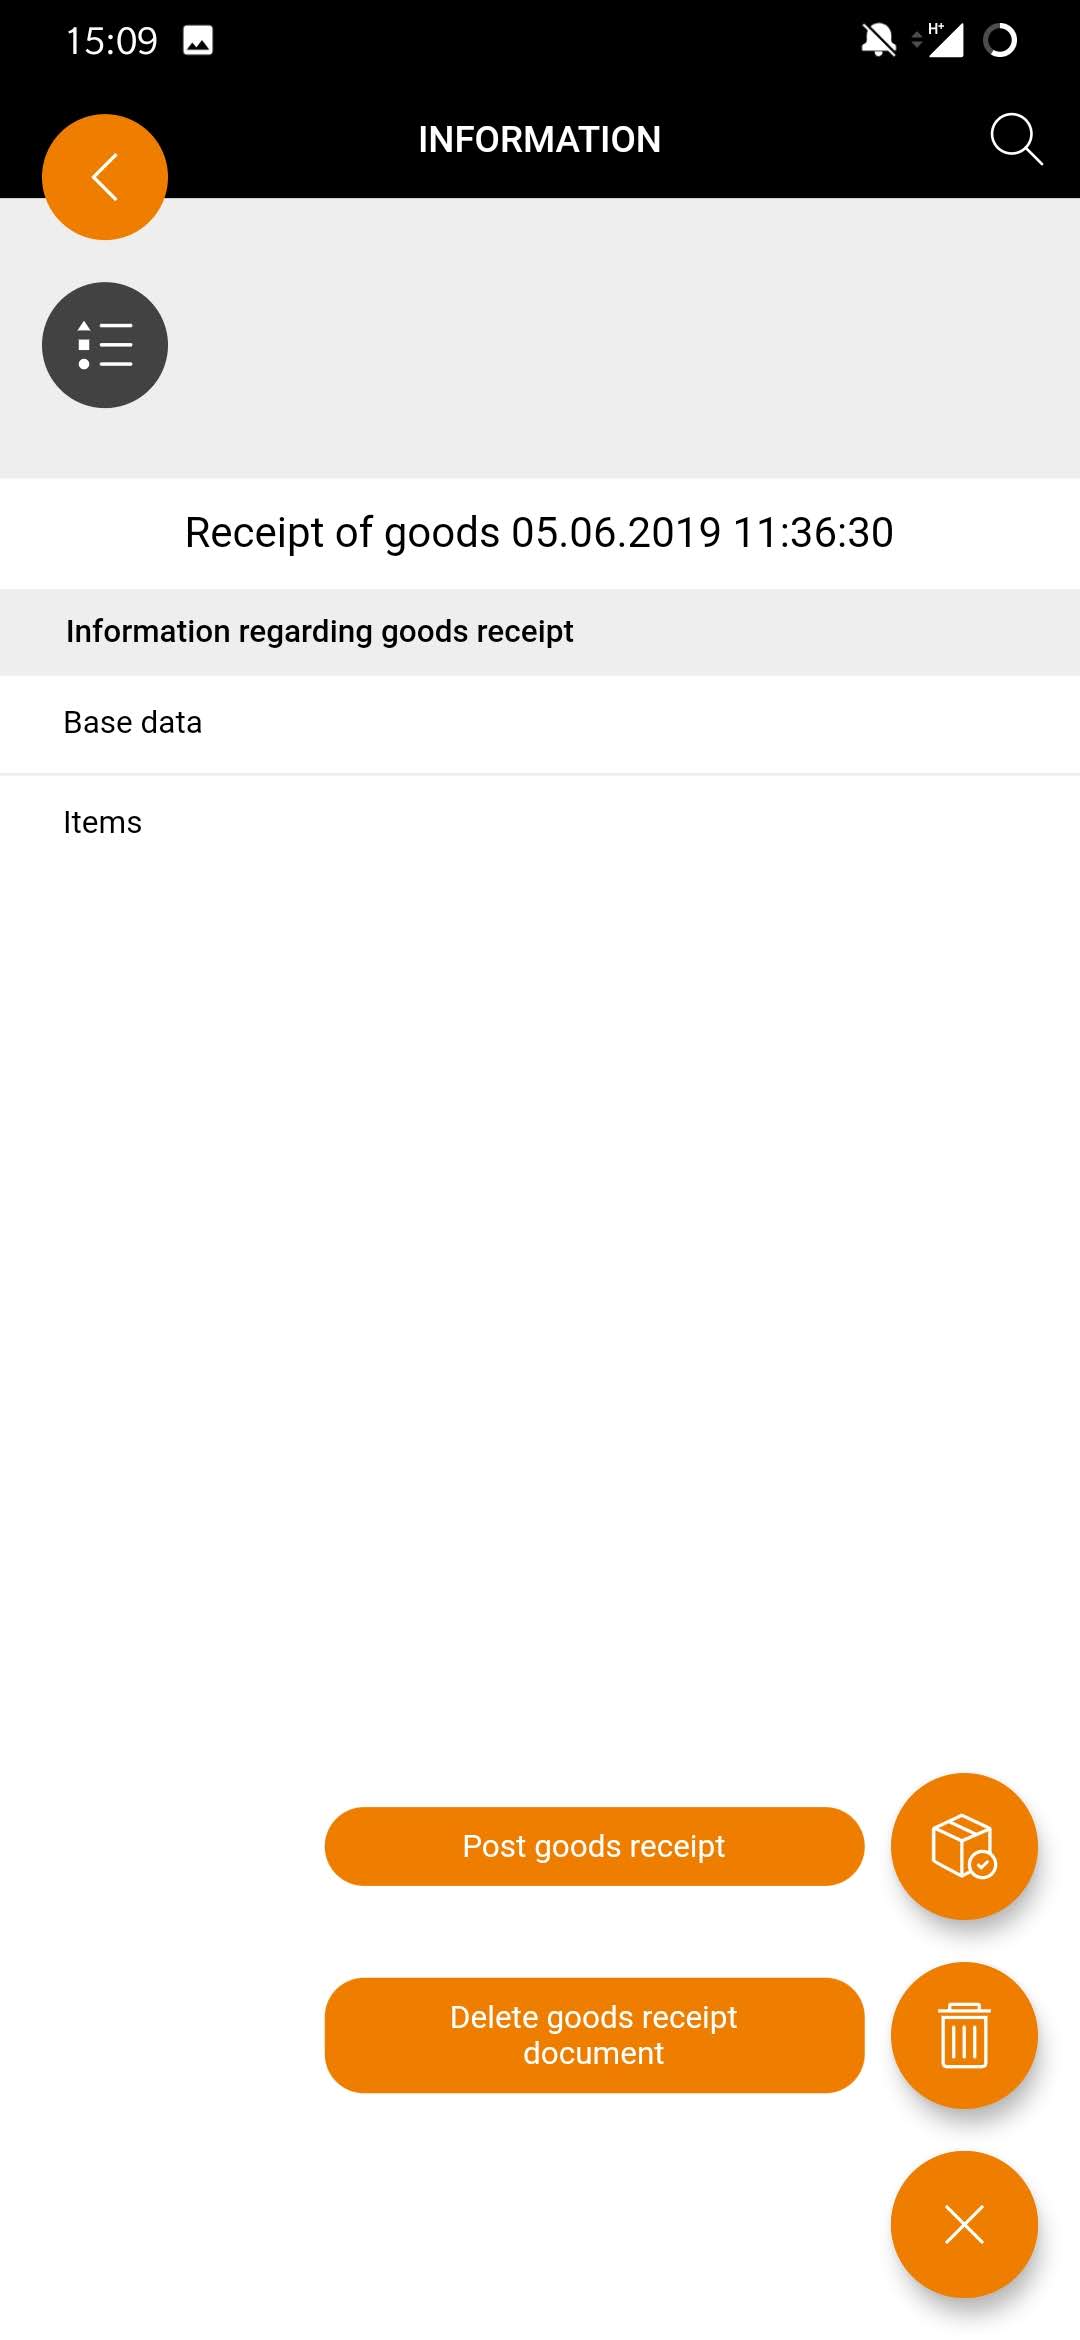
Actions in goods receipt
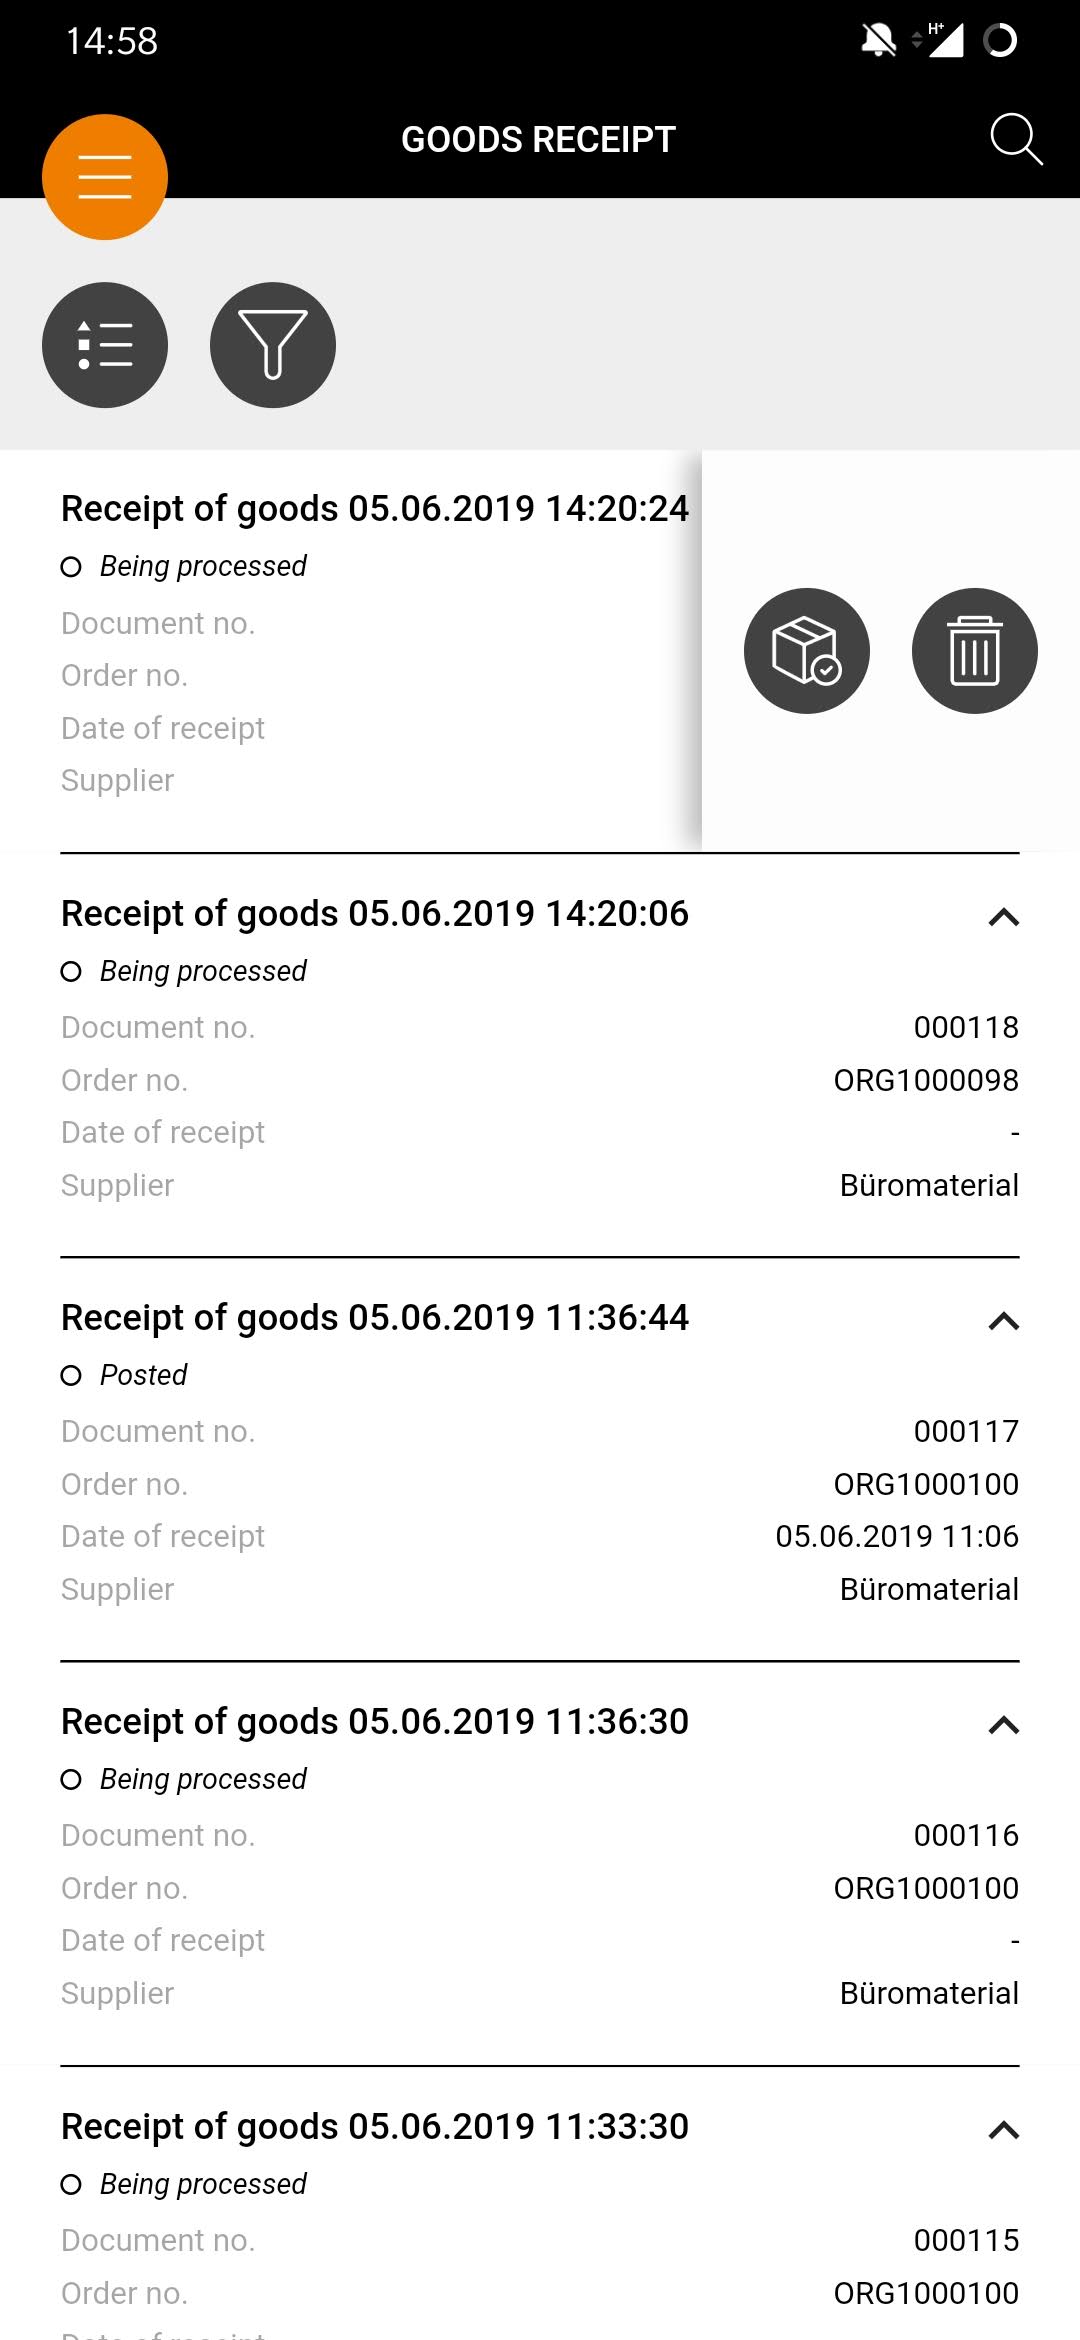
| Actions in goods receipt
You have exactly two options for displaying actions from goods receipt documents:
. |

Post goods receipt

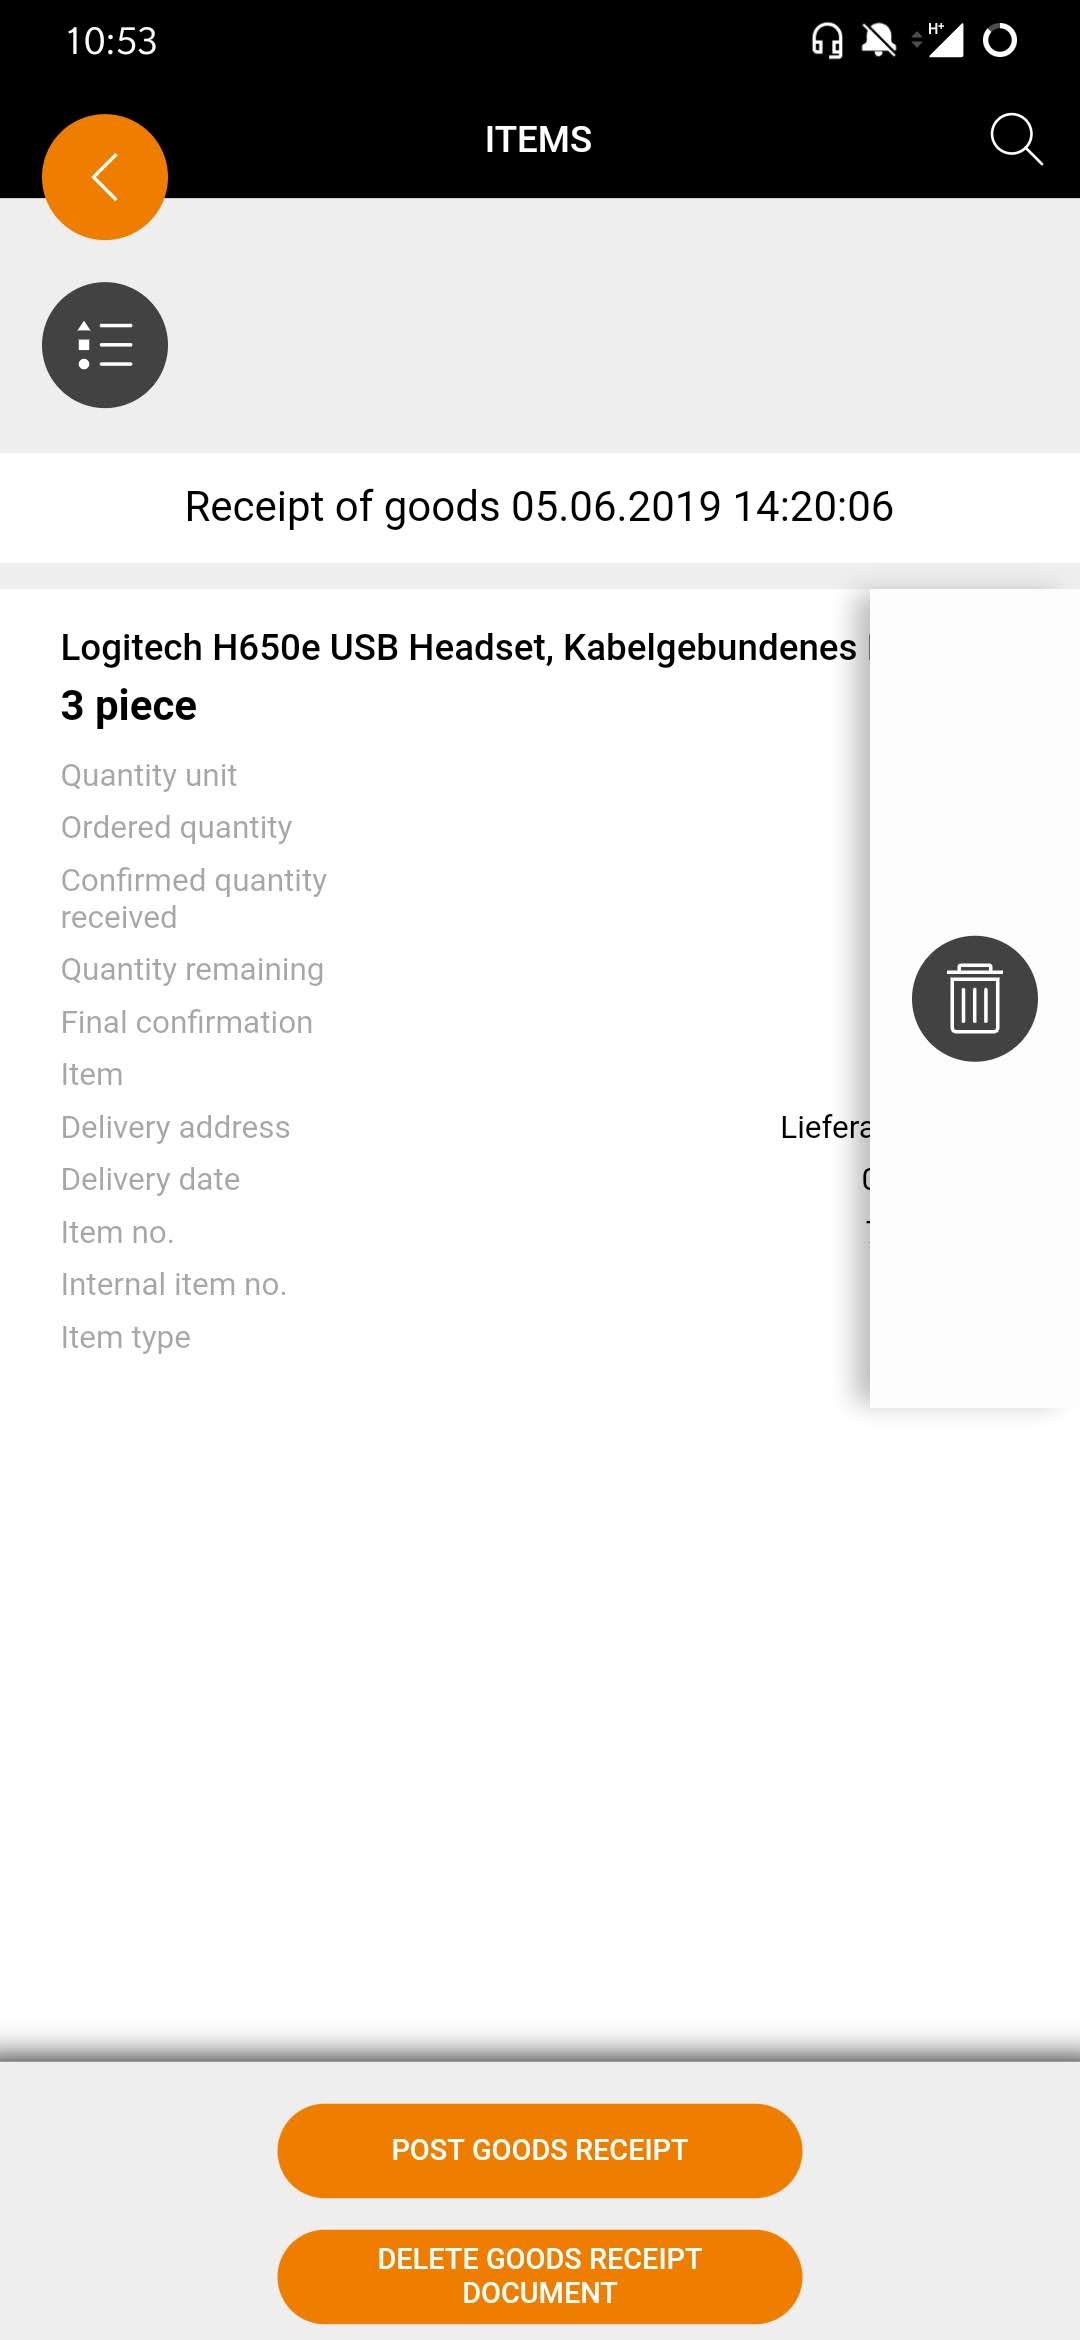
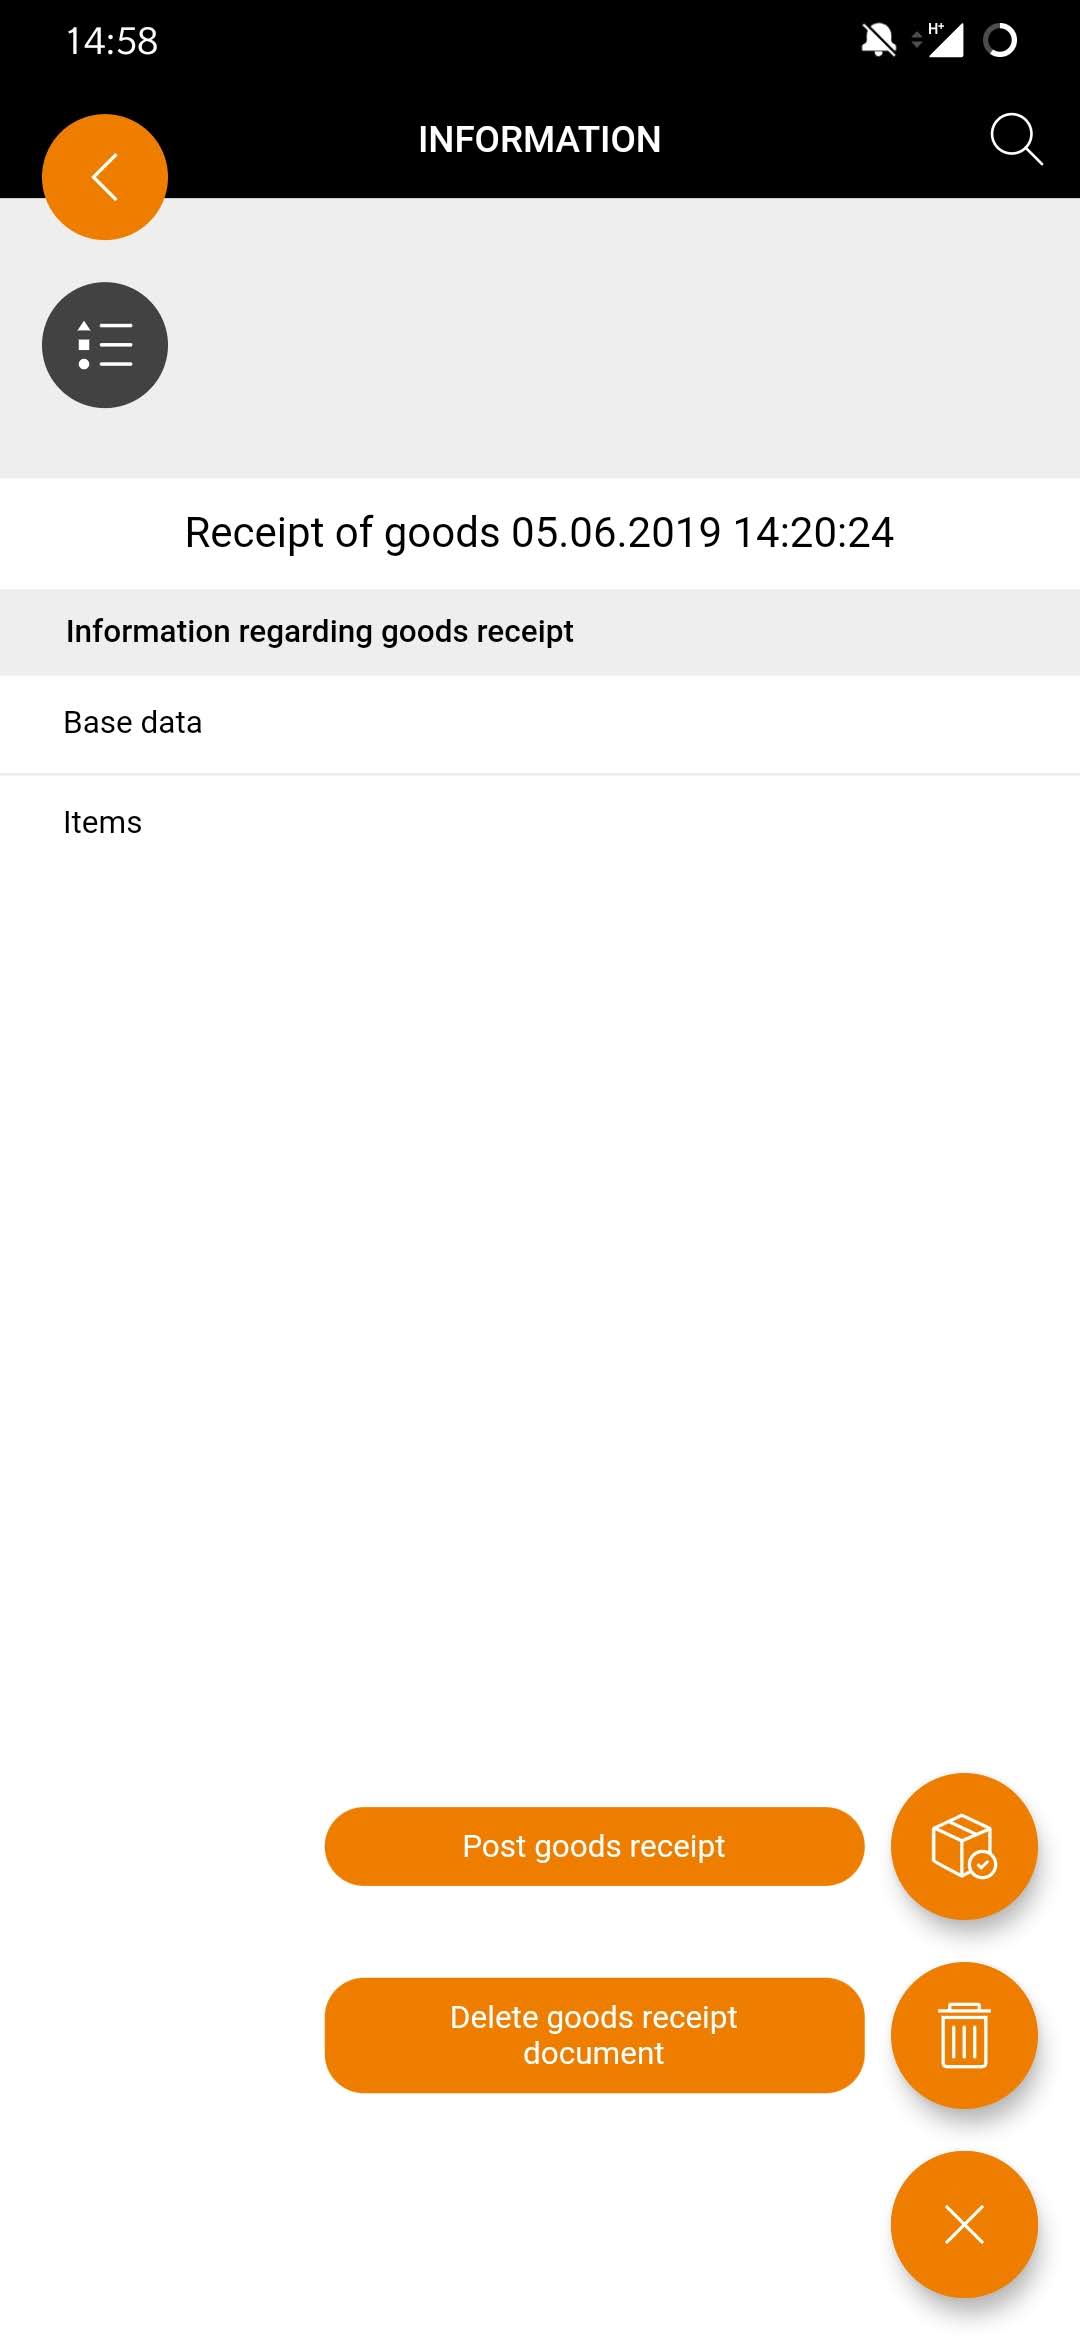
| Post goods receipt
To post a goods receipt, proceed as follows:
and select “Positions”.
Note: In the configuration of Onventis Buyer it is possible to preset the items of the goods receipt as “final confirmed” and prefilled with the ordered quantity in the goods receipt document. If you have activated this configuration, you can already book the goods receipt (if it is complete) via the list and the action swipe to the left and press the button If you still want to change individual positions, proceed as described (steps 1-6). To delete a item, simply swipe the item to the left in the item list. Now just tap
and confirm the operation. |

 .
.
Cancel goods receipt

| Cancel goods receipt
You have exactly two options for cancelling goods receipts:
. Confirm the operation, and the goods receipt will be canceled.
|


Delete goods receipt
| Delete goods receipt
You have exactly two options for deleting goods receipts:
|
 . Confirm the operation, the goods receipt is deleted.
 . Confirm the process so that the goods receipt will be deleted.
Retrieve goods receipt information

| Retrieve goods receipt information
You can naturally retrieve more detailed information on a goods receipt document in the app. To do this, simply press the desired document in the goods receipt list and then select base data. You are now taken to the page where you can find all the information on the goods receipt document. |
View goods receipt items

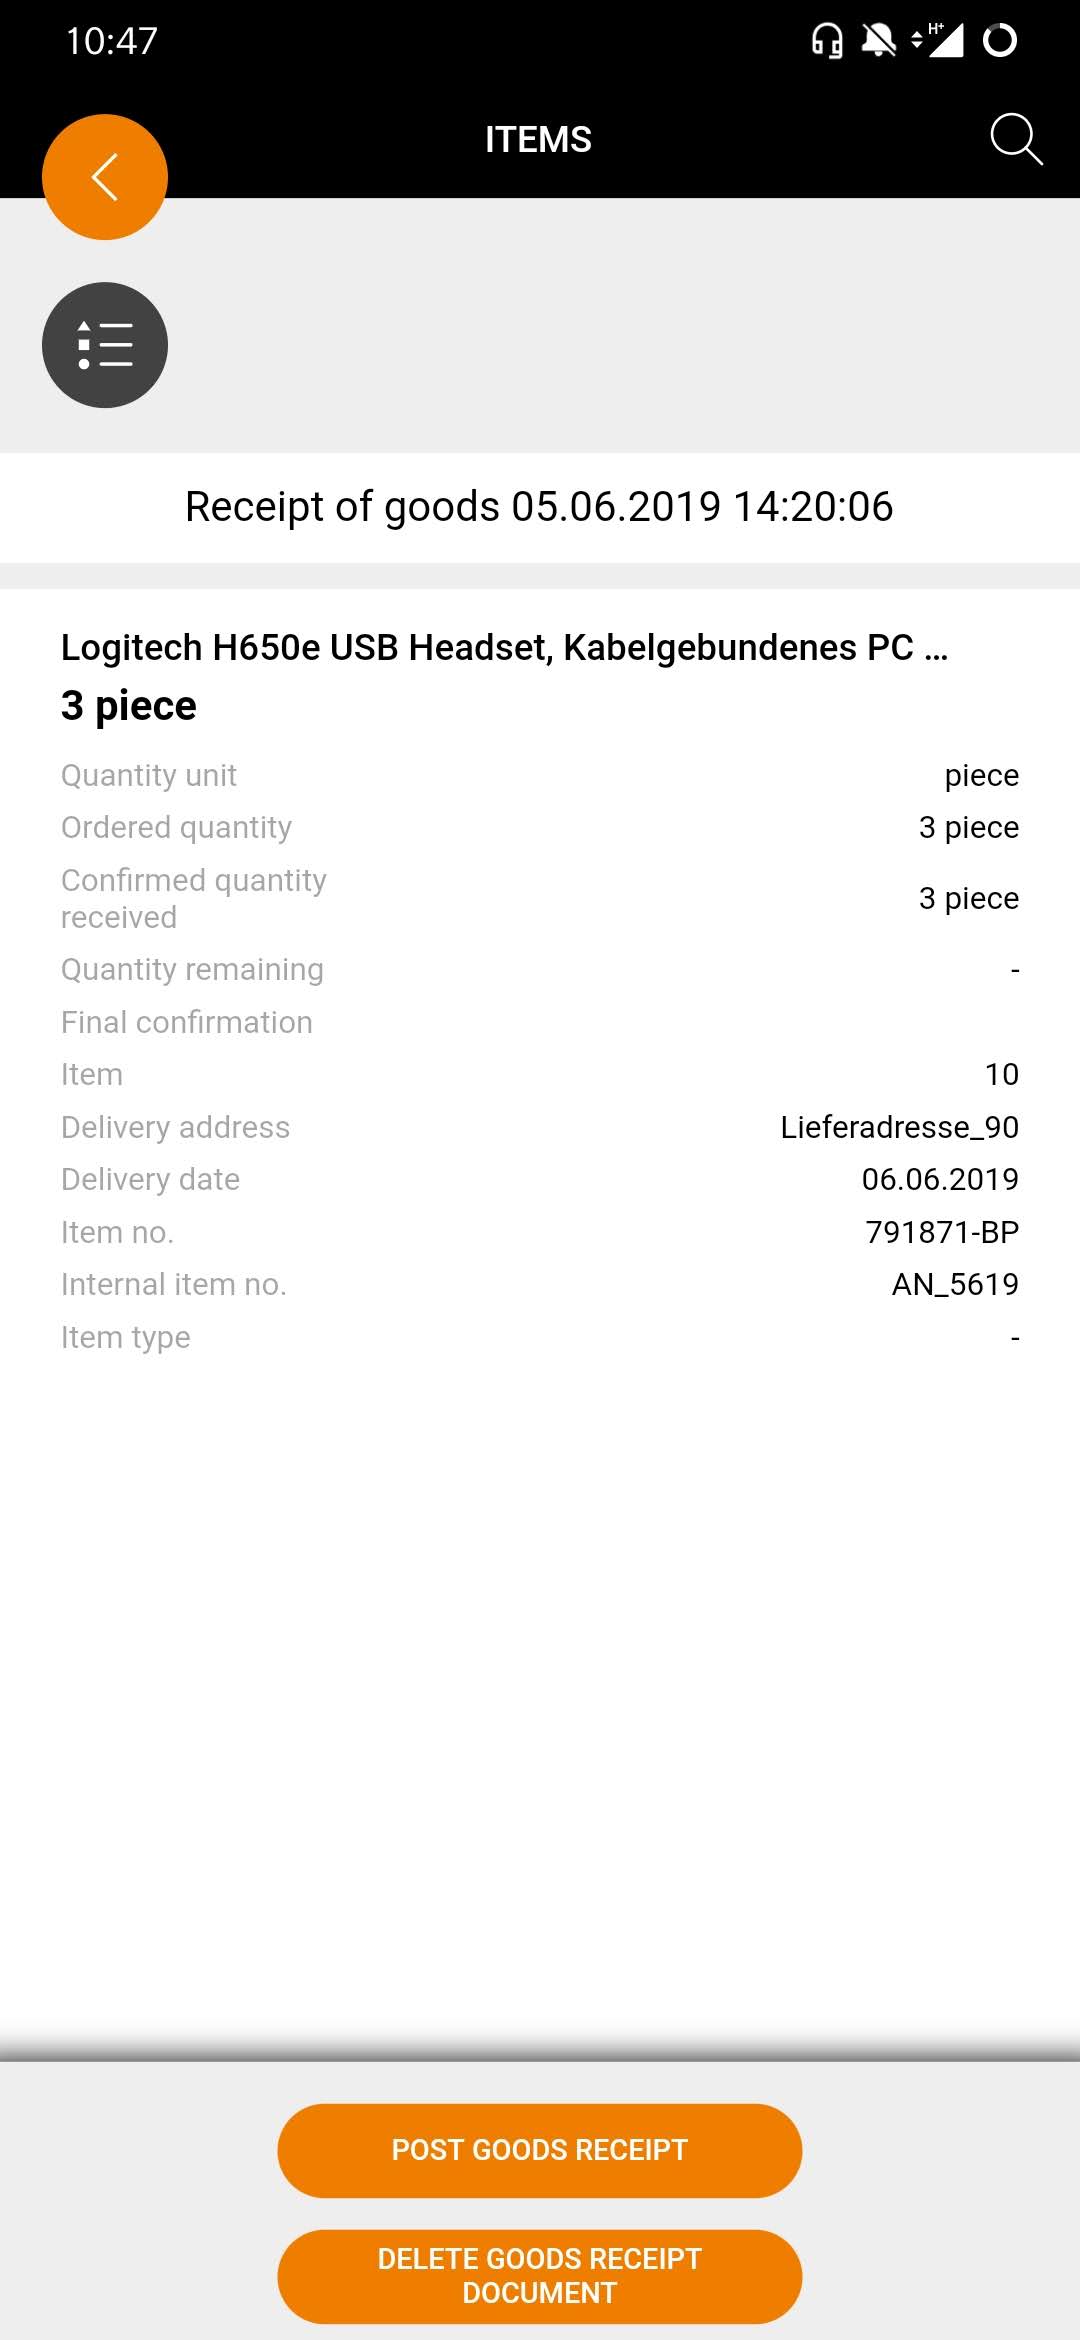
| View goods receipt information
You can use the app to retrieve and view the goods receipt items. To do this, select the required document in the goods receipt list. In the next step, choose Items and the item list will appear. You will find the individual items in the item list. The most important information for each item is already visible in the list. For further information simply select the position. |
Mobile service note
Smart recording of service notes
With the Onventis Mobile App, you can record and send service notes easily and efficiently – at any time, without complications and regardless of location. If the service has been performed, you check the submitted service note at the service location, view all relevant information, and release the service note immediately for posting.
Targeted use of workflows
You use the flexible Onventis workflow options throughout the entire process. You can easily mark items as closed, release and post them.
Service note list
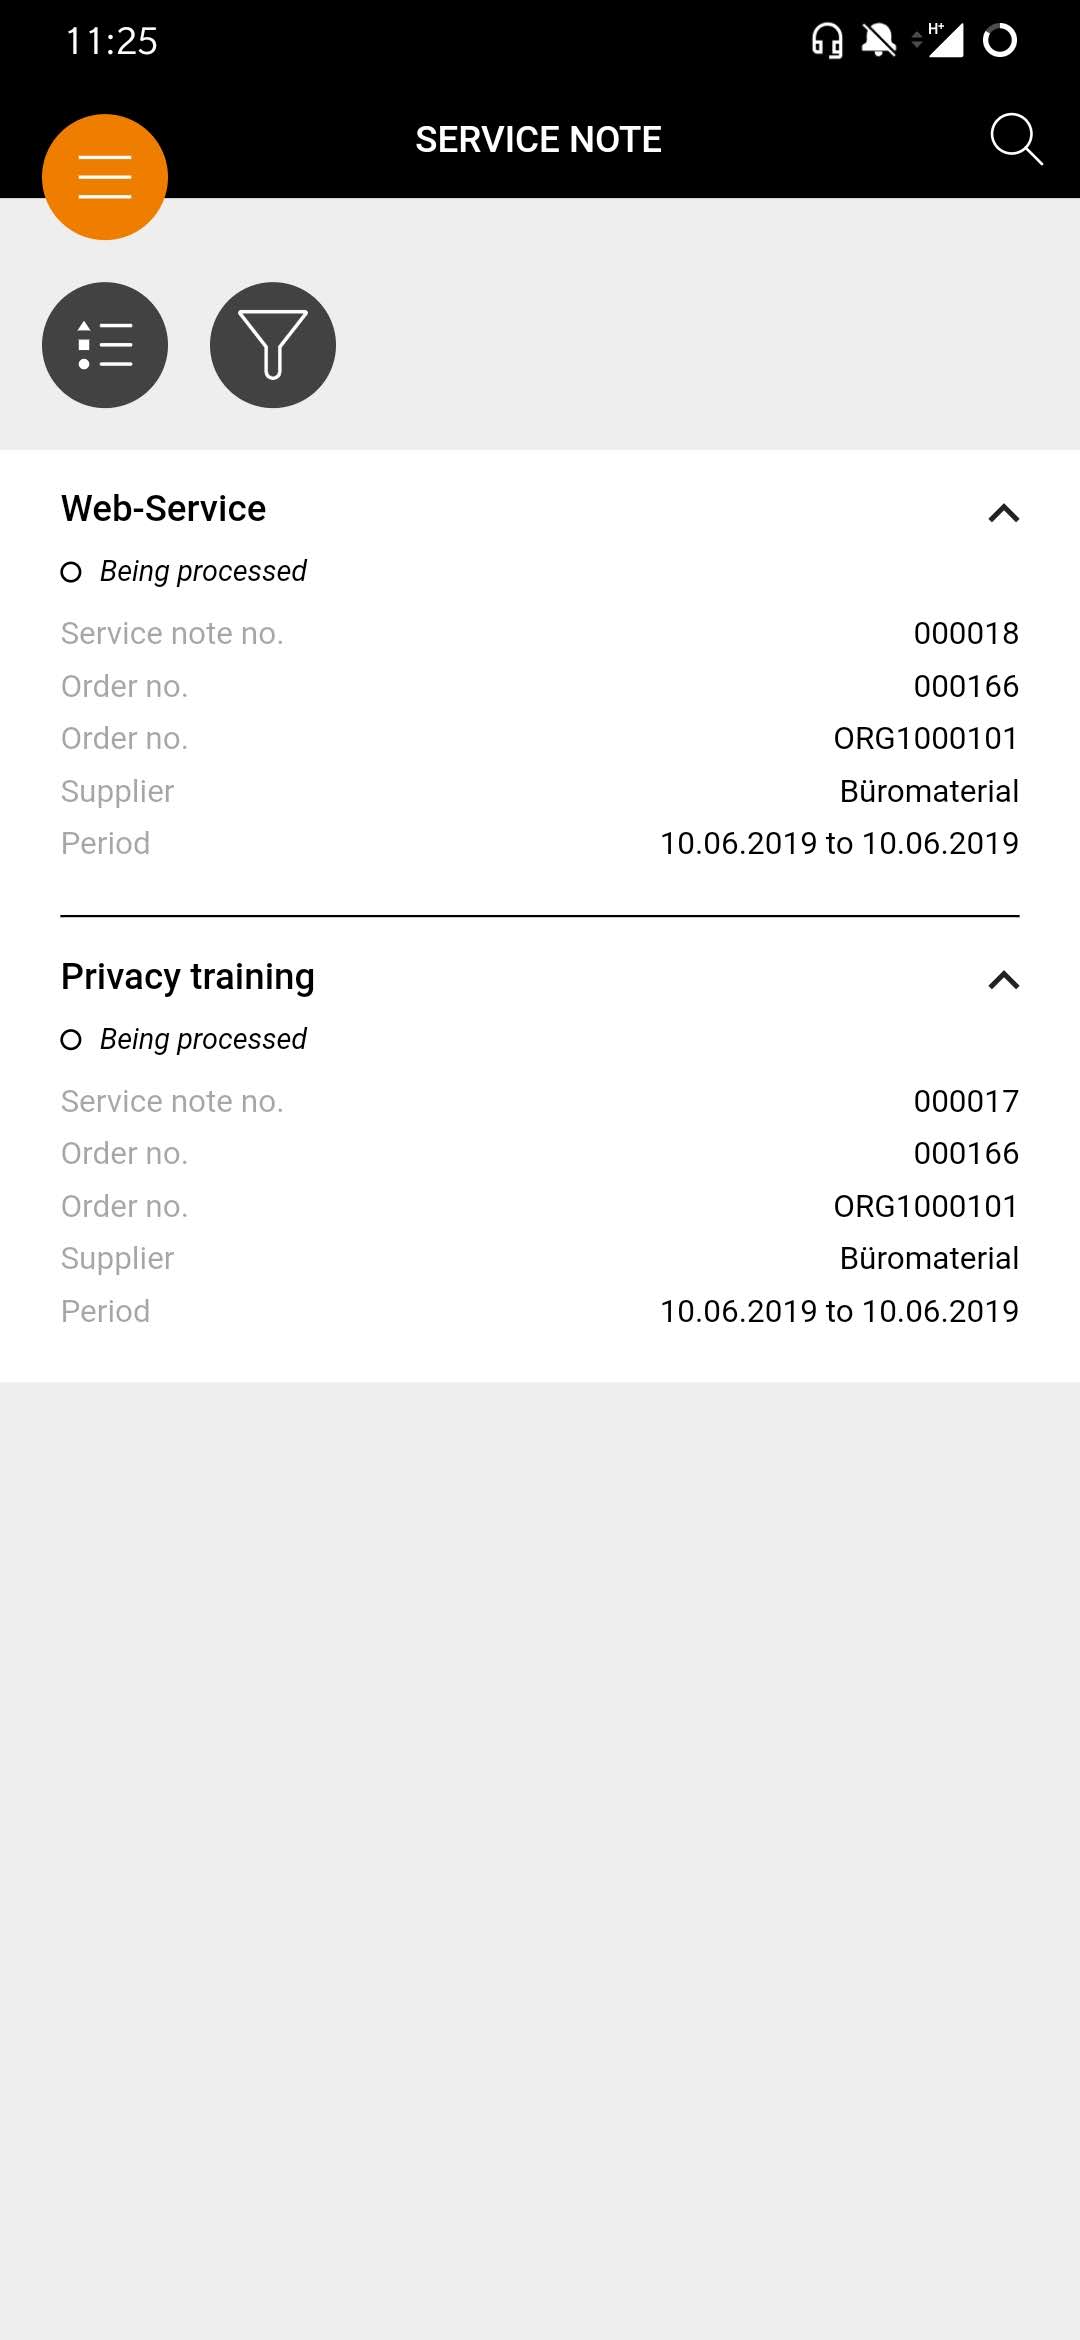
| Service note list
You will find all service notes in the service notes list. You can also use the icon You can also expand or collapse the various service notes by clicking on . Expand the individual documents in the list if you want to see more information in the list. The icon With the icon |
 to change the service notes list in the sort order. Simply press the button
  , select sorting and confirm. The list reloads and sorts the documents in the required order.
Actions in service note


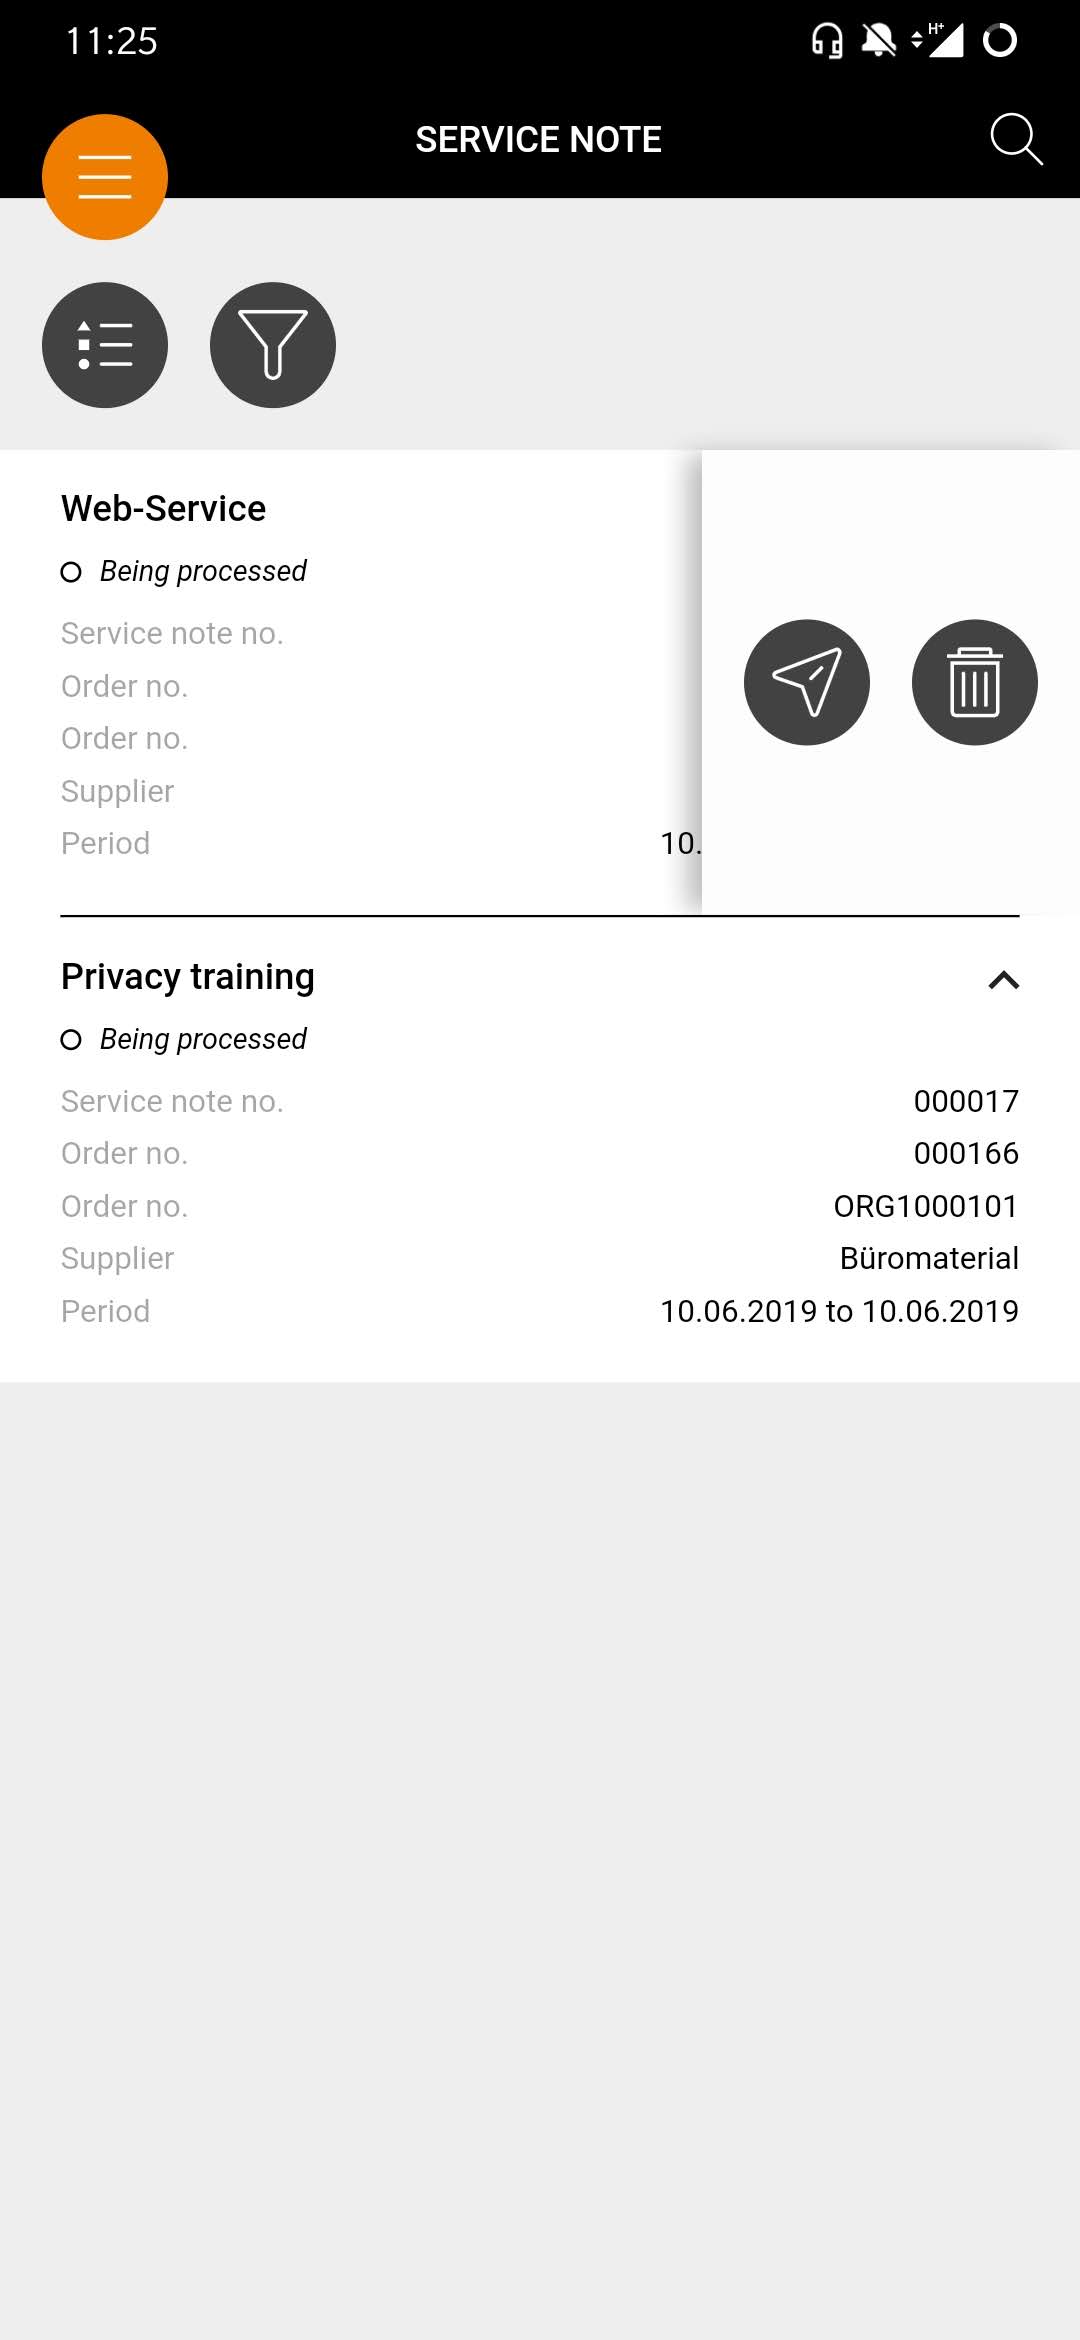
| Actions in service note
You have exactly two options for calling actions from performance records:
|
 .
.Send service note


| Send service note
To send a service note, proceed as follows:
Note: In the configuration of Onventis Buyer it is possible to preassign the items of the service note as “completed” by default and prefilled with the ordered quantity in the service note. If you have activated this configuration, you can also send the service note (if it is complete) via the list and the action swipe to the left and press the button If you still want to change individual positions, proceed as described (steps 1-6). To delete a position, simply wipe to the left on the desired element in the position list. Now just tap |
 .
.Delete service note
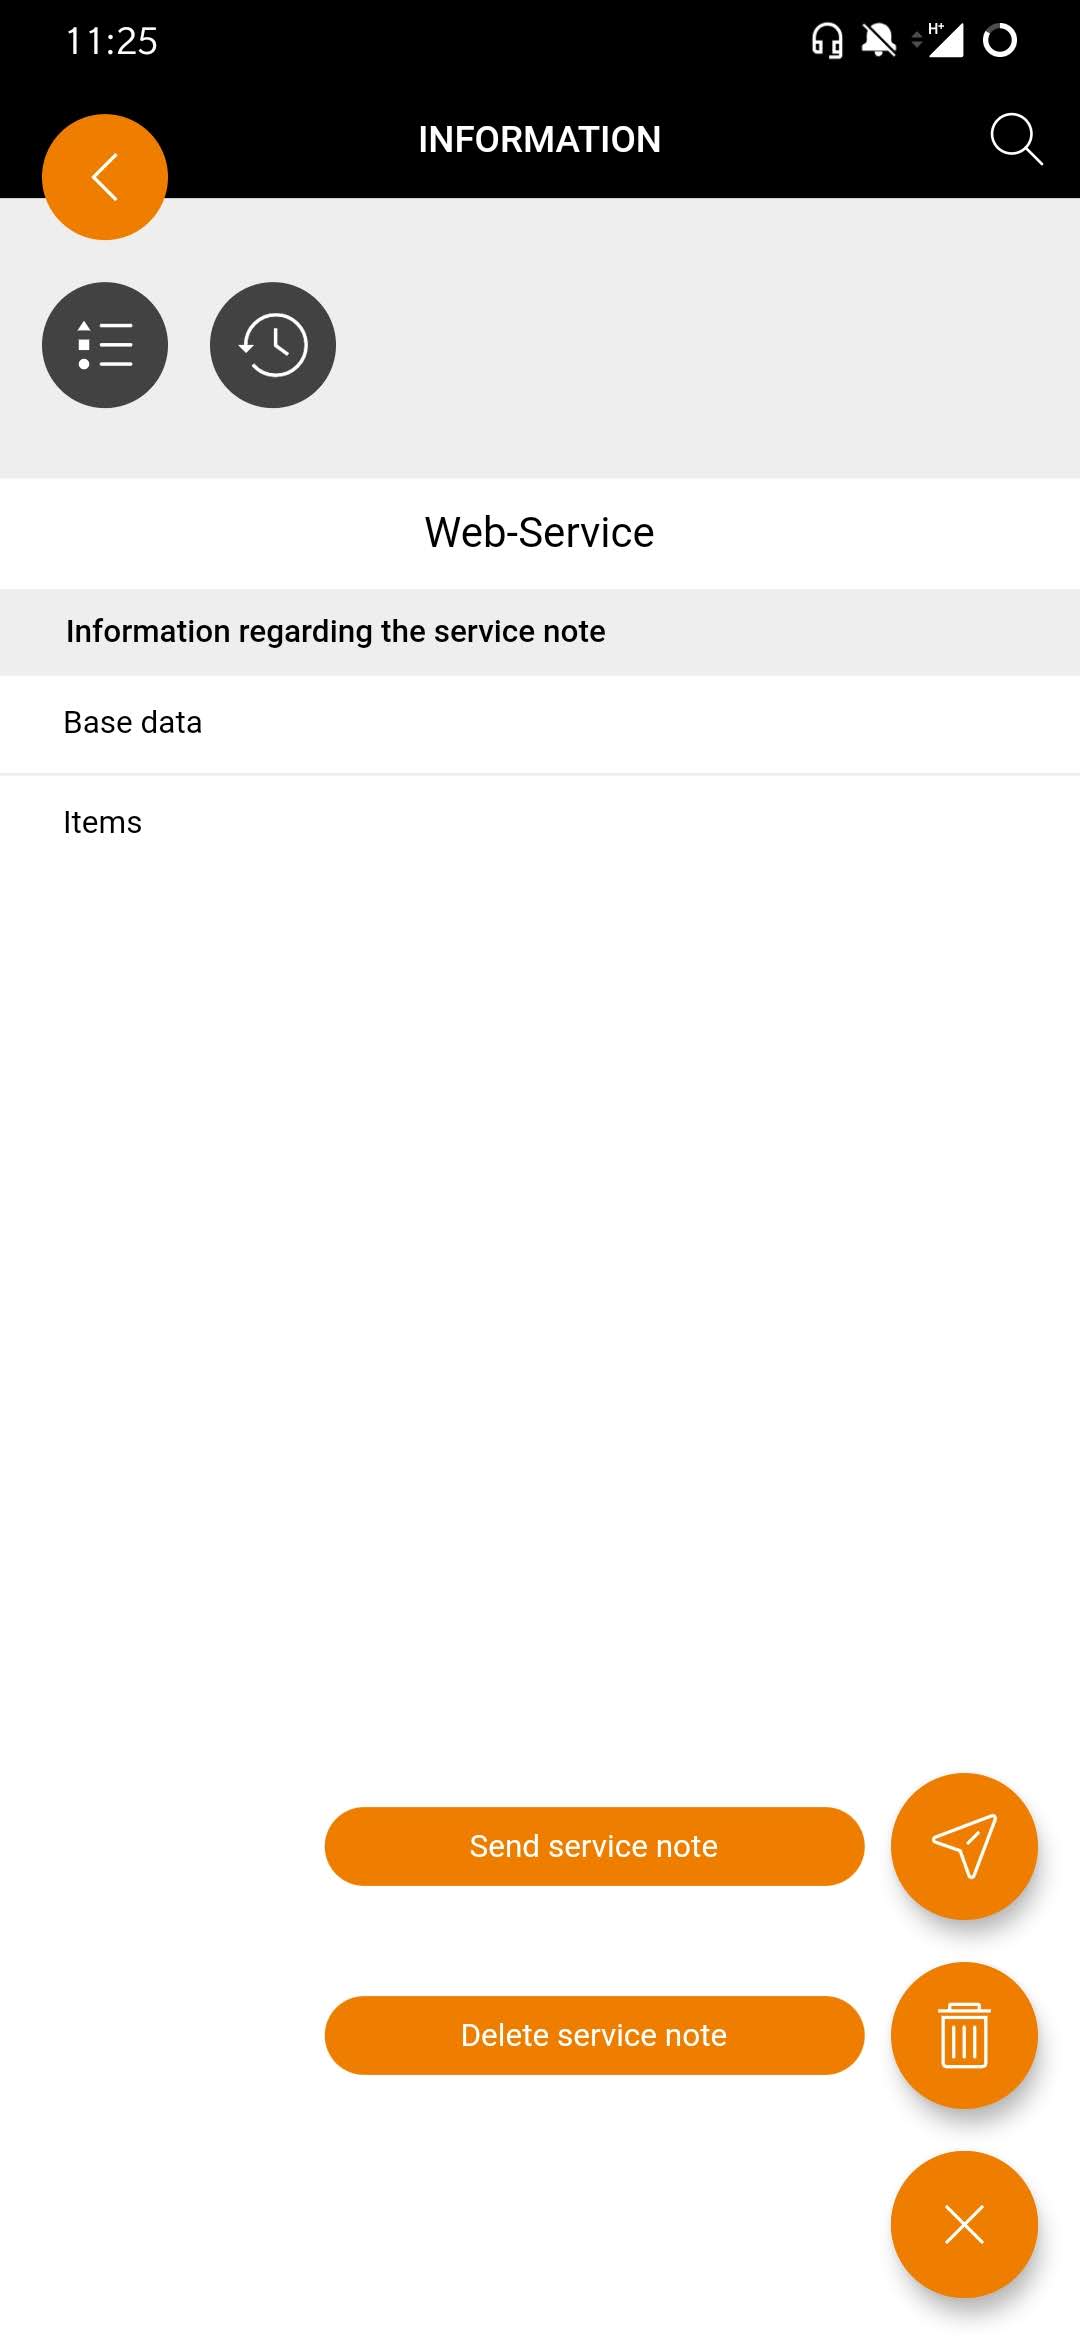
| Delete service note
You have exactly two options for deleting service notes:
|
 . Confirm operation and the service note will be deleted.
Retrieve service note


| Retrieve service note
You can, of course, retrieve more detailed information on a service note in the app. To do this, simply press on the desired document in the service note list and then select base data. You will be directed to the page where you will find all the information about the |
View service note items

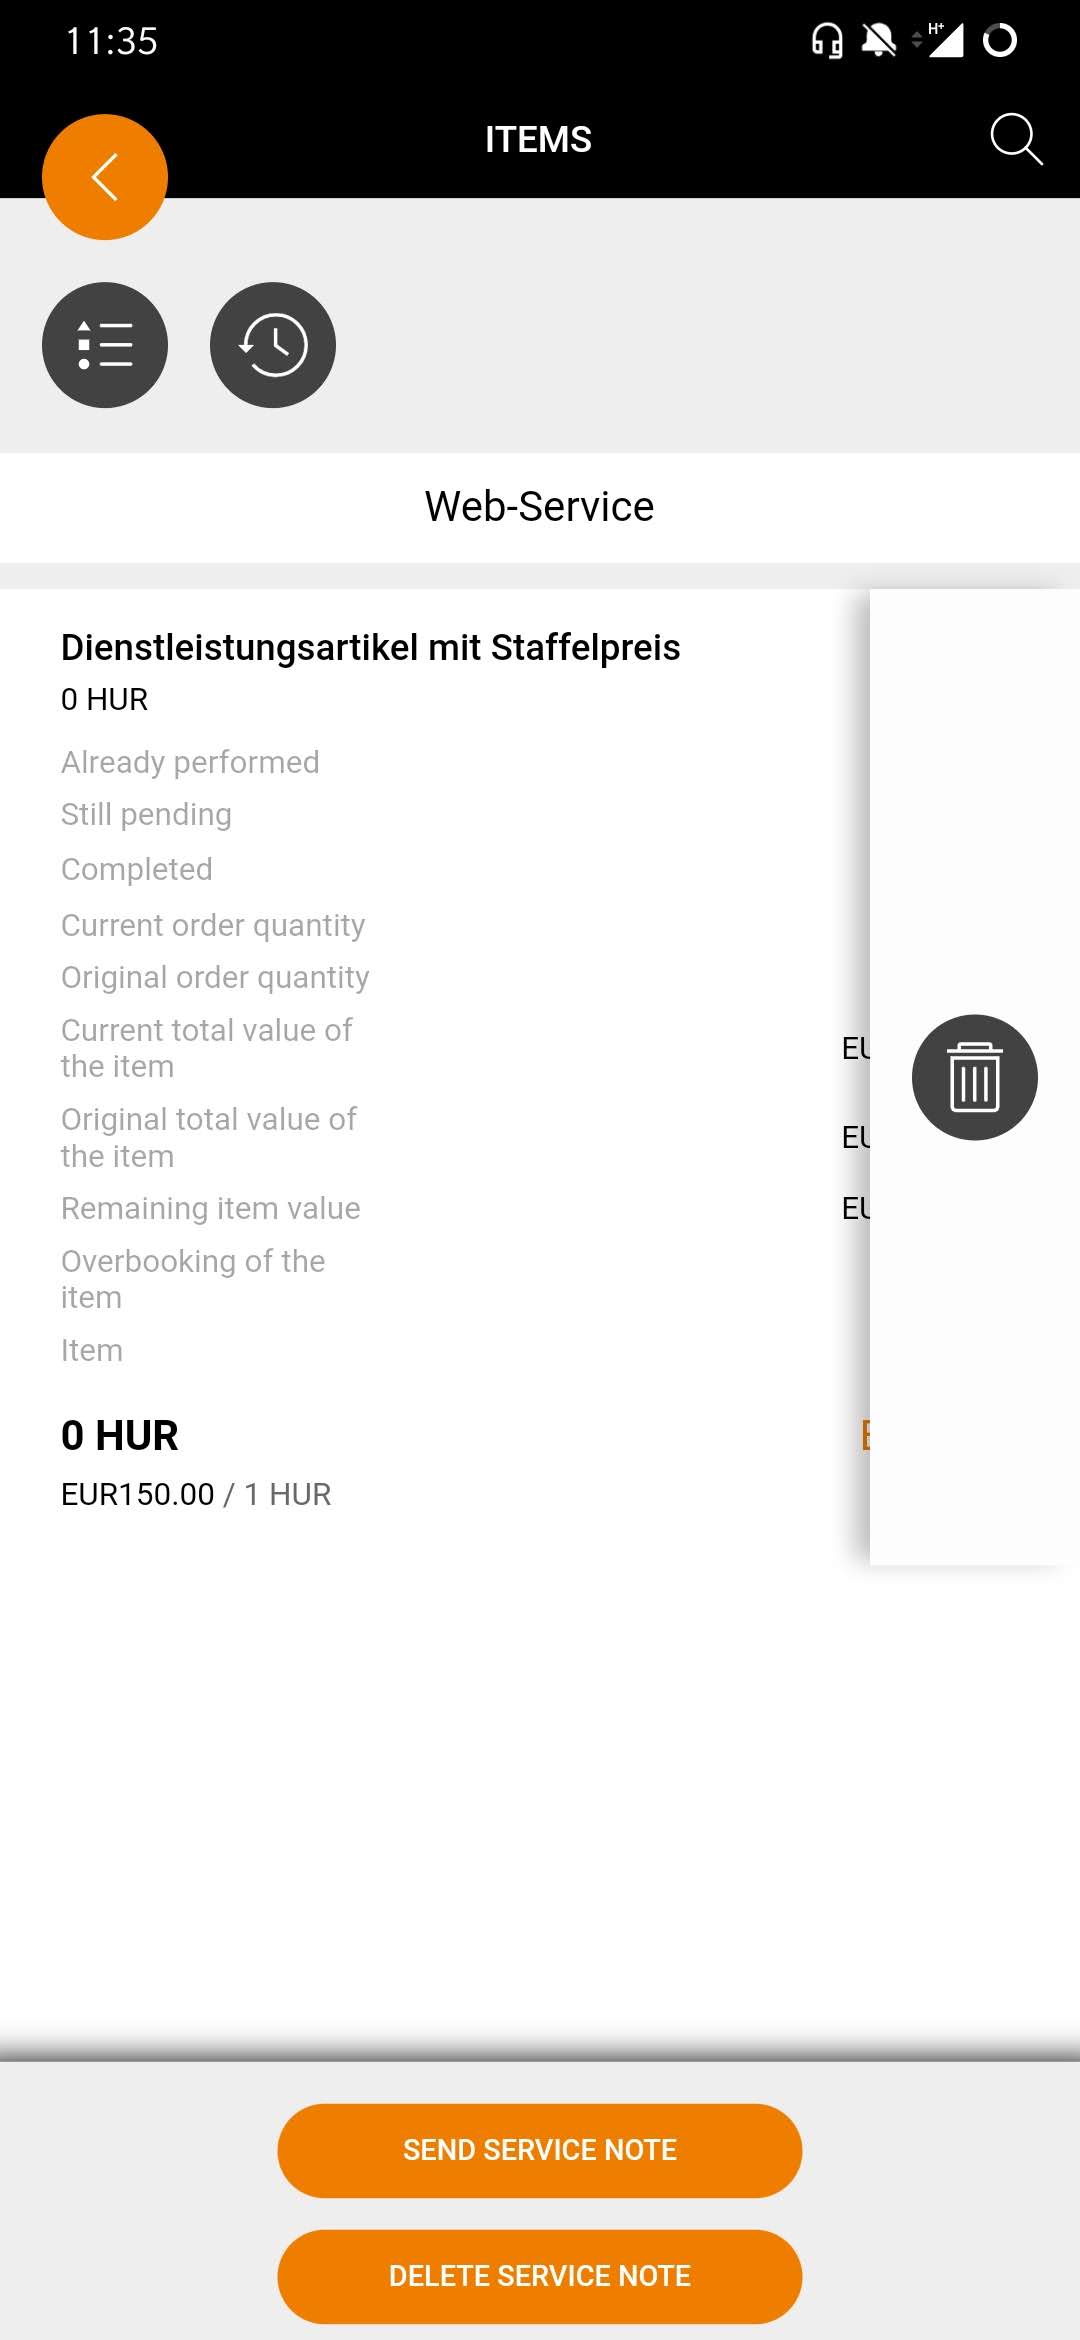
| View service note items
You can use the app to retrieve and view the service note items. For this purpose, you select the required document in the service note list. In the next step, choose Items and the item list will be displayed. You will find the individual items in the item list. The most important information for each item is already visible in the list. For more information simply select with a tip on it. |
Mobile requisition items
Clear presentation of requisition item
Capture your requirements on the spot at lightning speed. Access your demand items at any time, track their status and view all relevant information. With the Onventis Mobile App you can use, cancel, delete and complete your requisition items.
Requisition item list
| Requisition item lit
The requisition item list contains all requisition items. You can also use the icon You can also open or close the various requisition items by clicking on The icon The magnifying glass |
 to change the requisition item list in the sort order or filter it according to certain criteria. Simply press the button
  , select sorting and confirm. The list reloads and sorts the documents in the desired order using the selected filters.
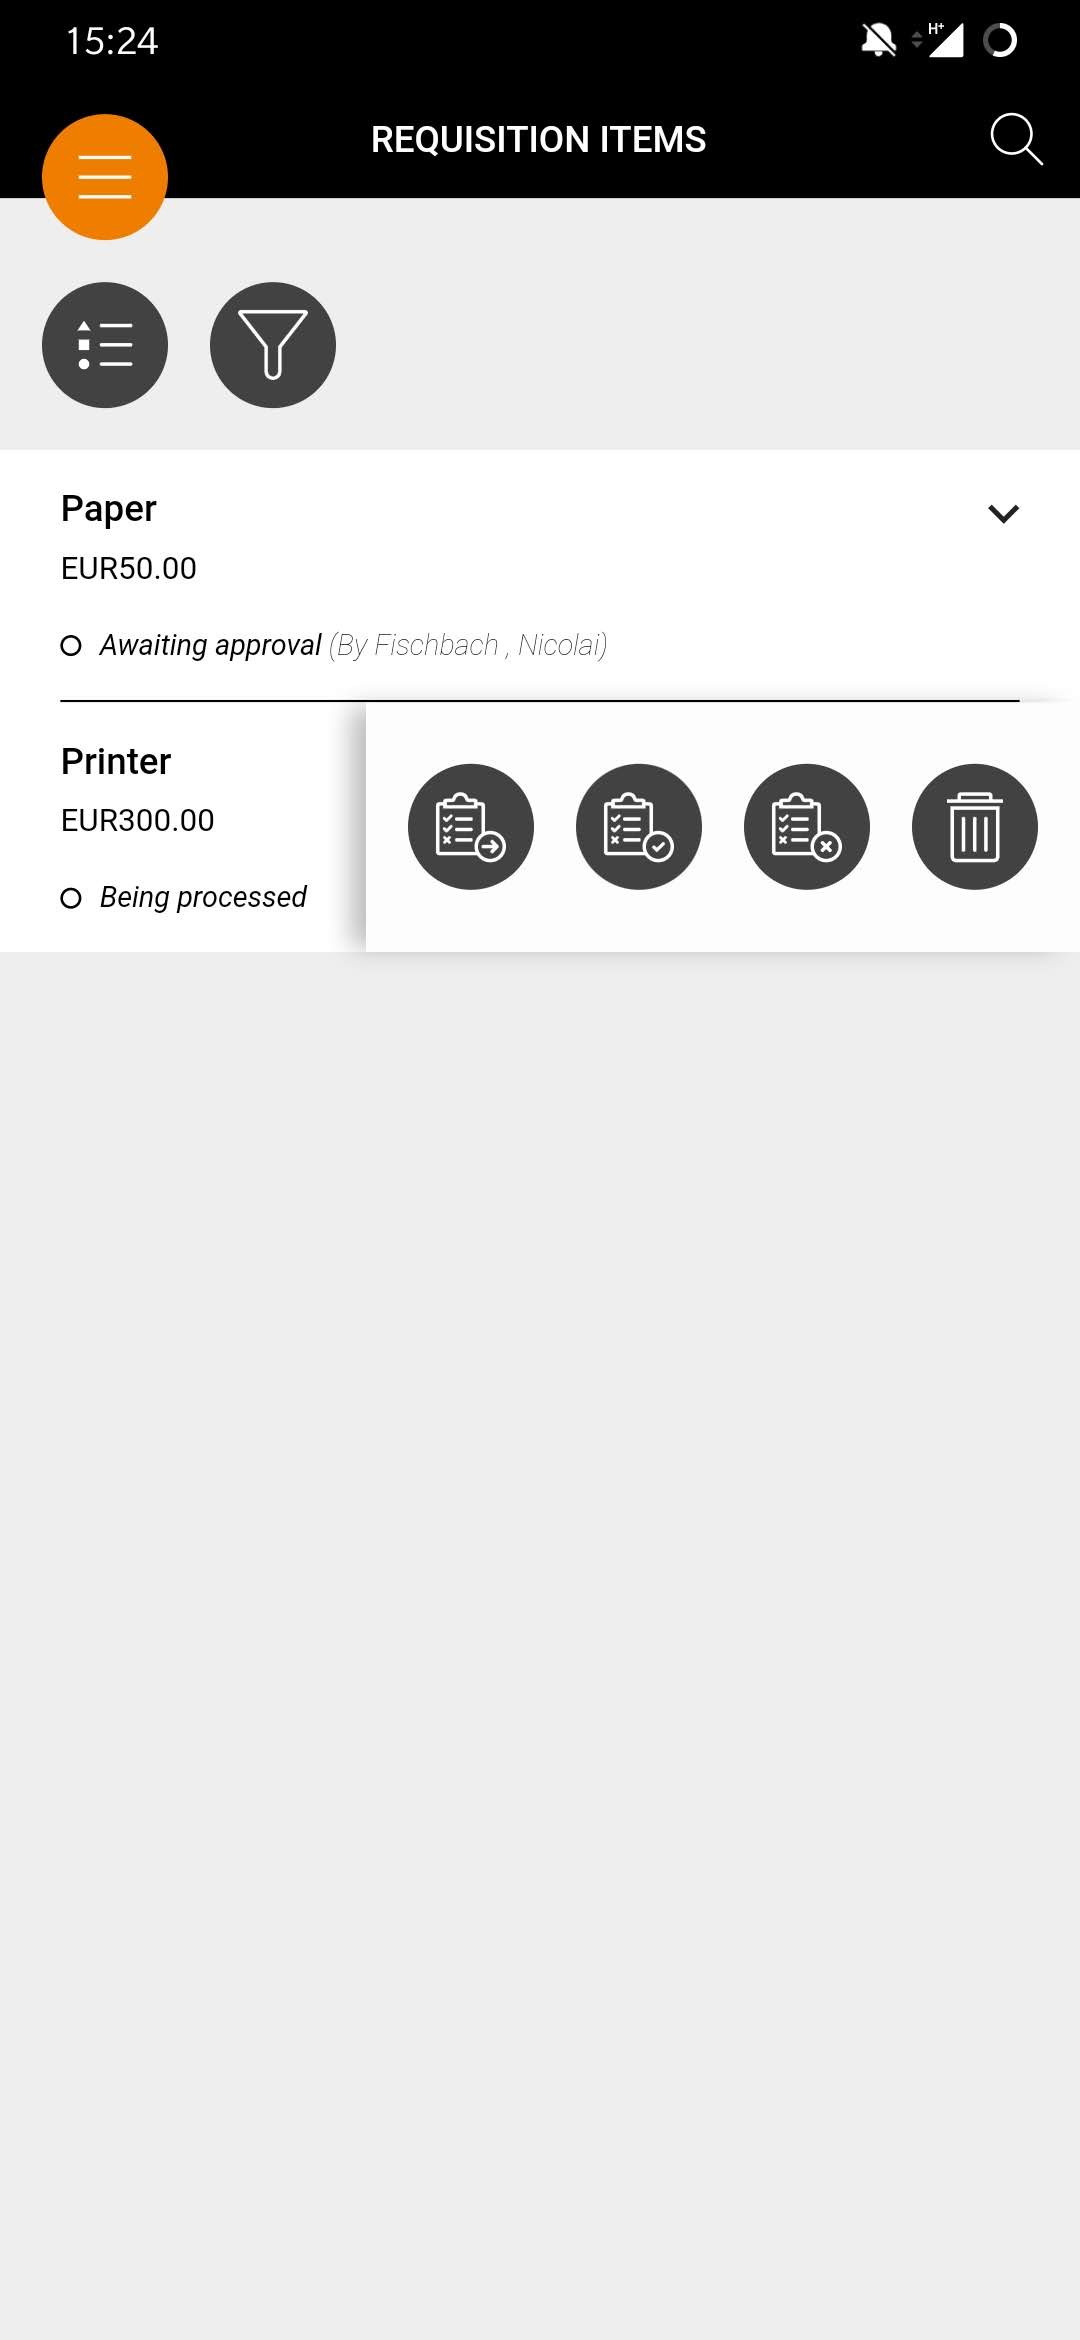
Actions of requisition items


| Actions of requisition items
You have exactly two options for calling up actions for requisition items:
|
 .
.Use requisition item


| use requirement item
To use a requisition item swipe the document to the left and tap the “Use requisition item” icon
. You confirm this process in the next window, the requisition item is processed further as a purchase order and placed in your order list with the status “In entry”. Alternatively, you can use the requisition items by tapping on the document and then on the “multi-actions” button
. Then tap
and confirm the selection. Please note: With Onventis Mobile, requisition items can only be transferred individually into an order. |


Delete requisition request


| Delete requisition request
To delete a requisition item, wipe the document to the left and tap the “Delete requisition item” icon Alternatively, you can delete a requisition item by tapping on the document and then on the “multi-actions” button
. Afterwards tap |

Cancel purchase requisition


| Cancel purchase requisition
To cancel a purchase requisition item wipe the document to the left and tap the “Cancel purchase requisition” icon Alternatively, you can cancel a purchase requisition item by tapping on the document and then on the “multi-actions” button
. Then tap on |
 . In the next window, confirm this operation and the system cancels the requisition item.
 and confirm the selection. The purchase requisition item will be canceled.
Complete requisition request


| Complete requisition irequest
To complete a requisition item, wipe the document to the left and tap the “Close request” icon Alternatively, you can close a requisition item by tapping on the document and then on the “multi-actions” button
. Then tap |
 . You confirm this operation in the next window and the requisition item will be completed.
 and confirm the selection. The order is completed.
View information of requisition item

| View information of requisition item
You can easily view more detailed information about a requisition item.
Within the base data, you will find all information on the current requisition item. In addition, you can always execute the document functions, regardless of where you are in the document. To do this, tap the “Multi-actions” button
and select the desired action. |

View document history
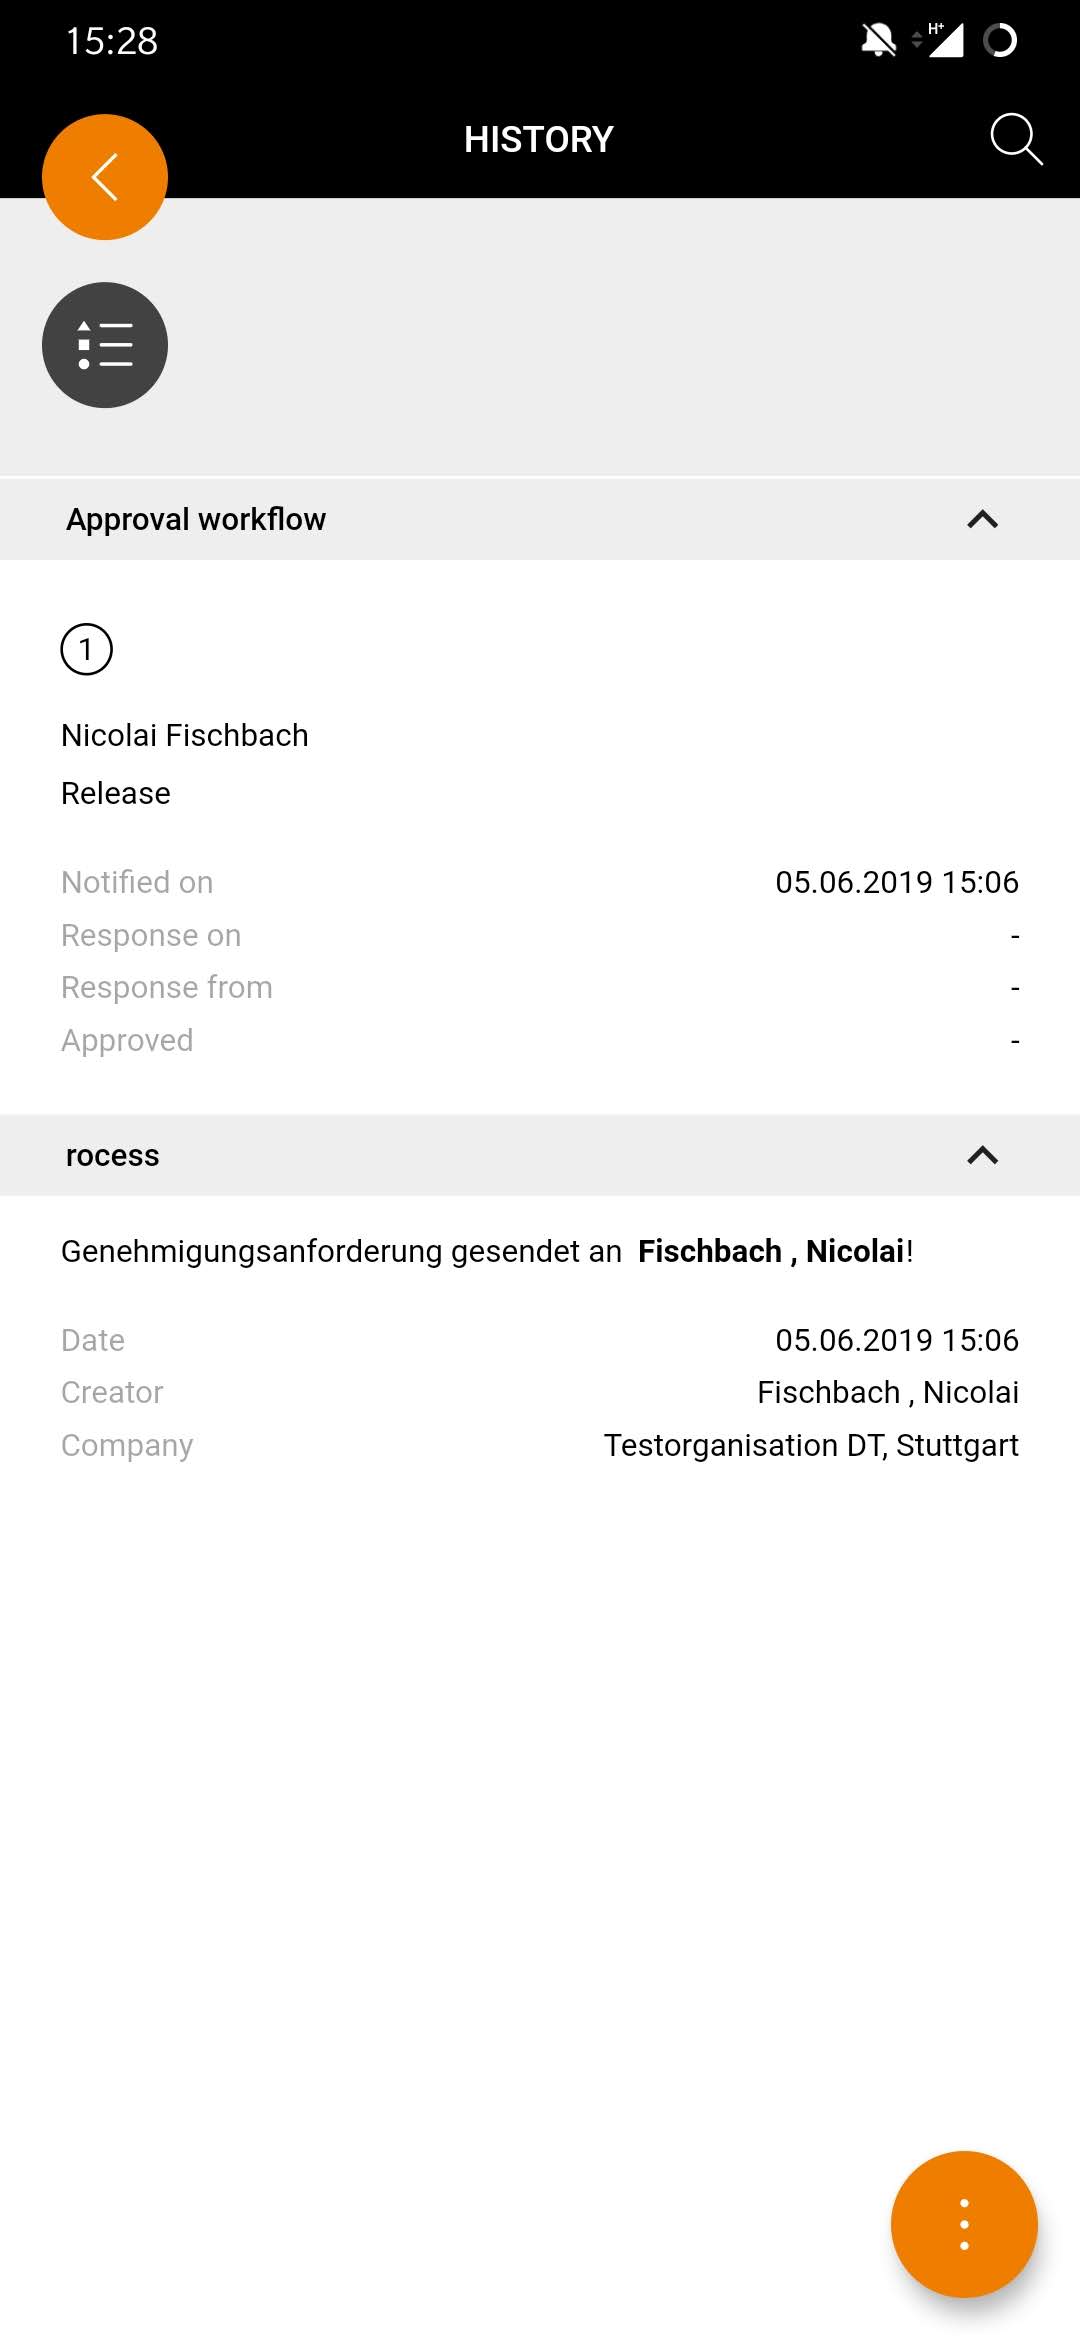
| View document history
Of course, you can view the document history at any time via Onventis Mobile. To do this, tap on the respective document. If you are in the document, the following “History” button Just tap it and a new page opens where you can view information about the release and progress of the document. |
 will be displayed in the header.
Mobile article favorites
Favorite article group list

| Favorite article group list
You can view your article favorite groups under “article favorites”. Your favorite groups are displayed in a list. To open a group, simply click on it. If this icon appears If this icon appears |
Article favorite list
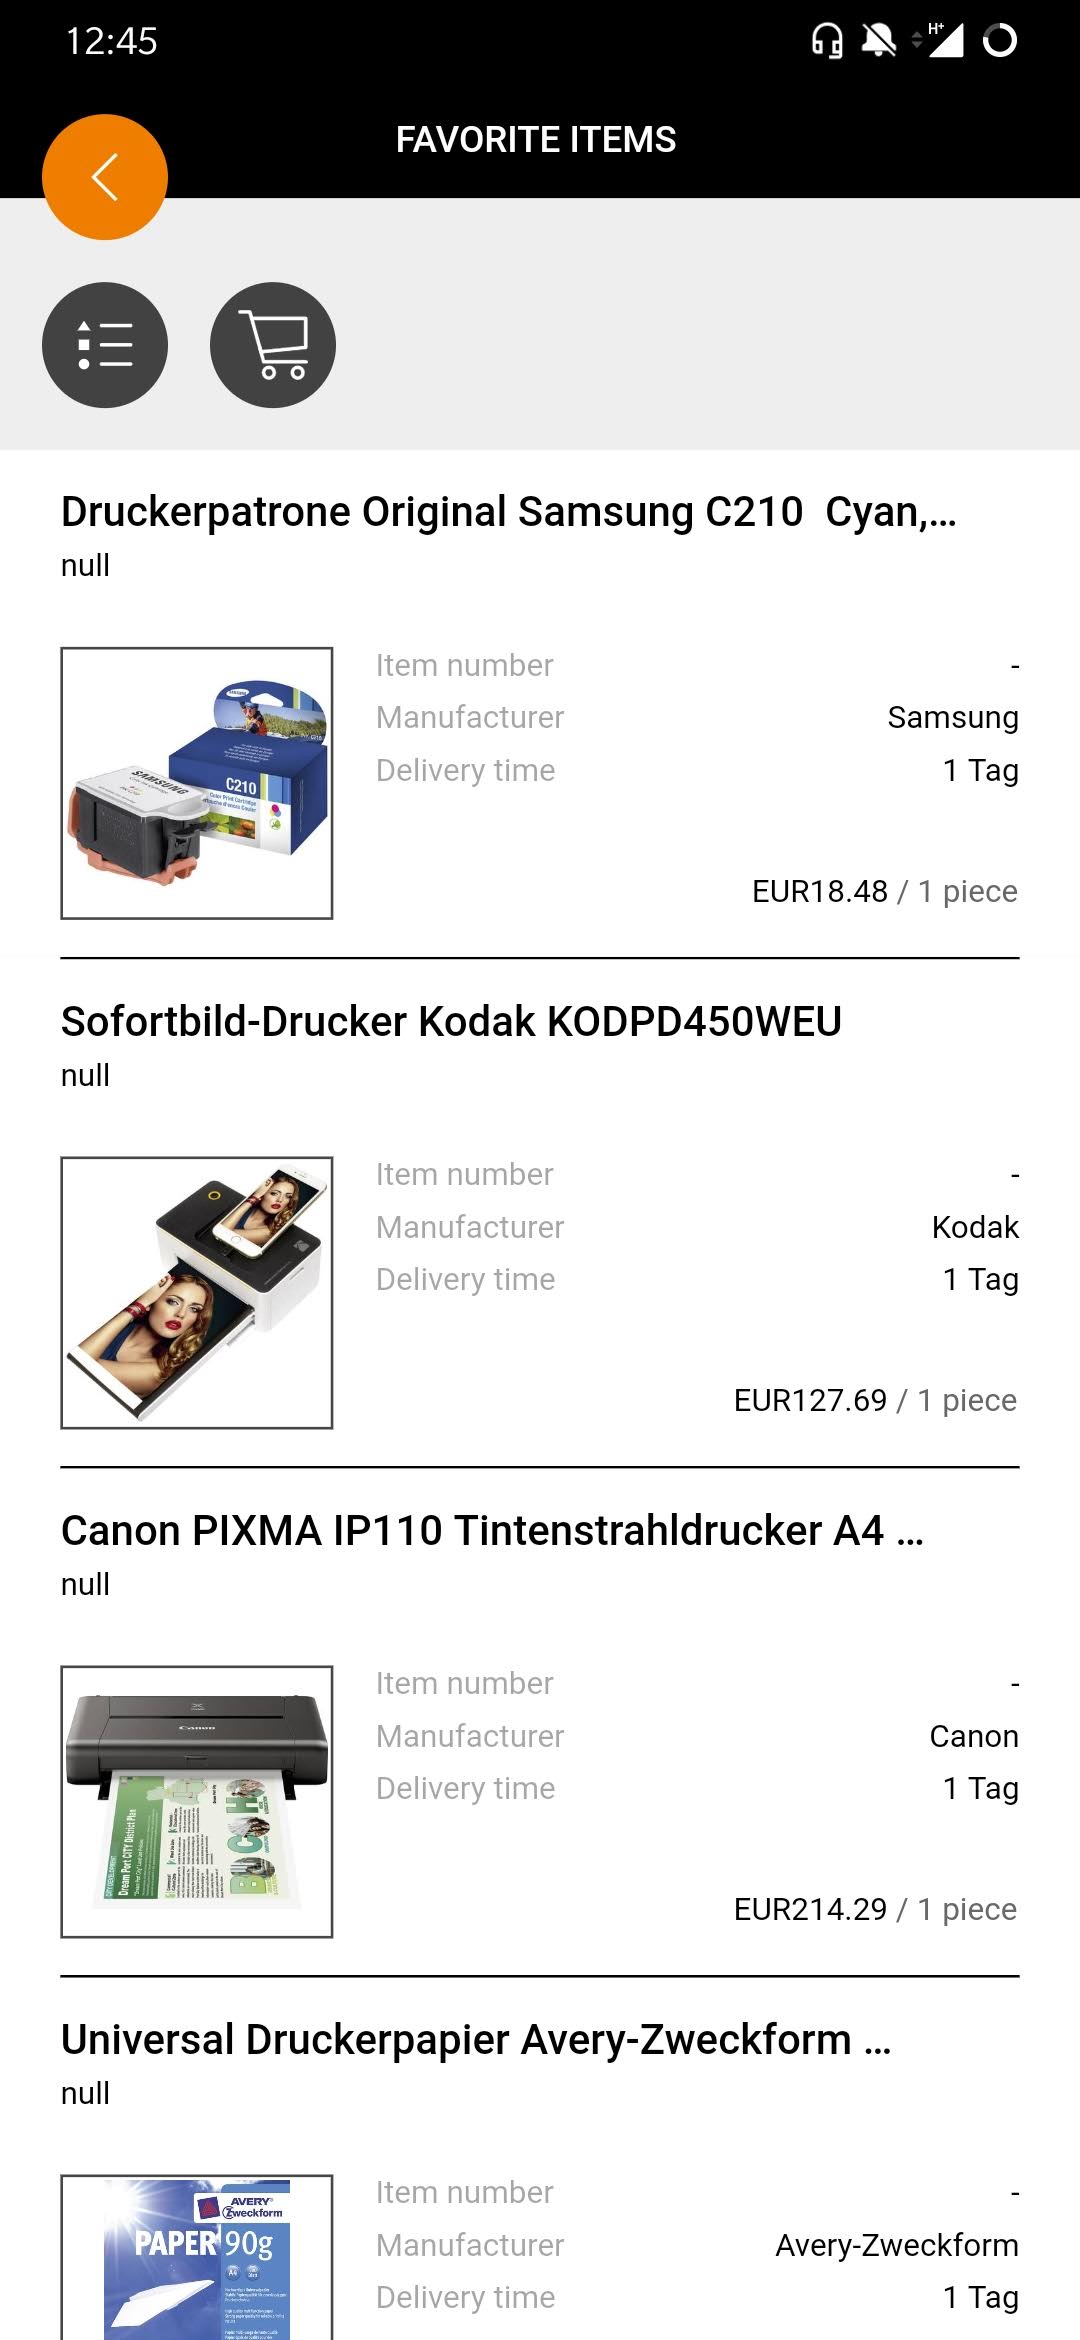
| Article favorite list
Your favorite articles are displayed in a list. The article list also provides you with the most important information on the respective article. |
Add article favorites to shopping cart
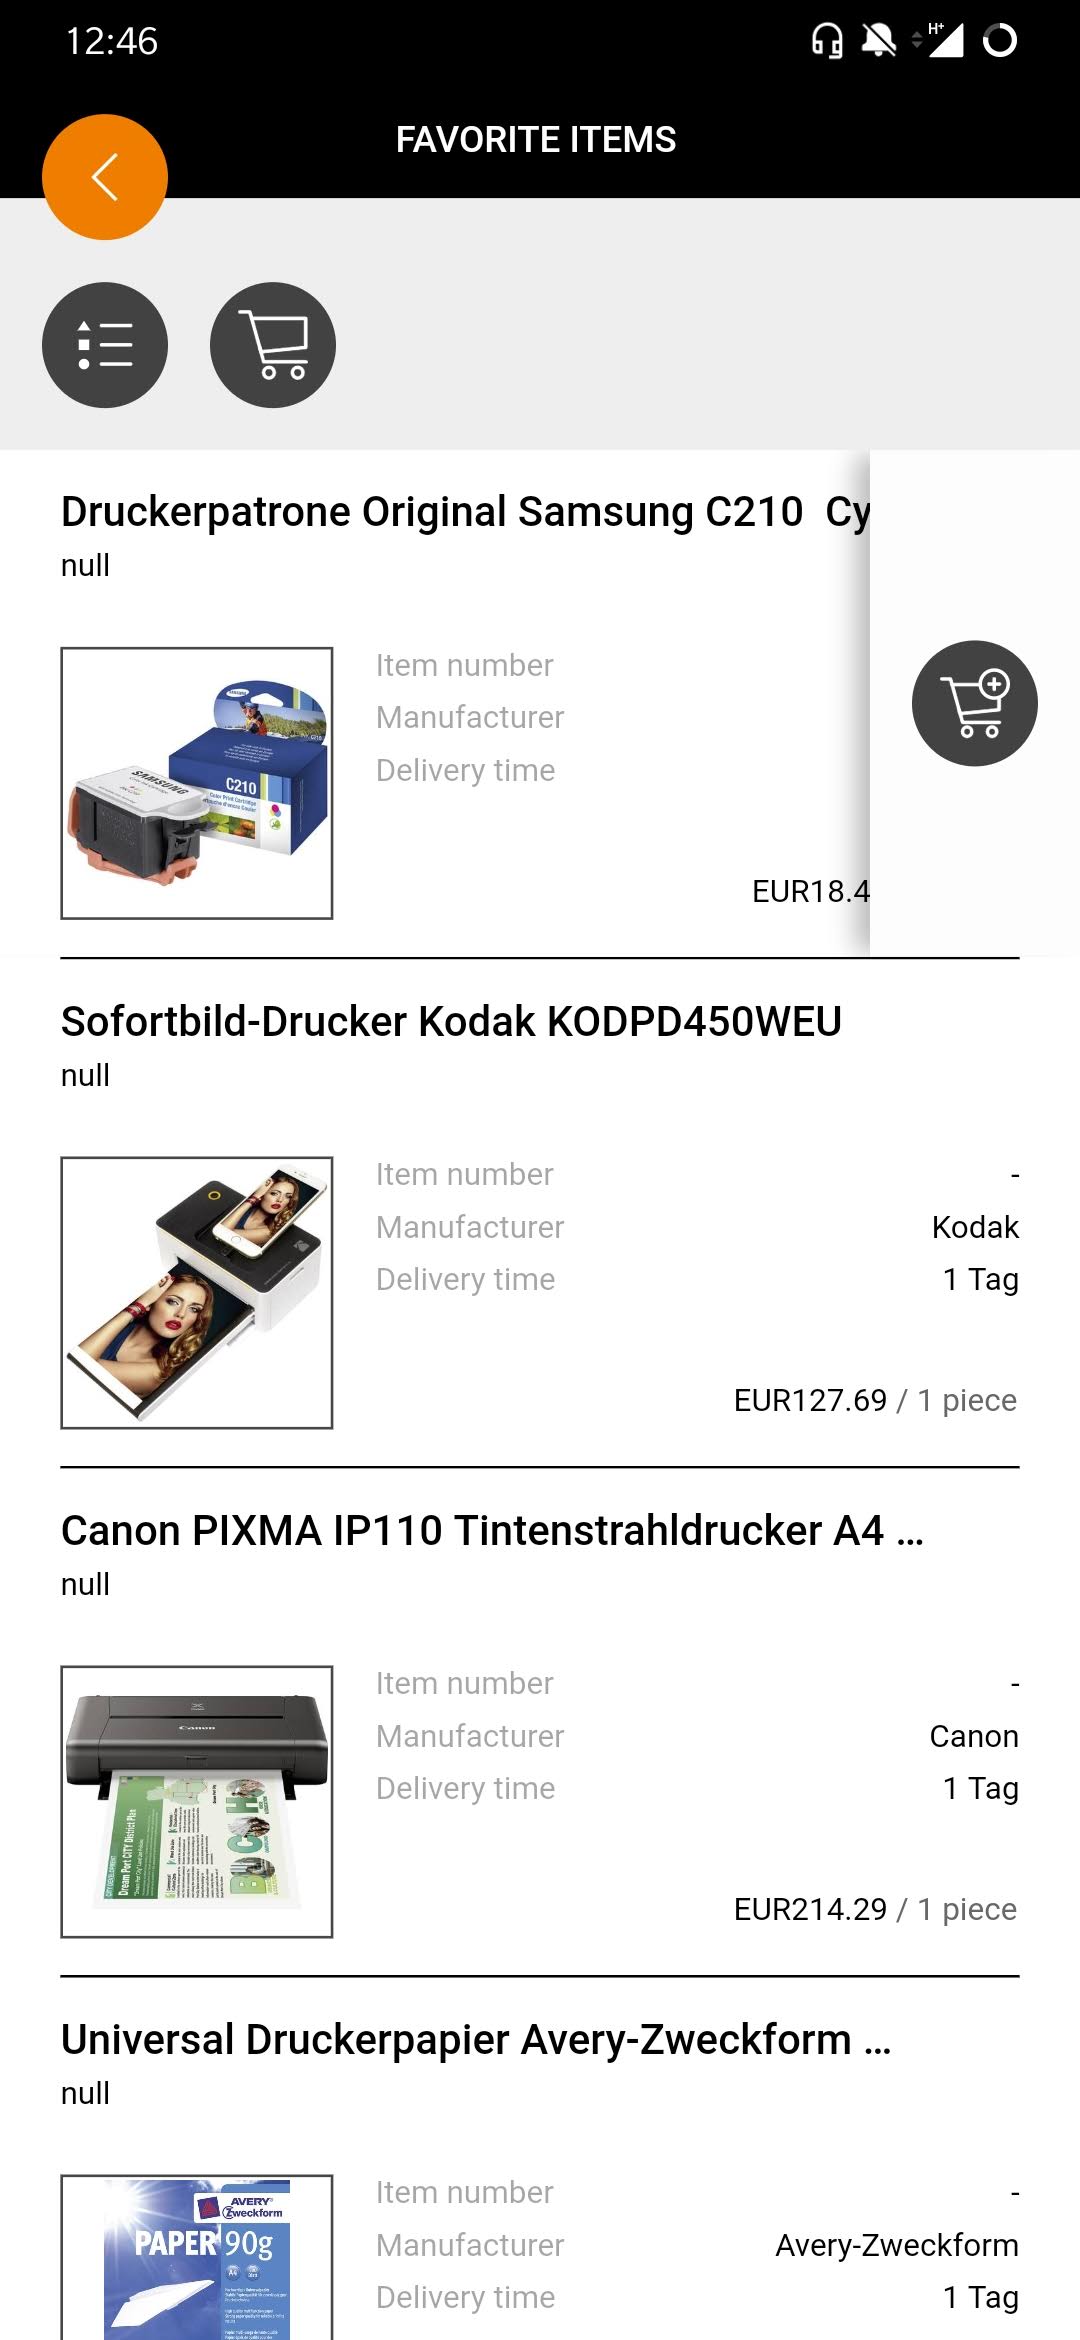
| Add article favorites to shopping cart
If you would like to add an item from the list to your shopping cart, simply wipe the item to the left. Then tap on the shopping cart icon |
 and confirm the action. The item will be added to the shopping cart and you are able to change the quantity of the article in the shopping basket.
Add all article favorites to shopping cart

| Add article favorites to shopping cart
If you would like to add all items from the list to your shopping cart, simply tap the shopping cart icon The items will be added to the shopping cart and you are able to change the quantity of the article. |
 .
.View article details

| View article details
To view article details, simply click on the respective article. All relevant article details are displayed, simply scroll through and view the respective information. |
Mobile Login
Login via biomtric athentication
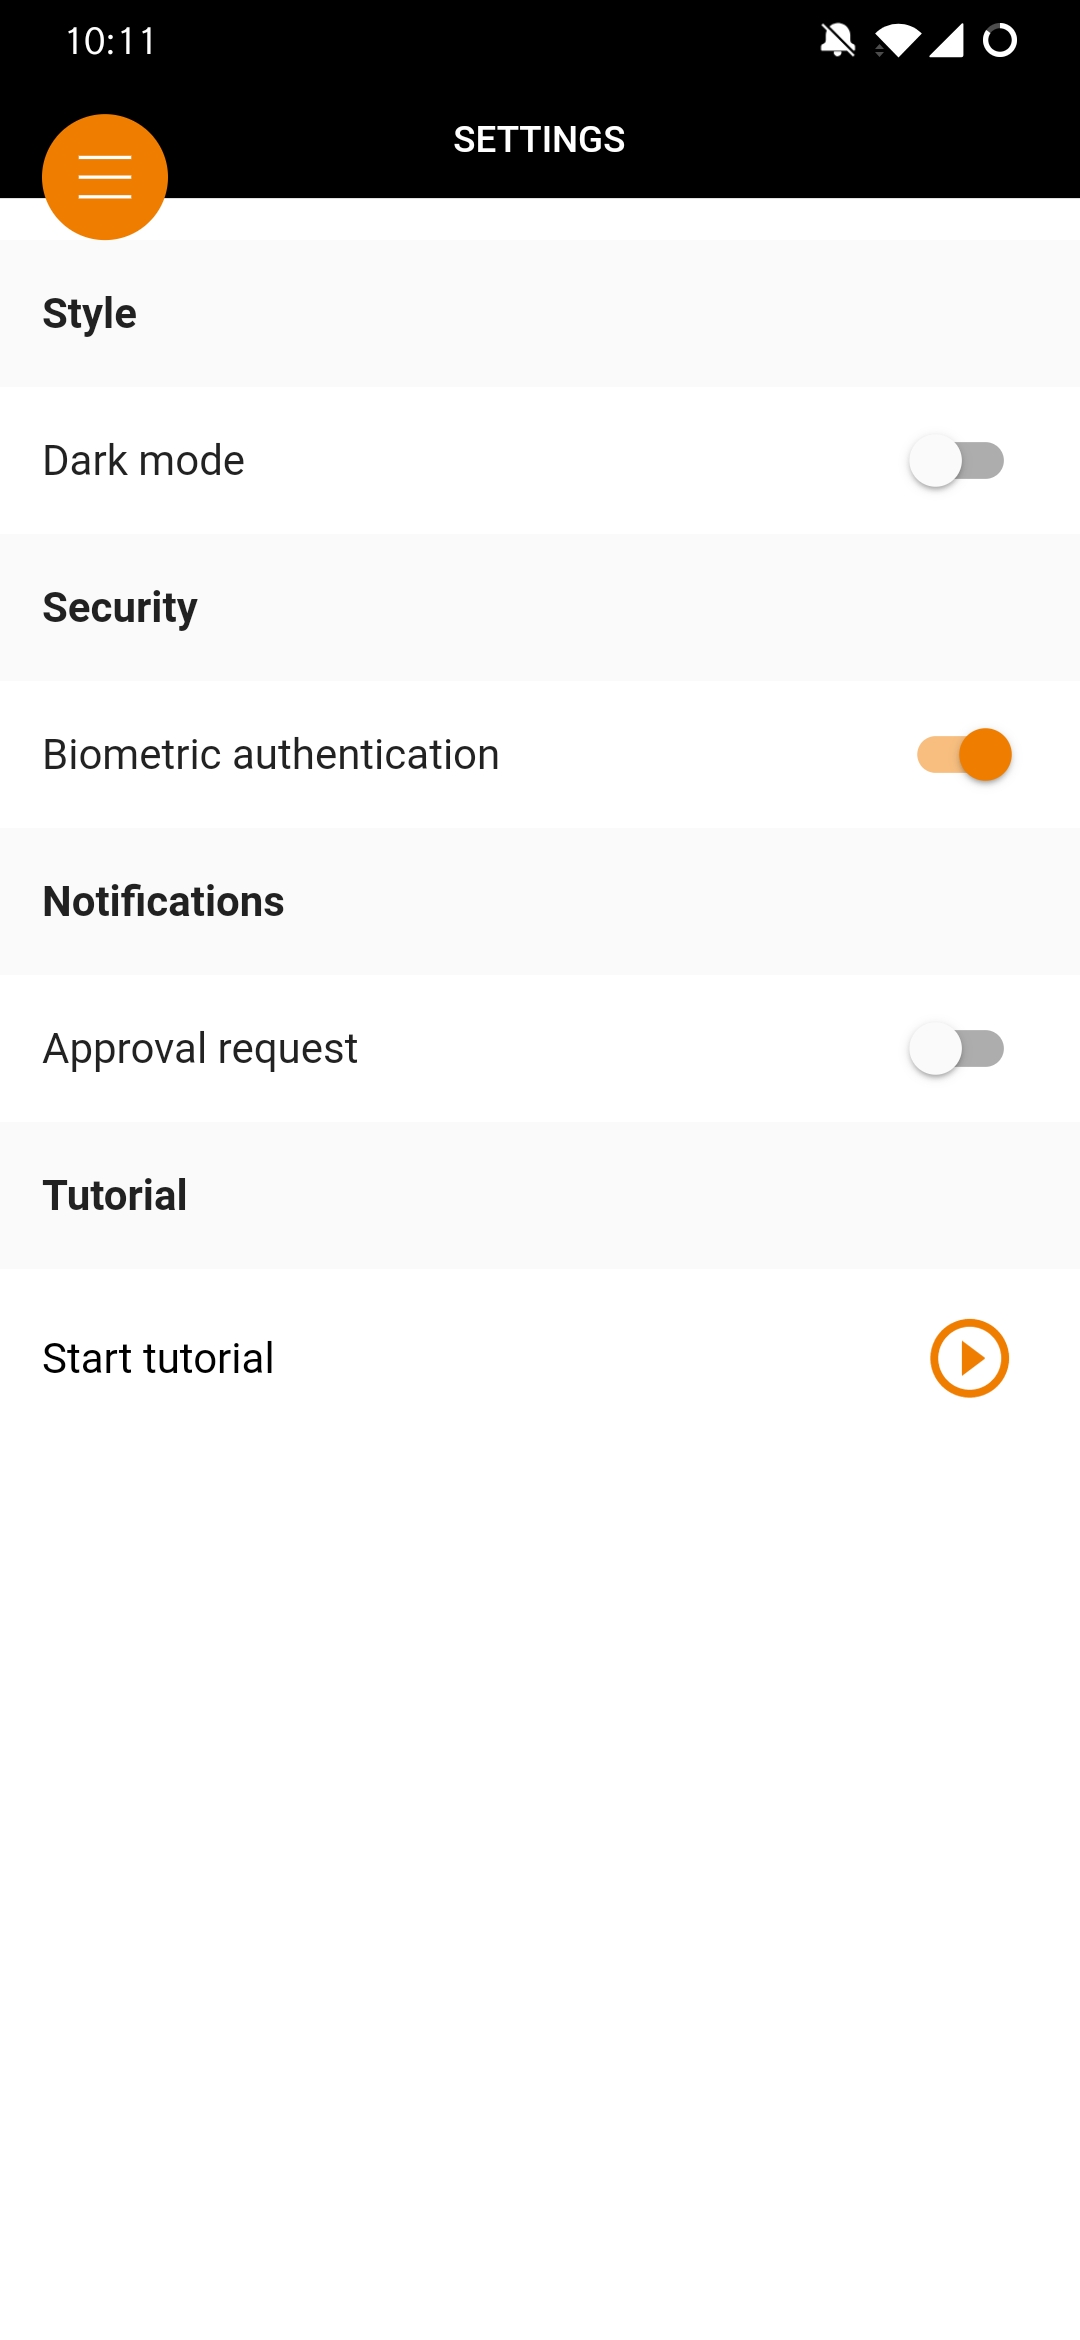
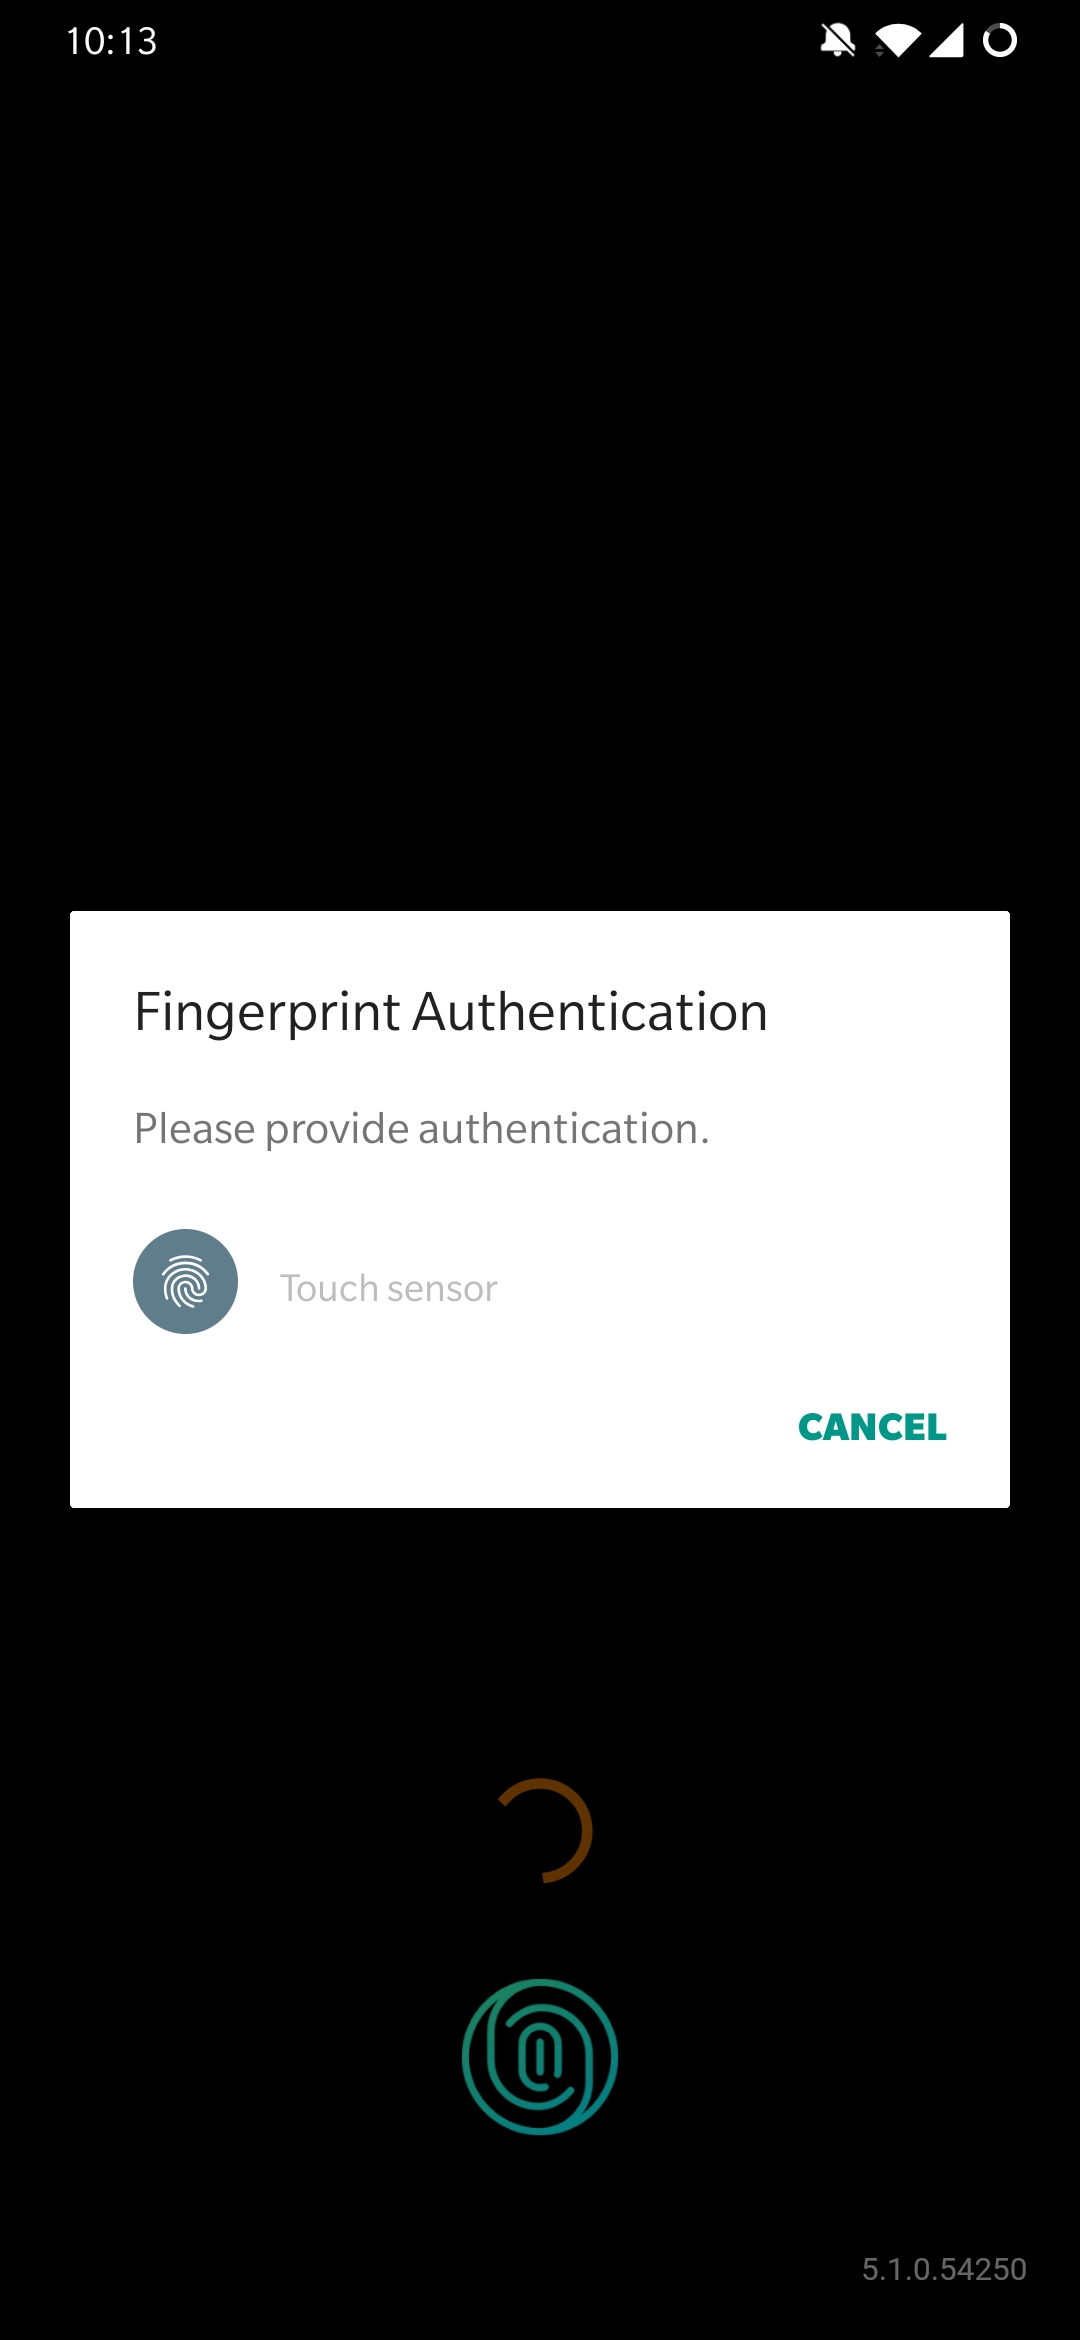
| Login via biometric athentication
Simply placing a finger on the fingerprint scanner allows convenient and quick authentication to unlock the screen. The function to activate or deactivate can be found in the settings under “Security Please note: However, to enable this feature, you need a smartphone that supports biometric authentication. |
SAML Single Singn-on (Security Assertion Markup Language)

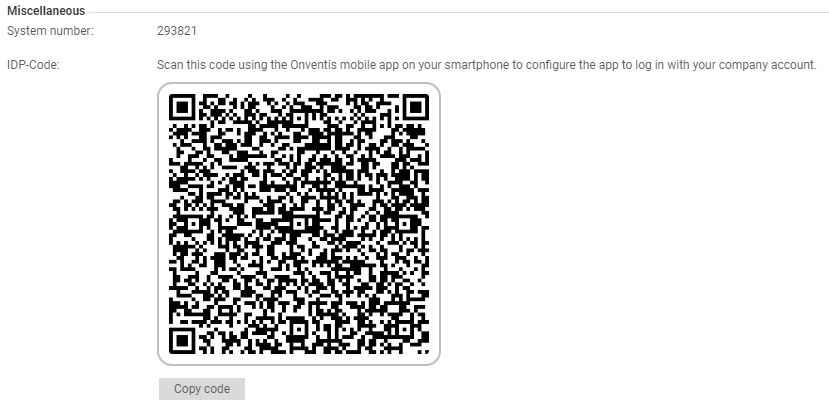
| SAML Single Sign-on
Single Sign-on describes a procedure that allows you to access the Onventis Mobile App after a one-time authentication by your Onventis Buyer login data. The Single Sign-on procedure thus prevents you from having to set up and know different identifiers and passwords for the multitude of different applications. To use the Single Sign-On, follow the steps below:
|