Onventis 2022.9
The new Onventis 2022.9 release contains various enhancements, improvements, and bug fixes. Check out the full list below!
Beta-Release date: Monday, December 12, 2022
Release date: Tuesday, December 20, 2022
Supplier Management
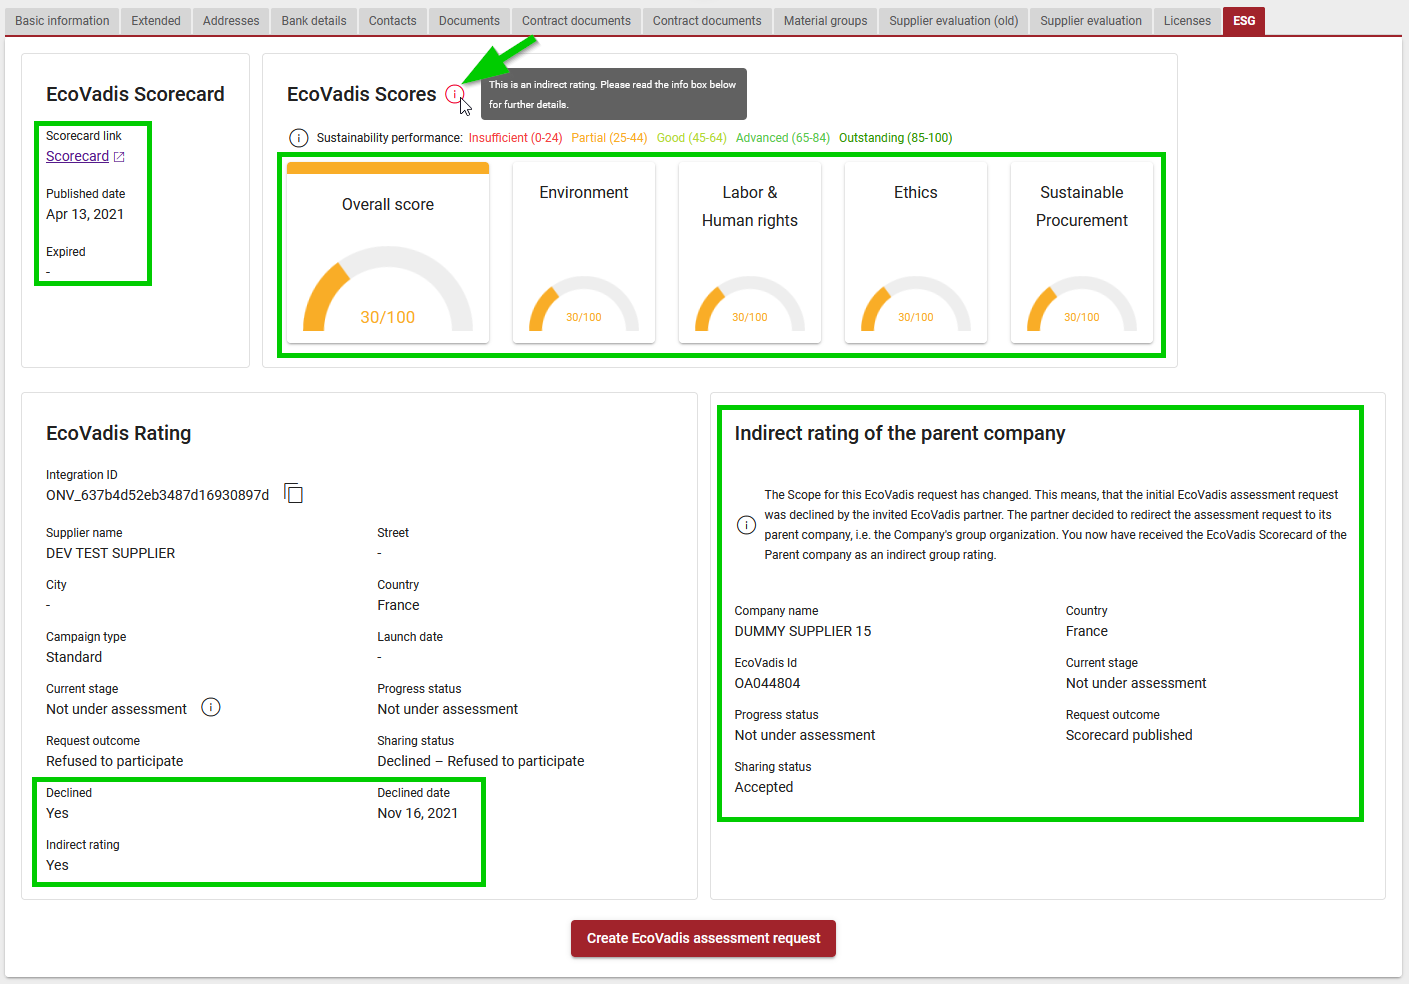
With the next version of the EcoVadis connector, it is possible to retrieve and display an EcoVadis Scorecard of the parent company.
Example: A supplier was requested to assess the EcoVadis questionnaires. The supplier rejected to participate and forwarded the request to its parent company. If the parent company did accept the request and share the EcoVadis Scorecard, these ESG ratings can now be retrieved and shown at the initially requested supplier.
Suppliers with indirect ratings are marked with an additional info icon. The Scorecard link, the ESG ratings and the company data of the parent company are shown:
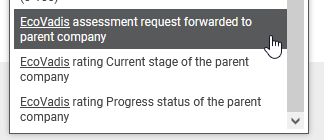
Additionally, we have added three new filter criteria to be able to filter for suppliers with an indirect rating, the current stage and progress status of the assessment process of the parent company.
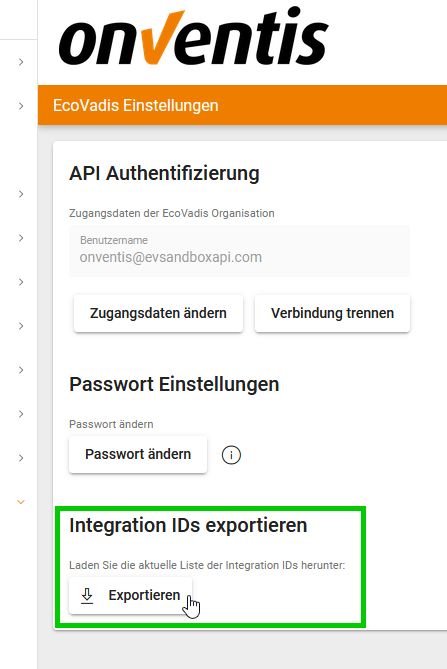
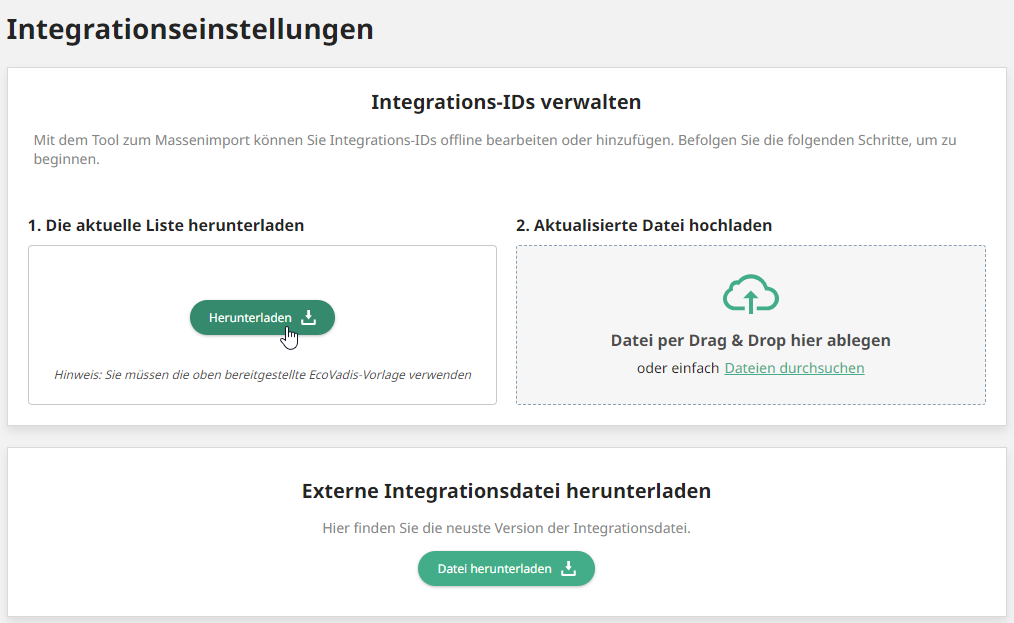
In “Configuration > EcoVadis settings” you can now download all suppliers and their integration IDs in a CSV document.
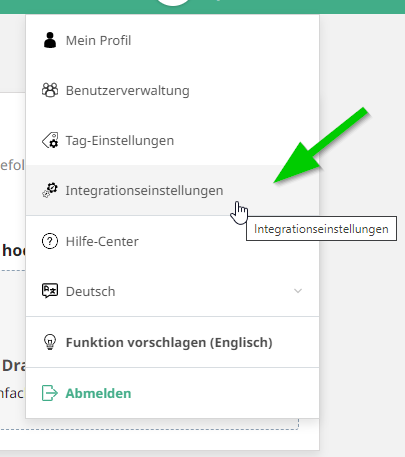
In the EcoVadis portal, you can access the management of the Integration IDs via your “Profile > Integration settings“. There you can download the current list of your EcoVadis suppliers in an import template.
Now add the Integration IDs from the Onventis export file in the EcoVadis import template to the matching supplier, e.g. by copy & paste.

You can then upload the EcoVadis import template again in the EcoVadis integration settings. All added integration IDs will be saved at the matching EcoVadis supplier.
After the next nightly update between Onventis and Ecovadis, via API interface, the ESG ratings are displayed in Onventis at the respective supplier.
To improve the user experience within the Onventis platform, the language selection in the Onventis Supplier Portal has been enhanced. The user now additionally receives the country information per language.

Procure-to-pay
The new shop cart
We are currently working on a new user interface for our shop cart. With the next release you will be able to try out the new user experience when working with the shop cart.
With a new look & feel the new shop cart offers are a more intuitive usability with many more interesting features and improvements yet to come. Currently the new shop cart is in BETA status, hence some features that you might use may not be implemented yet. Therefore, you will be directed to the old shopping cart by default, that still offers all functionalities that you are used to.
Please be aware that the new and the old shopping cart have the same basis, every change you make in the new shopping cart will impact the old shopping cart and vice versa.
How to access the new shop cart?
As we are offering only a preview of the new shopping cart and features are still in progress you will be directed to the old shopping cart by default. Don’t worry, nothing has changed here, you can work with the old shopping cart like you are used to.
If you want to try out the beta version of the new shopping cart you can access it by starting in the old shopping cart and clicking on the link above the toolbar which says “Go to new shopping cart”.
Similar, from the new shopping cart you can go back to the old one by clicking on the link which says “Go to old shopping cart”

How to enter header information?
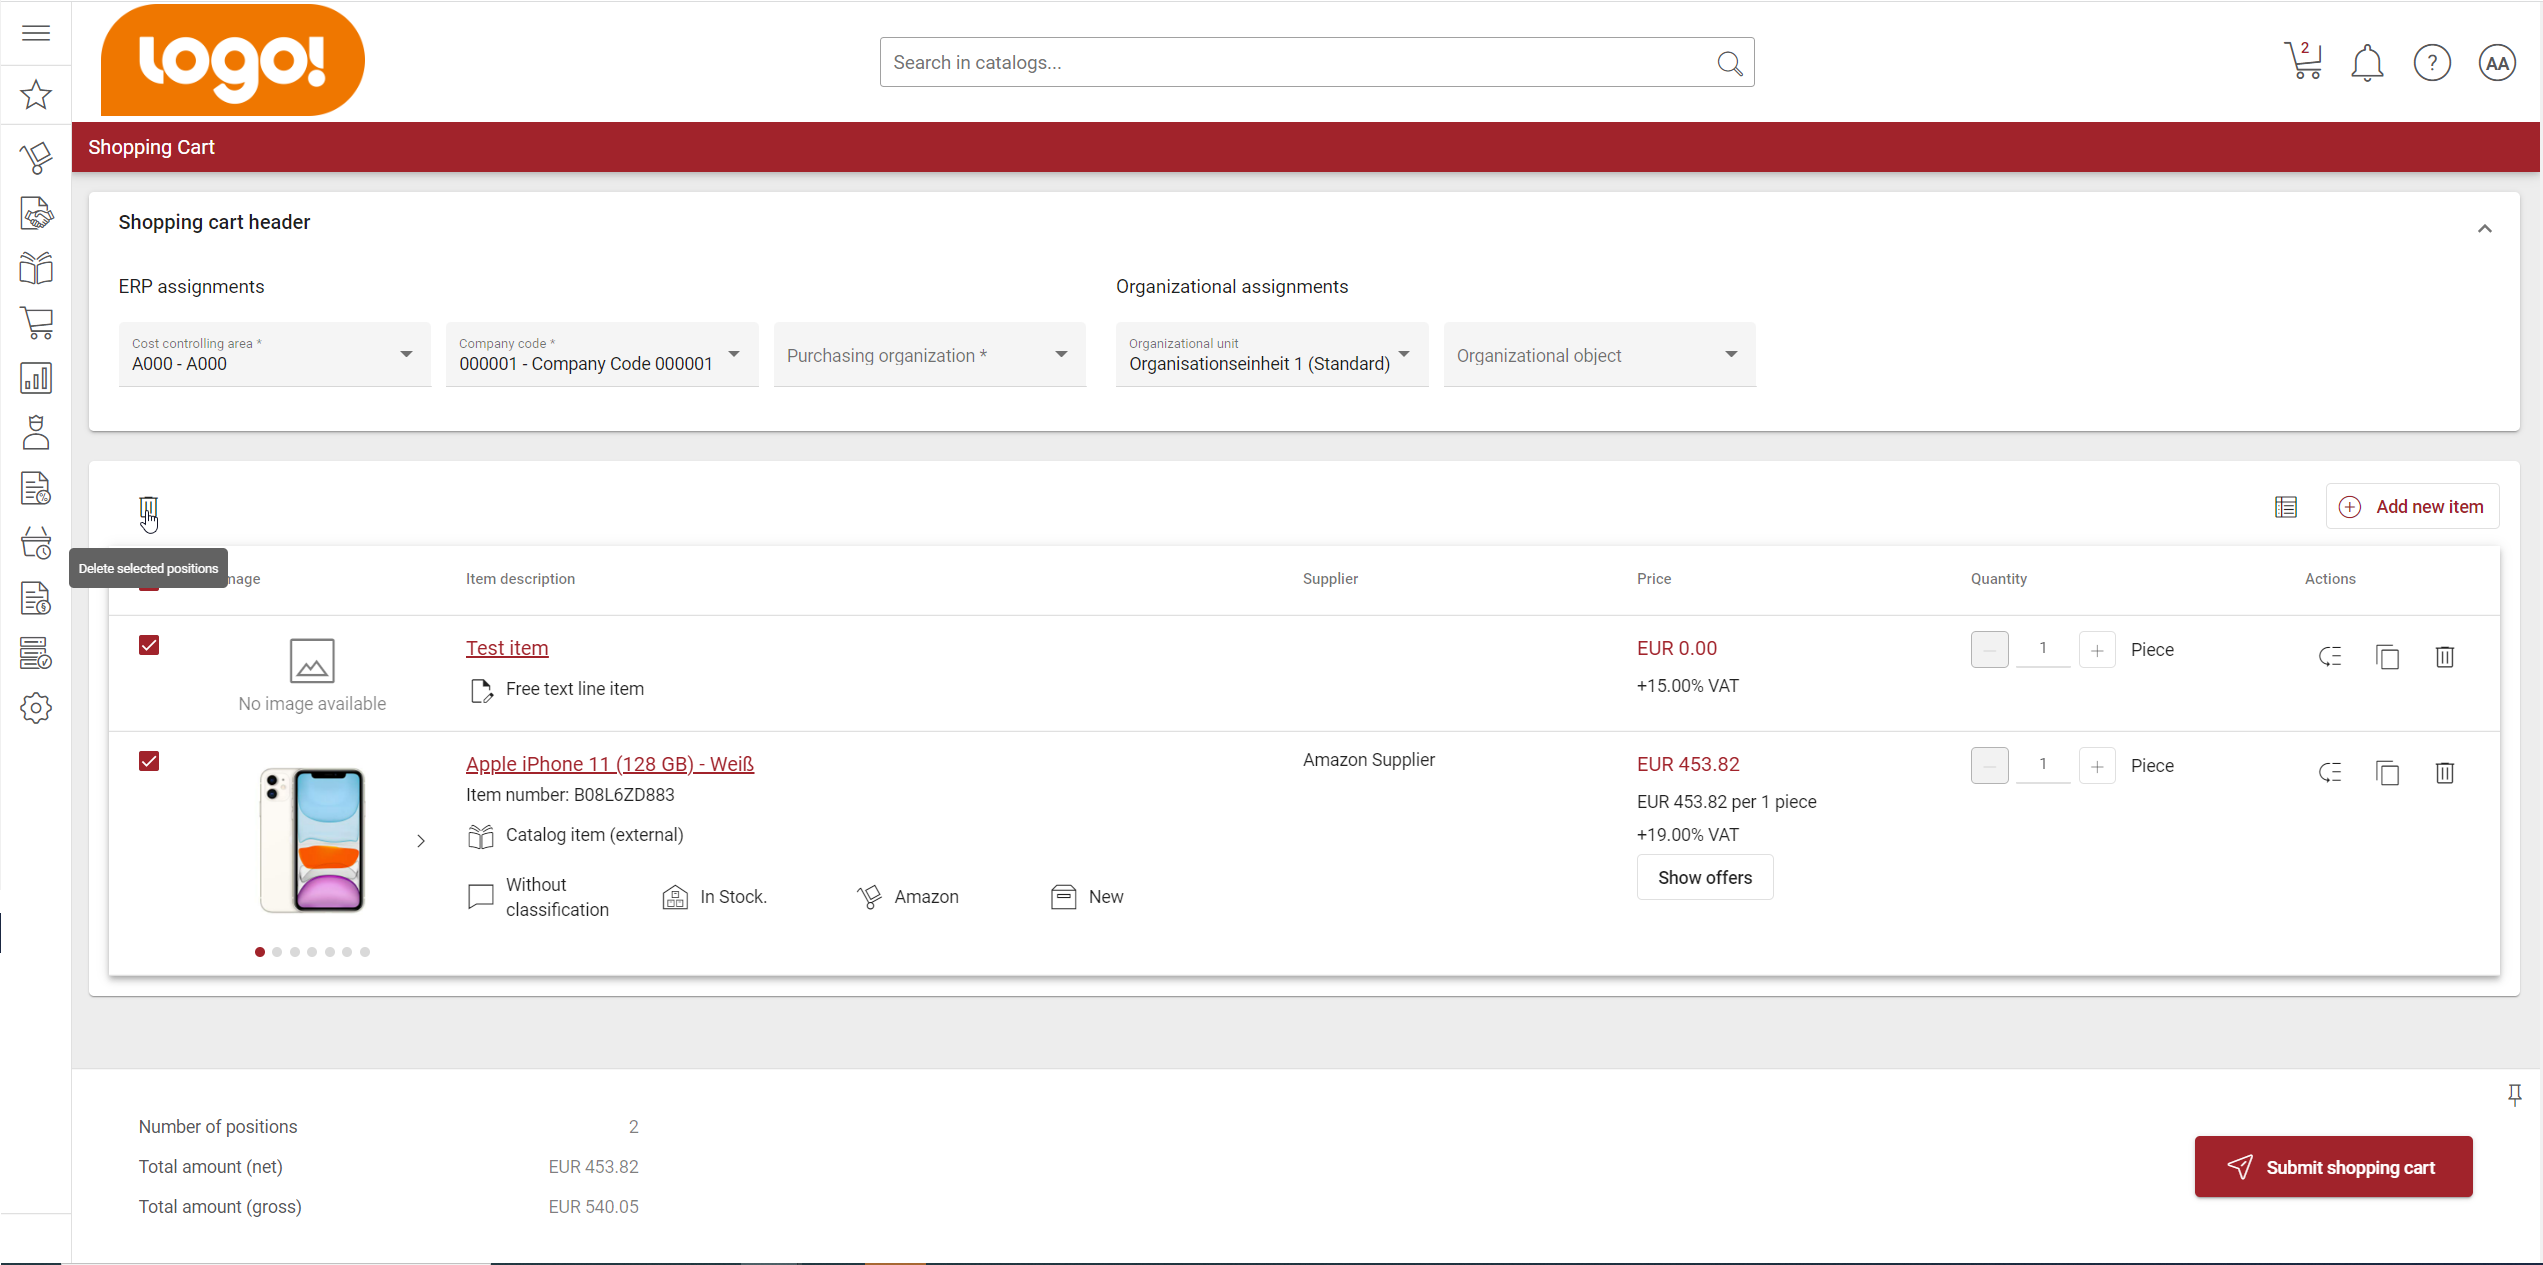
On top of the shopping cart you will find a header, where you can insert crucial header information. This header can be collapsed and expanded and automatically collapses when you scroll down the shopping cart, to give you more space for the shopping cart positions. However, in collapsed state you will still be able to see all relevant information in a smaller view.

How to add an item?
In the new shopping cart there is one central place in the right hand corner of the table to add new items. Here you find a button called “add new items” where you have the option to select a free-text line item, a catalog item, an item by item number or an item from the article favorites.
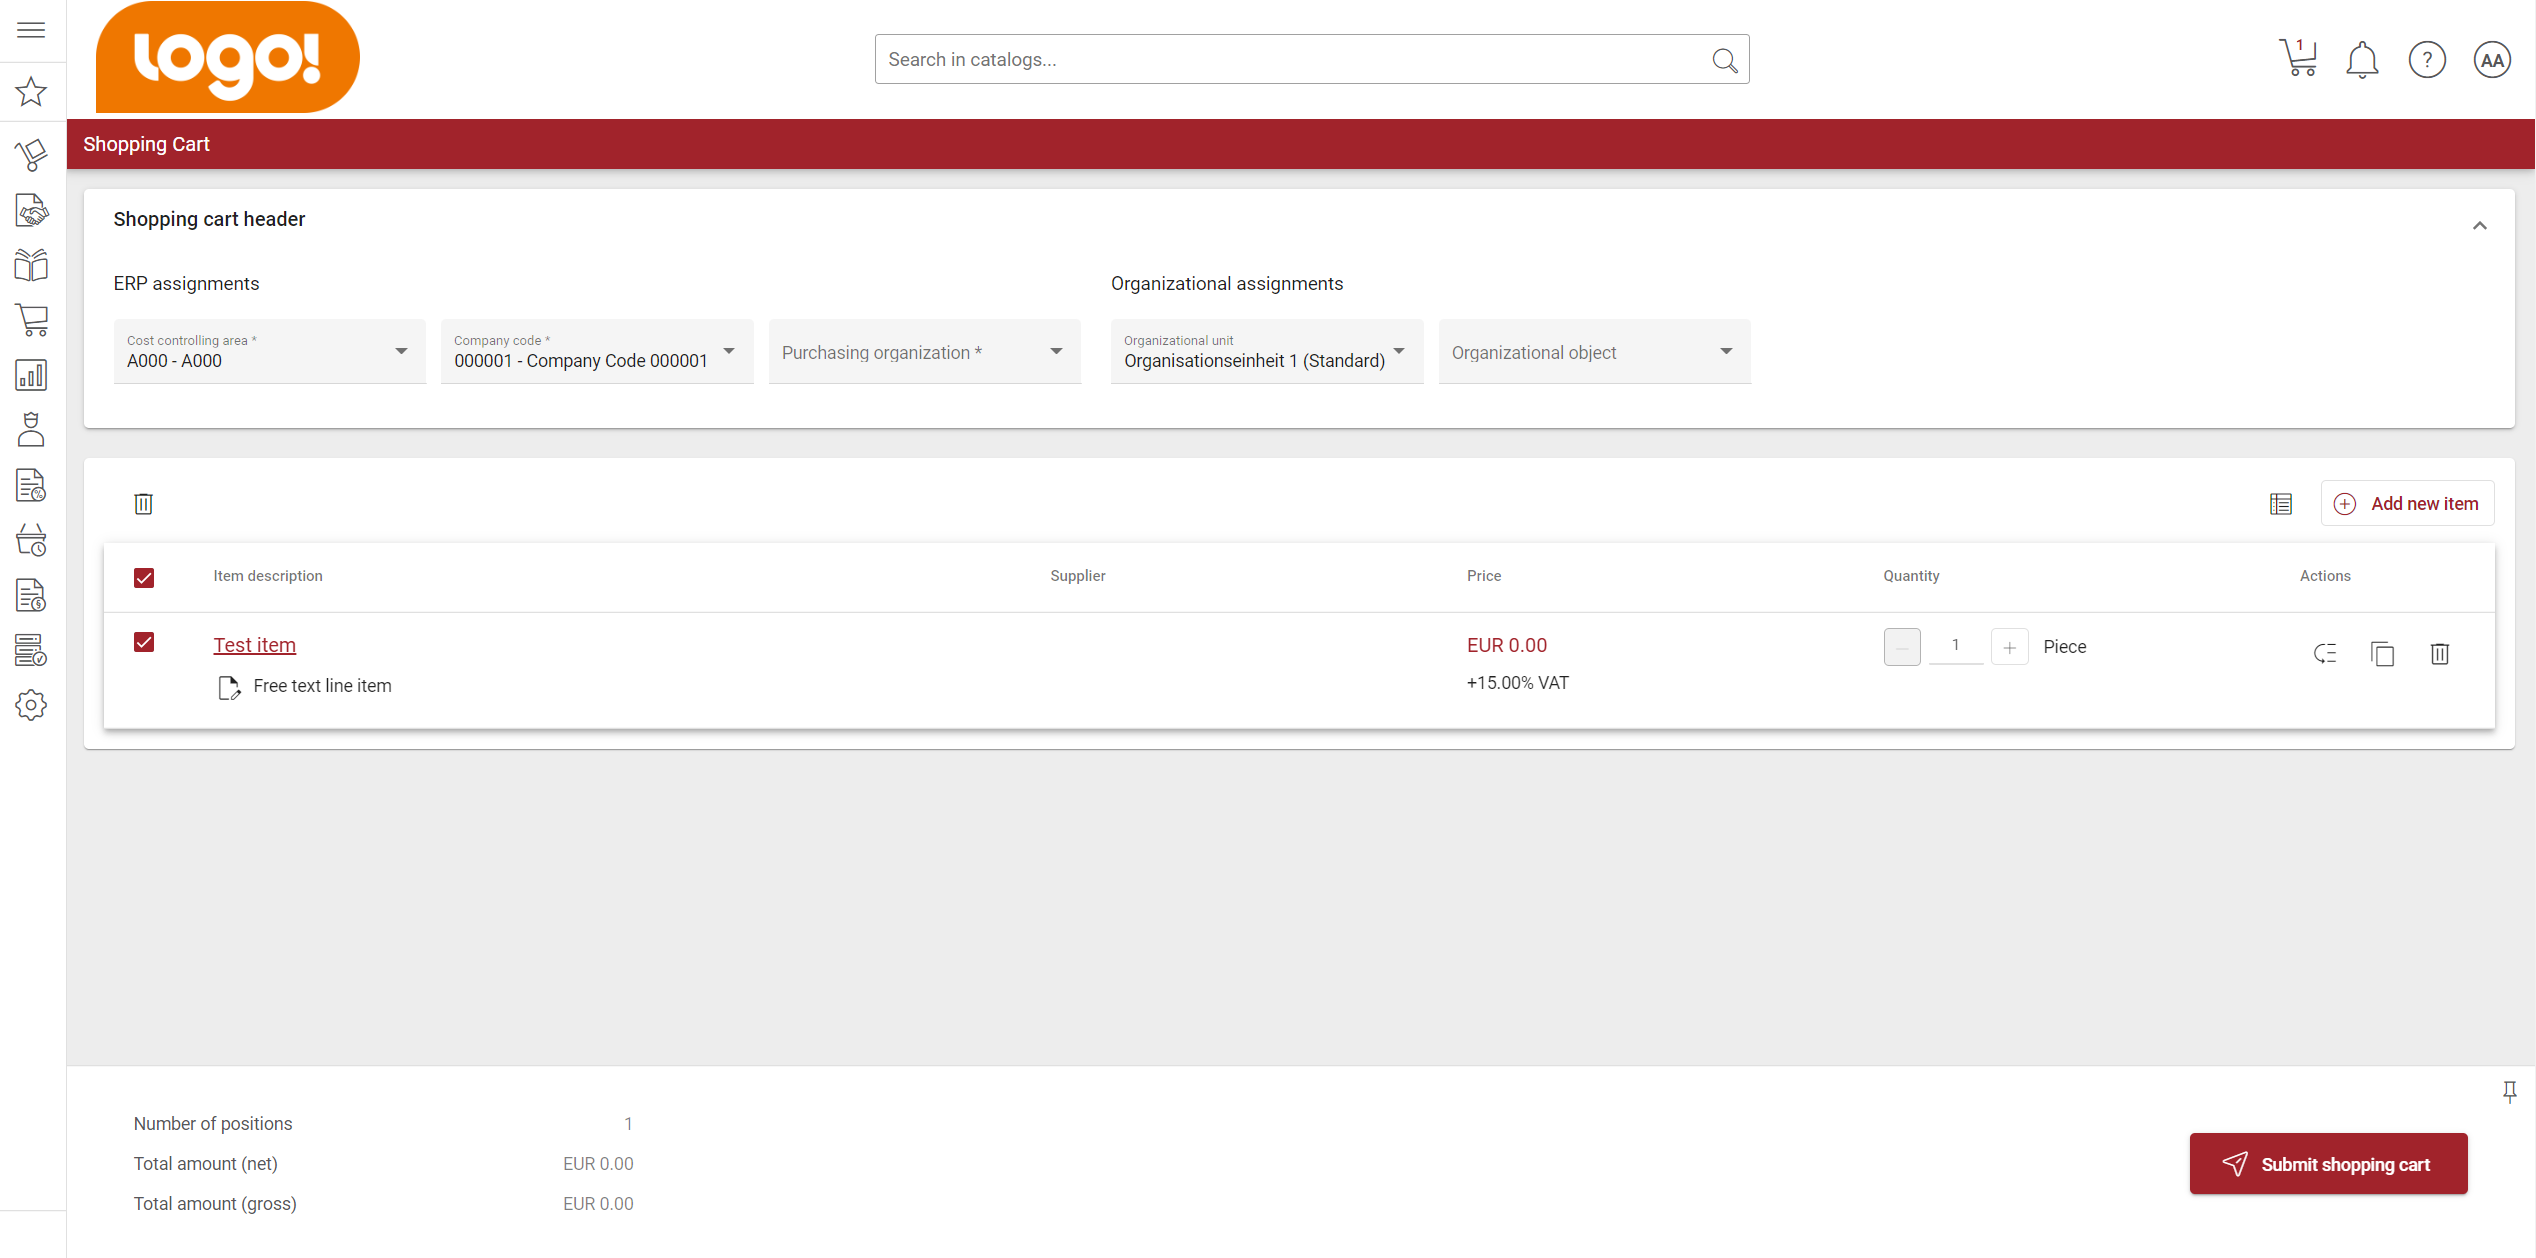
When you want to add a free-text line item, you simply select the first option from the dropdown and enter a title. The item is then created and added to the shopping cart.
If you want to add a catalog item you simply select a catalog item from the dropdown, which then leads you to the catalog search.
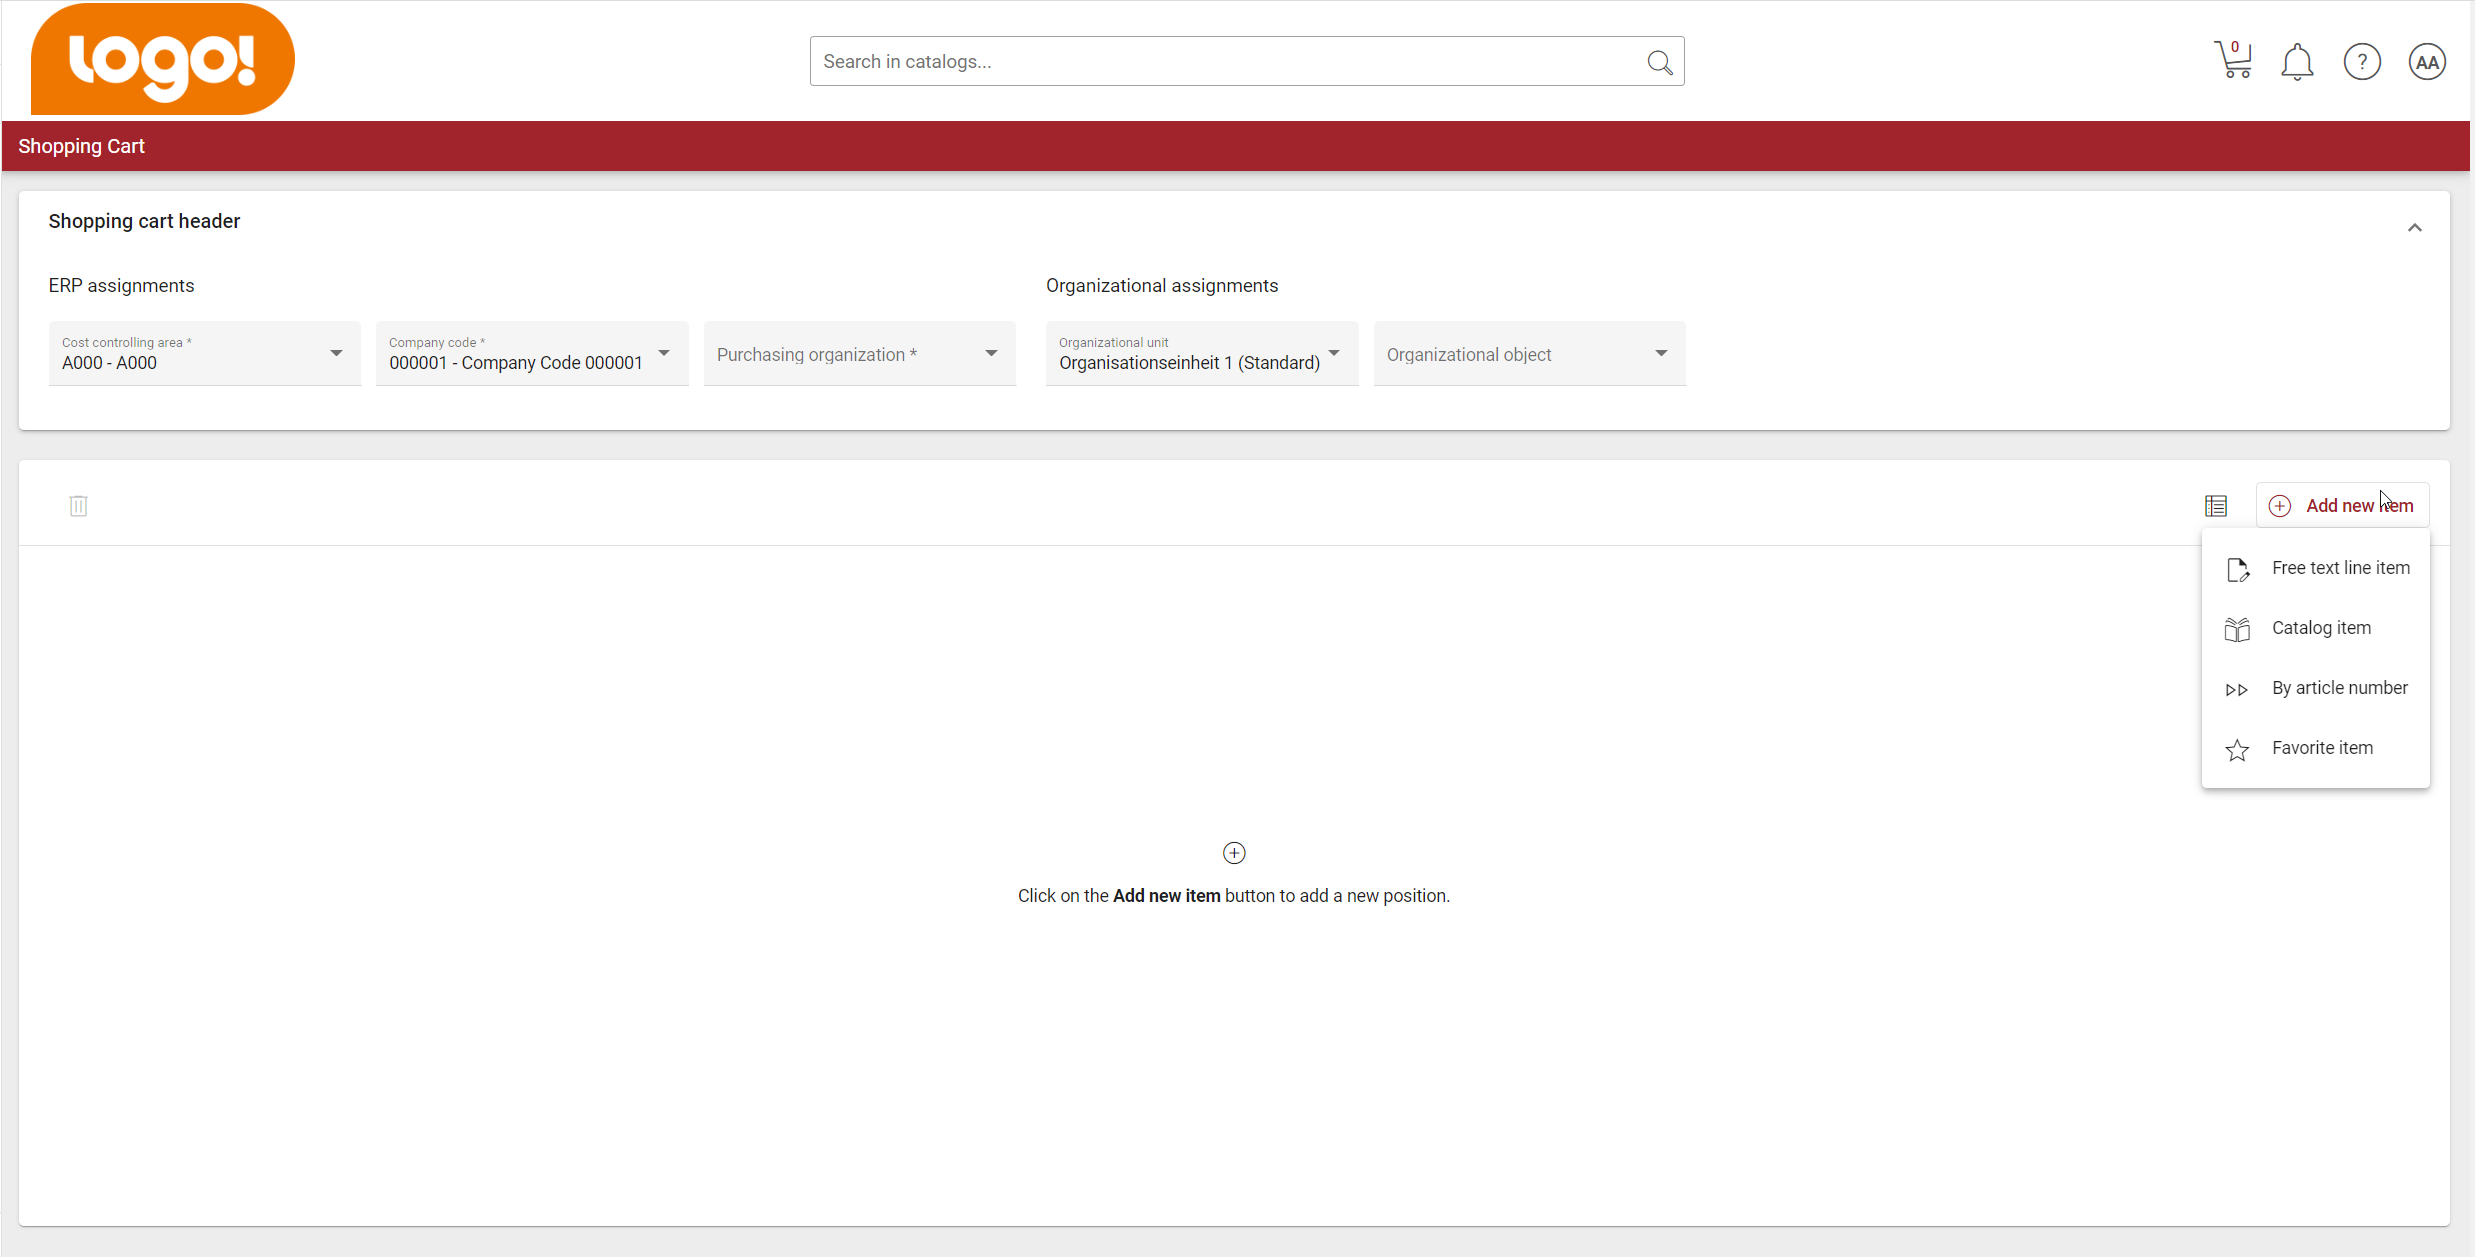
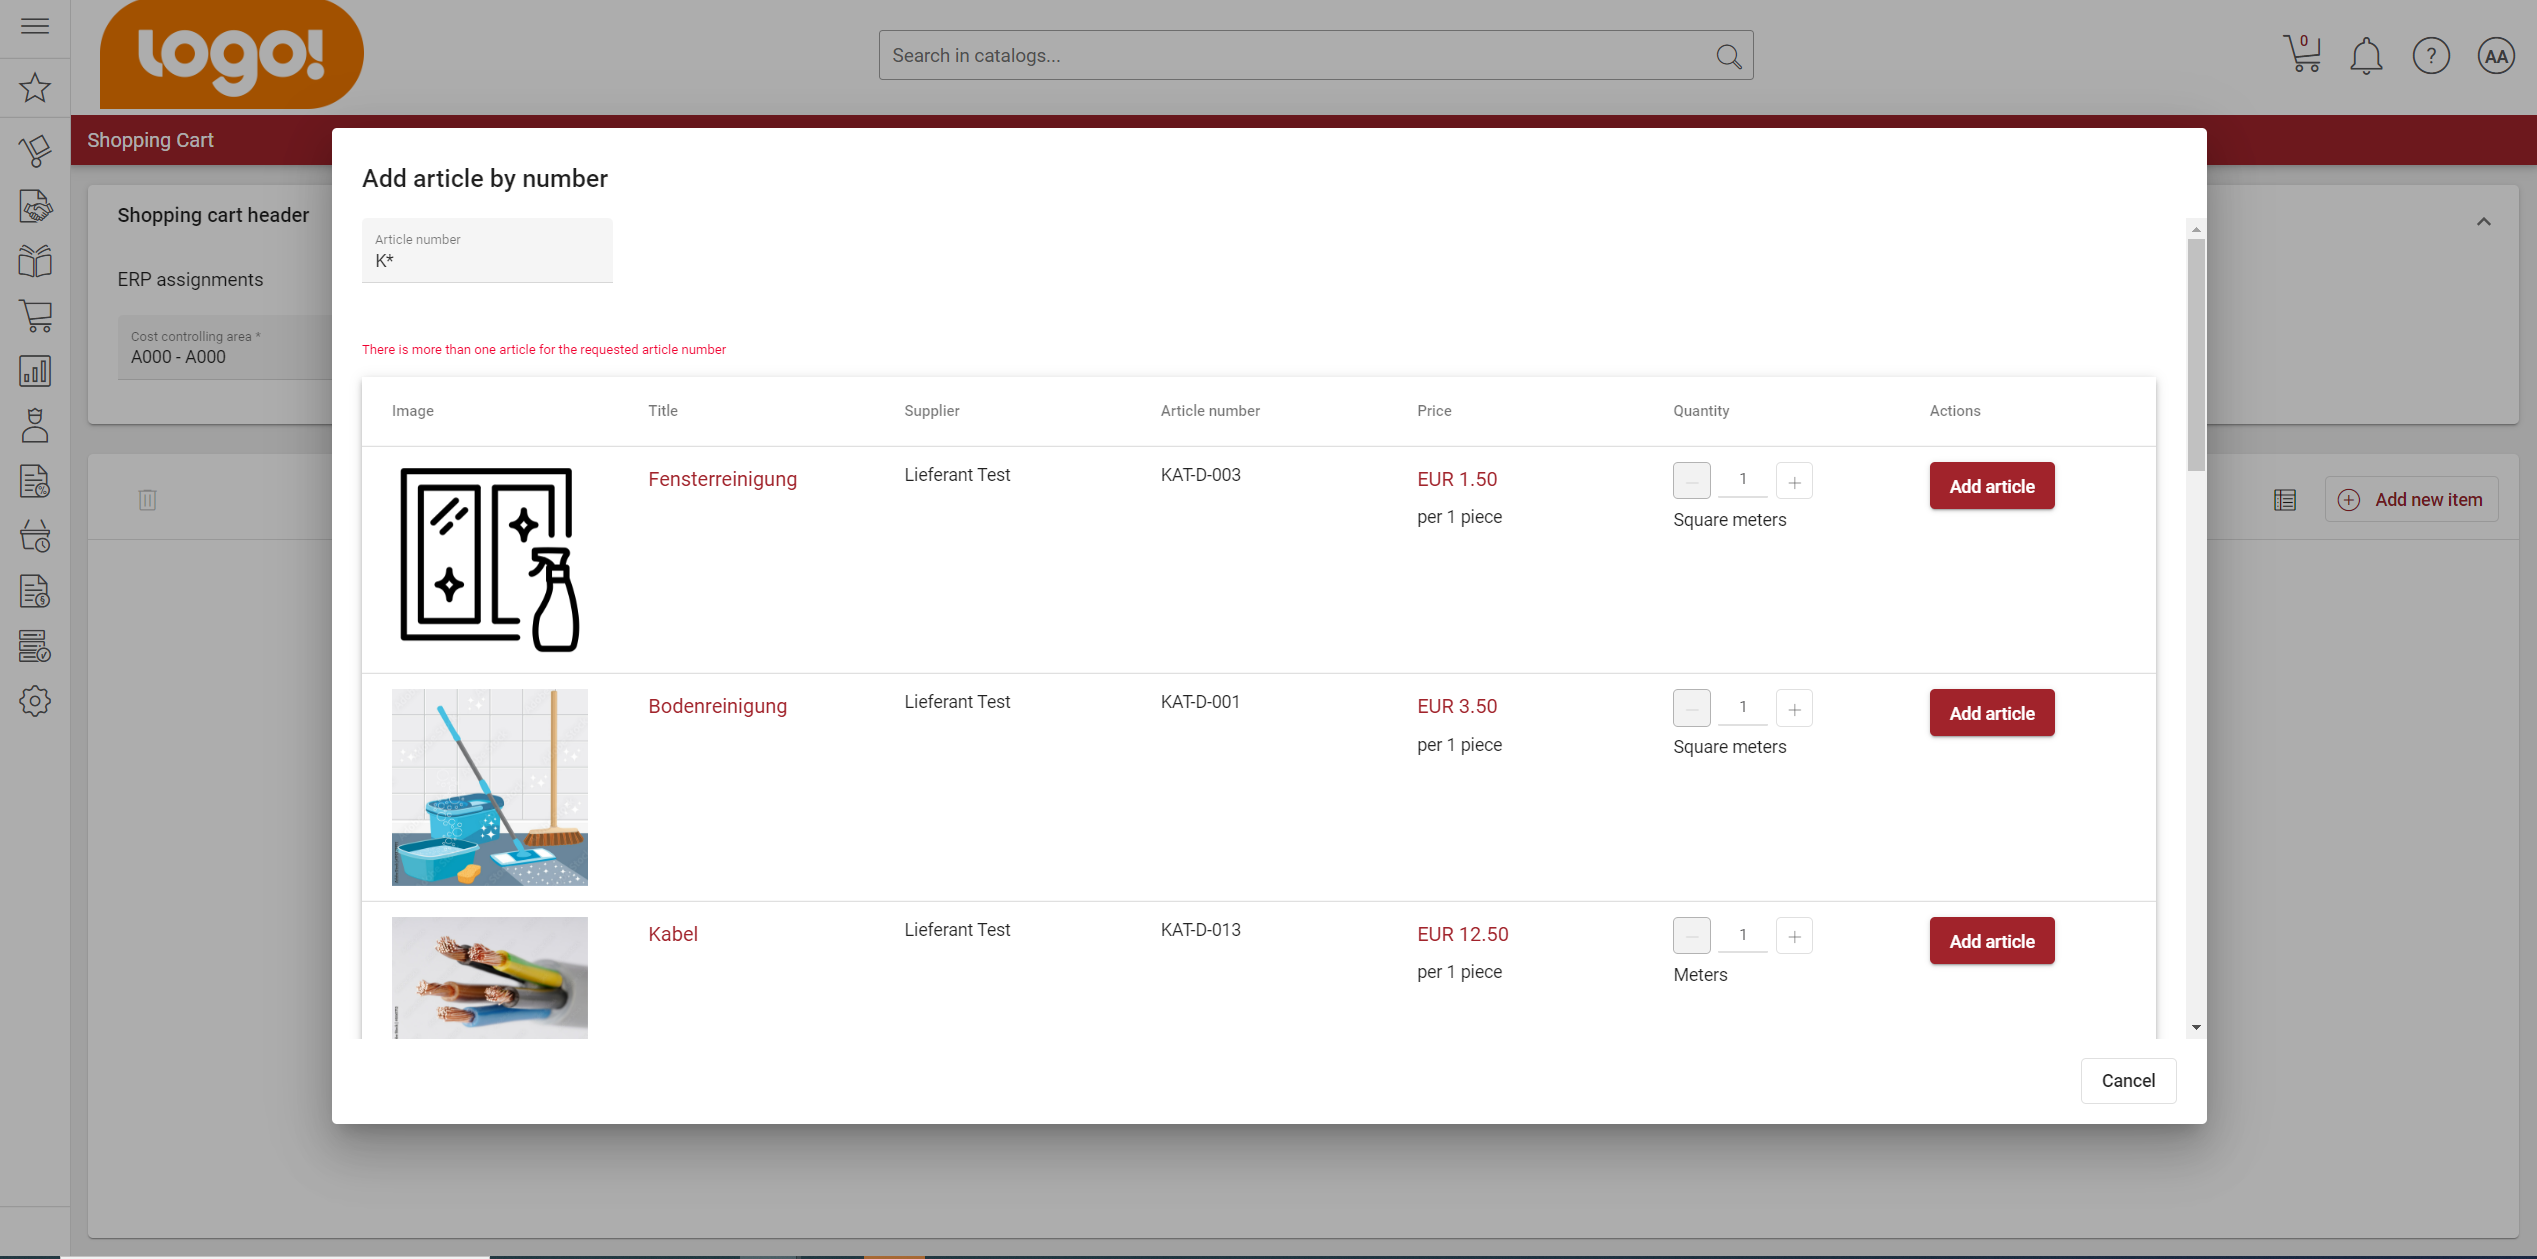
If you want to add an item by item number, you select the “By item number” and a modal opens where you can type in the item number. If there is only one exact match, the item will be added directly.
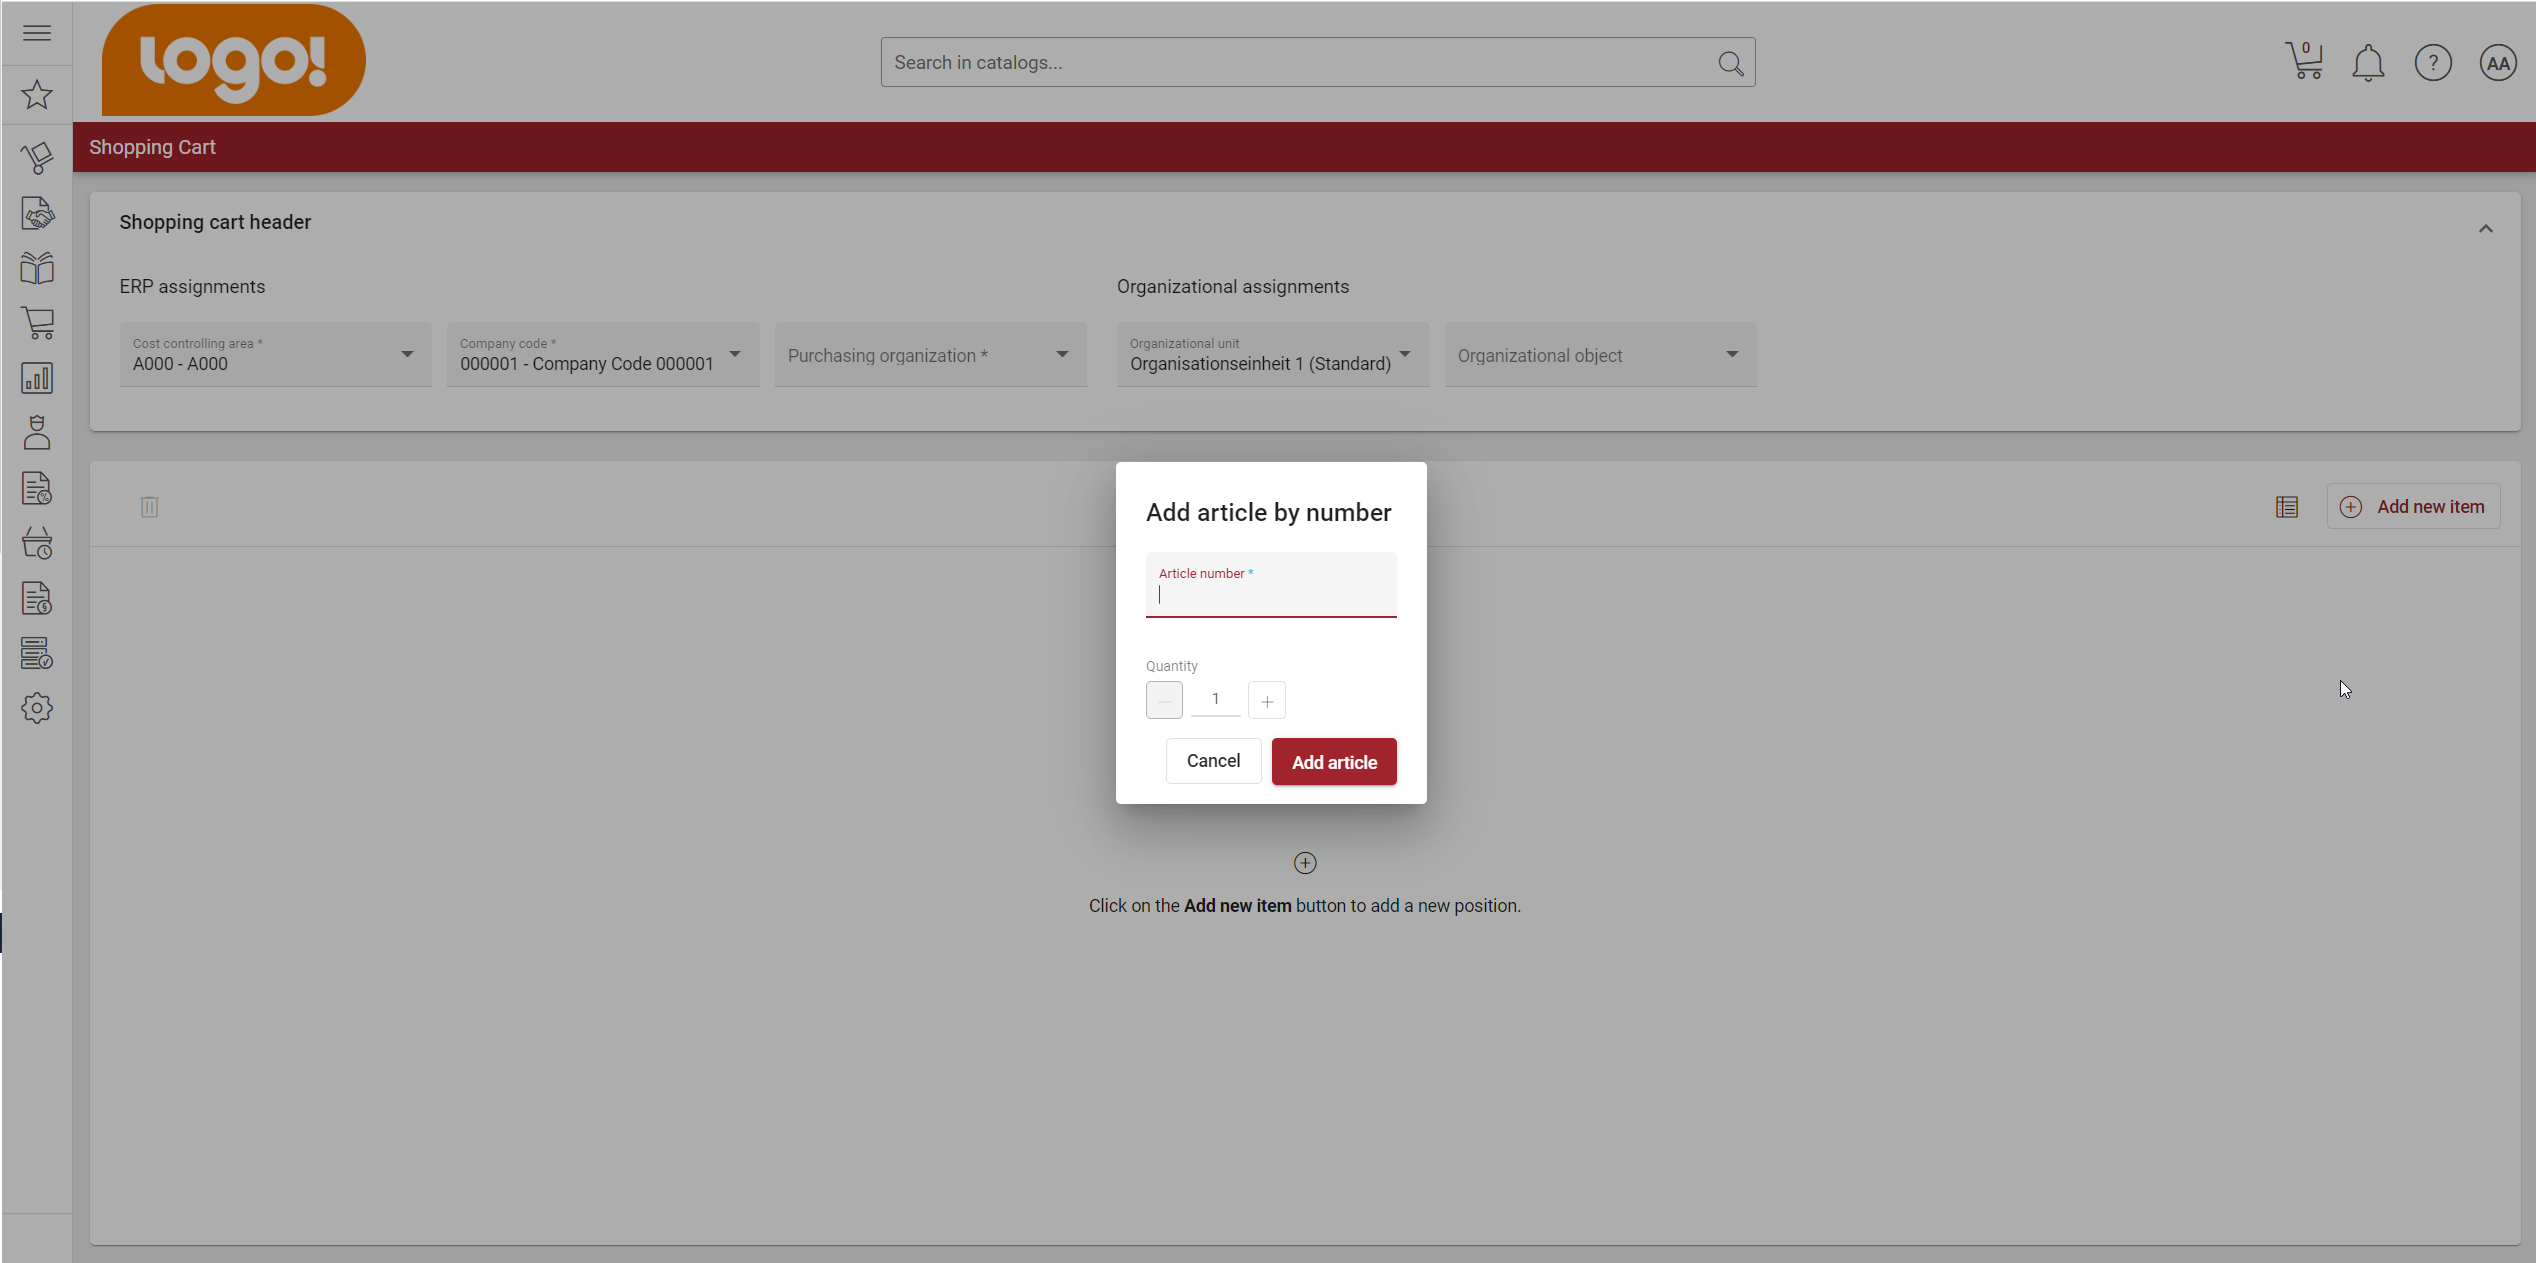
To extend the search you can enter a * to the input and you will receive a list of items that match your search. Here the min quantity and order interval is respected for being able to add an item.
How to edit a line item?
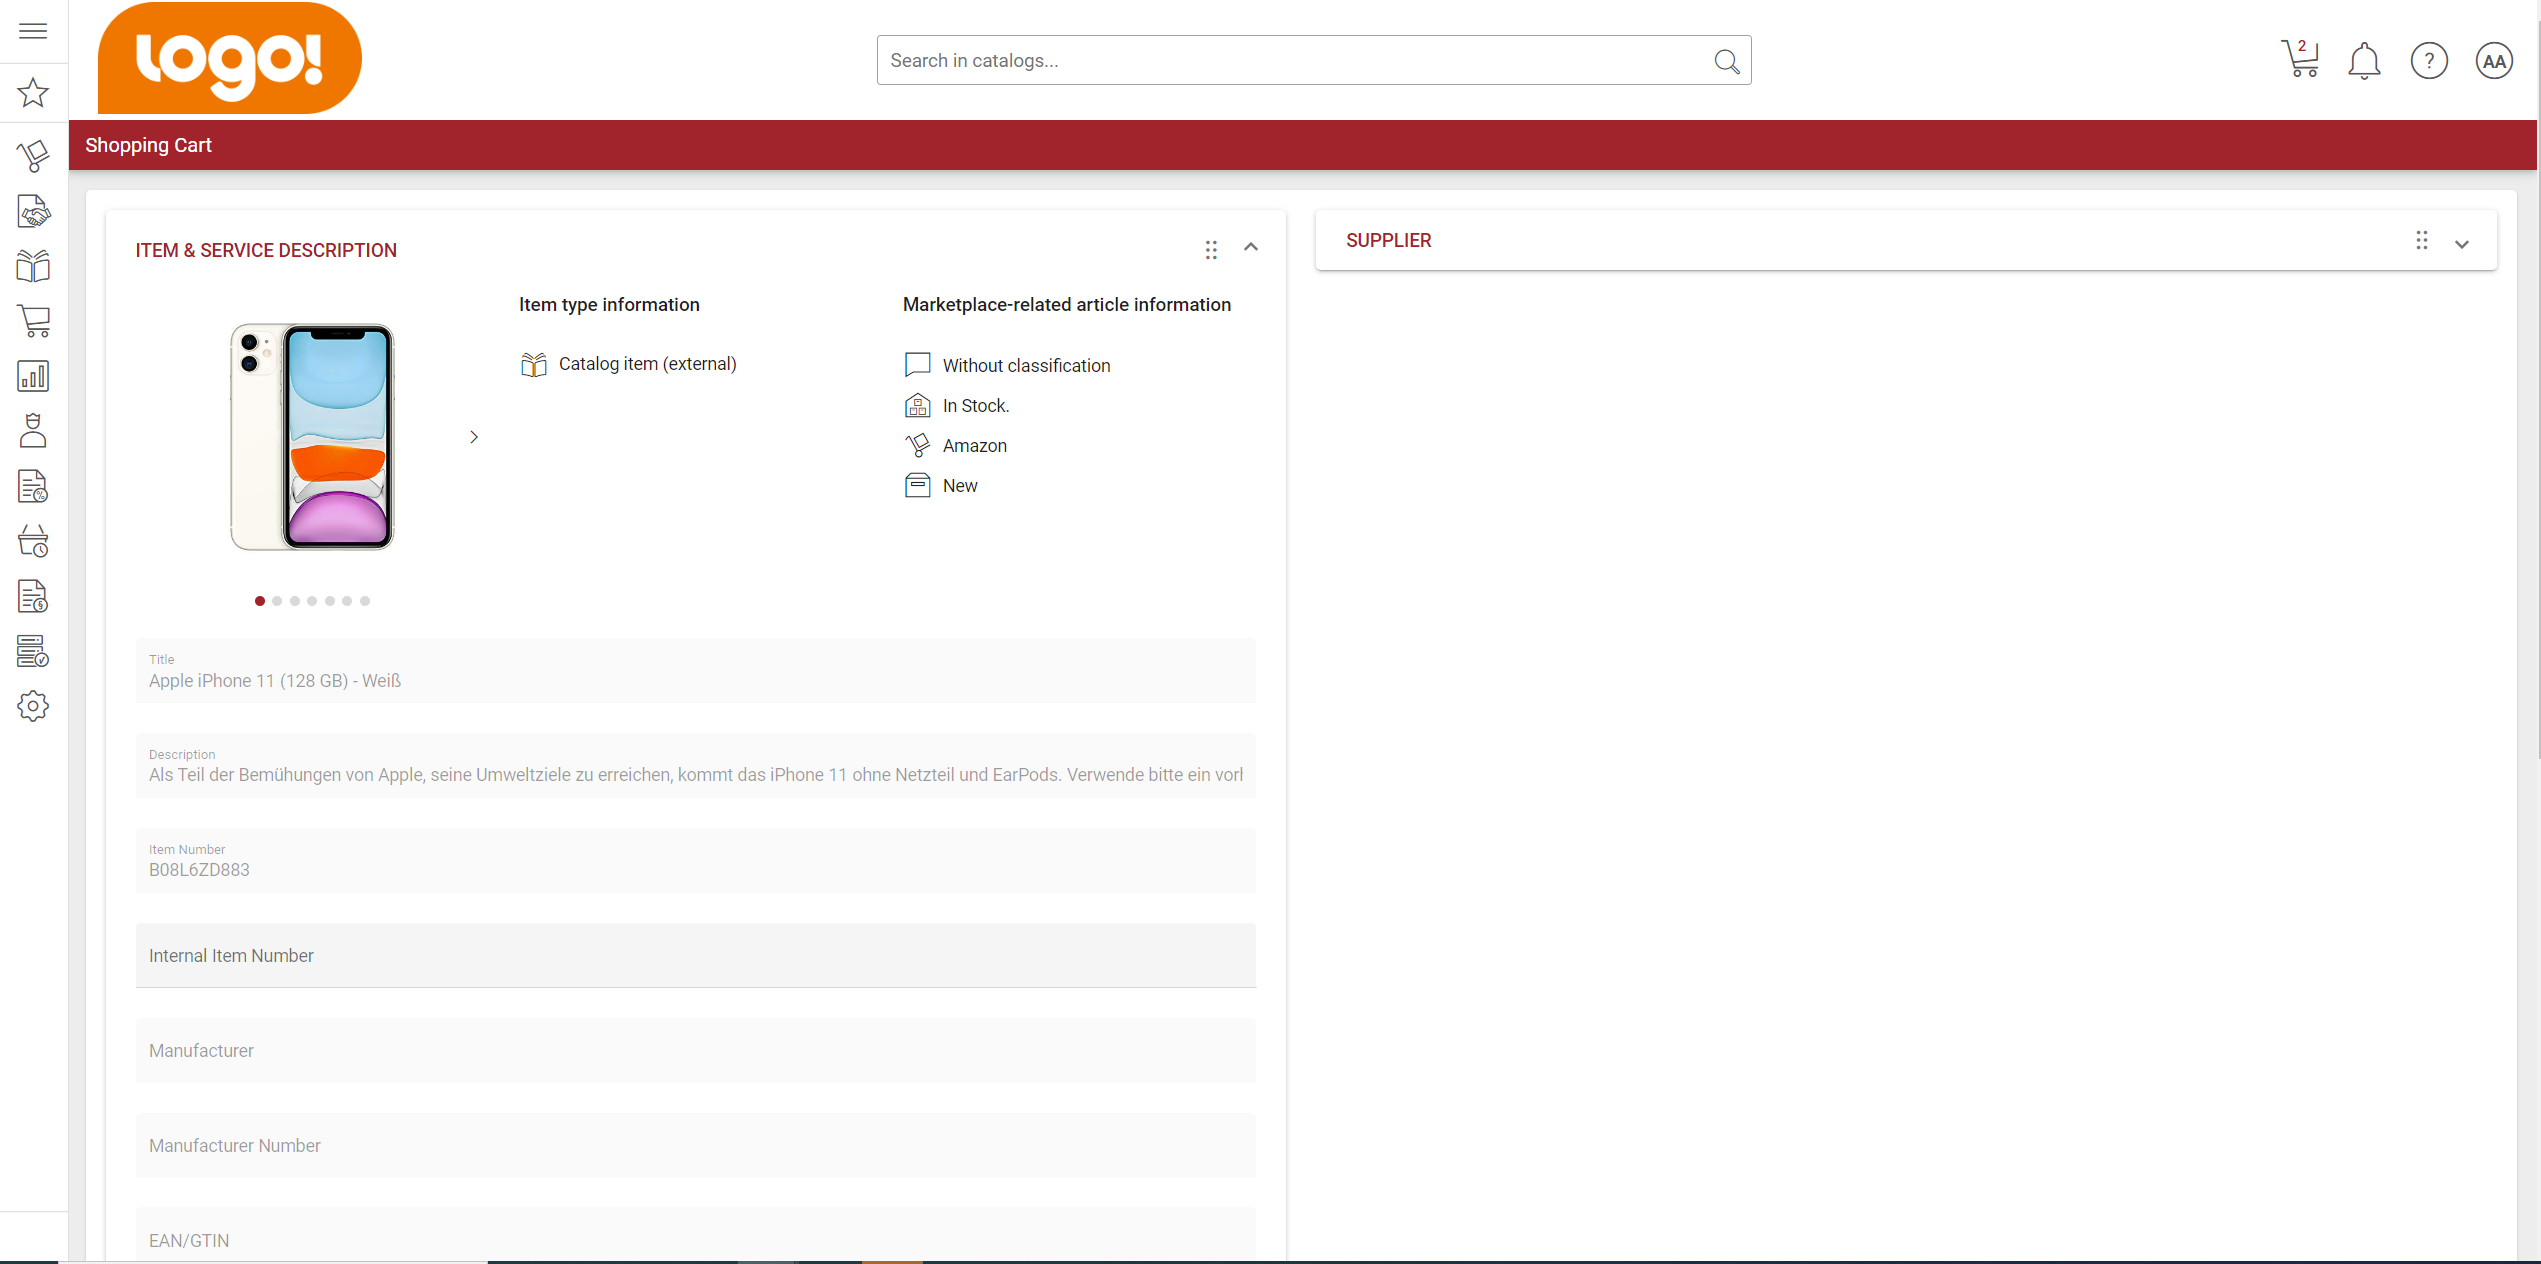
You can edit a shopping cart position and fill it with all necessary information by clicking on the item title. You will then be directed to the shopping cart position detail view, where you will see the information grouped in panels.
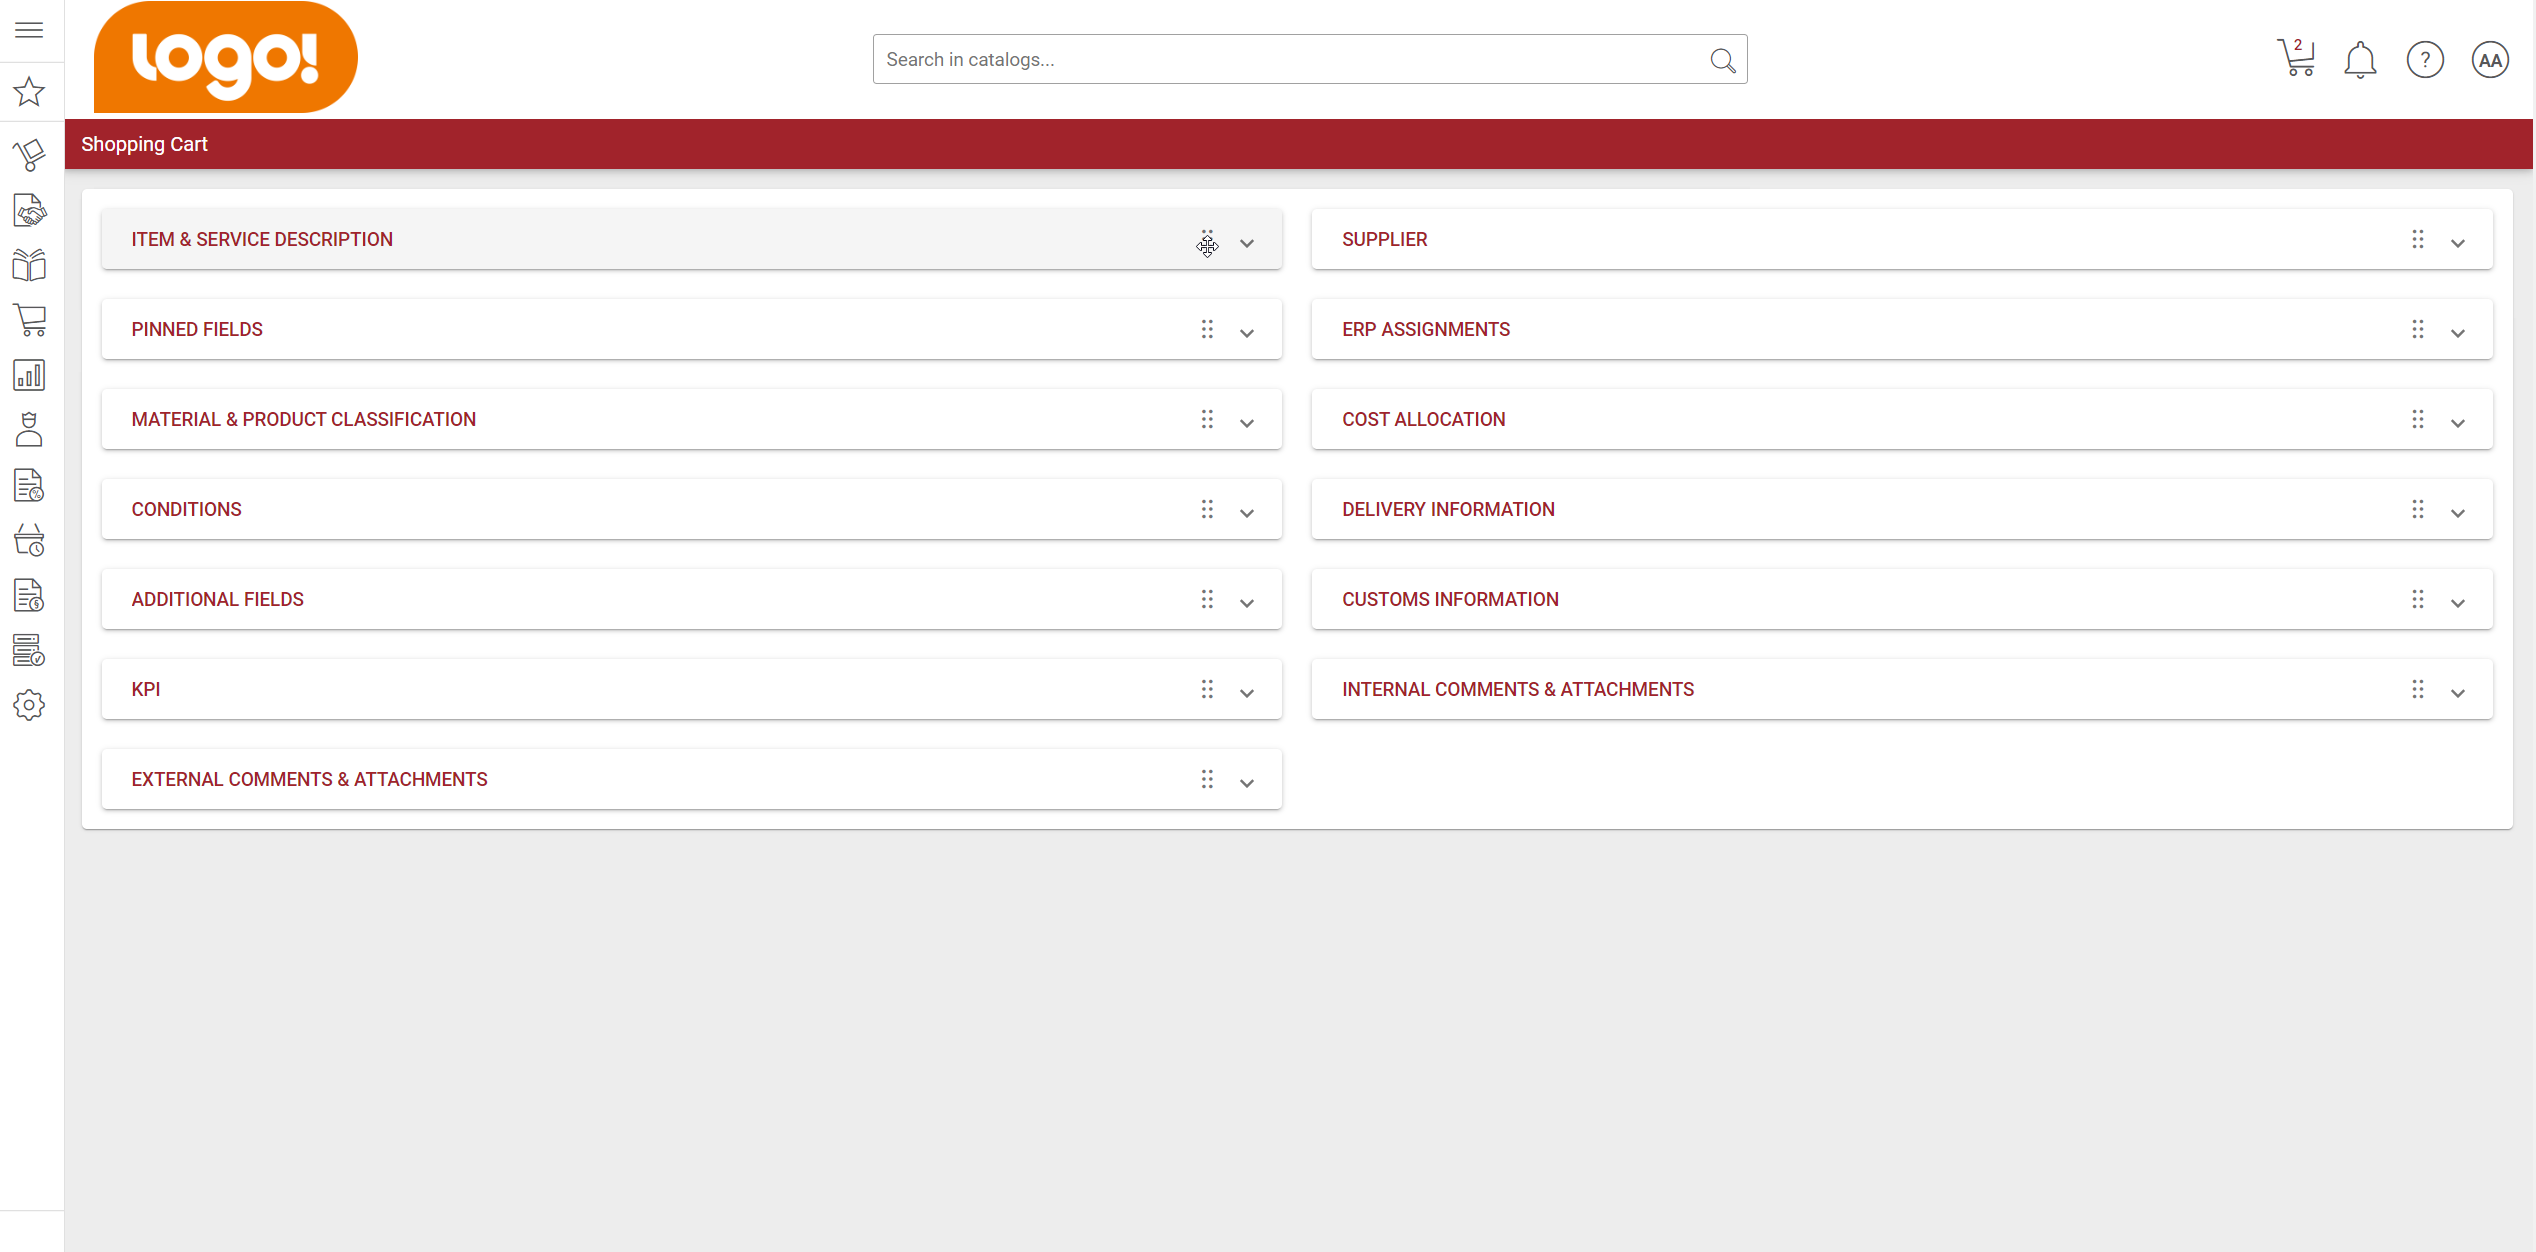
These panels can be expanded and collapsed, containing all information that you are also used from the old shopping cart. The arrangement of the panels follow a default layout but can be customized which will be described in the next section.
How to customize my shop cart?
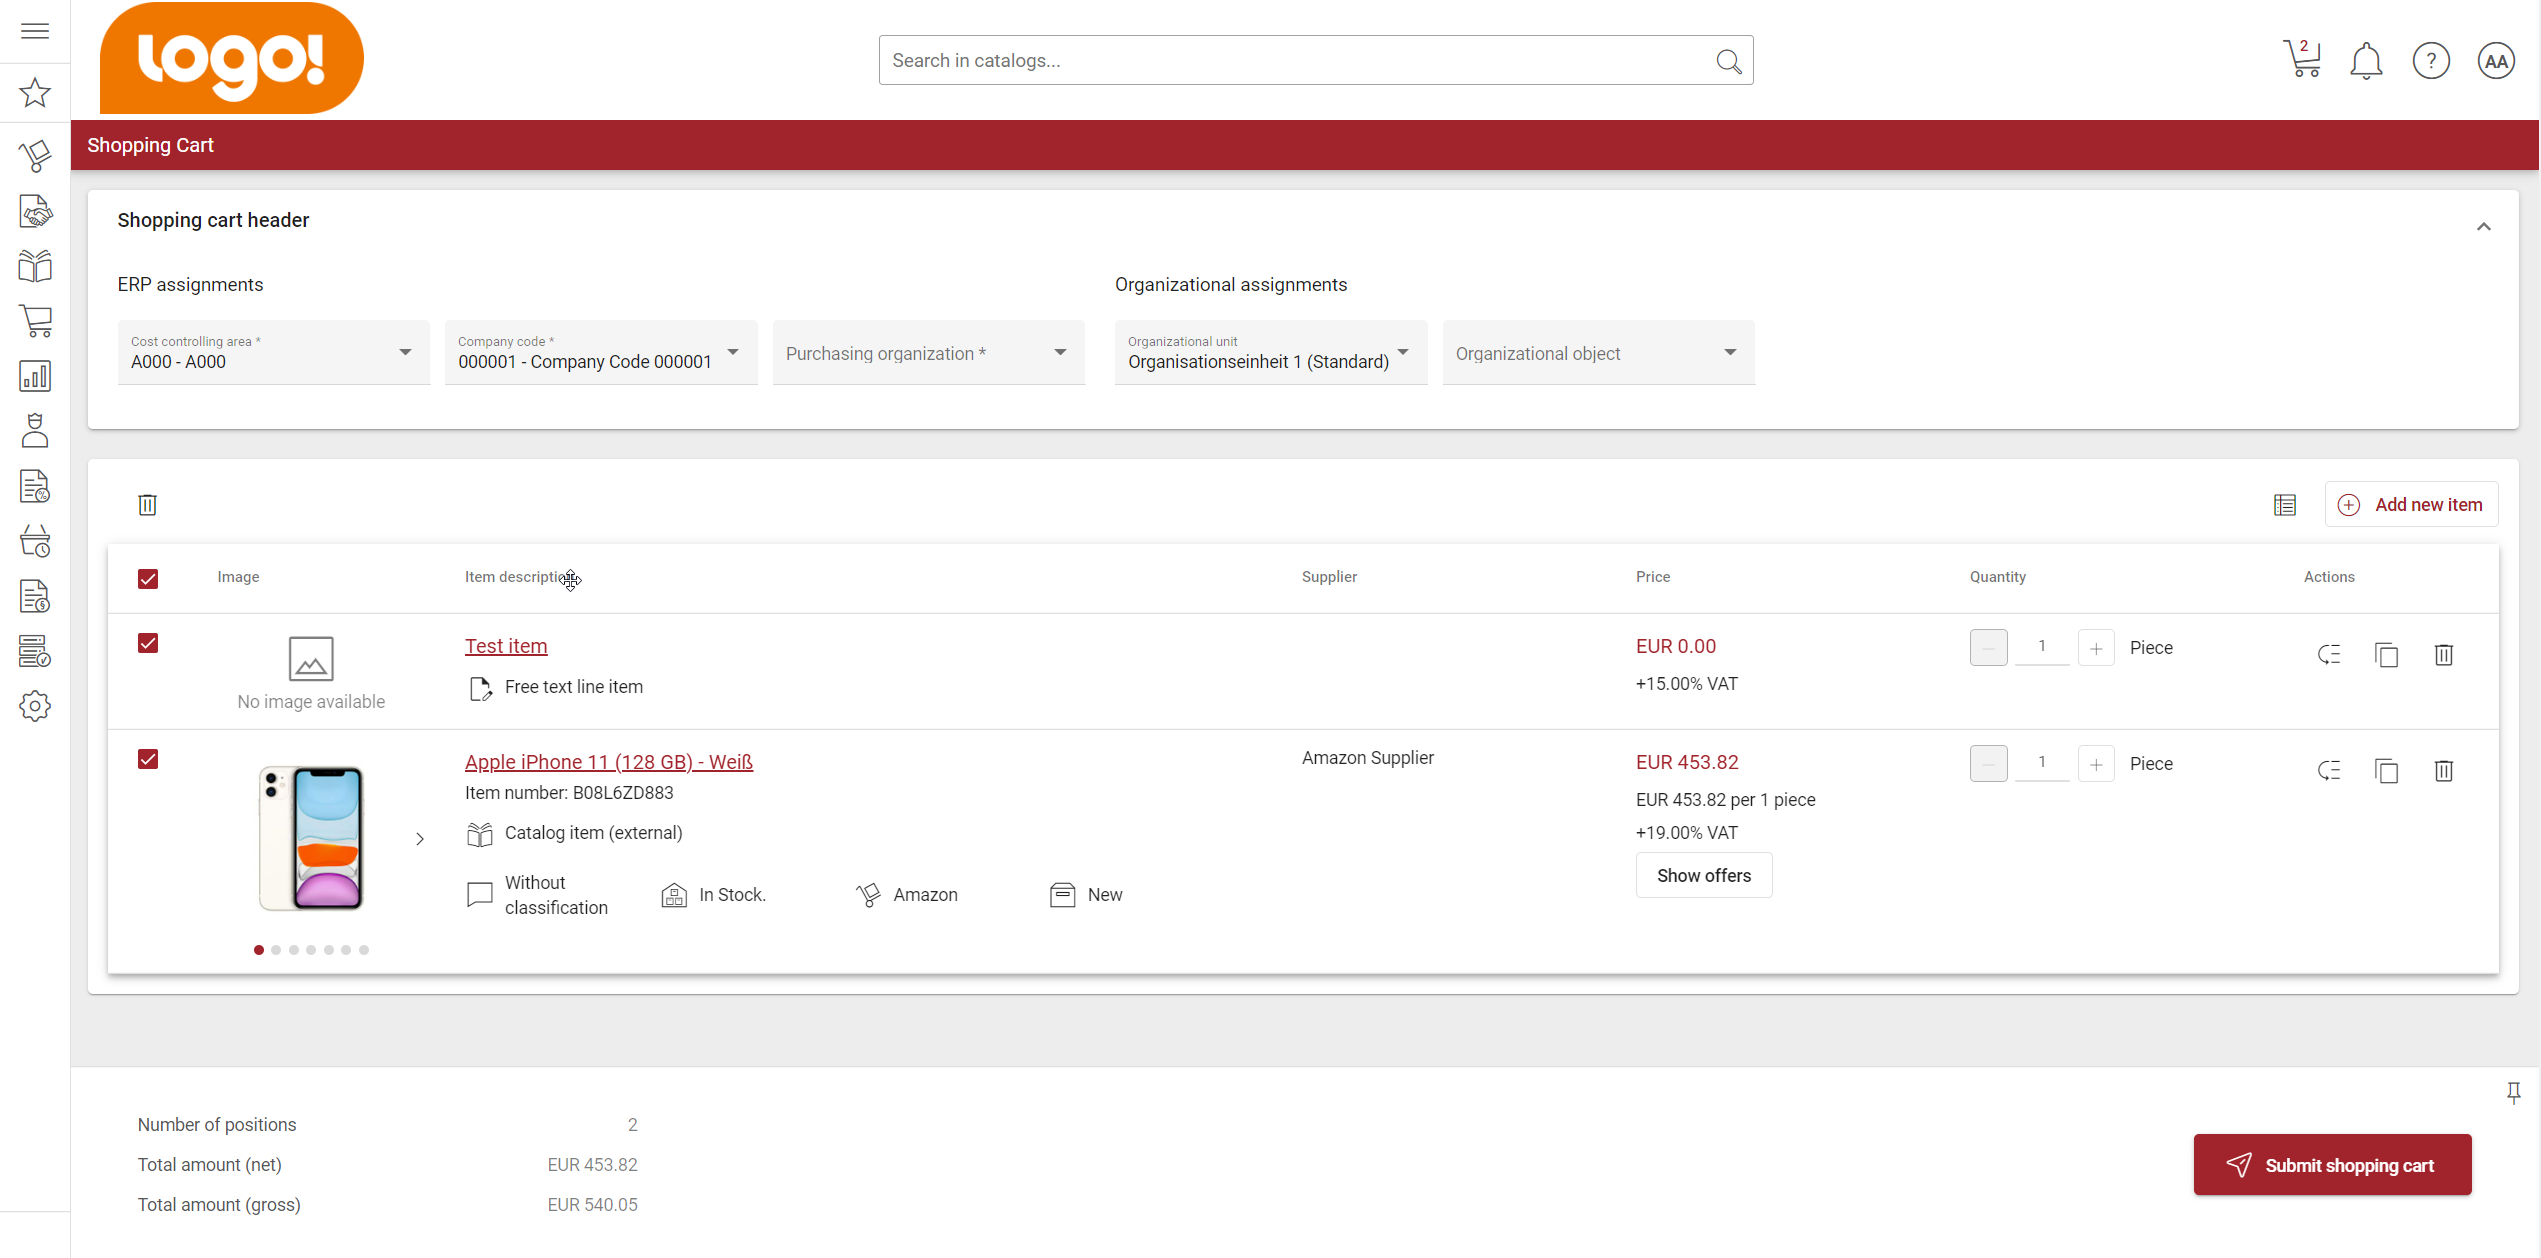
With the new shopping cart we offer users many more customization options. In the shopping cart overview, the user is able to change both the order of the columns as well as the amount of columns which the user wants to see.
For changing the order of the columns you can simply hover on the title of the column. Then you will see a drag symbol and you are now able to drag the columns and drop it at the desired place in the table.
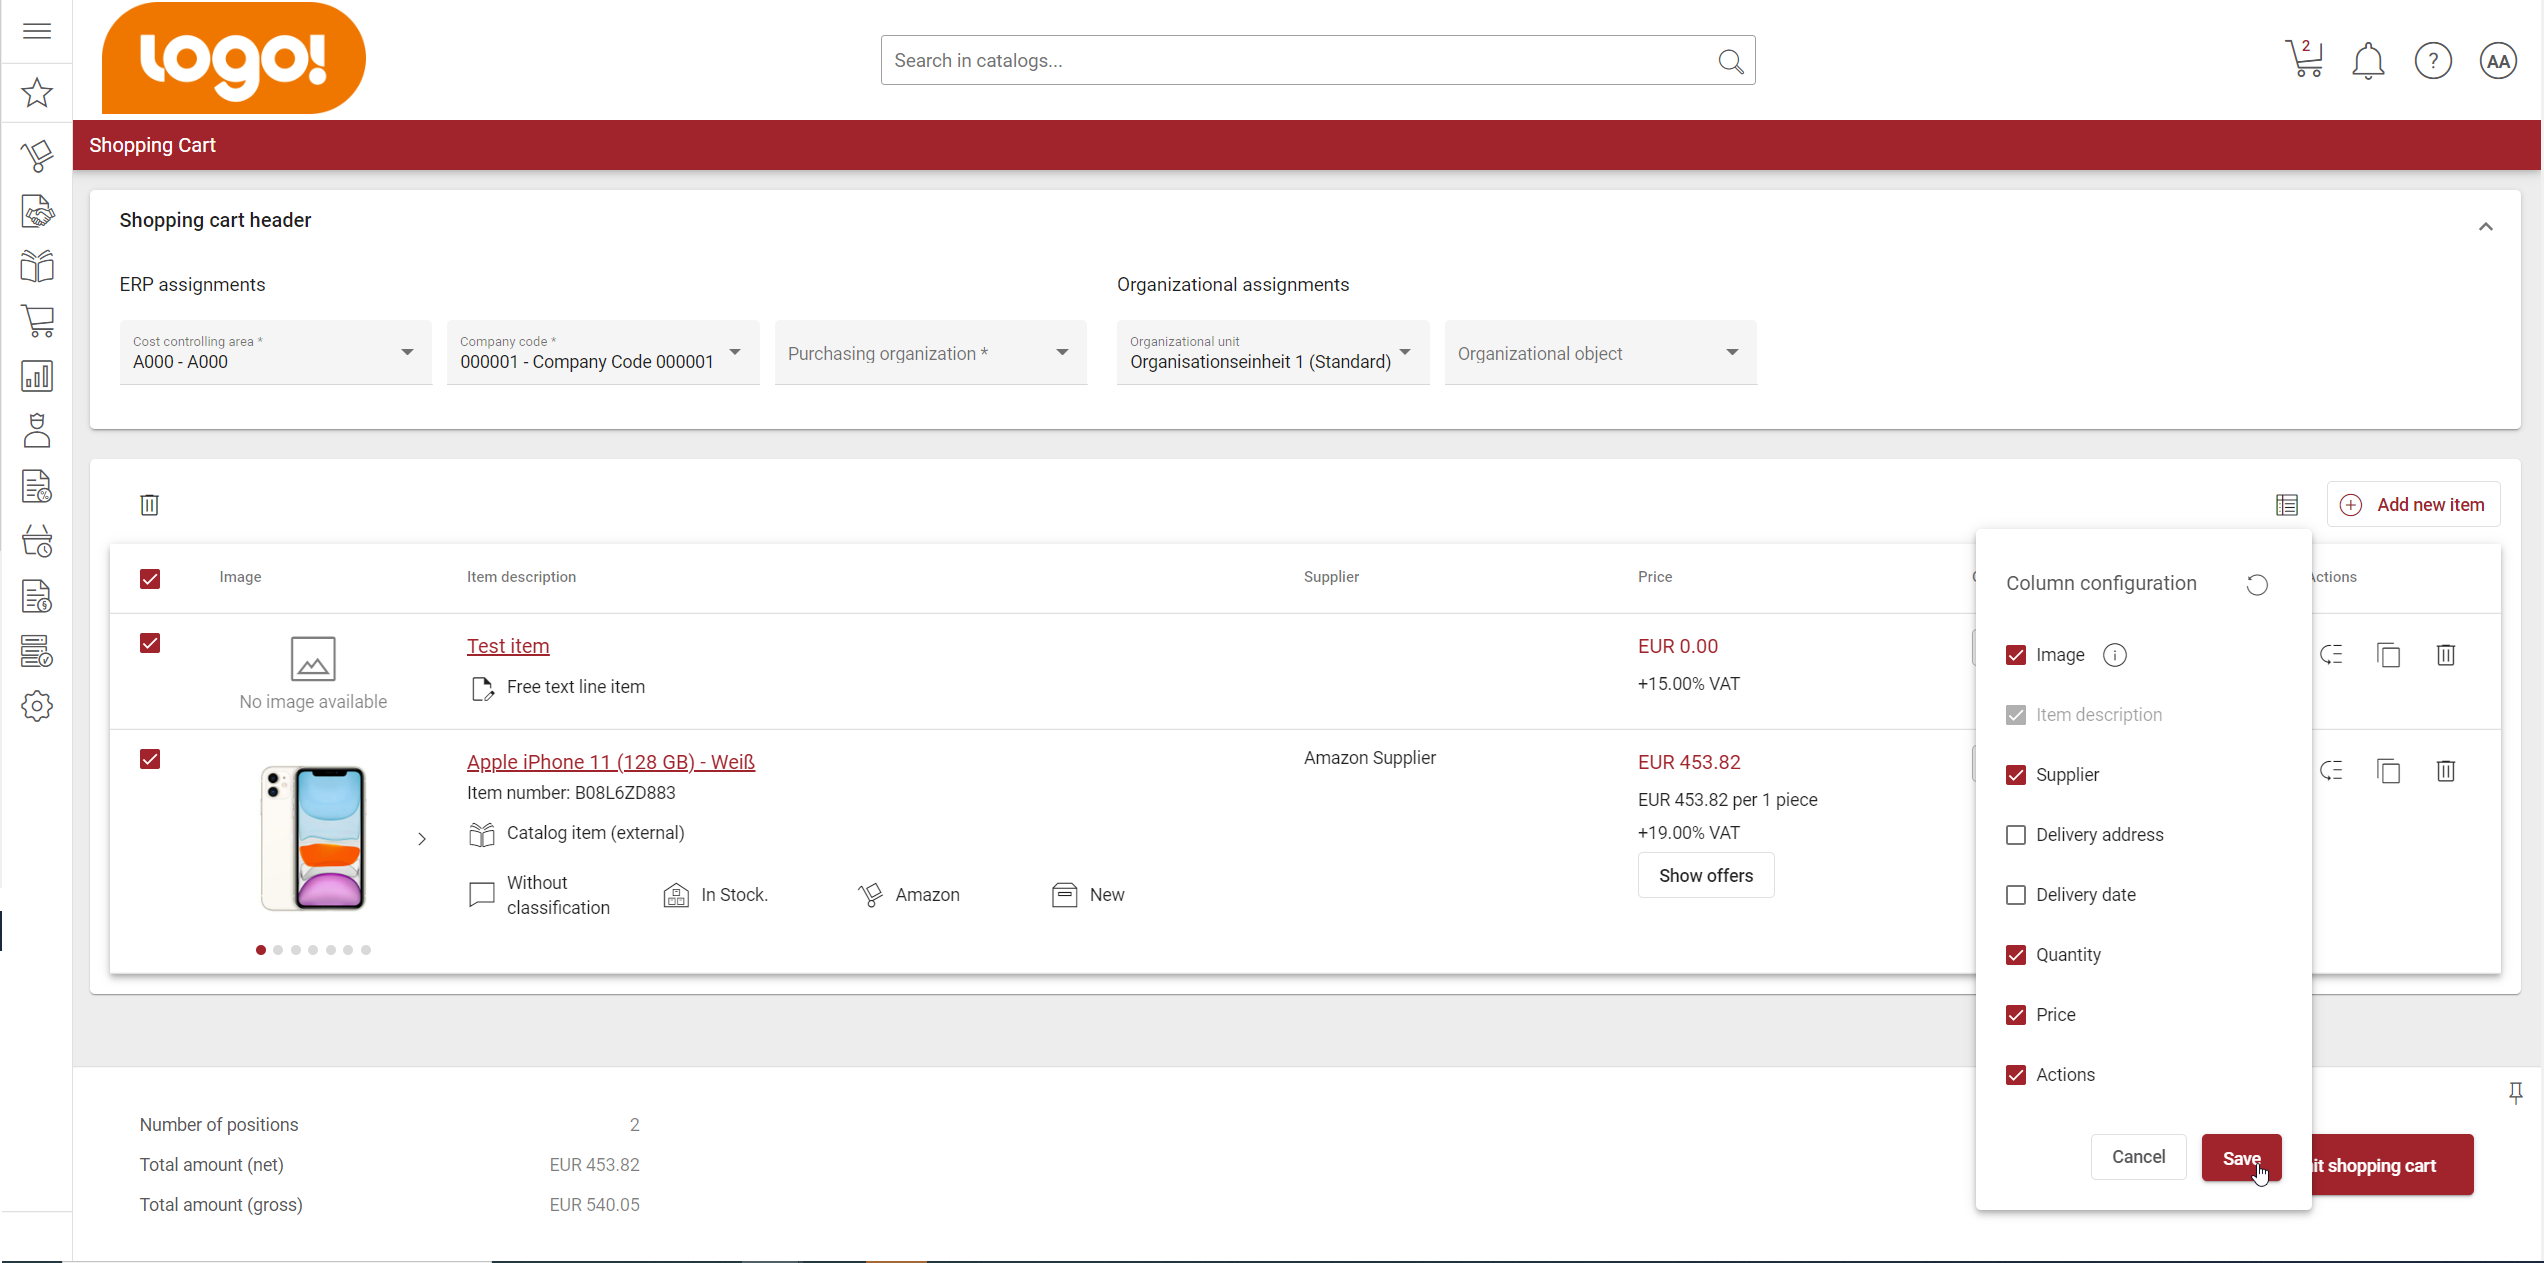
For hiding or showing certain columns you can use the column configurator where you can activate or deactive the columns. Please note, that the image column is hidden, if none of the positions contain an image. Further, you can easily go back to the default amount of columns by clicking on the “restore” option on the right hand corner of the column configurator.
Like previously mentioned you are now also able to change the arrangement of the panels of a certain shopping cart position. When you hover on the drag symbol (6 dots) in the title of a certain panel you will again see the drag option and you can move the panel to a different position.
How to apply actions to my shop cart items?
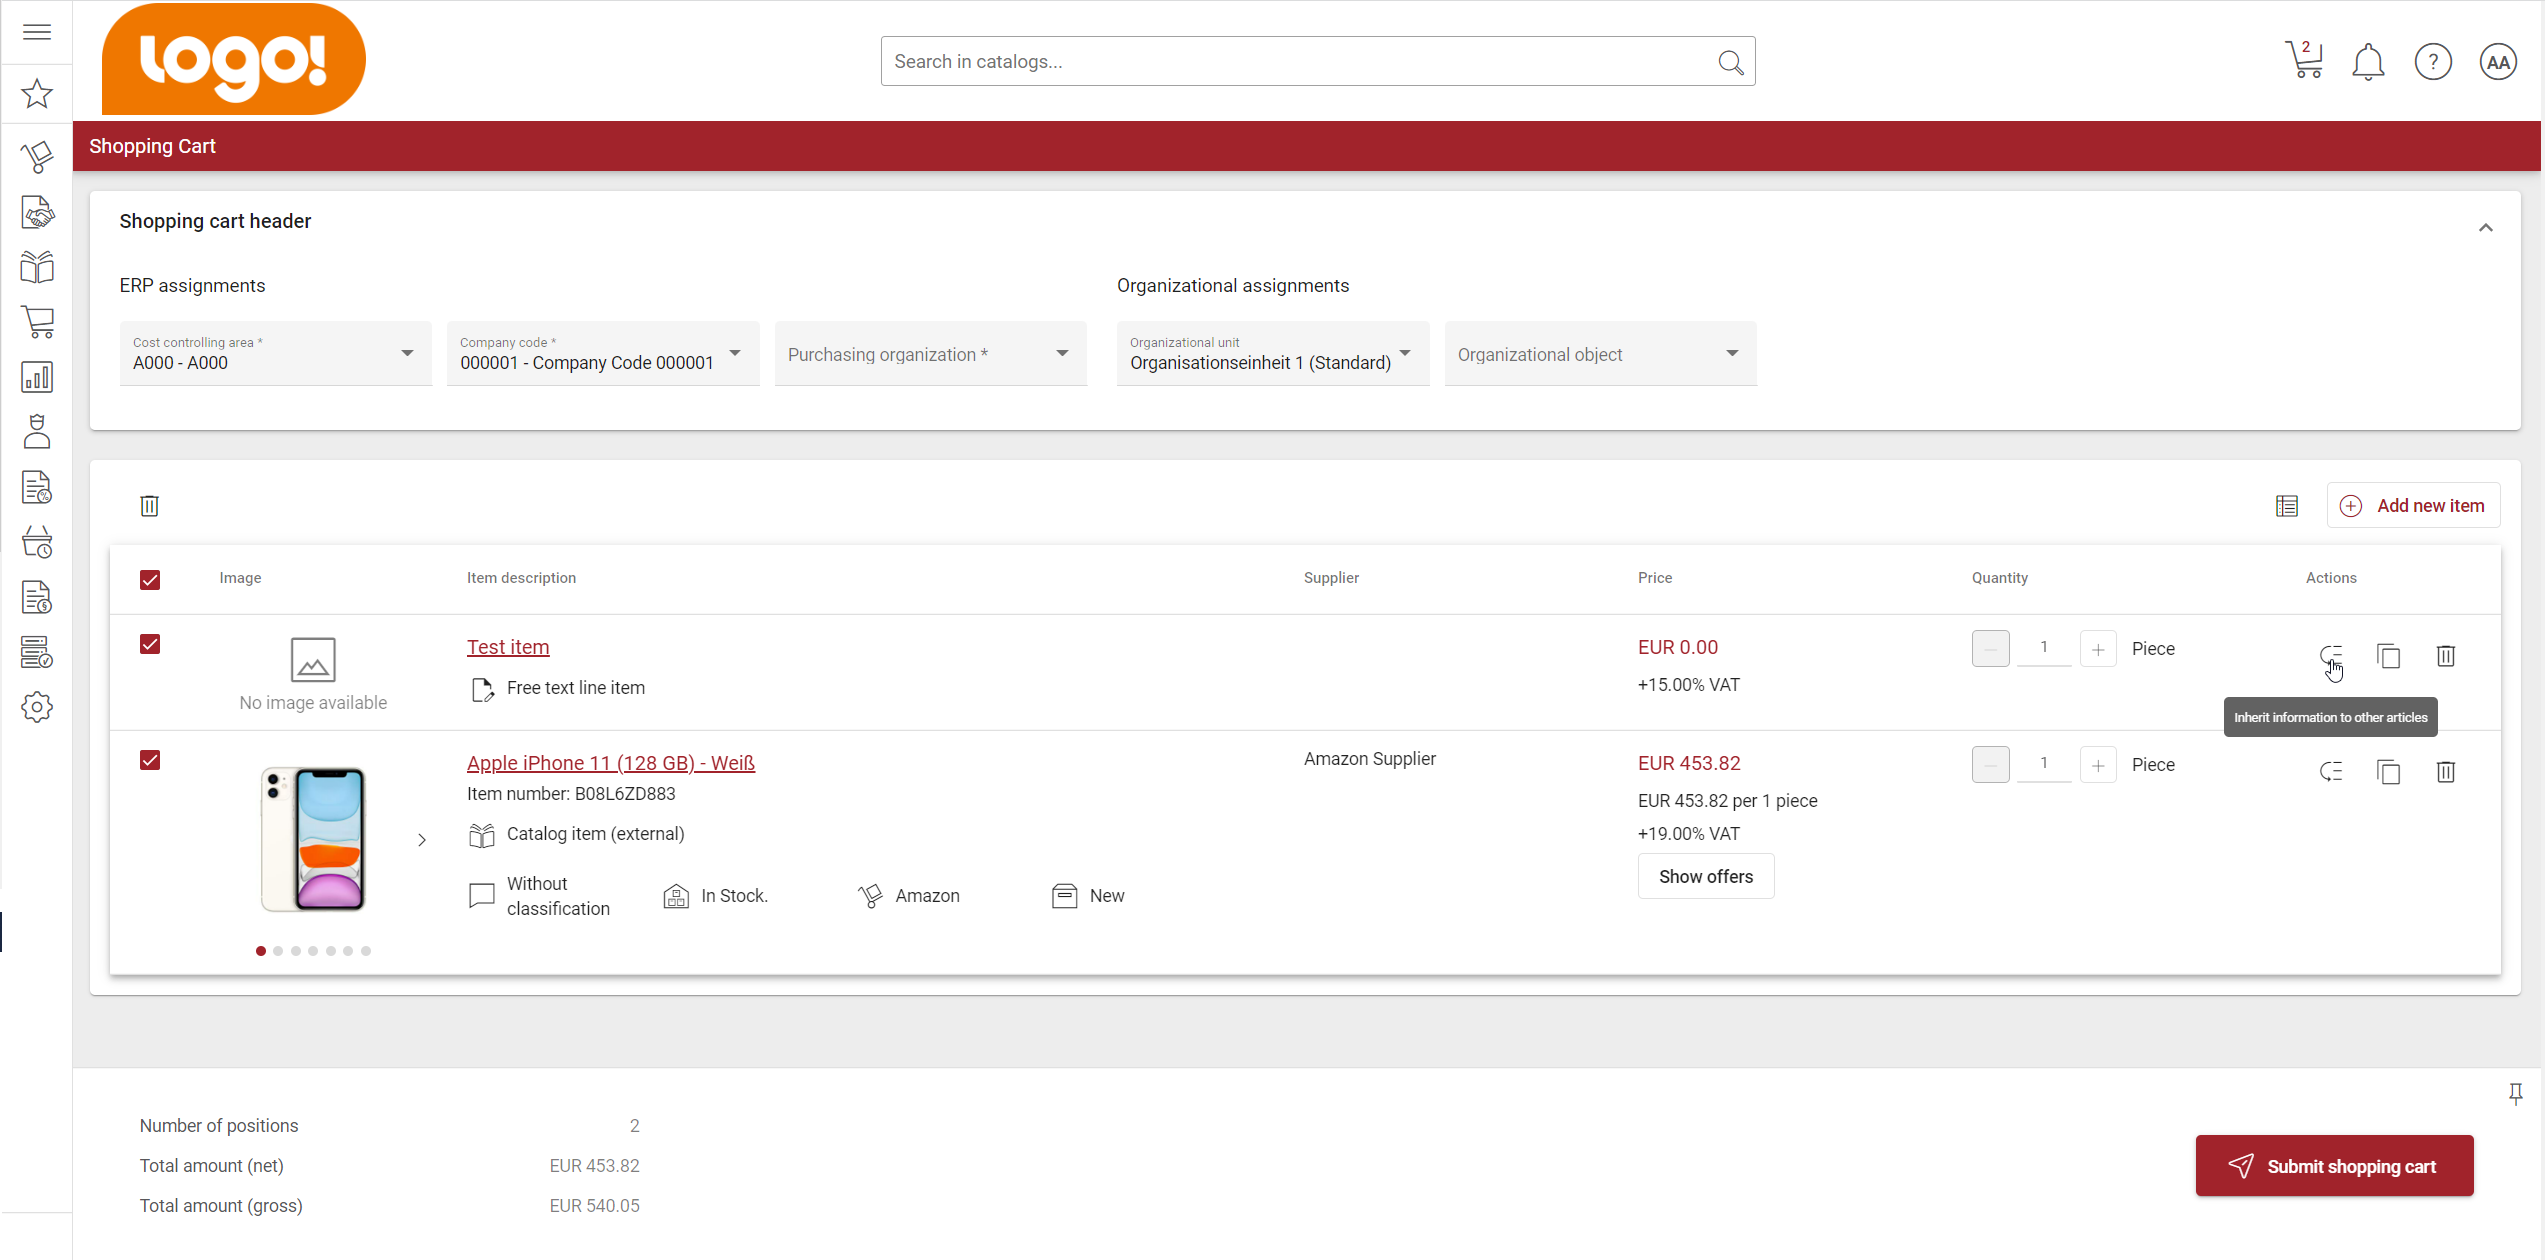
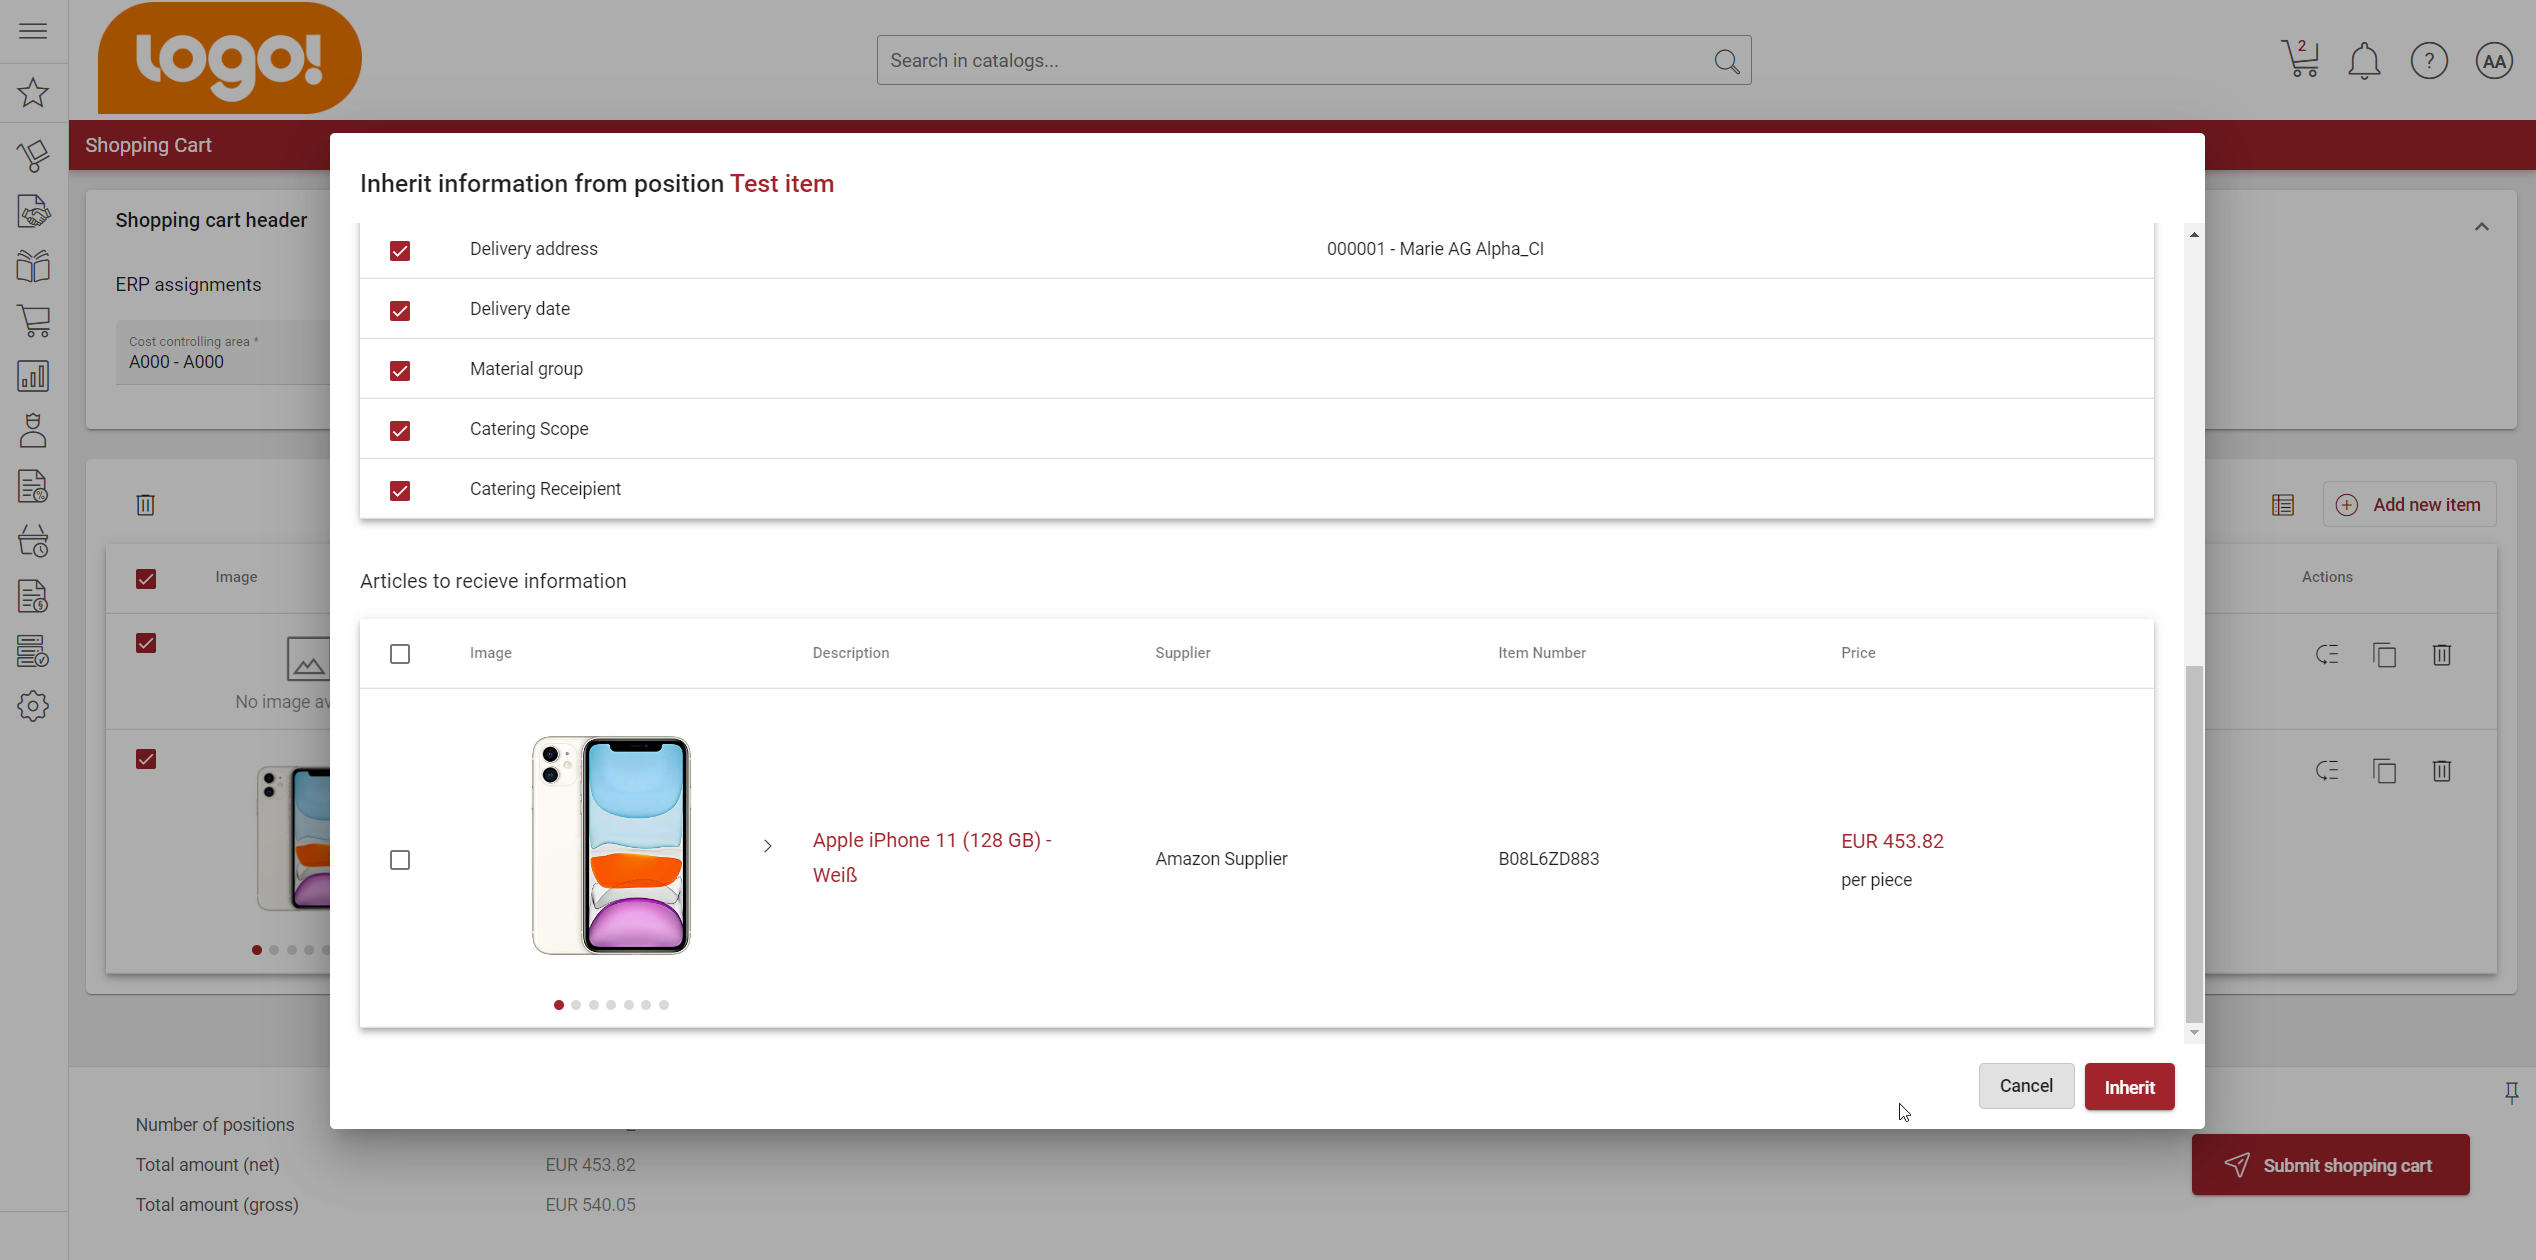
You can apply various actions to the shopping cart position. On the shopping cart overview you will see an action column which contains actions like inheriting information from this position to another postion. When you click on the action a modal opens where you can select all the values that you want to inherit from this position as well as you can select the position that should receive this information.
Further you can copy or delete the position.
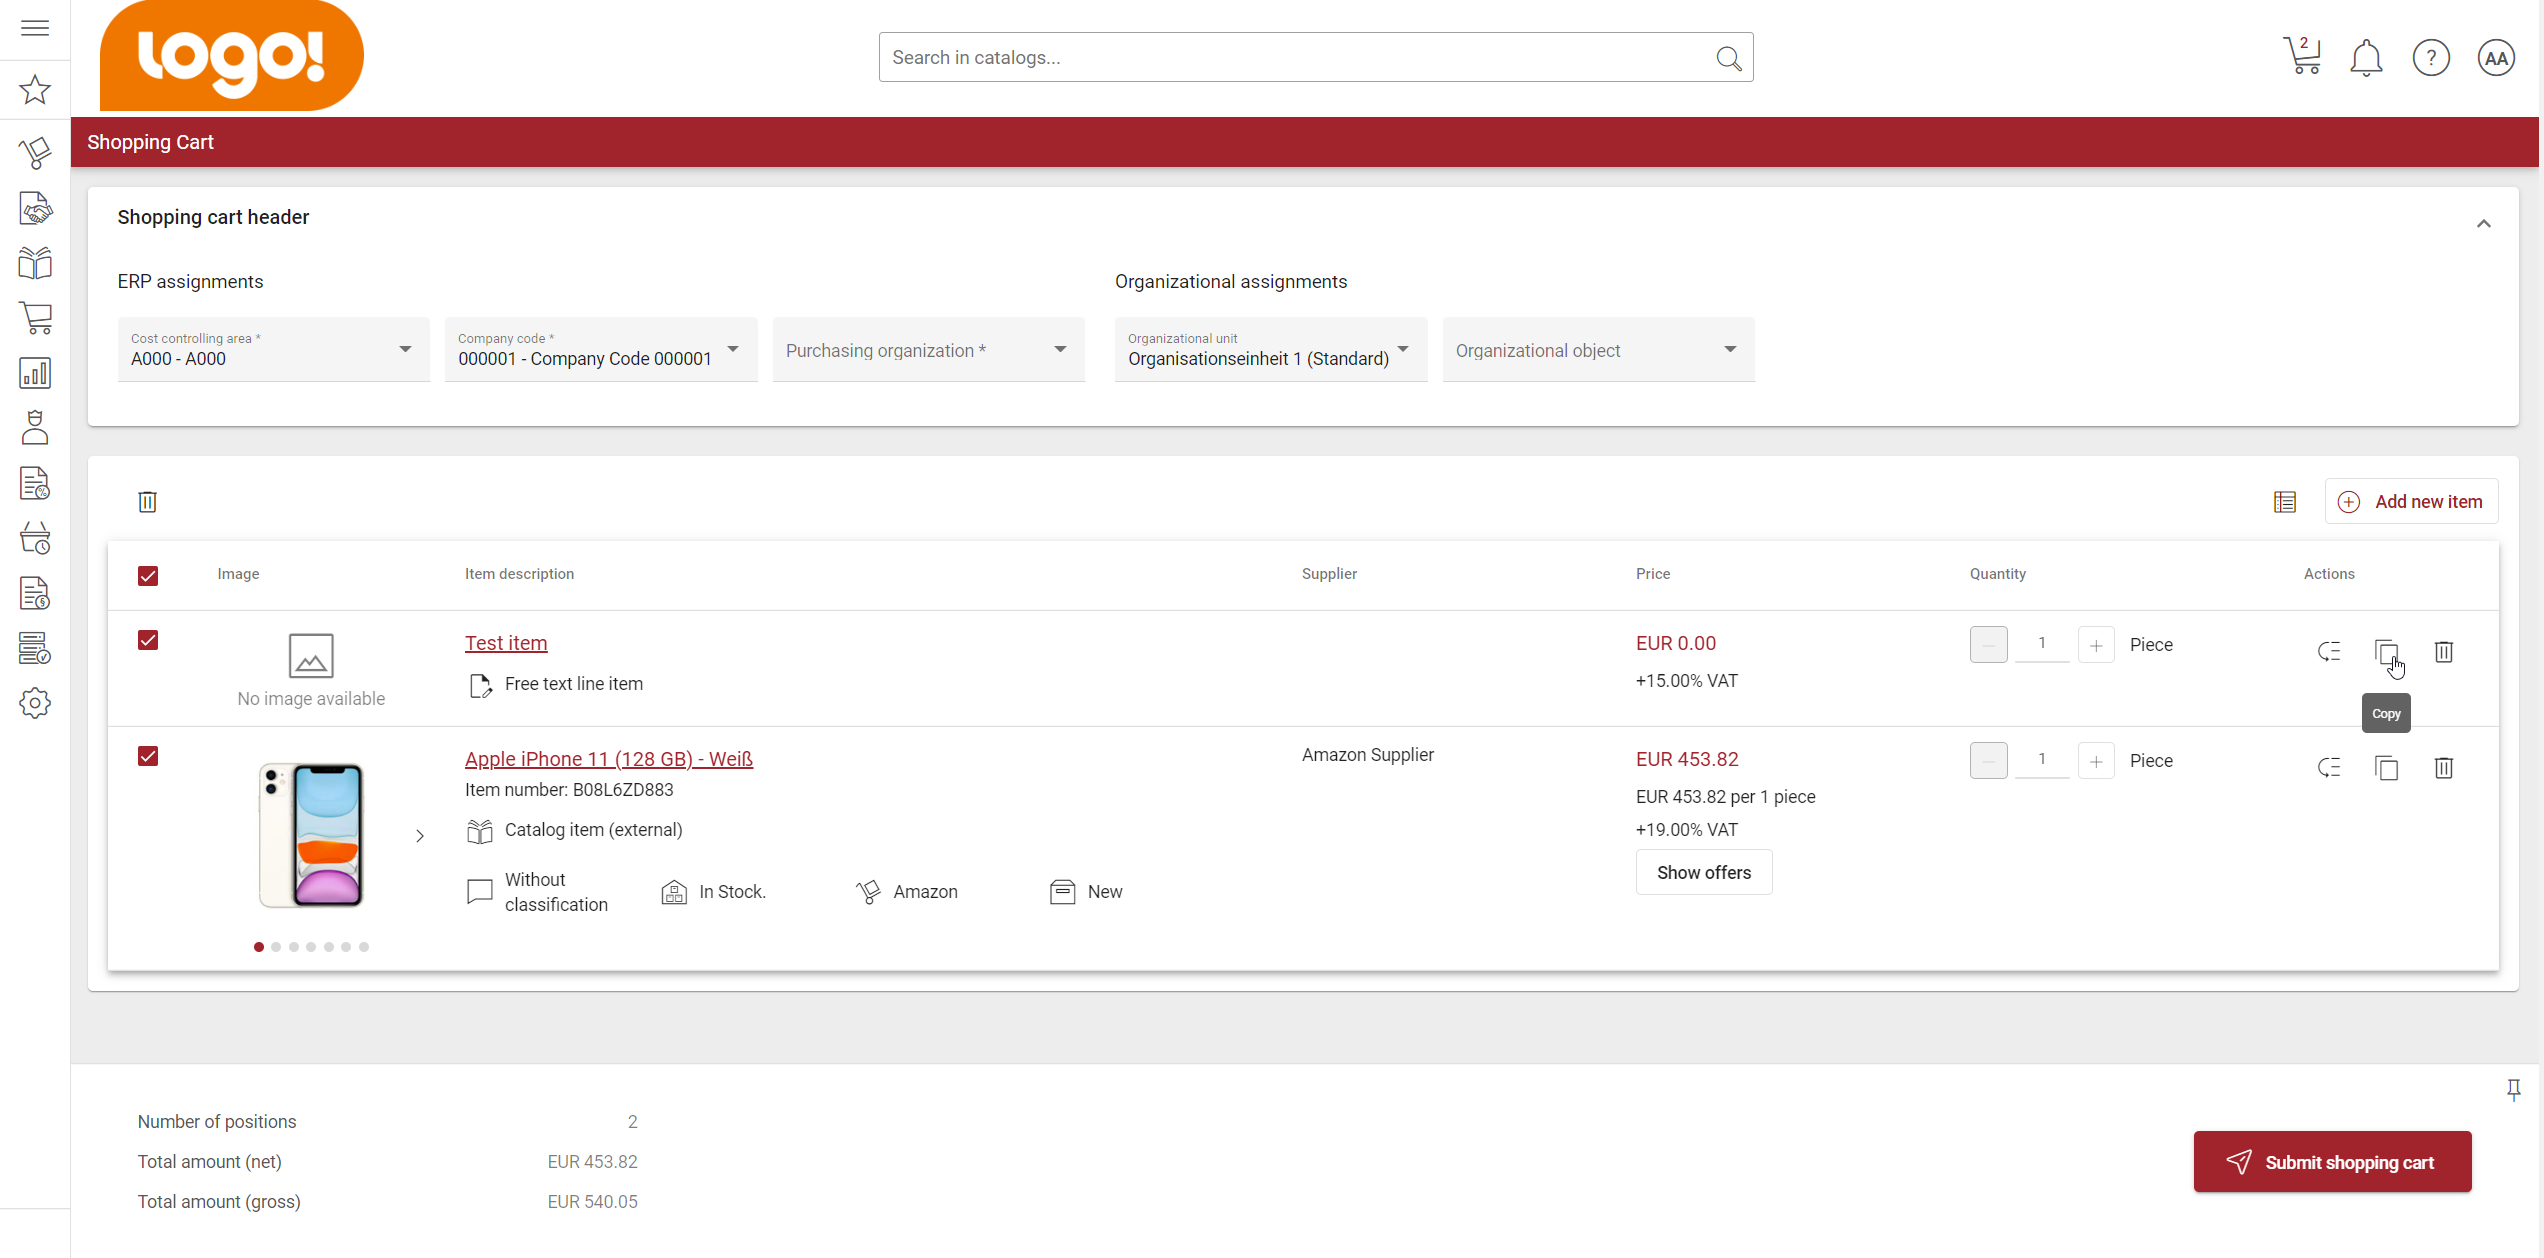
Besides deleting single positions, you can also apply a bulk delete to delete selected shopping cart positions at once. This option you can find in the left hand corner of the table, containing the shopping cart positions.
How to submit a shopping cart?
On the bottom you will see a checkout panel including information about the selected positions, their total sum and a button to “Submit shopping cart button”.
We strongly recommend checking the information in the old shopping cart, before submitting the shop cart. To prevent that any unexpected behavior occurs, we temporarily disabled the option to submit the new shopping cart. Please check all your positions in the old shopping cart and submit your positions in the old shopping cart.

How to give feedback?
Feedback is the key to improvement.
You have feedback for the new shopping cart that you would like to share with us? We appreciate your feedback on the beta version of the new shopping cart. You can share you thoughts about the new shopping cart by clicking on the “Feedback” button on the right hand side of the shopping cart. When you do so, a modal opens where you can tell us what you like or dislike about the new shop cart, the reasons for your decisions and other valuable information.
Additionally you can share you thoughts here, by filling the form below.
All data is collected anonymously unless you choose to provide your email address in question 3 of the feedback form.
We are looking forward to your feedback!
Please consider, that this is the beta version of the new shop cart and not the final version. Changes to the current design may be implemented.
A bug was fixed that led to a wrong currency if a requirement line item was transferred into a purchase order and a standard currency was defined as part of the SAP assignments of the used supplier.
We have changed the functionality of the order list export. Instead of running the order list export directly when the user requests it, the system will run the order list export in the backend. As soon as the order export file is ready, the requesting user will receive an email with a download link. Following the link, the user will be able to download the order export file successfully. That functional change will cause fewer performance issues and timeouts and the requesting user can proceed with working in the system instead of just waiting for the export.
We extended the logic for the creation of periodic orders based on their template order so that it will not lead to a system exception if a periodic order gets more than 100 characters in its title. Until now, that case lead to a system error that prevents other periodic orders to be successfully created and registered.
We fixed a bug causing a wrong description of the approval workflow step in very specific cases.
We added the network plan to the dynamic cost allocation finding. The network plan can now be configured as criteria or account assignment to be found. When configured and activated in the organizational settings, the network plan can then be set up in dynamic cost allocation finding rules accordingly.
Please note the network plan nr and activity are written in one column named “NetworkPlan” in the export and separated by a $ sign (Example: 111$A1).
With this release we have extended the BMEcat import by the ability to import images provided by link into the article category.
As of this release, Onventis also supports multi supplier Cxml catalogs for the transfer to orders or the shopping cart. For this, a supplier number must be transferred to us and this must be maintained in the supplier master sheet in the related number external field.
A bug was fixed where the response message from SAP was not shown in the application to the user when a demand position was finally approved.
The interface to export attachments from Onventis to SAP was extended with the information about the attachment types (internal attachment or external attachment) and the document type where the attachment refers to, like for example order, order change, and goods receipt,..
The capabilities to import cost centers from SAP were extended, so that cost centers of all languages can be imported to Onventis if they are supported by Onventis in general.
The interface DOK_IMPORT for Sales Orders was extended so that the company code is considered in the future.
In frameagreements, in addition to the capacity usage of the individual item, the utilisation is now also displayed in absolute figures.
Furthermore, the total sum already called off is displayed above the planned total sum.