
In the Templates section, you can create templates that are valid for your organization. Templates are predefined templates or fields that can be used in the different modules, e.g. tenders, orders or e-mails, by the users of your organization.
Text modules
Text modules are standard texts that can be added in various areas in Onventis.
You can create a new text module under Configuration → Templates → Text modules via the ![]() button. The following fields are available:
button. The following fields are available:
- Input language: Selection of the language in which the text is to be entered and displayed.
Text module area
- Type: By selecting the type you can choose in which area the text module should be available. The following options are available:
- Request
- Auction
- Order
- Information request
- Complaint
- Sale Auction
- Contract
- Title: Title for the text module. This field is mandatory.
- Description: Description for the text module.
- Text: here you can enter the desired text.
With ![]() the text module is saved.
the text module is saved.
Operations
If you store activity templates for the different areas, these automatically appear in the respective PDF files. You have the possibility to define an individual header and footer.
Email templates
You have the ability to turn email on and off at the organizational level. Under Configuration → Templates → Manage Email Templates, tab Global Templates, the administrator can deactivate or activate organization-wide email templates of the Onventis Connector. These settings affect all organizational units and all users in the organization. Sending is prevented for the deactivated e-mails regardless of other settings.
By default, all templates are activated.
Tender templates
Under Configuration → Strategic Purchasing → RFQ Templates you have the option to create different templates for the RFQ area.
You can create the following templates:
- Complete templates
- Text templates
- Position templates
- Question templates
- Team templates
- Assessment Survey Question Templates
Users can select these under Sourcing.
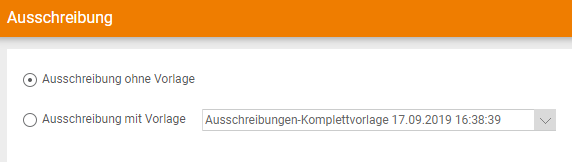
A user who wants to create a new call, for example, has two options to choose from when creating the call:
Query without template: the query is created without a template.
Request with template: for the creation of a request you can select the appropriate template via the dropdown menu.
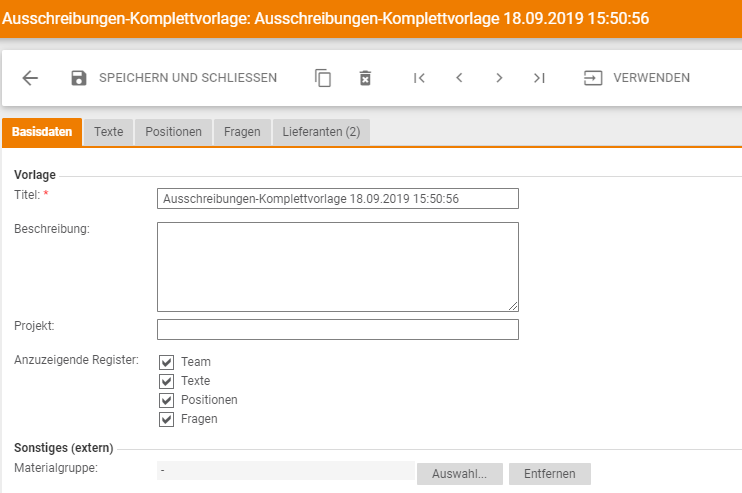
Complete templates
Other area (external)
A material group can be defined in an inquiry complete template. When you create a new inquiry from the template, the corresponding material group is automatically copied.
Existing team assignments to this material group are also taken into account and the corresponding team members are automatically transferred to the new request.
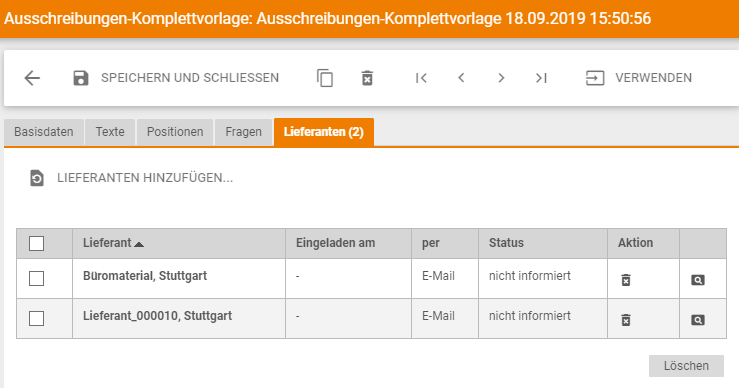
Deletion of multiple suppliers in request templates
In an inquiry complete template in the supplier tab, several suppliers can be marked and deleted via a central button.
Auction templates
Under Configuration → Strategic Purchasing → Purchasing Auctions you have the option to create complete templates for the area Strategic Purchasing → Auctions → Au ctions. Users can select these under Auctions.
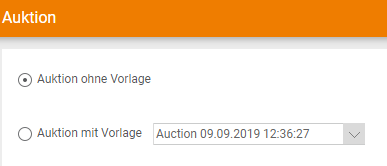
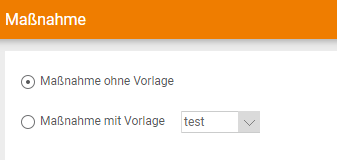
A user who wants to create a new auction has two options to choose from when creating the auction:
- Auction without template: the auction is created without a template.
- Auction with template: to create an auction, you can select the appropriate template from the drop-down menu.
Complaint templates
Under Configuration → Operational Purchasing → Complaints you can create different templates for the area Operational Purchasing → Order Processing → Complaints. You can create the following templates for the complaints area:
- Complete templates: here you can create a complete template for complaints. This is visible to users under Operative Purchasing → Order Processing → Complaints.
- Task templates: here you can create a template for internal tasks in the area of complaints. This is visible to users under Operative Purchasing → Order Processing → Complaints in the Tasks tab and is available for selection when complaints are created.
Action Templates
Under Configuration → Operational Purchasing → Action Templates you have the option to create different templates for the area Administration → Project Management. You can create the following templates for the Project Management area:
- Complete templates: under Complete templates you can create a template for internal measures. This is visible to users under Administration → Project Management → Measures .
- Task templates: under Task templates you can create a template for internal tasks. This is visible to users under Administration → Project Management→ Tasks and is also available for selection under Actions when creating tasks.
Orders
Under Administration → Templates → Orders you have the possibility to add additional fields on header and item level.
Additional fields (header level)
Under Configuration → Operative Purchasing → Additional Fields (Header Level) you have the possibility to create additional fields.
Additional fields for orders on header level are freely definable form fields, which you can add to the tab Basic data in the orders.
You can create a new additional field by clicking the New button.
Basic data tab
- Title: in the Title field, you must enter a title for the additional fields. This field is mandatory and must be entered.
- Description: in the Description field you can enter a description for the additional fields.
- Default: if you activate this checkbox, the additional fields will be displayed as default for all orders in the tab Basic data. If you do not activate this checkbox, the additional fields in a purchase order can be selected from the templates.
Additional fields tab
Additional field area
- Rank: the rank is a mandatory field and must be entered. If there are several additional fields, you can use the rank to specify the sequence in which the additional fields are displayed.
- Title: the title of the additional field. This is displayed in the additional field in the order.
- Heading: Heading for the additional field. The heading is displayed above the additional field.
Settings area
- Field property vendor: with field property vendor you can define the properties for the additional field from the dropdown field. The following properties are available for selection:
- Optionalfield: with the optional field property, the selection or entry in this additional field is optional.
- Mandatoryfield: with the mandatory field property, this additional field is a mandatory field.
- Write-protected field: with the write-protected property, only the orderer can enter something in the additional field.
- Invisible field (not public): with the property invisible field the additional field is only visible for the orderer.
- Field property Customer: By activating the checkbox “Mandatory field” you can define the field as a mandatory entry for the user.
Area Definition
- Text: with the field type Text you can create an additional field as a text field.
- Number: with the field type Number you can create an additional field as a number field.
- Date: with the field type Date you can create an additional field as a date field.
- Selection as dropdown menu: with the field type Dropdown menu you can create an additional field as a selection field with predefined values. In a drop-down menu, only one value can be selected at a time.
- Selection as checkbox: with the field type Checkbox you can create an additional field as a checkbox with predefined values. In the case of a checkbox, there is the possibility of multiple selection.
- Field group: with the field type Field group you can create a field group with several fields.
- Blank line: with the field type Blank line you can define blank lines between the additional fields.
- Unit text: in the Unit text field you can specify a unit (e.g. unit of quantity, currency or time) for the response field. The unit is displayed behind the answer field
- Number of text lines: in the field Number of text lines you can define the number of text lines for the selected field type
- Length of text lines: in the field Length of text lines you can define the number of characters within a text line for the selected field type.
Additional fields (item level)
Under Configuration → Operative Purchasing → Additional Fields (Item Level) you can create additional fields for purchase order items.
Additional fields for orders on item level are freely definable form fields which can be added to the order items in the orders.
You can create a new additional field by clicking the New button.
Basic data tab
- Title: in the Title field, you must enter a title for the additional fields. This field is mandatory and must be entered.
- Description: in the Description field you can enter a description for the additional fields.
- Default: if you activate this checkbox, the additional fields will be displayed as default for all order items. If you do not activate this checkbox, the additional fields in a purchase order can be selected from the templates.
Additional fields tab
Additional field area
- Rank: the rank is a mandatory field and must be entered. If there are several additional fields, you can use the rank to specify the sequence in which the additional fields are displayed.
- Title: the title of the additional field. This is displayed in the additional field in the order item.
- Heading: Heading for the additional field. The heading is displayed above the additional field.
Settings area
- Field property vendor: with field property vendor you can define the properties for the additional field from the dropdown field. The following properties are available for selection:
- Optionalfield: with the optional field property, the selection or entry in this additional field is optional.
- Mandatoryfield: with the mandatory field property, this additional field is a mandatory field.
- Write-protected field: with the write-protected property, only the orderer can enter something in the additional field.
- Invisible field (not public): with the property invisible field the additional field is only visible for the orderer.
- Field property Customer: By activating the checkbox “Mandatory field” you can define the field as a mandatory entry for the user.
Area Definition
- Text: with the field type Text you can create an additional field as a text field.
- Number: with the field type Number you can create an additional field as a number field.
- Date: with the field type Date you can create an additional field as a date field.
- Selection as dropdown menu: with the field type Dropdown menu, you can create an additional field as a selection field with predefined values. In a drop-down menu, only one value can be selected at a time.
- Selection as checkbox: with the field type Checkbox you can create an additional field as a checkbox with predefined values. In the case of a checkbox, there is the possibility of multiple selection.
- Field group: with the field type Field group you can create a field group with several fields.
- Blank line: with the field type Blank line you can define blank lines between the additional fields.
- Unit text: in the Unit text field you can specify a unit (e.g. unit of quantity, currency or time) for the response field. The unit is displayed behind the answer field
- Number of text lines: in the field Number of text lines you can define the number of text lines for the selected field type
- Length of text lines: in the field Length of text lines you can define the number of characters within a text line for the selected field type.
Other
Create your own FAQs
Under Configuration → Other → FAQ – Administration you can enter your own FAQs for your organization, customers and suppliers.
In the overview of all FAQ topics you can see who created this topic under Organization. FAQ topics can be written by ONVENTIS or by providers who have the necessary rights.
Your customers and suppliers will then see the topics you have entered under FAQ in the menu bar Modules in addition to the FAQ topics of ONVENTIS. For each topic, you can specify whether all customer or supplier organizations can see it, or only selected ones. You can enter a FAQ topic in all available languages.
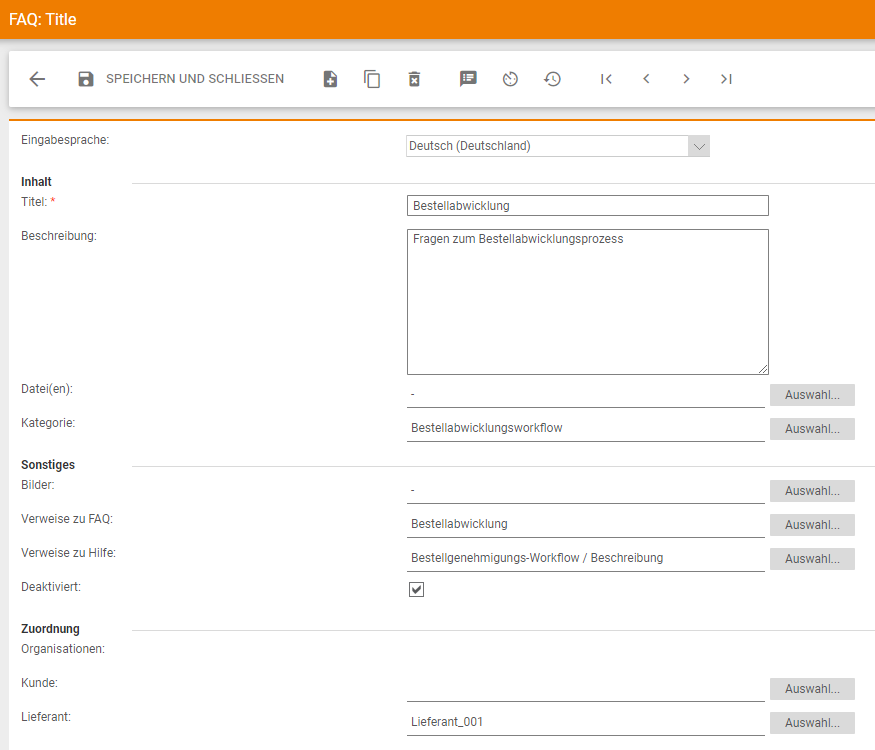
Area Content
- Title: in the title you can enter the desired question
- Description: in this field you can enter a description or an answer to the question.
- HTML tags are allowed in both fields, which you can use to highlight the text or create a bulleted list.
- Files: via the selection button you can attach files to the question.
- Category: you can assign the topic to a category using the selection button. All topics of a category are then summarized on the FAQ page.
Other area
- Images: To include images in the text, you must first attach them using the Select button. Then you need to embed the image in the text. To do this, place the file name in curly brackets, {image.jpg}, at the desired position in the response field (Field: Description). The image is embedded at this point.
- Links to FAQ: here you can store the links to other FAQ topics.
- Links to help: here you can store the links to the online help.
- Disabled: if you enable this option, the question will be hidden in the FAQ. If you want to publish this question, you must deactivate the option.
Area Assignment
In the Assignment section, you determine whether the FAQs are to be displayed for all customers and suppliers or only for selected ones.
- Organizations: If you select the “All organizations” option, the FAQs are visible to all organizations; this applies to all organizations, customers and suppliers.
If you select the option “only the following organizations”, the FAQ’s will only be visible for the selected organizations.
- You can use the Select button to choose the customers who should see the FAQs.
- You can use the Select button to choose the suppliers who should see the FAQs.