
Organization settings
Organization settings – General tab
General settings are configured in the General tab.
Settings area
- Open PDF with intermediate dialog: If this item is activated, a popup window opens whenever a PDF file is to be created, e.g. by clicking the printer icon. Here you have the possibility to open the file or to download it from the server.
- Close browser window: Closes the browser window after logging out.
- Allow direct login by provider: Provides the provider with the ability to log into another user’s or vendor’s account.
- Provider can change company data: by activating this checkbox, the provider has the possibility to adjust the company data in supplier accounts. This is only possible if the direct login is activated or permitted from the supplier side.
- Extended user self-administration: with this checkbox you give the user the possibility to make his complete basic data and settings in the tab Extended in the user administration.
- Hide login data in the user self-administration: With this setting, users cannot change their login data in the self-administration.
- Login name may not be changed (password remains changeable): With this setting, users in self-administration can change the password, but not the login name.
- Automatically preset and expand default catalog when searching for articles in the user cockpit : This setting can be used to enable users to search for articles in the user cockpit. The catalog marked as the default catalog is searched.
- Display DUNS in vendor list: in addition to your internal vendor number, the unique DUNS number of the vendor is displayed in the list of your vendors.
- Call participant in the “Notes” area as a required field: if you use the “Notes” function, the “Call participant” field is a required field when creating a note.
- Activate team template assignment during position transfer to the inquiry module: If this function is active, the rules created in the team template are dragged into an inquiry and assigned to the team template when a position is transferred, e.g. from a BANF or a purchase order.
- Category in the “Notes” area as a required field: if you use the “Notes” function, the “Category” field is a required field when creating a note.
- Supplier can select items in the auction: if you use the “Auctions” function, the supplier can select the items of an auction that he offers.
- Enable approvals via direct link without entering logon data: this enables approvers to approve purchasing documents by calling them up via direct link and without entering logon data. The prerequisite for this is the activation of the function “Enable release via direct link” in the approval step.
- Do not display logon screen after approval via direct link: in the default setting, the logon screen for Onventis is displayed after approving purchasing documents. If you activate the checkbox, it will be hidden.
- Require reason for rejection from approval email: when enabling this option, the approver must always enter a reason for rejection when rejecting orders. To do this, he must first register in Onventis. A rejection via direct link is not possible with this setting.
- Make field “Customs tariff number” selectable from list: with this setting the user has the possibility to select a customs tariff number from a list of available numbers.
- Set the field “Subject to customs declaration” by default: if this checkbox is activated, all newly created order items will always be marked as subject to customs declaration.
- Suppliers must be approved: with this option you can control whether the suppliers – according to the supplier approval workflow – must be approved in Onventis.
- Allow assignment of several responsible persons to an account assignment object: with this checkbox you can add several responsible persons to an account assignment object. In the case of account assignment-dependent approval workflows, the persons responsible receive a request to approve the purchasing document in accordance with the predefined rank. You can define from which order value which rank must carry out the approval of an order. For this purpose, value limits can be defined in the purchase order approval workflow and the persons responsible can be assigned on the basis of the ranking order.
The ranking should always be deposited in ascending order from 1 onwards.
Example:
1st approval step:
Value limit 0-10,000 EUR Approver: “Person responsible with rank 1”.
2nd approval step:
Value limit 0-20,000 EUR Approver: “Person responsible with rank 2 “In certain scenarios, it is possible that individual ranks are not occupied by persons responsible. To avoid orders being sent out unapproved, in these cases you should fill the unfilled ranks with the next highest responsible person.
In order to avoid that the responsible persons have to approve several times one after the other, Onventis automatically combines the corresponding approval steps that are directly behind each other. - Define material group in invoices as required field: with this setting you can define the material group as a required field for all invoices created in Onventis.
- Assign multiple supervisors to a user: with these settings you can assign multiple supervisors to a user. This setting is useful if a user orders for other departments and the rules, e.g. of order approval workflows, of the responsible department are to apply to order processing.
- Use search function for selections: with this setting you optimize the performance of the search function for dropdown fields where many selection options are available, e.g. for material groups. This reduces the loading time of the page called up in each case. This setting plays out in the background of Onventis.
- Disable global email templates for all recipient organizations: You can globally disable email sending for individual email types for related organizations (for example, suppliers in a customer-supplier relationship).
This setting allows the provider organization to control the receipt of e-mail on the sender side.
If the option is active, all templates that have been deactivated under Administration → Templates → Other → Email templates will no longer be sent to connected organizations. This means that e-mails can be deactivated centrally for all suppliers or customers. - Do not forward approval to super admin if cost center manager is missing: activating this option prevents the order approval from being forwarded to the super admin if the cost center manager is missing.
- Renumber items in collective credit memos: in collective credit memos, the items from several purchase orders are combined in one collective credit memo; for example, item 10 may appear more than once. To avoid this, you can activate the option for renumbering items in collective credit memos.
- Use search function for selections: with this setting, the dropdown fields are replaced by the Search… button. button. This setting makes searching in fields with many records, such as cost centers, more convenient. This setting is only available in the shopping cart and in the order item. The following dropdown fields are replaced by the search fields: Material Group, Cost Center, Cost Type/G/L Account, Business Area, Job (chargeable), Job (non-chargeable), Task, Order and Project.
- Use text input with auto search function in invoices: with this setting you activate the auto complete function in invoices. With the Auto-Complete function, the entries are narrowed down as they are entered. This setting overrides the search function for Use selections option.
- Use text input with auto search function in orders: with this setting you activate the auto complete function in orders. With this setting you activate the auto-complete function in invoices. With the Auto-Complete function, the entries are narrowed down as they are entered. This setting overrides the search function for Use selections option.
| The AutoComplete function is a function which completes the search entries already during the input in a meaningful way. The proposed terms in the selection fields are narrowed down to the entries that match the entry.
|
 →
→ 
- Business days: with this setting you can select the business days that are valid as delivery dates for your organization.
- Calendar week: Here you distinguish the calendar week according to the setting for Europe or USA. You should note the following differences:
- Start of the calendar week: in Europe, Monday is always considered the first day of the calendar week. In contrast, in the US, Sunday is always considered the first day of the calendar week.
- Beginning of the year and beginning of the calendar weeks: in Europe the counting of the calendar weeks, KW01, always begins in the first week of the year in which at least four days of the new year fall or in the first week of the year in which more days fall on the new than on the old year. In the U.S., the count always begins the week in which January 1 falls, regardless of the day of the week.
Budget area
In the Budget section you can enter the total budget valid for your organization. By entering the validity periods, the budget becomes active.
| Hinweis
The total budget set in the organizational settings applies to your entire organization and can be distributed to the organizational units and then to the organizational objects. |
- Budget: in the Budget field you can enter the total budget valid for your organization. You can use the due selection fields to select the budget currency valid for your organization and its validity period.
- Valid: in the input fields you can enter the exact validity date from (DD.MM.YYYY) to (DD.MM.YYY). In order to use the budget logic, you must fill in both date fields.
User area
- Automatically lock (at x days, weeks, months) Inactivity: with this option you can select a certain period of time after which, if Onventis is not used, the user should be locked. In this way, you can ensure, for example, that employees who have left your company can no longer log on to your Onventis. However, if the user has been inactive for a longer period of time, they can request a new password.
- Lock newly created user until credentials are sent: this option ensures that a newly created user cannot log in to Onventis until they have received their credentials. You can send the Onventis access data in the user administration.
- Substitutes can only be from your own org unit: with this setting you can specify, for substitute rules in Onventis, that only users belonging to the same org unit can be selected as substitutes.
- Substitutes can only be from your own user group: with this setting, for substitute rules in Onventis, you can specify that only users assigned to the same user group can be selected as substitutes.
- Default catalog view: from the drop-down menu you can select a default catalog view. This is automatically assigned to each newly created user when a new user is created.
E-mail dispatch area
- Inform the following users in the event of failed e-mail transmission: In Onventis, you have the option in various areas to send notifications by e-mail to users or suppliers. These emails are sent automatically from Onventis. If an e-mail was not sent, you can use this option to specify which users should be informed about the failed e-mail dispatch. Via the Selection … button you can select the desired user(s).
User group / settings area
- Show grouping field: with this setting you activate the mandatory field “Grouping” in the user groups. The grouping is used, within the user group list, to sort according to the grouping characteristic.
User registration area via link/ settings
- Default user role for requester <requester>: by selecting a default user role, you can specify which user role the requester will be assigned. You can adjust the user role at any time if necessary.
- Copy all SAP settings from template user: by activating this option, you can create and manage a user as a template user. Once a user has registered in Onventis via the user registration link and their request has been approved, the SAP settings are automatically assigned to the user by the template user.
- IP Restriction: in this field you can set IP restrictions for user requests. Once you have entered an IP address, Onventis checks whether an incoming user request has been sent from an IP address that you have authorized. If the field is empty, no check takes place.
Area Account Assignment Objects / SAP Assignment
- Check numbers for uniqueness in company code: with this setting, you activate the check for the unique assignment of account assignment objects to a company code. This option is only relevant for companies with an SAP connection.
Account assignment categories area
- Consider assignment to material groups: with this option you can assign one or more account assignment categories, including a standard account assignment category, to a material group. By making this setting, you ensure that only the account assignment categories permitted for the material group can be selected in a purchasing document. Please note that by activating this option, the field Account assignment category becomes a mandatory field.
Cost element area
Assignment possible in:
- Account assignment objects: with this setting you have the option of assigning the cost elements to the account assignment objects. This means that only the cost elements assigned to the account assignment object are made available to users as selections in the purchasing documents.
- Material groups: with this setting you have the possibility to assign the cost elements to the material groups. This means that only the material groups assigned to the account assignment object are made available to users as selections in the purchasing documents.
- Assignment of organizational units possible: with this setting, you can further restrict the selection of cost elements in the purchasing documents. When you create cost elements, you can then select either all cost elements or only those that are valid for the organizational unit. When you create cost elements, you must assign the cost element to at least one organizational unit.
Tasks / Settings area
- Assignment of tasks to material groups possible: with this setting you have the possibility to assign tasks to the material groups. This allows you to restrict the selection of tasks for a material group.
- Assignment of organizational units possible: by activating this option, all or only certain organizational units must be assigned to the tasks. This allows you to restrict the selection of tasks per organizational unit.
Suppliers area
Required fields:
You can define the street as a required entry field for data maintenance in the vendor master. By activating the checkbox Street, the field is defined as a mandatory field.
Settings:
- Preset payment terms selectable: in Onventis you have the possibility to maintain the payment terms valid for your organization in the supplier master. By activating this checkbox, the supplier can only select from the preset payment terms.
- Delivery terms selectable from Incoterms ®: in Onventis, you have the possibility to maintain the Incoterms for delivery terms valid for your organization in the supplier master. By activating this checkbox, the supplier can only select from the preset Incoterms.
Shipment tracking
In Onventis you have the possibility to maintain your parcel service providers. If the supplier now specifies a consignment number in the delivery note in his order process, this is displayed for the respective service provider in the order and can be tracked by the orderer at any time.
Service provider: the name of the forwarding agent is entered in the Service provider field.
URL: please maintain the URL for tracking here.
A URL must always contain the 0 in curly brackets as a placeholder. In the delivery note, the 0 is automatically replaced by the corresponding consignment number. For DHL, for example, a tracking URL might be structured like this:
http://nolp.dhl.de/nextt-online-public/set_identcodes.do?idc={0}&lang=en
Orders / Settings area
- Highlight marked positions in the order PDF: by activating this checkbox you have the possibility to highlight the positions marked in Onventis, e.g. free text positions, in the order PDF.
- Sort by EAN/GTIN number: you can use this function to sort the items in the orders by EAN/GTIN number.
- Display changes in order PDF: You can use this function if you want to display changes, e.g. quantities, delivery dates, etc., in the order PDF.
Area Offers / Other
- Customer is allowed to view the current processing status of quotations: with this option you give your customers the possibility to view the current processing status of quotations by the supplier.
- Quote PDF with signature field: this option adds a signature field on the PDF document for the quotes. This gives the supplier the opportunity to sign it personally.
- Upload files at the header level of a request: by selecting this option you oblige the supplier to upload files in a request. This function is important, for example, in the field of mechanical engineering for the provision of drawings.
- Hide additional costs on supplier side: in quotations, additional costs, e.g. packaging, delivery costs, surcharges, etc. may be incurred in addition to the net price offered. With this option you have the possibility to hide the input fields for additional costs on the supplier side.
Payment documents / Settings area
- Display account assignments: with this option you activate the display of the account assignment information from the purchase orders in the corresponding payment documents.
- Define date of dispatch/service provision as mandatory field: with this option you activate the two mandatory fields in the invoice forms: Date of dispatch/service provision on and Date of dispatch/service provision by. These fields are also displayed on the invoice PDF.
- Display delivery/service recipient in invoice PDF: with this option you have the possibility to additionally display the delivery or service recipient in the invoice PDF. You can use this function in particular if the invoice recipient differs from the ship-to party or service recipient within your organization.
- Show invoice recipient in invoice PDF: with this option the invoice recipient is displayed on the invoice PDF.
- Do not display delivery date on item level in invoice PDF if shipping/service performance date is filled: by default, the delivery date is always displayed in the order items, which is transferred to the invoice PDF when the invoice is created. This option allows you to hide the delivery date whenever the shipping date or service performance date is filled.
- Display reverse charge note in invoice item and invoice PDF: if an invoice item is a reverse charge item, you can display this information in the invoice PDF.
- Email reminder for release to the current approver X days after sending the invoice: by activating this checkbox, the current approver in the invoice release workflow will be reminded by email of the release of the outstanding documents X days after sending the invoice. The time intervals apply to the entire organization.
- Reminder interval: the reminder interval can be used to define the time interval at which the e-mail reminder for approval is to be sent to the current approver. The following intervals are available for selection:
- Send daily
- Send once a week, every x day of the week from dropdown selection
- Send every x working day
SAP Data / Settings Area
If you use an SAP connection for the transfer of purchasing or sales documents, the SAP structures, e.g. controlling area, associated company code, associated purchasing organization, etc., must be mapped identically for the data transfer to and from Onventis. Since the organizational units are mandatory fields in purchasing documents in SAP, no documents can be transferred to your SAP system without mapping the SAP structures in Onventis.
- Purchasing organization: with this option, you activate the possibility of mapping SAP purchasing organization data in Onventis.
- Sales organization: with this option, you activate the possibility of mapping SAP sales organization data in Onventis.
Area VMI
If you use the VMI (Vendor Managed Inventory) function, you can use the following two options to define the basic data on which the demand, stock, and days’ supply are to be calculated.
- Based ondemand: with this option, the forecast figures are determined based on the demand coming from SAP.
- Basedon consumption: with this option the forecast figures are calculated based on the consumption coming from SAP.
Organization settings – Number ranges tab
In the tab Number ranges you can configure the numbers of different objects, which are assigned at new creation, e.g. order, address, user etc.. You can customize the number ranges for your organization by changing the value at Current Number, the Initial Number, or resetting at the beginning of the year.
Range of number ranges for purchase orders
In the number ranges for purchase orders section, you can define a separate number range for certain purchase orders. The use of different number ranges enables a clear presentation of orders within your organization.
- Own number range for purchase orders from BANF: if you activate this option, you can define an own number range for all purchase orders which are transferred from a requirement item into a purchase order.
- Own number range for certain vendors: if you activate this option, you can define an own number range for certain vendors.
- Own number range for service purchase orders: if you activate this option, you can define your own number range for service purchase orders.
- Own number range for purchase orders per organizational unit: if you activate this option, you can define an own number range for the selected organizational units.
- Own number range for purchase orders per account assignment category: if you activate this option, you can define your own number range for selected account assignment categories.
Number range for purchase orders per organizational unit
In the number range for purchase orders per organizational unit section, you have the option of configuring a separate number range for each of your organizations created in Onventis.
Organizational unit: from the selection box you can choose the organizational units for which you want to configure your own number ranges.

Use the Add button to add the organizational unit. The description for the configuration of the number ranges can be found under the point Configuration of the number ranges.
You can delete the configuration for the organizational units using the Delete icon.
Range of number ranges for purchase orders per account assignment category
In the Number range for purchase orders per account assignment category area, you have the option of configuring a separate number range for each account assignment category created in Onventis.
Account assignment category: from the selection box you can choose the account assignment categories for which you want to configure your own number ranges.

The account assignment category is added via the Add button. The description for the configuration of the number ranges can be found under the point Configuration of the number ranges.
You can delete the configuration for the account assignment categories using the Delete icon.
Configuration of the number ranges
- Object: the Object column lists all objects for which the number ranges can be configured within Onventis.
- Template: in the template you can specify the desired number structure.
Example 1:
the order numbers should have 8 digits and start with 65
To do this, make the following entry in the Template column:
65{Nr6} = 65000001 Order number on the first order created
Structure:
65 = the leading number
{Nr6} = number of digits with which the number is to be padded
Example 2:
The purchase orders should have 8 digits, start with the organizational unit of the ordering party and be separated by a hyphen.
To do this, make the following entry in the Template column:
{OrgUnit}-{Nr5} = 450-00001 Order number of the first order created
Structure:
{OrgUnit} = organizational unit as leading number, in the example = 450
{Nr5} = number of digits with which the number is to be padded
- Current number: in the column Current number you can see the number currently assigned by Onventis for the associated object. For example, the value 22 in the Address object provides information about the number of addresses entered in Onventis (22). The count is performed automatically by Onventis. Please note that deleted records are also counted, i.e. in the case of addresses, there could be only 11 addresses in Onventis, which would mean that again 11 records have been deleted.
- Reset at the beginning of the year: if you activate this option, the number of the corresponding object will be reset on January 1st of the following year. Onventis starts counting again, beginning always with the initial number.
- Initial number: in this field you specify the number with which Onventis should start counting the associated objects. In the above example, the orders were preset with 1, the corresponding number is 65000001. If you were to preset the initial number with 0, the first order number created would be 650000.
Further configuration options in the number range
- {Year2} or {Year}: The current year is added to the number with 2 digits
Template: {Year2}-
Value: 23-3678 - {Year4}: The current year is added to the number with 4 digits
Template: {Year4}-
Value: 2023-3678 - {Month}: The current month is added to the number
Template: {Month}-
Value: 03-3678 - {Nr6} or {} or {Nr} or {No }: The number is padded with 0. In the case of {Nr6}, the number has a total of 6 characters and the missing characters are filled with 0.
Template: {Nr6}-
Value:
003678
–
Note: The value in the parenthesis must be greater than 0 and less than 35. I.e. a template like e.g. {Nr9} is valid and generates the following number 000003678–
List of objects for which you can define your own number ranges
- Reconciliation account
- Address
- Request
- Offer
- Offer supplier
- Order
- Auction
- BANF
- User
- Order
- Evaluation survey
- Purchasing project
- Credit
- Information request
- Inventory
- Account group
- Account assignment object
- Cost type
- Criteria group
- Criteria set
- Criterion supplier evaluation
- Customer
- Customer group
- Acceptance of performance
- Performance record
- Supplier
- Supplier evaluation survey
- Delivery note
- Measure
- Group of measures
- Note
- Organizational unit
- Project
- Framework contract
- Invoice
- Invoice approval
- Complaint
- Status
- Task
- Trackboard operation
- Sale Auction
- Contract
- Incoming goods
- Terms of payment
- Degree of target achievement
- Purchased parts list
Organizational Settings – Requirements Items Tab
In the Requirement items tab, you can make settings for the general handling of requirement items within Onventis.
General area
- Display budget/comparison price: You can display the budget and the comparison price in a requirements item. This information can be used when creating a requisition to help his buyer: 1. the own budget level or 2. to communicate a comparative price of an alternative article. In the case of an inquiry, the purchaser can use this information to make a decision.
- Display unit price: by activating this option, the item unit price is displayed in the requirement items.
- Transfer items multiple times: You can transfer a requirement item to new purchase orders, auctions, RFQs, or to a purchasing project. As soon as the item has been transferred to another document, the status changes accordingly and the item is no longer available for use in other documents. If you activate this option, you can transfer the requirement items several times and repeatedly to other documents, irrespective of the status.
- Requirement requester may not approve own requirements: if you use the approval workflows for your organization within Onventis, you can prevent a user who is both a requirement requester and an approver from approving his or her own requirement requests by activating this option. With this setting, the system skips the approval step in which the requester is also the approver and checks the next approval step.
- Requester must approve purchase orders: with this option, the requester of the requirement item automatically becomes the first approver for the purchase order or request. This setting applies to all requirement items that have been transferred to a purchase order or via an inquiry to a purchase order.
- Only when using the requester’s purchase order approval workflow: enabling this option restricts the requester’s purchase order approval to the requester’s approval workflows.
- Enable requester order approval via direct link: this setting allows approvers to approve or reject orders via the direct link call without having to log in to Onventis. The prerequisite for this is the activation of the function “Enable release via direct link” in the approval step of the purchase order approval workflow.
- Adopt SAP assignment of requester when transferring to purchase order: With this setting, the organizational data of the requester stored under “SAP assignment” is adopted instead of that of the purchaser when the requisition is transferred to a purchase order.
- Take over default billing address of requester when transferring to purchase order: you can activate this option if the default billing address of the requester should be taken over instead of that of the purchaser when transferring the BANF to a purchase order.
- Use requester’s organizational unit in purchase order: with this setting, the organizational unit of the requester of the BANF is adopted in a purchase order instead of that of the purchaser.
- Use delivery address of requester in order: with this option the delivery address of the requester is taken over into the order when transferring the BANF into an order.
- Store requisitioner as orderer (only for non-bundled requirements): with this option, the requisitioner of the BANF is adopted as the orderer in the purchase order. This setting only applies to non-bundled requisitions.
- Take over SAP delivery/service recipient and unloading point of the requisitioner when transferring to purchase order: by activating this option, the delivery/service recipient, if entered in the requirement item, is taken over when transferring the requirement item to the purchase order.
- Inform purchasing group after completion of the approval process: by activating this option, the users assigned to the purchasing group in the approval process will be informed by e-mail about the completion of the requirements approval process.
- E-mail reminder for release to the current approver X days after sending the requirement item: by activating this option and entering X number of days, the approver will be reminded of the release of the requirement item(s) by e-mail. The reminder email is only sent if the current approver has not yet approved the requirement item(s).
Organization settings – Order tab
In the tab Order you can make general settings for the orders, the shopping cart, the order header, the order items as well as the order PDF.
General area / service function
If you use Onventis to process service orders, you can mark the orders accordingly. You can choose from the following options:
- None: with this setting, all items of a purchase order, including service items, are treated as a normal purchase order.
- Via flagging of items and orders: by activating this function, users who have the appropriate rights can flag and order service items. This gives you the option of separate and thus targeted process control of service orders within Onventis, e.g. via order processing and/or order approval workflows.
General area / blanket orders
- Marking as blanket purchase order at header level: with this setting, you can activate the blanket purchase order function. By marking a purchase order as a blanket purchase order, purchase orders with a predefined validity period can be generated. Within the blanket purchase order, it is possible to mark items as “limit items”. A check of the limit value and total value over the entire term is possible within the purchase order approval.
General area / Periodic ordering
- Marking purchase orders as template purchase orders: by activating this function, users can create a purchase order as a template purchase order. A template purchase order serves as a template for interval or recurring purchase orders. The template order itself is not sent. For the dispatch, the user can define an interval for the dispatch of the follow-up orders. As soon as the process has been started manually, information appears that the execution is currently running. Follow-up purchase orders are generated automatically at the specified times (intervals) and sent to the vendor or for approval.
The execution can be stopped at any time. In this case, no more purchase orders will be created at the next possible point in time and the status of the template purchase order will change back to “In Entry”.
General / Settings area
In this area you can make general settings for the processing, display and handling of orders within Onventis.
- Transfer shopping cart items with quantity 0 to order: with this option items with quantity 0 can be transferred to the order. This setting creates an item container for material consumption in service purchase orders that is not yet known at the time the purchase order is created.
Case study:
You hire a painter to do 10 hours of painting. At the time of the order, it is not yet known which material is required in which quantity, e.g. adhesive tape, paint, tools for the service.
Procedure:
You create a service purchase order with:
1st position: 10 hours painting
2nd position tool with quantity 0 (position container)
After completion of the painting work, the service provider for position 1. prepare his performance record for the hours incurred and in position 2. Add the required material, e.g. 100 litres of paint.
- Send purchase orders with preview: for each purchase order created in Onventis, a purchase order PDF is automatically sent to the supplier by e-mail. This option allows the purchaser to view this PDF before sending the order to the supplier.
- Do not pre-populate order title: the order title in Onventis is a mandatory field and will default to the following title: Purchase Order <current date> <time>. This title may be overwritten by the purchaser. If you do not want to use the default title for orders within your organization, you can enable this option. Thus, the orderer must enter the order title himself.
- Activate fax function: with this option you can activate the fax function in addition to sending orders by e-mail. This means that the purchase orders generated in Onventis are sent to your suppliers at the fax number entered in the supplier administration.
- Determine tax code automatically: You have the option in Onventis to store tax codes including the associated tax rates. If these are maintained accordingly, you can use this setting to have the system determine the appropriate control code automatically.
- Do not change tax rate: in principle, purchasers can manually overwrite the tax rate in a purchase order. With this setting, the control rate can only be changed in conjunction with the selection of a suitable control code.
- Automatically set tax rate to 0% for cross-border deliveries: if you activate this setting, Onventis will check if orders are sent to suppliers located outside the country of the respective organizational unit. If this condition is met, the tax rate is automatically preset to 0%.
- Automatically set tax rate to 0% for deliveries across the external EU border: if you activate this setting, Onventis checks whether the orders are sent to suppliers who are located outside the external EU border. If this condition is met, the tax rate is automatically preset to 0%.
- Make tax code selectable in invoices: within Onventis you have the possibility to create invoices. This setting allows the invoice issuer to select the tax code in the invoice documents.
- Define tax code in invoices as mandatory field: with this option you define the tax code as a mandatory entry when creating invoices. Thus, no invoice can be created without selecting a tax code.
- Define barcode in invoices as mandatory field: by activating this option, the barcode entry in invoices becomes a mandatory field and must be entered. If there is already a barcode in the order, it will be included in the invoice.
- Orderer may not approve own orders: within Onventis you have the possibility to configure order approval workflows. Depending on the configuration, the orderer can also be the approver of his orders at the same time. If you activate this option, the approval step is skipped and the purchase order approval is sent to the next person responsible in the approval workflow.
- Combine successive purchase order changes: You can activate this option to combine successive purchase order changes that the vendor has not yet confirmed or rejected into one purchase order change. This ensures that the vendor can always confirm or reject all changes to a purchase order.
- Make additional fields available in orders: with this setting you can create additional fields in the order header for all newly created orders.
- Hide quantity variance in purchase order: in the case of a purchase order confirmed by the vendor with a quantity variance, the purchase orders can only be archived after they have been posted from the goods receipt if the “Confirm quantity variance” button has been pressed. If you do not use order archiving, you can hide this button with this setting.
- Do not allow price units with decimal places in purchase order: you can use this setting if you do not want to allow price units with decimal places in Onventis. Please note that an error message will be issued in the case of a catalog import where the articles contain decimal places. The import is only possible if you delete the decimal places from the import file.
- Do not automatically fill the Buyer field: In the standard system, each user is assigned to a buyer. When a purchase order is created, the corresponding buyer is determined by Onventis and filled automatically. By activating this option, the purchaser must select the responsible purchaser himself.
- Create collective credit memos by SAP company code: You have the option to create credit memos in Onventis. If you have an SAP connection, you can group collective credit memos by SAP company code by activating this option.
Area General / Marking of…
In the General / Flag of: section, you can highlight the listed item categories using a flag:
- Free text items
- Catalogue items
- ERP items
Shopping cart / cost centers area
- Allocation in the item list possible (depends on other conditions): if this option is activated, the user can select the cost centers in the shopping cart items.
| Hinweis
Please note that the assignment of cost centers to users, as well as in the case of SAP integration, depends on the SAP assignments of cost centers to company codes. For non-SAP organizations, the dropdown for selecting cost centers in the shopping cart is only visible if a default account assignment category has been defined and the “Cost Center” field, in the Account Assignment Categories area, is an “Optional” or “Required” field for that category. |
- Maximum number of directly selectable cost centers (default 15) per item: If this option is activated, the user can assign the cost centers in the item list of the shopping cart. The selection of cost centers in the shopping cart depends on the number of cost centers assigned to the user.
Example:
You have 100 cost centers in your Onventis Buyer. 15 were entered as the standard. In this case, the cost centers can only be selected in the shopping cart item.
To enable the selection directly in the shopping cart item list you would have to increase the maximum number of cost centers to 100.
Shopping cart / settings area
- Show links to the general terms and conditions in the shopping cart: with this option you have the possibility to show the links to the general terms and conditions of the supplier in the shopping cart.
- Generally transfer free text items to the requirements list: in the standard system, all items from the shopping cart are transferred to a purchase order. By activating this option, all user-defined text items are first transferred to the requirements list. In the requirements list, these can be processed by Purchasing and then transferred to a purchase order.
- Generally transfer catalog items to the requirements list: in the standard system, all items from the shopping cart are transferred to a purchase order. By activating this option, all catalog items are first transferred to the requirements list and can be further processed there.
- Send orders directly from the shopping cart: by default, shopping cart items that are transferred to an order are first sent from the order list to the supplier or for approval. If you activate this option, the shopping cart items are sent directly for approval or to the vendor. This setting only applies to items that are transferred to a purchase order.
- Transfer articles from the following suppliers to the requirement item: by default, all items from the shopping cart are transferred to a purchase order. By activating this option, items that are procured from the selected suppliers are first transferred to the requirements list and can be processed further there. The selection of the suppliers is done via the Selection… button.
- Transfer articles of the following material groups to the requirement item: by default, all items from the shopping cart are transferred to a purchase order. By activating this option, all items of certain material groups are first transferred to the requirements list and can be further processed there. The selection of the material groups is done via the Selection… button.
| By transferring the items from the shopping cart to the requirements list, you can control material procurement within your organization in a targeted manner. In the requirements list, you can bundle the items, for example, according to vendor and date or material group and thus secure savings potential for your company. |
- Mandatory field check in shopping cart items: the mandatory field entry is checked at the latest when an order is sent. By activating this option, the mandatory field check already takes place in the shopping cart.
- Mark supplier as mandatory field: if you activate this option, the Supplier field in the shopping cart becomes a mandatory field and must be entered. In the standard system, the vendor must first be selected in the follow-on documents.
- Select inherited items: within a purchase order with several items, certain fields, e.g. account assignment information, can be inherited by further items and thus no longer have to be maintained per item. With this setting a note appears in the shopping cart and in the order in the tab Position, if fields of an article were inherited to other or all other positions.
Order header / settings area
- Order number can be changed manually: by default, the order number is generated by Onventis itself. This number is read-only. The number specification is controlled in the Number Ranges tab and can be configured on a company-specific basis. By activating this option, users can overwrite the order number.
With the options listed below, you can activate the following additional fields in the order header:
- Commission no. visible
- customer order no. visible
- Commission visible
- Project no. visible
- Display ‘Conditions’ block
- Display ‘Additional costs’ block
- Show ‘Other’ block
- Show ‘Resend’ button: with this setting you can activate the button for manually sending messages in the message queue. If certain messages have not been sent, e.g. due to a missing connection, you can manually initiate the sending again.
- Deactivate supplier check: When sending orders, the system checks whether the ordered item matches the supplier from the catalog. If it does not match, an error message is displayed and the order cannot be shipped. If you do not need this check, you can disable it by activating the setting. For purchase orders that have been transferred from requirement items to a purchase order, by activating this option. the vendor specified in the requirements item can be changed.
- Document request visible: The field “Document request” is visible in the order header. By activating this option, the user can request an attachment, e.g. a delivery note, from the supplier. This option is not a required field.
- Delivery address visible: with this setting you can activate the visibility of the delivery address in the order header. The delivery address is then valid for all order items. This setting is useful if the same delivery address is used for all items.
- Purchasing group as required field: by activating this option, the purchasing group becomes a required field. The purchasing group is responsible internally for the procurement of a material or class of materials and usually acts as the contact person for vendors externally. This setting is useful when transferring purchase orders to SAP. In SAP, the purchasing group is a mandatory field and must be entered when the purchase order is transferred to SAP.
- Assignment of another user possible: by activating this option, another user can be assigned to an order. The assigned user can see these orders in his order overview. This setting is intended to ensure that all orders that fall within the user’s area of responsibility are visible to him.
- Display vendor: you can use this option to display the vendor to whom a purchase order is to be sent in the basic data of the purchase order.
- Purchase order can be marked as SG&A purchase order: by activating this option, a purchase order can be marked as SG&A (Selling, General and Administrative Expenses) purchase order.
- Display packaging regulations: for some goods, certain packaging regulations must be adhered to in order to protect the goods from stresses in the course of the logistics chain, e.g. for the transport of technical goods. With this option you activate the display and selection of the packing instructions in the tab Basic data in the purchase orders. These can be administered in the area Administration → Master Data → Packaging Instructions.
- Define packing instructions as mandatory field: this option allows you to define the shipping instructions as a mandatory field in the order or purchase order. Thus, orders or contracts cannot be shipped without a selection of packaging instructions.
- Automatic determination of the account assignment category based on material group and/or article value:
Preset order header / delivery date area
You can use these settings to predefine the delivery date in all newly created purchase orders with no delivery date or with a predefined delivery date.
- with no date: no date is preset
- With current date: the current date is preset.
- with date in X-days: the current date + X working days is calculated
- X-number of days from order generation (not BANF generation): the date in X-days from order generation is entered.
- Delivery date as mandatory field: the delivery date becomes a mandatory field and must be entered.
- Execution period end is delivery date: for service orders, this is a predefined period in which the service is to be performed. This option sets the specified delivery date as the end date for the service. Please note that the service provider cannot post services after the end date.
Order header area / For orderers
In this section, you have the option to send automated email reminders to purchasers. These apply to all purchase orders that have the status ‘In process’ and can be sent at certain intervals:
- E-mail reminder X day(s) after the order has been sent to the approver: the current approver in the order release workflow is reminded by e-mail about the outstanding documents that he still has to process. The time intervals apply to the entire organization and thus to reminders for purchase orders in the status “In Entry” as well as for purchase orders “In Approval”:
- E-mail reminder X-day(s) after order creation for orders in status ‘In capture’: Selection of start time X for the reminder interval, e.g. 5 days after order creation.
Order header / reminder interval area
In this area you can set the interval at which the reminder emails are to be sent to the orderers:
- Send daily: daily e-mail dispatch
- Send once a week, every <weekday selection>: Send e-mail only once a week on a specific day of the week, e.g. Monday.
- Send every <X> working day: E-mail dispatch every X days, e.g. every 2nd day
Order item area
In the Purchase Order Item area, you can make the following settings for purchase order items:
- EAN/GTIN no. visible: Display of EAN/GTIN no. in the order item
- Internal article number visible: Display of the internal article number in the order item.
- Internal article number changeable for catalog items: allows the user to change the internal article number.
- Customer item number visible: the customer’s item number is visible to the supplier
- Commission no. visible: display of commission number on item level
- Shipping types on item level: Display shipping types on item level. The setting allows you to select different shipping types for each item.
- Delivery addresses on item level: Display of the delivery address on item level. This setting is useful when Onventis users, such as buyers, order for employees at other locations, but the delivery is to be made to the employee’s location.
- Delivery date on item level: allows to display and select the delivery date on item level. This allows the user to select a different delivery date for each item.
- Display ‘Account assignment’ block: Display and maintenance of account assignment information for the ordered article, e.g. cost centers, WBS elements, etc.
- Show block ‘Other’: by activating this option, the free text fields Document request, External and internal remarks, and File attachments will be activated. You can use the “Other” block to exchange internal or external information as well as file attachments for a purchase order item with the vendor or within your organization.
- Storage location as mandatory field: with this option, the storage location in the order item becomes a mandatory field and must be filled in to send an order.
- Material group visible: Display of the material group in the purchase order item
- Material group as mandatory field: with this option the material group in the order item becomes a mandatory field and must be filled in to send an order.
- Display VAT rate: Display of the VAT rate in percent in the order item.
- Delivery schedule possible: by this option several delivery dates can be selected for an article per order item. Delivery scheduling can be carried out on a percentage or quantity basis.
- Multiple account assignment possible: by activating this option, the user can distribute the account assignment of an article to several account assignment objects of an account assignment category for each purchase order item. The account assignment can be made on a percentage or quantity basis.
- Different order quantity and price unit possible: by activating this option the order quantity and price units can differ. Example: Order quantity 1 canister (content 5 litres), price unit 10.00 Euro per 1 litre = total 50.00 Euro.
- Show field ‘Customs declarable’: the option Customs declarable is displayed in the order items and can be activated by the user for declarable items. This setting is useful if you procure goods from non-resident vendors within your organization and must comply with reporting requirements for foreign trade.
- Set ‘Inventory managed’ automatically if storage location filled in: the field Inventory managed will be set automatically as soon as a storage location is specified for order items. Prerequisite is the activation of the option: “Show field ‘Inventory managed‘ “.
- Display field ‘Test tool’: Option for manual marking of trial tools in the order items.
- Document request visible: The field “Document request” is visible in the purchase order item. By activating this option, the user can request an attachment, e.g. a delivery note from the supplier. This option is not a required field.
- Transfer statistics-relevant delivery date to SAP: with this option you activate the option “Adjust statistics-relevant delivery date” in the order item. This option is only useful for SAP integration. By activating the option, the statistics-relevant delivery date in SAP is compared with the delivery date.
- Allow super-admin to change account assignment data: this option allows the user who is created as super-admin in Onventis to change the account assignment data subsequently, e.g. if a correction is necessary.
- Make additional fields available in order items: activate this option to make the Additional Fields tab available to users in the order items. This setting applies to free text and catalog items.
- Display purchasing KPIs in order item: with this option you can display the KPIs valid for the article in the order item.
- Selection of material groups from outline agreements: with this option you can map outline agreements on material group level. If you conclude outline agreements with the vendor at material group level, the value utilization of the outline agreement is checked. In the outline agreement, the value of the purchase orders is incremented with the relevant material group. By linking the material groups, you also have the option of processing free-text items via an outline agreement.
- Display field ‘Inventory-managed’: the option for marking inventory-managed material orders is displayed in the purchase order item and can be activated manually by the user. Inventory management is stock accounting based on quantity, in which the correct stock levels can be shown by posting goods receipts and issues.
- Do not edit “Inventory managed” field for catalog items:
- Display ‘Manufacturer No.’ field: You can display the manufacturer number of the item in the order items.
- Display ‘Manufacturer’ field: You can display the manufacturer of the item in the order items.
- Display ‘eClass’ field: You can display the eClass number for the item in the order items.
- Display block ‘Customs data’: You can display the block ‘Customs data‘ for the article in the order items. The data is a weight entry which is maintained either in the catalog for the respective article or in the order item.
- Show file attachments: by activating this option you have the possibility to exchange documents with the supplier. This option is only effective in connection with the activation of the option Show block other.
- Allow entry of discounts and surcharges: by activating this option, a discount or surcharge can be entered on the order item level.
- X-number of decimal places of the price: with this option you can define the number of allowed decimal places for the prices in Onventis. If you enter 2, the prices are displayed with 2 decimal places, e.g. 10.99 Euro. If the articles in the catalogues contain more than 2 decimal places, e.g. 10.99111, the remaining decimal places are not displayed. In the background Onventis always calculates with all decimal places. This setting is only used to display the prices.
SAP Assignment: in this area you can select additional mandatory fields. These only apply to SAP integration:
- Recipient of delivery/service as mandatory field: with this option the field Recipient of delivery/service becomes a mandatory field and must be filled in.
- Unloading point as mandatory field: with this option the field Unloading point becomes a mandatory field and must be filled in.
GWG: In the GWG area, you can define article value limits and note texts for low-value assets within your organization.
- Display note for an item value between X-EUR and X-EUR: here you define a value for GWGs that applies to your organization.
- Text: in the corresponding text field you can enter a note text, which will then be displayed in the shopping cart or in the order.
- Numbering step:
- Number items according to the following pattern: with this option you specify a numbering pattern for the order items. For example, when selecting increments of 10, position 1 = 10, position 2 = 20, etc.
- Drop shipment delay in days: by entering a number of days, the delivery date for a purchase order with drop shipment for the 2nd supplier is delayed by the number of days entered, e.g. delivery date is on 10.07 + 5 days = the final delivery date for supplier 2 is on 15.07.
Order PDF area
When an order is placed, an order PDF is always generated in the background with the basic information about the order. If you need to add more information to the file, you can select additional fields in the Order PDF section.
The following information can also be printed out in the order PDF:
- Display of the cost center in the order PDF
- Display of the cost element/property account in the purchase order PDF
- Representation of the business area in the order PDF
- Representation of the order in the order PDF
- Presentation of the project in the order PDF
- Display of the PSP element in the order PDF
- Representation of the system in the order PDF
- Display of the sales order in the order PDF
- Display of the article long text in the order PDF
- Display of the shipping method in the order PDF
- Display of the delivery address in the order PDF
- Display of delivery schedule lines in the order PDF
- Display of the VAT rate in the order PDF
- Highlight marked positions in the order PDF
- Show name of purchaser in addition to purchaser in PDF
- Representation of the material group in the order PDF
- Representation of the payment method in the order PDF
- Display of the VAT number of the supplier in the order PDF
- Display of the supplier no. in the order PDF
- Display of the task in the order PDF
- Representation of the chargeable job in the order PDF
- Representation of the non-chargeable job in the order PDF
- SAP contract number visible
- Reverse charge note in the order PDF
- Representation of the contact person of the supplier in the order PDF
- Representation of the recipient of the delivery/service in the order PDF
- Representation of the unloading point in the order PDF
Organization settings – Goods receipt tab
In the Goods Receipt tab, you can define general settings for goods receipt documents, as well as up to three additional numbers for goods receipt items. These can be optionally stored for each position and can be activated by clicking on the checkbox.
Range of numbers for goods receipt items
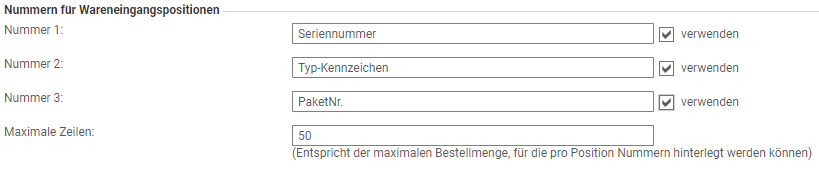
- Number 1 to 3: In the fields 1 to 3 you can maintain additional numbers, e.g. serial number, type code, package number, etc. These are displayed in the goods receipt document. These are displayed in the goods receipt document. In the goods receipt items you will find the additional numbers in the tab Numbers.
- Maximum lines: in the line “Maximum lines” you can enter the maximum order quantity up to which numbers can be stored. For example, with a value of 50, only numbers for items with a quantity less than or equal to 50 could be stored. The number of lines depends on the order quantity. This allows you to store numbers for each article in the item.
The fields defined in this area can then be used in the goods receipt posting.
Settings area
- For inventory-managed items, storage location is a required field: with this option, the field storage location becomes a mandatory entry as soon as an item has been marked as an inventory-managed item.
- Possibility to change the posting date: by this option you give the users the possibility to change the posting date of the goods receipt. In the standard system, the current date is entered.
- Purchaser is not allowed to post goods receipt for own orders: with this option the users who have sent the order to the supplier are not allowed to post goods receipt. This only applies to purchase orders created by the user.
- Goods receipts with quantity 0 not possible: with this option, goods receipt postings with quantity 0 are not possible. This setting is useful if you process service orders via Onventis. A goods receipt is automatically posted here after the service confirmation has been released. The quantity 0 is not allowed in this operation.
- Final Confirmed Indicator Enabled by Default: you can check this option to enable the Final Confirmed Indicator = “Final Delivered” as the default for all goods receipt documents. If the goods receipt is not yet complete, the user must remove the checkmark manually. The final confirmation indicator means that no further goods receipt can be posted for this purchase order.
- Do not automatically pre-populate delivered quantities in goods receipt: by activating this option, the user must check the delivered quantities and maintain them manually in goods receipt. If you do not activate this option, the ordered quantities are copied.
- Display item values in goods receipt: by selecting this option, you activate the display of prices in the goods receipt documents. This means that not only the quantity but also the valuated goods receipt is displayed. If, for example, the ordered quantity is to be distributed to different cost centers, you can see the delivery value in relation to the account assignments by means of the item value.
- Delivery date is mandatory field: by activating this option you can define the delivery date as a mandatory field. It is then not possible to post a goods receipt without entering the delivery date.
Posting period area
In the Posting Period area, you can define posting periods for goods receipts. Users can only post goods receipts for this period; the posting date must be within the specified period. Please note that posting periods are not taken into account for automatically posted goods receipts.
The following fields are available for defining posting periods:
- Title: Title of the posting period, e.g. “Period February to November 2016”.
- Valid from: Start time (date) on which the posting period is to begin.
- Valid until: End time (date) on which the posting period is to end.
- Earliest posting date: in this field you can define from which day (key date) the goods receipts for this posting period should be taken into account.
Organization settings – Catalog tab
In the Catalog tab, you can make catalog-specific settings that apply across organizations.
Settings/Miscellaneous area
- Show extended article numbers: with this option you have the possibility to show additional article numbers.
- Show country of origin and customs tariff number: this setting displays the country of origin and the customs tariff number of the corresponding article in the catalog. This information then no longer needs to be maintained by users, if the information is necessary.
- Hide supplier names in catalogs: by activating this setting, the supplier name will not be displayed in the catalog data.
- Use condition areas (only for own conditions): within TradeCore you can maintain different conditions for your own catalogs and different areas, e.g. countries. This setting is useful, for example, for different currencies, tax rates or special surcharges that only apply to certain areas.
- Do not block article favorites without conditions: with this option you can remove the block on invalid conditions for articles that are in a favorites list, e.g. condition validity expired. The article can still be ordered despite expired conditions.
- Presetaccount assignment information in article favorites (preset has priority over other account assignment settings): with this option you have the possibility to preset the account assignment information for articles in the article favorites list. These take precedence over all other ice positions in TradeCore.
- Presetshipping address in article favorites (preset has priority over user settings): with this option you have the possibility to preset the shipping address for articles in the article favorites list. These take precedence over all other ice positions in TradeCore.
- Update ERP conditions during order approval: if you activate this option, the conditions from the ERP are compared with the conditions in TradeCore in the relevant order during an order approval and updated if necessary.
- Update and display available quantity for item via web service: this option always displays the current available quantities for the item in the catalog. You can activate this option if your supplier has licensed the web service and makes it available to you.
- Number of characters for item description (The value 0 means that all characters are displayed): with this setting you can define the maximum length for the item description. The characters which are not to be displayed are always counted, e.g. with an article description with 60 characters and the specification 0, the entire description with 60 characters would be displayed. On the other hand, if you enter 10, a total of 50 of characters will be displayed.
- Send e-mail to condition owner X days before condition expires: catalogs are usually provided and administered by vendors. The catalog owner is also the condition owner. Within TradeCore, the conditions for catalogue articles have a certain validity, which must be stored in catalogue articles. With this setting, the catalog owner is sent information about the expiration of the conditions X days (e.g. 10) before the conditions expire by e-mail.
- Perform mapping to material group for OCI transfer eClass: With this setting, you can perform mapping to the material group in your organizational unit for OCI catalogs. The E-Class key is a cross-industry product data standard for the classification and description of products and services. In the Condition release field, you can store one or more e-mail addresses of users who are to be informed when conditions have been updated.
- Hide menu item “Catalogs”: if you activate this option, the menu item Catalogs will be hidden. The user can only access the catalogs from the documents: the shopping cart, the orders, via the catalog… button to access the catalogs.
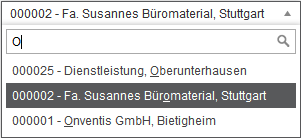
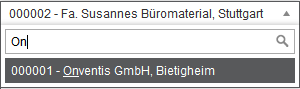
- Remember facet selection on new search: you can use facet selection to refine your search for items. This checkbox saves the user’s last facet selection. You can call up the facet selection via the central search, in the header area and the Catalogs selection.
Condition release area
Info Mail: In the Condition Release area, you can maintain a user’s e-mail address. If there are new conditions for the release of catalog articles, the user will be notified by e-mail.
Core assortment area
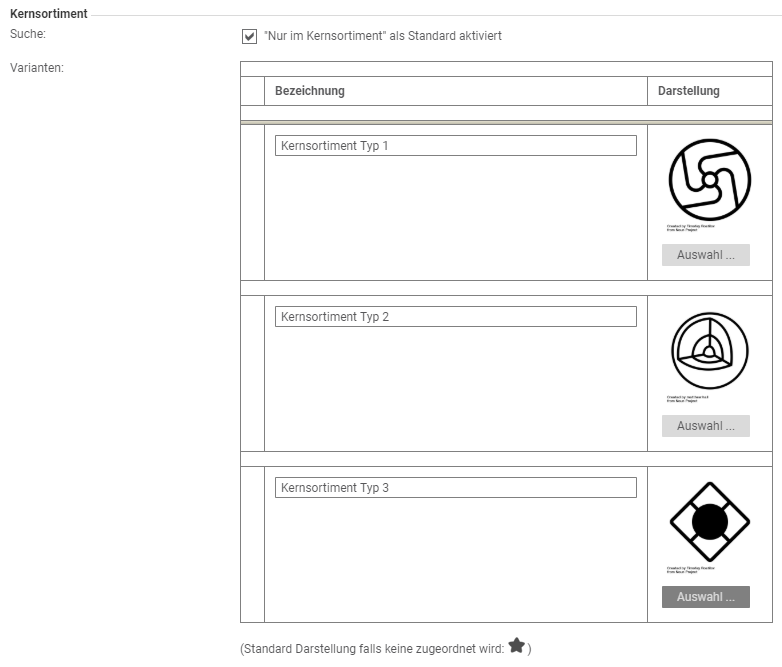
In the Core Assortment area, you can highlight catalog items that belong to the core assortment by marking them. The articles defined as the core assortment are defined in Catalog Management.
- Quest:
- Only in core assortment activated as default: with this setting you can limit the search in the catalog to the core assortment. When users search for an article, this setting will only search in the articles defined as core assortment.
- Variants: In the Variants section, you have the option of defining three variants for your core assortment:
- Designation: under Designation you assign the name of the core assortment, e.g. Topseller.
- Representation: under Representation you can select a file which should highlight the core assortment variant. In fig. 30 you can see an example of an article defined as a top seller in the catalogue.

Organization settings – Requests tab
In the tab Requests you can make general settings for the requests.
Settings area
- Material group as mandatory field: by activating this option, the field Material group in the auctions and inquiries becomes a mandatory field and must be entered.
- Do not preassign title of request: you can activate this option if you do not want to preassign the title of the request. If you do not activate this option, the title will be preset according to the following scheme: Request <current date + time>, e.g. Request 14.04.2016 10:30:31
- Hide VAT field in quote: by activating this option, the applicable VAT will not be displayed in the quote.
- Send email to supplier without attachments: by activating this option, no attachments will be sent to the supplier.
| Hinweis
Attachments with a total size of > 10 MB will generally not be sent by e-mail. |
- Hide titles in emails of confidential requests: when creating requests, you can set the confidentiality levels. For the confidentiality levels “Request contents confidential” and “Request confidential”, the title of the request is not included in the e-mail.
- Show title of request in request and quote PDF: with this option you activate the display of the title in the request and quote PDF.
- Show field “Time”: by activating this option, the input field for the time will be shown for the offer period.
- Offer validity as mandatory field: by activating this option, the entry of the offer validity becomes a mandatory field.
- Hide input fields for delivery and payment terms in quotations: with this option you deactivate the input fields for delivery and payment terms in the queries.
- All positions in price comparison “not activated” by default: by activating this option, the offer positions must be selected manually during a price comparison. In the standard system, all items are activated.
- Hide “Purchasing success” area: by activating this option, the purchasing success area will not be displayed in the offers. For the presentation of the purchasing success, the reference and award price are compared with each other and the savings are displayed in absolute and percentage terms.
- Net price in quotation overview includes internal additional costs from price comparison: when comparing quotations, you have the option of maintaining internal costs. By activating this option, these additional costs are included in a price comparison.
- Unreleased requests can be resumed: by activating this option, a rejected request can be reset via the Reset button. The user can edit the request and request a new release. You can define multiple team members for a request who must approve the request before it is sent to the supplier.
- Send attachments of a request also to not registered suppliers: with this option attachments of a request can also be sent to not yet registered suppliers. If this option is not activated, the attachments will only be sent to already registered suppliers.
| Hinweis
When a request is published, a supplier who has not yet been created in Onventis receives an e-mail with a registration link and can then participate in the request. |
- Archiving of requests only after completion of the award: with this option a request can only be archived after completion of the award process. If this option is not activated, on the other hand, an inquiry can be archived at any time after it has been sent to the suppliers.
- Award entry only possible after approval of the award proposal: if you use an award approval workflow in Onventis, this option allows the award to be entered only after approval. If the option is disabled, the award workflow process is skipped and the award of a request can be entered and completed immediately.
- Hide external remarks in approval PDF: with this option the external remarks of a request are not displayed in an approval PDF.
- Internal questions can be changed even after the call has been sent: You have the option of creating internal questions for calls. If this option is activated, they can also be changed after a request has been sent, without prior versioning. If you do not activate this option, a new query version must be created in order to change internal questions.
- Send award and rejection emails to suppliers even if they have entered their own offers: by activating this option, the award and rejection emails will also be sent to suppliers whose offers the user has entered himself. If a supplier cannot submit quotes in Onventis, the user can enter the supplier’s quotes themselves. If you enter vendor quotations yourself, it makes sense to activate this option.
- Show SAP settings: with this option the fields for the SAP assignment are displayed in the requests and are mandatory fields. This option is only useful in conjunction with SAP integration. The following mandatory selection fields are displayed:
- In the basic data: Controlling area, company code, purchasing organization
- in the positions: Plant and Warehouse.
- Purchasing group as mandatory field: by activating this option, the purchasing group is a mandatory field in the requests and must be selected.
- View bids only after deadline: by activating this option, suppliers’ bids can only be viewed after the bid deadline has passed. If you do not activate this option, the offers can be viewed by the user at any time.
- Approval of offers by two persons: by activating this option, the offers of the suppliers must first be approved by two authorized persons before the offers can be viewed by other users.
- Hide internal article number on position level: by activating this option, the internal article number is hidden in the inquiry positions and is therefore not visible for the supplier.
- Request does not contain offers: by activating this option the tab offers in the requests will be hidden.
- Budget/comparison price as reference offer in price comparison: by activating this option, a budget/comparison price manually maintained in the request item is displayed in the price comparison of offers.
- Budget/comparison price read-only: by activating this option, the budget/comparison price is read-only and cannot be changed.
- Partial award: by activating this option you have the possibility of a partial award, i.e. you can award the surcharges for individual positions to different suppliers. In the case of RFQs with multiple items, you can award the RFQ to vendor A for item 1 and vendor B for item 2, for example. If you do not activate this option, the award can only be made to one supplier at a time.
| By activating partial award, you can always secure the best offers from your vendors for individual items. |
- Delete items in price comparison: by activating this option, the user can delete items from the price comparison.
- Field “Show submission number”: by activating this option the submission number will be shown in the basic data of the inquiries and can be entered. The submission number is used to group purchase orders within the framework of load building.
- Field “Show request type”: by activating this option the dropdown menu for the selection of the request type will be shown. When you transfer queries to SAP, the selection of the query type is a required field. When transferring the requests to SAP, you should activate the field.
- Hide surcharges/deductions at item level: by activating this option, the surcharges and deductions at item level are hidden and cannot be maintained by the supplier. This means that users only see the pure item price without, for example, discounts, cash discount or alloy surcharge.
- Allow editing the delivery date in the quote: this option allows the supplier to modify the requested delivery date when submitting the quote and enter an earlier or later delivery date.
- Additional costs can be changed in the partial allocation: by activating this option, the entered internal additional costs can be changed in the partial allocation.
- Send free text e-mails in one language regardless of the supplier’s language settings: by activating this option, requests with free text e-mails will always be sent in one language, despite the supplier’s language settings. For example, if you contact suppliers in France, they will still receive the e-mail in German, for example.
- Update term start field retroactively: by activating this option, the time at which the request is sent to the supplier is stored in the term start field.
- Do not send request as PDF document to suppliers: when sending requests and requests for information, registered and non-registered suppliers can select whether the request is also sent as a PDF document.
- Define start of runtime in requests: by activating this option, the time at which the request should be automatically sent to the supplier can be defined. The following options are available:
- Term start with future date – The request will be sent to suppliers in Onventis on this specific date. The status of the request changes from “In capture” to “Sent to supplier”.
- Start of term with today’s date – The request is sent to the suppliers in Onventis in a timely manner and has the status “Sent to suppliers”.
- Start of term without date entered – The request is created in Onventis for further processing and is given the status “In capture”. The “Send” action button can be used to send the request to the supplier.”
- Item transfer from part templates:
- Insert items without taking the existing structure into account
- Insert items at the level of the last item or under the last force element.
View Options Area
- Show purchasing group (without “Purchaser as contact person of the supplier”): by activating this option the purchasing group will be displayed in the basic data of the request. The field that defines the buyer as the contact person for the supplier is not available.
- Show requester: when a requisition item is transferred to a request, activating this option will transfer the requester to the request
- Show “Account assignment” block (only for inquiry items from the requirements list): by activating this option, the “Account assignment” block is displayed for inquiry items that have been transferred from the requirements list to an inquiry. The block “Account assignment” can no longer be processed within the request item.
- Material group at item level: by selecting from the drop-down menu, you can make the following settings for the display of the material group in the inquiry items:
- No material group at item level
- Material group at item level as optional field
- Material group at item level as required entry field
Offer period area
- Offer period as mandatory field: by activating this option the field Offer period is defined as mandatory field and must be entered.
- Manually send email reminder to suppliers about the soon ending bid deadline: by activating this option it is possible to manually send a reminder email to the respective suppliers about the bid submission.
- Automatically send email reminder to suppliers X days before deadline: by activating this option, a reminder email will be automatically sent to the respective suppliers X days before the deadline. The interval may be between 1 and 365 days.
Area Weighting
- Activate weighting of questions by default: by activating this option, the weighting of questions will be set to “YES” by default, i.e. the questions will always be weighted. In the request, the user still has the option to set the weighting to “No”.

- Question weighting can also be changed after sending the request: by activating this option, the weighting on question item level can also be edited after sending the request and after the suppliers have submitted their offer. The weighting is taken into account accordingly in the question comparison.
- When deleting a question, automatically reweight the remaining questions of the structure element via weighting wizard: by activating this option, the weighting of the questions within a structure element is automatically adjusted after removing a question.
- Knockout criterion:
- Without weighting (hard K.O.): with “Without weighting (hard K.O.)” the supplier is evaluated with a hard K.O. if the criterion is not fulfilled, i.e. he is not considered for the award.
- With weighting: with “With weighting” the criterion can be weighted, e.g. with 50% of the total score, and thus enters the award with a high weighting.
Inquiry area-PDF
Settings:
Hide budget/comparison price (entered) in approval PDF: by activating this option, the budget/comparison price, if entered in the request, will be hidden in the approval PDF.
Organization settings – Contracts tab
In the Contracts tab, you can define which fields are to be defined as mandatory fields for a contract.
Please note that if you change the settings, they will also apply to existing contracts. At the next opening, the mandatory fields must be completed accordingly.
Settings / Mandatory fields area
You can specify the following mandatory fields for maintaining contracts:
- Supplier
- Contract date
- Runtime
- Earliest callable
- Notice period
- Storage location
- Contact person (internal)
Organization settings – Passwords tab
In the Passwords tab, you can define password rules that should apply within your organization.
| Hinweis
If a user enters the wrong password, your account will be locked for 2 minutes after the sixth unsuccessful attempt. |
- Different login name and password: With this setting, the login name and password must be different.
- Minimum password length: Here you can define the minimum number of characters the password must contain.
- Not allowed passwords: In this field not allowed passwords can be defined. These can either be separated by commas or entered line by line.
- Password must contain letters/numbers/special characters: With these settings, the password must contain letters, numbers, or special characters.
- Lock the last three passwords: With this setting, the last three passwords of the users are locked and cannot be selected again.
- Password expiration after (number of days): Here you can define how long the passwords are valid.
- Change password after 1st login: This setting is useful for new users so that they have to change the password assigned by the system or the super admin.
- Apply password rules to existing account: This option also applies the password rules to all existing user accounts. They will then have to enter a new password that complies with the rules the next time they log in.
- Apply password rules to all suppliers: with this setting, the password rules also apply to your suppliers.
- Allow user to cache password in Onventis Mobile: if you use the smartphone application for Onventis “Onventis Mobile” within your organization, this setting allows you to allow users to cache passwords.
Customize layout and texts
Under Configuration → Settings → Layout and Texts you have the option of defining individual texts, a CI-compliant layout and standard texts for contact forms.
Texts tab / Text area
In the Texts tab, you can store your own texts for different areas in Onventis. The following fields are available for this purpose:
- Login area: in this field you can enter a personal text for the login.
- Contact area: in this field you can enter a personal text for the contact area.
- Dashboard: in this field you can store a personal text, e.g. a welcome text, for your organization. You can use variables to address individual users personally. The data for the variables is read from the user administration. You can use the following variables to address users individually:
- {UserSalutation} = Salutation of the logged in user
- {UserFirstName} = First name of the logged in user
- {UserLastName} = Last name of the logged in user
Example with use of variables:
Welcome to Onventis {UserSalutation} {UserFirstName} {UserLastName}
Output result in the dashboard:
Welcome to Onventis Mr. Max Mustermann
- Consignment text for order PDF: if you process consignment orders via Onventis, you can enter a consignment text for the order PDF in this field. This text is only displayed in the PDF if the order has been marked as a consignment order.
- Supplier: when sending the registration link to suppliers directly from Onventis, without copying it to an external email program, you can create a default text here. This serves as a template and is automatically drawn in the Text field of the supplier registration form.
- User applications: if you use the user registration in Onventis, you can store a standard text in this field. This text is automatically inserted into the email when a registration link is sent to the user.
Layout tab
Design settings area
Adopt the standard layout of the provider (Onventis GmbH).
Company logo:
Background graphic header:
Color value (Hex):
Onventis Mobile design settings area
Adopt the standard layout of the provider (Onventis GmbH):
Color value 1 (Hex):
Color value 2 (Hex):
PDF Settings Area
FOOTNOTE PDF:
Area Startlink
To use Onventis with your individual settings, please access the application via the following link: Link
Contact form tab
Texts area
Input language:
General text:
Order form text:
Additional Controls Area
Input language:
Checkbox
Selection list:
Vendor Master Data tab
Input language:
Texts area
Texts:
Activity Stream – Configuration
Under Configuration → Settings → Activity Stream you have the option to configure notifications for users regarding current processes as well as an activity stream.
With the Activity Stream, users can see all important information and procurement processes in their work environment at any time. In the Activity Stream, the user immediately sees the current status of transactions or status changes of his documents without having to interrupt his current work.
The Activity Stream can be displayed at any time via the Activity Stream icon in the right menu bar. If the activity stream is to be displayed permanently, it can optionally be pinned via the left arrow icon. With the arrow right icon you can hide the activity stream again.
In the Activity Stream, all events and actions are logged and listed chronologically. By clicking on an event, the corresponding document, e.g. a purchase order, can be called up directly.

Configuring the notifications and activating the events for the activity stream
With the Enable Screen Notifications option, users are notified of all activity related to their own receipts within Onventis.
By entering the display duration for notifications , you specify, in seconds, the display duration for the notifications.
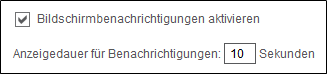
| Hinweis
Notifications are only displayed while Onventis is open in the web browser. Activities and events that occur while Onventis is not open can be viewed via the Activity Stream. Users have the option to customize these settings. Please note that users can only see notifications for the objects and documents for which they have read permission. |
The settings icon can be used to open the personal settings page of the Activity Stream.
The following options are available for configuration:
- Activate on-screen notifications, so called. Notifications
- Display duration for notifications
- Selection of events to be displayed via notification and in the activity stream.
- Selection of other users, user groups and organizational units about whose activities the user wants to be informed via notifications and in the activity stream.
- Resetting the personal settings to the currently valid organizational standard.
Regardless of any settings made, the Activity Stream always takes into account the rights and views set by the administrator of the organization in the user administration.
By selecting or clearing the checkboxes, you can choose which activities and events to display by default as on-screen notifications and in the Activity Stream.
You can preconfigure the activity stream organization-wide. The settings are valid for all new users of the organization. The user has the possibility to adjust the settings according to his personal needs at any time.
The Activate All Activities button allows you to activate all available activities.
The Disable All Activities button allows you to disable all available activities.
The Restore Defaults button loads the default settings for notifications and your organization’s Activity Stream. Your individual settings will be overwritten.
Activating activities and events of other users, user groups, organizations, and organizational units
You can also view activities and events of other users, user groups, organizations, and organizational units as on-screen notifications and in the Activity Stream.
| Hinweis
Notifications are only displayed for the objects and documents for which you have read permission. |
Users: by clicking this field, all users are listed. By selecting the desired user, the events and activities of the selected user(s) are displayed in addition to your own. Multiple selection is possible.
User groups: by clicking this field all user groups are listed. By selecting the desired user group(s), the events and activities of the selected user group(s) are displayed in addition to your own. Multiple selection is possible.
Organizational units: by clicking this field all organizational units are listed. By selecting the desired organizational unit, the events and activities of the selected organizational unit(s) are displayed in addition to your own. Multiple selection is possible.

Create and manage terms of use
With the function “Terms of use” under Configuration → Settings → Terms of use you can maintain terms of use for customers, suppliers as well as internal users.
If you have activated the “Terms of Use”, the user will be asked to confirm them before logging in for the first time. If the User does not accept the Terms of Use, he will not be granted access to Onventis.
To meet the legal requirements of the countries of individual organizational units, you can define the terms of use for each country.
Confirmation status for terms of use
In the user administration, the confirmation status Terms of Use records whether and when a user has accepted the Terms of Use.
You can check the status via Master data management → User management → User, selection of user, tab “Advanced” under item “Other”.

Reset confirmation status
If the terms of use change, the confirmation status can be reset via the administration. The user will then be asked to confirm again the next time he logs in.
Create Terms of Use
You can maintain new terms of use via the New button.
The following fields are available for maintaining terms of use:
- Input language: selection of the language in which the terms of use are entered and displayed
- Title: here you can enter a title for the terms of use
- Description: here you can enter detailed information
- Type: the drop-down menu allows you to define the type of terms of use. You can choose from the following types:
- Confirmation of the AGBs (General Terms and Conditions)
- Inquiries – Conditions of participation
- Auctions – Conditions of participation
- Terms of use for internal users
- Text: in this field you can store an information text for the users. This is displayed, for example, when you are asked to confirm the general terms and conditions.
- Valid for: by clicking the selection button you can choose for which country the terms of use should apply. This field is not available for the types “Conditions of participation for auctions” or “Inquiries”.
- Status: here you can define from when the terms of use are valid. If you do not enter a date, the system always generates the current date.
- Status: the status indicates whether the terms of use have been activated. The terms of use are set active with the Activate button and deactivated with the Deactivate button. The terms of use appear, regardless of the status, only after its activation
- Default: if this checkbox is activated, the terms of use are defined as default.
- Files: via the selection button you can attach files with the valid terms of use. These will be displayed to the user or supplier when they are asked to confirm the terms of use.
Create and manage general terms and conditions
You can store the General Terms and Conditions under Configuration → Settings → General Terms and Conditions (GTC). The terms and conditions are displayed in the shopping cart of your customers.
You have the option to highlight the text using HTML tags. The link to your terms and conditions is displayed in the shopping cart under the items.
The following fields are available for maintaining the general terms and conditions:
- Input language: Selection of the language in which the GTCs are written and displayed
- Title: Award of the title for the GTCs
- Description: detailed description for the GTCs
- Text: Input of the associated text
Clicking the Save and Close button will save the T&Cs and take you back to the Onventis Dashboard.
External settings for subsidiaries or customers
Under Configuration → Settings → External Settings , you as a provider have the option of making general settings for your subsidiary organizations and/or, as a merchant, general settings for your customers.
These settings can only be assigned to organizations = customers with their own Onventis account, but not to their own organizational units.
You can check whether it is an independent Onventis account by comparing the system numbers. You can find the system number in the Infocenter.
You can access the Infocenter via the icon on the right side in the menu bar. The 5-digit system number is displayed in the Miscellaneous → System number area.
Create settings for a subsidiary or customer
You can create new settings for a subsidiary or a customer by clicking the New button.
Basic data tab
- Title: Enter the title for the external settings. This field is mandatory and must be maintained.
- Description: here you can enter a short description of the external settings.
To activate the settings for the organization, you must assign them to the organization. You can make the settings under Customer Management → Assign Customers.
In the Provider tab, the settings created can be assigned to the customer or organization by selecting from the drop-down menu.
External settings – General tab
General settings are configured in the General tab.
Settings area
- Open PDF with intermediate dialog: If this item is activated, a popup window opens whenever a PDF file is to be created, e.g. by clicking the printer icon. Here you have the possibility to open the file or to download it from the server.
- Close browser window after logout: Closes the browser window after logout.
- Allow direct login by provider: Provides the provider with the ability to log into an account from the other user or vendor.
- Provider can change company data: by activating this checkbox, the provider has the possibility to adjust the company data in supplier accounts. The prerequisite for this is that the direct login is activated or that this is permitted from the supplier side.
- Extended user self-administration: with this checkbox you give the user the possibility to make his complete basic data and settings in the tab Extended in the user administration.
- Hide login data in the user self-administration: With this setting, users cannot change their login data in the self-administration.
- Login name may not be changed (password remains changeable): With this setting, users in self-administration can change the password, but not the login name.
- Automatically preset and expand default catalog when searching for articles in the user cockpit: This setting can be used to allow users to search for items in the user cockpit. The catalog marked as the default catalog is searched.
- Display DUNS in vendor list: in addition to your internal vendor number, the unique DUNS number of the vendor is displayed in the list of your vendors.
- Call participant in the “Notes” area as a required field: if you use the “Notes” function, the “Call participant” field is a required field when creating a note.
- Activate team template assignment when transferring positions to the inquiry module: If this function is active, when a position is transferred, e.g. from a BANF or a purchase order, the rules created in the team template are dragged into an inquiry and assigned to the team template.
- Category in the “Notes” area as a required field: if you use this function, the Category field is a required field when creating a note.
- Supplier can select items in auction: if you use this function, the supplier can select the items he offers in an auction.
- Enable approvals via direct link without entering logon data: this enables approvers to approve purchasing documents by calling them up via direct link and without entering logon data. The prerequisite for this is the activation of the function “Enable release via direct link” in the approval step.
- Do not display logon screen after approval via direct link: in the default setting, the logon screen for Onentis is displayed after approving purchasing documents. If you activate the checkbox, it will be hidden.
- Own number range for purchase orders from BANF: with this setting, you have the option of defining your own number range for purchase orders that come from a requisition. This setting is very useful, for example, for evaluations according to order numbers.
- Own number range for certain vendors: with this setting you can define your own number range for the vendors you have assigned.
- Own number range for service purchase orders: with this setting you can define your own number range for service purchase orders. This gives you a better opportunity in Onentis to narrow down orders by service order number.
- Make field “Customs tariff number” selectable from list: with this setting the user has the possibility to select a customs tariff number from a list of available numbers.
- Set the field “Subject to customs declaration” by default: if this checkbox is activated, all newly created order items will always be marked as subject to customs declaration.
- Suppliers must be approved: with this option you can control whether suppliers must be approved in Onentis or not, according to the supplier approval workflow.
- Allow assignment of several responsible persons to an account assignment object: with this checkbox you can add several responsible persons to an account assignment object. In the case of account assignment-dependent approval workflows, the persons responsible receive a request to approve the purchasing document in accordance with the predefined rank. You can define from which order value which rank must carry out the approval of an order. For this purpose, value limits can be defined in the purchase order approval workflow and the persons responsible can be assigned on the basis of the ranking order.
The ranking should always be deposited in ascending order from 1 onwards.Example:
1st approval step:
Value limit 0-10,000 EUR Approver: “Person responsible with rank 1”.
2nd approval step:
Value limit 0-20,000 EUR Approver: “Person responsible with rank 2 “In certain scenarios, it is possible that individual ranks are not occupied by persons responsible. To avoid orders being sent out unapproved, in these cases you should fill the unfilled ranks with the next highest responsible person.
In order to avoid that the responsible persons have to approve several times one after the other, Onentis automatically combines the corresponding approval steps that are directly behind each other. - Define material group in invoices as mandatory field: with this setting you can define the material group as mandatory field for all invoices created in Onentis.
- Show purchasing group field in eOrdering: by activating this setting, a purchasing group can be added in the basic data of an order.
- Use search function for selections: with this setting you optimize the performance of the search function for dropdown fields where many selection options are available, e.g. material groups. This reduces the loading time of the page called up in each case. This setting plays out in the background of Onentis.
- Disable global email templates for all recipient organizations: You can globally disable email sending for individual email types for related organizations (for example, suppliers in a customer-supplier relationship).
This setting allows the provider organization to control the receipt of e-mail on the sender side.
If this option is active, all templates that have been disabled under Configuration → Templates → Email Tem plates will no longer be sent to connected organizations. This means that e-mails can be deactivated centrally for all suppliers or customers. - Do not forward approval to super admin if cost center manager is missing: activating this option prevents the order approval from being forwarded to the super admin if the cost center manager is missing.
- Own number range for purchase orders per organizational unit: with this setting you can define your own number ranges at organizational unit level. This option enables a clear representation of orders within your organization. Please note that you must activate this option in the relevant organizational unit and define the number range.
- Working days: with this setting you can select the working days which are valid as delivery date for your organization.
- Calendar week: Here you distinguish the calendar week according to the setting for Europe or USA.
You should note the following differences:- Start of the calendar week: in Europe, Monday is always considered the first day of the calendar week. In contrast, in the US, Sunday is always considered the first day of the calendar week.
- Beginning of the year and beginning of the calendar weeks: in Europe the counting of the calendar weeks, KW01, always begins in the first week of the year, in which at least four days of the new year fall or in the first week of the year, in which more days fall on the new than on the old year. In the U.S., the count always begins the week in which January 1 falls, regardless of the day of the week.
User area
- Automatically block (at x days, weeks, months) inactivity: with this option you can select a certain duration after which, in case of non-use of Onentis, the user should be blocked. In this way, you can ensure, for example, that employees who have left your company can no longer log on to your Onentis. However, if the user has been inactive for a longer period of time, the user can request a new password.
- Lock newly created user until access data is sent: with this option you ensure that a newly created user can only log in to Onentis once he has received his access data. You can send the Onentis access data in the user administration.
- Substitutes can only be from your own org. unit: with this setting you can specify in substitute rules in Onentis that only users who belong to an organizational unit can be selected as substitutes.
- Substitutes can only be from your own user group: with this setting you can specify for substitute rules in Onentis that only users who are assigned to the same user group can be selected as substitutes.
E-mail dispatch area
- Inform the following users in case of failed e-mail transmission: In Onentis you have the possibility in different areas to send notifications by e-mail to users or suppliers. These emails are sent automatically from Onentis. If an e-mail was not sent, you can use this option to specify which users should be informed about the failed e-mail dispatch.
User group / settings area
Show details…
- Show grouping field: with this setting you activate the mandatory field “Grouping” in the user groups. The grouping is used to sort within the user group list according to the grouping characteristic.
User requests / settings area
- Processing of released user requests by group <Group>: with this option you can control which user group should process the released user requests for the use of Onentis.
- Default user role for requester <requester>: by selecting a default user role, you can specify which user role the requester will be assigned. You can adjust the user role at any time if necessary.
- Users are allowed to make change requests: by activating this checkbox you give users the possibility to make change requests for their own user, e.g. name change, via Onentis.
- IP Restriction: in this field you can set IP restrictions for user requests. As soon as you have entered an IP address, Onentis checks an incoming user request to see whether it was sent from an IP address that you have approved. If the field is empty, no check takes place.
Account assignment categories area
Settings:
- Consider assignment to material groups: with this option you can assign one or more account assignment categories, including a standard account assignment category, to a material group. By making this setting, you ensure that only the account assignment categories permitted for the material group can be selected in a purchasing document. Please note that by activating this option the field Account assignment category is a mandatory field.
Cost element area
Assignment possible in:
- Account assignment objects: with this setting you have the option of assigning cost elements to the account assignment objects. This means that only the cost elements assigned to the account assignment object are made available to users as selections in the purchasing documents.
- Material groups: with this setting you have the option of assigning cost elements to the material groups. This means that only the material groups assigned to the account assignment object are made available to users as selections in the purchasing documents.
- Assignment of organizational units possible: with this setting, you can further restrict the selection of cost elements in the purchasing documents. When you create cost elements, you can then select either all cost elements or only those that are valid for the organizational unit. When you create cost elements, you must assign the cost element to at least one organizational unit.
Tasks / Settings area
- Assignment of tasks to material groups possible: with this setting you have the possibility to assign tasks to material groups. This allows you to restrict the selection of tasks for a material group.
- Assignment of organizational units possible: by activating this option, all or only certain organizational units must be assigned to the tasks. This allows you to restrict the selection of tasks per organizational unit.
Orders / Settings area
- Highlight marked positions in the order PDF: by activating this checkbox you have the possibility to highlight the positions marked in Onentis, e.g. free text positions, in the order PDF.
- Sort by EAN/GTIN number: you can use this function to sort the items in the orders by EAN/GTIN number.
- Display changes in order PDF: You can use this function if you want to display changes, e.g. quantities, delivery dates, etc., in the order PDF.
Area Offers / Other
- Customer is allowed to view the current processing status of quotations: with this option you give your customers the possibility to view the current processing status of quotations by the supplier.
- Quote PDF with signature field: this option adds a signature field on the PDF document for the quotes. This gives the supplier the opportunity to sign it personally.
- Upload files at the header level of a request: by selecting this option you oblige the supplier to upload files in a request. This function is important, for example, in the field of mechanical engineering for the provision of drawings.
- Hide additional costs on supplier side: for offers, additional costs to the net price offered, e.g. packaging, delivery costs, surcharges, etc., may be incurred. With this option you have the possibility to hide the input fields for additional costs on the supplier side.
Payment documents / Settings area
- Display account assignments: with this option you activate the display of the account assignment information from the purchase orders in the corresponding payment documents.
- Define date of dispatch/service provision as mandatory field: with this option you activate the two mandatory fields in the invoice forms: Date of dispatch/service provision on and Date of dispatch/service provision by. These fields are also displayed on the invoice PDF.
- Show delivery/service recipient in invoice PDF: with this option you have the possibility to additionally display the delivery or service recipient in the invoice PDF. You can use this function in particular if the invoice recipient differs from the ship-to party or service recipient within your organization.
- Show invoice recipient in invoice PDF: with this option the invoice recipient is displayed on the invoice PDF.
- Do not display delivery date on item level in invoice PDF if shipping/service performance date is filled: by default, the delivery date is always displayed in the order items, which is transferred to the invoice PDF when the invoice is created. This option allows you to hide the delivery date whenever the shipping date or service performance date is filled.
- Display reverse charge note in invoice item and invoice PDF: if an invoice item is a reverse charge item, you can display this information in the invoice PDF.
- Email reminder for release to the current approver X days after sending the invoice: by activating this checkbox, the current approver in the invoice release workflow will be reminded by email of the release of the outstanding documents X days after sending the invoice. The time intervals apply to the entire organization.
- Reminder interval: the reminder interval can be used to define the time interval at which the e-mail reminder for approval is to be sent to the current approver. The following intervals are available for selection:
- Send daily
- Send once a week, every x day of the week from dropdown selection
- Send every x working day
Area VMI
If you use the VMI (Vendor Managed Inventory) function, you can use the following two options to define the basic data on which the demand, stock, and days’ supply are to be calculated.
- Based on demand: with this option, the forecast figures are determined on the basis of the demand coming from SAP.
- Basedon consumption: with this option the forecast figures are calculated based on the consumption coming from SAP.
External Settings – Requirements Items Tab
In the Requirement items tab, you can make settings for the general handling of requirement items within Onventis.
General area
- Display budget/comparison price: You can display the budget and the comparison price in a requirements item. This information can be used when creating a requisition to help his buyer: 1. the own budget level or 2. to communicate a comparative price of an alternative article. In the case of an inquiry, the purchaser can use this information to make a decision.
- Display unit price: by activating this option, the item unit price is displayed in the requirement items.
- Transfer items multiple times: You can transfer a requirement item to new purchase orders, auctions, RFQs, or to a purchasing project. As soon as the item has been transferred to another document, the status changes accordingly and the item is no longer available for use in other documents. If you activate this option, you can transfer the requirement items several times and repeatedly to other documents, irrespective of the status.
- Requirement requester may not approve own requirements: if you use the approval workflows for your organization within Onventis, you can prevent a user who is both a requirement requester and approver from approving his own requirements by activating this option. With this setting, the system skips the approval step in which the requester is also the approver and checks the next approval step.
- Requester must approve purchase orders: with this option, the requester of the requirement item automatically becomes the first approver for the purchase order or request. This setting applies to all requirement items that have been transferred to a purchase order or via an inquiry to a purchase order.
- Only when using the requester’s purchase order approval workflow: enabling this option restricts the requester’s purchase order approval to the requester’s approval workflows.
- Enable requester order approval via direct link: this setting allows approvers to approve or reject orders via the direct link call without having to log in to Onventis. The prerequisite for this is the activation of the function “Enable release via direct link” in the approval step of the purchase order approval workflow.
- Adopt SAP assignment of requester when transferring to purchase order: With this setting, the organizational data of the requester stored under “SAP assignment” is adopted instead of that of the purchaser when transferring the requisition to a purchase order.
- Take over default billing address of requester when transferring to purchase order: you can activate this option if the default billing address of the requester should be taken over instead of that of the purchaser when transferring the BANF to a purchase order.
- Use requester’s organizational unit in purchase order: with this setting, the organizational unit of the requester of the BANF is adopted in a purchase order instead of that of the purchaser.
- Use delivery address of requester in order: with this option the delivery address of the requester is taken over into the order when transferring the BANF into an order.
- Store requisitioner as orderer (only for non-bundled requirements): with this option, the requisitioner of the BANF is adopted as the orderer in the purchase order. This setting only applies to non-bundled requisitions.
- Take over SAP delivery/service recipient and unloading point of the requisitioner when transferring to purchase order: by activating this option, the delivery/service recipient, if entered in the requirement item, is taken over when transferring the requirement item to the purchase order.
External settings – Order tab
In the tab Order you can make general settings for the orders, the shopping cart, the order header, the order items as well as the order PDF.
General area / service function
If you use Onventis to process service orders, you can mark the orders accordingly. You can choose from the following options:
- None: with this setting, all items of a purchase order, including service items, are treated as a normal purchase order.
- Via flagging of items and orders: by activating this function, users who have the appropriate rights can flag and order service items. This gives you the option of separate and thus targeted process control of service orders within Onventis, e.g. via order processing and/or order approval workflows.
General / Settings area
In this area you can make general settings for the processing, display and handling of orders within Onventis.
- Transfer shopping cart items with quantity 0 to order: with this option items with quantity 0 can be transferred to the order. This setting creates a so-called item container for – at the time of order generation – still unknown material consumption in the case of service purchase orders.
Case study: You hire a painter to do 10 hours of painting work. At the time of the order it is not yet known which material in which quantity, e.g. tape, paint, tools etc. is required for the service.
Procedure: You create a service purchase order with:
1st position: 10 hours painting
2nd position tool with quantity 0 (position container)
After completion of the painting work, the service provider for position 1. prepare his performance record for the hours incurred and in position 2. Add the required material, e.g. 100 litres of paint.
- Send purchase orders with preview: for each purchase order created in Onventis, a purchase order PDF is automatically sent to the supplier by e-mail. This option allows the purchaser to view this PDF before sending the order to the supplier.
- Do not pre-populate order title: the order title in Onventis is a mandatory field and will default to the following title: Purchase Order <current date> <time>. This title may be overwritten by the purchaser. If you do not want to use the default title for orders within your organization, you can enable this option. Thus, the orderer must enter the order title himself.
- Activate fax function: with this option you can activate the fax function in addition to sending orders by e-mail. This means that the purchase orders generated in Onventis are sent to your suppliers at the fax number entered in the supplier administration.
- Determine tax code automatically: You have the option in Onventis to store tax codes including the associated tax rates. If these are maintained accordingly, you can use this setting to have the system determine the appropriate control code automatically.
- Do not change tax rate: in principle, purchasers can manually overwrite the tax rate in a purchase order. With this setting, the control rate can only be changed in conjunction with the selection of a suitable control code.
- Automatically set tax rate to 0% for cross-border deliveries: if you activate this setting, Onventis will check if orders are sent to suppliers located outside the country of the respective organizational unit. If this condition is met, the tax rate is automatically preset to 0%.
- Automatically set tax rate to 0% for deliveries across the external EU border: if you activate this setting, Onventis checks whether the orders are sent to suppliers who are located outside the external EU border. If this condition is met, the tax rate is automatically preset to 0%.
- Make tax code selectable in invoices: within Onventis you have the possibility to create invoices. This setting allows the invoice issuer to select the tax code in the invoice documents.
- Define tax code in invoices as mandatory field: with this option you define the tax code as a mandatory entry when creating invoices. Thus, no invoice can be created without selecting a tax code.
- Define barcode in invoices as mandatory field: by activating this checkbox the barcode in invoices becomes a mandatory field and has to be entered. If there is already a barcode in the order, it will be included in the invoice.
- Orderer may not approve own orders: within Onventis you have the possibility to configure order approval workflows. Depending on the configuration, the orderer can also be the approver of his orders at the same time. If you activate this option, the approval step is skipped and the purchase order approval is sent to the next person responsible in the approval workflow.
- Combine successive purchase order changes: You can activate this checkbox to combine successive purchase order changes that the supplier has not yet confirmed or rejected into one purchase order change. This ensures that the vendor can always confirm or reject all changes to a purchase order.
- Make additional fields in orders available: with this setting, additional fields can be created in the order header for all newly created orders.
- Hide quantity variance in purchase order: in the case of a purchase order confirmed by the vendor with a quantity variance, the purchase orders can only be archived after they have been posted from the goods receipt if the “Confirm quantity variance” button has been pressed. If you do not use order archiving, you can hide this button with this setting.
- Donot allow price units with decimal places in purchase order: you can use this setting if you do not want to allow price units with decimal places in Onventis. Please note that an error message will be issued in the case of a catalog import where the articles contain decimal places. The import is only possible if you delete the decimal places from the import file.
- Do not automatically fill the Buyer field: In the standard system, each user is assigned to a buyer. When a purchase order is created, the corresponding buyer is determined by Onventis and filled automatically. By activating this checkbox, the purchaser must select the responsible purchaser himself.
- Create collective credit memos by SAP company code: You have the option to create credit memos in Onventis. If you have an SAP connection, you can group collective credit memos by SAP company code by activating this option.
Area General / Marking of…
In the area “General / Marking of:” you can highlight the listed item categories by means of a marking:
- Free text items
- Catalogue items
- ERP items
Shopping cart / cost centers area
- Allocation possible in the item list (Depends on further conditions): if this option is activated, the user can select the cost center shopping cart items.
Please note that the assignment of users to cost centers in an SAP integration depends on the SAP assignments of cost centers to company codes.
For non-SAP organizations, the dropdown for selecting cost centers is only visible if a default account assignment category has been specified and the Cost Center field, in the Account Assignment Categories area, is an “optional” or “required” field for that category.
- Maximum number of directly selectable cost centers (default 15) per item: If this option is activated, the user can assign the cost centers in the item list of the shopping cart. Otherwise, an assignment is possible in the item detail by clicking on the article description of the article.
Shopping cart / settings area
- Show links to the general terms and conditions in the shopping cart: with this option you have the possibility to show the links to the general terms and conditions of the supplier in the shopping cart.
- Transfer articles from the following vendors to the requirement item: in the standard system, all items from the shopping cart are transferred to a purchase order. By activating this checkbox, items that are procured from the selected suppliers are first transferred to the requirements list and can be processed further there. The selection of the suppliers is done via the selection button.
- Transfer articles of the following material groups to the requirement item: In the standard system, all items from the shopping cart are transferred to a purchase order. By activating this checkbox, all items of certain material groups are first transferred to the requirements list and can be further processed there. The selection of the material groups is done via the selection button.
| By transferring the items from the shopping cart to the requirements list, you can control material procurement within your organization in a targeted manner. In the requirements list, you can bundle the items, for example, according to vendor and date or material group and thus secure savings potential for your company. |
- Mandatory field check in shopping cart items: the mandatory field entry is checked at the latest when an order is sent. By activating this option, the mandatory field check already takes place in the shopping cart.
- Mark supplier as mandatory field: if you activate this option, the Supplier field in the shopping cart becomes a mandatory field and must be entered. In the standard system, the vendor must first be selected in the follow-on documents.
- Select inherited items: within a purchase order with several items, certain fields, e.g. account assignment information, can be inherited by further items and thus no longer have to be maintained per item. With this setting a note appears in the shopping cart and in the order in the tab Position, if fields of an article were inherited to other or all other positions.
Order header / settings area
- Order number can be changed manually: in the standard system, the order number is generated by Onventis itself, this number is read-only. The number specification is controlled in the Number Ranges tab and can be configured on a company-specific basis. By activating this option, users can overwrite the order number.
You can activate additional fields in the order header with the options listed below:
- Commission no. visible
- customer order no. visible
- Commission visible
- Project no. visible
- Display ‘Conditions’ block
- Display ‘Additional costs’ block
- Show ‘Other’ block
- Show ‘Resend’ button: with this setting you can activate the button for manually sending messages in the message queue. If certain messages have not been sent, e.g. due to a missing connection, you can manually initiate the sending again.
- Deactivate supplier check: When sending orders, the system checks whether the ordered item matches the supplier from the catalog. If it does not match, an error message is displayed and the order cannot be shipped. If you do not need this check, you can disable it by activating the setting.
- Document request visible: The field “Document request” is visible in the order header. By activating this option, the user can request an attachment, e.g. a delivery note from the supplier. This option is not a required field.
- Delivery address visible: with this setting you can activate the visibility of the delivery address in the order header. The delivery address is then valid for all order items. This setting is useful if the same delivery address is used for all items.
- Purchasing group as required field: by activating this option, the purchasing group becomes a required field. The purchasing group is responsible internally for the procurement of a material or class of materials and usually acts as the contact person for vendors externally. This setting is useful when transferring purchase orders to SAP. In SAP, the purchasing group is a mandatory field and must be entered when the purchase order is transferred to SAP.
- Assignment of another user possible: by activating this option, another user can be assigned to an order. The assigned user can see these orders in his order overview. This setting is intended to ensure that all orders that fall within the user’s area of responsibility are visible to him.
- Display vendor: you can use this option to display the vendor to whom a purchase order is to be sent in the basic data of the purchase order.
- Purchase order can be marked as SG&A purchase order: by activating this option, a purchase order can be marked as SG&A (Selling, General and Administrative Expenses) purchase order.
- Display packaging regulations: for some goods, certain packaging regulations must be adhered to in order to protect the goods from stresses in the course of the logistics chain, e.g. for the transport of technical goods. With this option you activate the display and selection of the packing instructions in the tab Basic data in the purchase orders. These can be administered in the area Administration → Master Data → Packaging Instructions.
- Define packing instructions as mandatory field: this option allows you to define the shipping instructions as a mandatory field in the order or purchase order. Thus, orders or contracts cannot be shipped without a selection of packaging instructions.
Preset order header / delivery date area
You can use these settings to predefine the delivery date in all newly created purchase orders with no delivery date or with a predefined delivery date.
- with no date: no date is preset
- With current date: the current date is preset.
- with date in X-days: the current date + X working days is calculated
- X-number of days from order generation (not BANF generation): the date in X days from order generation is entered.
- Delivery date as mandatory field: the delivery date becomes a mandatory field and must be entered.
- Execution period end is delivery date: for service orders, this is a predefined period in which the service is to be performed. This option sets the specified delivery date as the end date for the service. Please note that the service provider cannot post services after the end date.
Order header area / For orderers
In this section, you have the option to send automated email reminders to purchasers. These apply to all purchase orders that have the status ‘In process’ and can be sent at certain intervals:
- E-mail reminder X day(s) after the order has been sent to the approver: the current approver in the order release workflow is reminded by e-mail about the outstanding documents that he still has to process. The time intervals apply to the entire organization and thus to reminders for purchase orders with the status “In Entry” as well as for purchase orders with the status “In Approval”:
- E-mail reminder X-day(s) after order creation for orders in status ‘In capture’: Selection of start time X for the reminder interval, e.g. 5 days after order creation.
Order header / reminder interval area
In this area you can set the interval at which the reminder emails are to be sent to the customers:
- Send daily: daily e-mail dispatch
- Send e-mail once a week, every <selection weekday>: Send e-mail only once a week on a specific day of the week, e.g. Monday.
- Send every <X> working day: E-mail dispatch every X days, e.g. every 2nd day
Order item area
In the Purchase Order Item area, you can make the following settings for purchase order items:
- EAN/GTIN no. visible: Display of EAN/GTIN no. in the order item
- Internal article number visible: Display of the internal article number in the order item.
- Internal article number changeable for catalog items: allows the user to change the internal article number.
- Customer item number visible: the customer’s item number is visible to the supplier
- Commission no. visible: display of commission number on item level
- Shipping types on item level: Display shipping types on item level. You can use this setting to select different shipping types for each item.
- Delivery addresses on item level: Display of the delivery address on item level. This setting is useful when Onventis users, e.g. buyers, order for employees at other locations, but the delivery should be made to the employee’s location.
- Delivery date on item level: allows to display and select the delivery date on item level. This allows the user to select a different delivery date for each item.
- Display ‘Account assignment’ block: Display and maintenance of account assignment information for the ordered article, e.g. cost centers, WBS elements, etc.
- Show block ‘Other’: by activating this option, the free text fields Document request, External and internal remarks, and File attachments will be activated. You can use the “Other” block to exchange internal or external information, as well as file attachments for a purchase order item with the vendor or within your organization.
- Storage location as mandatory field: with this option, the storage location in the order item becomes a mandatory field and must be filled in before an order can be sent, .
- Material group visible: Display of the material group in the purchase order item
- Material group as mandatory field: with this option, the material group in the order item becomes a mandatory field and must be filled in before an order can be sent,
- Display VAT rate: Display of the VAT rate in percent in the order item.
- Delivery schedule possible: this option allows you to select several delivery dates for an article per order item. Delivery scheduling can be carried out on a percentage or quantity basis.
- Multiple account assignment possible: by activating this option, the user can distribute the account assignment of an article to several account assignment objects of an account assignment category for each purchase order item. The account assignment can be made on a percentage or quantity basis.
- Different order quantity and price unit possible: by activating this option the order quantity and price unit can differ. Example: Order quantity 1 canister (content 5 litres), price unit 10.00 Euro per 1 litre = total 50.00 Euro.
- Display field ‘Inventory-managed’: the option for marking inventory-managed material orders is displayed in the purchase order item and can be activated manually by the user. Inventory management is stock accounting based on quantity, in which the correct stock levels can be shown by posting goods receipts and issues.
- Set inventory managed automatically if storage location is filled in: the field Inventory managed will be set automatically as soon as a storage location is entered for order items. Prerequisite is the activation of the option: “Display field inventory managed”.
- Display field ‘Trial tool’: Option for manual marking of trial tool in the order items.
- Document request visible: The field “Document request” is visible in the purchase order item. By activating this option, the user can request an attachment, e.g. a delivery note from the supplier. This option is not a required field.
- Transfer statistics-relevant delivery date to SAP: with this checkbox you activate the option “Adjust statistics-relevant delivery date” in the order item. This option is only useful for SAP integration. By activating the option, the statistics-relevant delivery date in SAP is compared with the delivery date.
- Allow Super Admin to change account assignment data afterwards: this option allows the user who is created as Super Admin in Onventis to change the account assignment data afterwards, e.g. if a correction is necessary.
- Make additional fields available in order items: activate this option to make the Additional Fields tab available to users in the order items. This setting applies to both free text and catalog items.
- Display purchasing KPIs in order item: with this option you can display the KPIs valid for the article in the order item.
- Selection of material groups from outline agreements: with this option you can map outline agreements on material group level. If you conclude outline agreements with a vendor at material group level, the value utilization of the outline agreement is checked. In the outline agreement, the value of the purchase orders is incremented with the relevant material group. By linking the material groups, you also have the option of processing free-text items via an outline agreement.
- Display ‘Manufacturer No.’ field: You can display the manufacturer number of the item in the order items.
- Display ‘Manufacturer’ field: You can display the manufacturer of the item in the order items.
- Display ‘eClass’ field: You can display the eClass number for the item in the order items.
- Show block ‘customs data’: You can display the block customs data for the article in the order items. The data is a weight entry which is maintained either in the catalog for the respective article or in the order item.
- Show file attachments: by activating this option you have the possibility to exchange documents with the supplier. This option is only effective in connection with the activation of the option Show block other.
- Allow entry of discounts and surcharges: by activating this option you can enter a discount or surcharge on order item level.
- X-number of decimal places of the price: with this option you can define the number of allowed decimal places for the prices in Onventis. If you enter “2”, the prices are displayed with 2 decimal places, e.g. 10.99 Euro. If the articles in the catalogues contain more than 2 decimal places, e.g. 10.99111, the remaining decimal places are not displayed. In the background Onventis always calculates with all decimal places. This setting is only used to display the prices.
SAP Assignment: in this area you can select additional mandatory fields. These only apply to SAP integration:
- Delivery/service recipient as mandatory field: with this option the field delivery/service recipient becomes a mandatory field and must be filled in.
- Unloading point as mandatory field: with this option the field Unloading point becomes a mandatory field and must be filled.
GWG: In the GWG area, you can define article value limits and note texts for low-value assets within your organization.
- Display note for an item value between X-EUR and X-EUR: here you define a value for GWGs that applies to your organization.
- Text: in the corresponding text field you can enter a note text, which will be displayed in the shopping cart or in the order.
- Numbering step:
- Number items according to the following pattern: with this option you specify a numbering pattern for the order items. For example, when selecting increments of 10, position 1 = 10, position 2 = 20, and so on.
- Drop shipment delay in days: by entering a number of days, the delivery date for a purchase order with drop shipment for the 2nd vendor is delayed by the number of days entered, e.g. delivery date is on 10.07 + 5 days = the final delivery date for vendor 2 is on 15.07.
Order PDF area
When an order is placed, an order PDF is always generated in the background with the basic information about the order. If you need to add more information to the file, you can select additional fields in the Order PDF section.
The following information can also be printed out in the order PDF:
- Display of the cost center in the order PDF
- Display of the cost element/property account in the purchase order PDF
- Representation of the business area in the order PDF
- Representation of the order in the order PDF
- Presentation of the project in the order PDF
- Display of the PSP element in the order PDF
- Representation of the system in the order PDF
- Display of the sales order in the order PDF
- Display of the article long text in the order PDF
- Display of the shipping method in the order PDF
- Display of the delivery address in the order PDF
- Display of delivery schedule lines in the order PDF
- Display of the VAT rate in the order PDF
- Highlight marked positions in the order PDF
- Show name of purchaser in addition to purchaser in PDF
- Representation of the material group in the order PDF
- Representation of the payment method in the order PDF
- Display of the VAT number of the supplier in the order PDF
- Display of the supplier no. in the order PDF
- Display of the task in the order PDF
- Representation of the chargeable job in the order PDF
- Representation of the non-chargeable job in the order PDF
- Reverse charge note in the order PDF
- Representation of the contact person of the supplier in the order PDF
- Representation of the recipient of the delivery/service in the order PDF
- Representation of the unloading point in the order PDF
External settings – Goods receipt tab
In the Goods Receipt tab, you can define general settings for goods receipt documents, as well as up to three additional numbers for goods receipt items. These can be optionally stored for each position and can be activated by clicking on the checkbox.
Range of numbers for goods receipt items
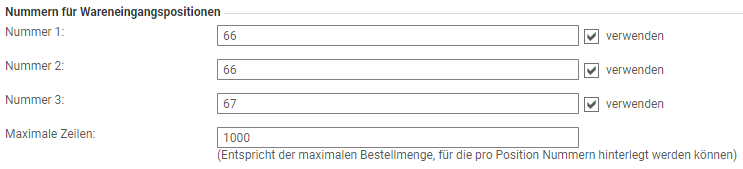
- Number 1 to 3: In the fields 1 to 3 you can maintain additional numbers, e.g. serial number, type code, package number, etc. These are displayed in the goods receipt document. These are displayed in the goods receipt document. In the goods receipt items you will find the additional numbers in the tab Numbers.
- Maximum lines: in the line “Maximum lines” you can enter the maximum order quantity up to which numbers can be stored. For example, with a value of 50, only numbers for items with a quantity less than or equal to 50 could be stored. The number of lines depends on the order quantity. This means that numbers can be stored for each article in the item.
Settings area
- Possibility to change the posting date: by this option you give the users the possibility to change the posting date of the goods receipt. In the standard system, the current date is entered.
- Purchaser is not allowed to post goods receipt for own orders: with this option the users who have sent the order to the supplier are not allowed to post goods receipt. This only applies to purchase orders created by the user.
- Final Confirmed Indicator Enabled by Default: you can check this option to enable the Final Confirmed Indicator = “Final Delivered” as default for all goods receipt documents. If the goods receipt is not yet complete, the user must remove the checkmark manually. The final confirmation indicator means that no further goods receipt can be posted for this purchase order.
- Do not automatically pre-populate delivered quantities in goods receipt: by activating this option, the user must check the delivered quantities and maintain them manually in goods receipt. If you do not activate this option, the ordered quantities are copied.
- Display item values in goods receipt: by selecting this option, you activate the display of prices in the goods receipt documents. This means that not only the quantity but also the valuated goods receipt is displayed. If, for example, the ordered quantity is to be distributed to different cost centers, you can see the delivery value in relation to the account assignments by means of the item value.
- Delivery date is mandatory field: by activating this option you can define the delivery date as a mandatory field. It is then not possible to post a goods receipt without entering the delivery date.
Posting period area
In the Posting Period area, you can define posting periods for goods receipts. Users can only post goods receipts for this period; the posting date must be within the period. Please note that posting periods are not taken into account for automatically posted goods receipts.
The following fields are available for defining posting periods:
- Title: Title of the posting period, e.g. period February to November 2016.
- Valid from: Start time (date) on which the posting period is to begin.
- Valid until: End time (date) on which the posting period is to end.
- Earliest posting date: in this field you can define from which day (key date) the goods receipts for this posting period should be taken into account.
External settings – Catalog tab
In the Catalog tab, you can make catalog-specific settings. These apply across organisations.
Settings/Miscellaneous area
- Show extended article numbers: with this option you have the possibility to display additional article numbers.
- Show country of origin and customs tariff number: this setting displays the country of origin and the customs tariff number of the corresponding item in the catalog. This information then no longer needs to be maintained by users, if the information is necessary.
- Hide supplier names in catalogs: by activating this setting, the supplier name will not be displayed in the catalog data.
- Use condition areas (only for own conditions): within Onventis, you can maintain different conditions for your own catalogs and different areas, e.g. countries. This setting is useful, for example, for different currencies, tax rates or special surcharges that only apply to certain areas.
- Do not block article favorites without conditions: this option allows you to remove the block on invalid conditions (for example, if the condition validity has expired) for articles that are in a favorites list. The article can still be ordered despite expired conditions.
- Predefine Account Assignment Information in Item Favorites (Predefine has priority over other account assignment settings): this option allows you to predefine the account assignment information for items in the item favorites list. These take precedence over all other settings in Onventis.
- Presetshipping address in item favorites (preset takes precedence over user settings): this option allows you to preset the shipping address for items in the item favorites list. These take precedence over all other settings in Onventis.
- Update ERP conditions during purchase order approval: if you activate this option, the conditions from the ERP are compared with the conditions in Onventis in the relevant purchase order during a purchase order approval and updated if necessary.
- Update and display available quantity for item via web service: this option always displays the current available quantities for the item in the catalog. You can activate this option if your supplier has licensed the web service and makes it available to you.
- Number of characters for item description (The value 0 means that all characters are displayed): with this setting you can define the maximum length for the item description. This specifies the number of characters that should not be displayed. For example, if the item description is 60 characters and 0 is entered, the entire description would be displayed as 60 characters. If, on the other hand, you enter 10, only 50 of 60 characters will be displayed in total.
- Send e-mail to condition owner X days before condition expires: catalogs are usually provided and administered by vendors. The catalog owner is also the condition owner. Within Onventis, the conditions for catalog articles have a certain validity, which must be stored in catalog articles. With this setting, the catalog owner is sent information about the expiration of the conditions X days (e.g. 10) before the conditions expire by e-mail.
- Perform eClass mapping to material group during OCI transfer: with this setting, you can perform mapping to the material group in your organizational unit for OCI catalogs. The eClass key is a cross-industry product data standard for the classification and description of products and services. In the Condition release field, you can store one or more e-mail addresses of users who are to be informed when conditions have been updated.
- Hide menu item “Catalogs”: if you activate this option, the menu item Catalogs will be hidden. The user can then only access the catalogs via the Catalog... button for documents, the shopping cart and orders. button to access the catalogs.
- Remember facet selection on new search: you can use facet selection to refine your search for items. This checkbox saves the user’s last facet selection. You can access the facet selection via the central search, in the header area and the catalog button.
Condition release area
Info Mail: In the Condition Release area, you can maintain a user’s e-mail address. If there are new conditions for the release of catalog articles, the user will be notified by e-mail.